Table of Contents
Advertisement
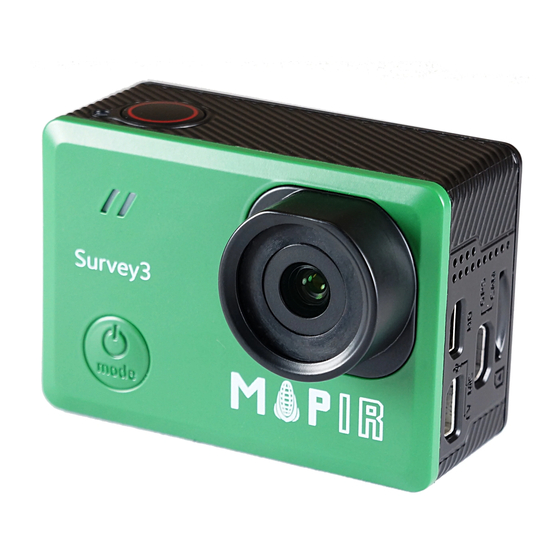
Survey3
QUICK START GUIDE
Table of Contents
Camera Overview
Inserting / Removing the Battery
Inserting / Removing Memory Cards
Charging the Battery
Status LEDs
Powering Camera On and O
Change Camera Mode
Touch Display Overview
Touch Display Gestures
Quick Settings
Photos
Taking a Photo
Photo Settings
Video
Video Settings
Playback
Viewing Videos and Photos on Your Camera
Viewing Videos and Photos on HDTV
System Settings
3
6
6
8
10
11
14
18
19
01
Advertisement
Table of Contents

Summary of Contents for MAPIR Survey3
- Page 1 Table of Contents Camera Overview Inserting / Removing the Battery Inserting / Removing Memory Cards Charging the Battery Survey3 Status LEDs Powering Camera On and O Change Camera Mode Touch Display Overview QUICK START GUIDE Touch Display Gestures Quick Settings...
-
Page 2: Table Of Contents
Camera Overview Table of Contents Using the GPS Module Wireless Wi-Fi Remote Control Bluetooth Remote Control Connecting External Microphone PWM Triggering USB Media Management Package Included Optional Accessories Customer Support 1. Shutter Button 7. Front LED 2 2. Cooling Hole 8. - Page 3 Getting Started Inserting / Removing the Battery Charging the Battery 1. Open the battery cover and insert the battery (normally a battery is already installed). 3. Charging the battery by connecting the camera to a computer or other USB charging adapter using the included USB cable. The camera status light turns on during charging.
-
Page 4: Powering Camera On And O
Powering Camera On and O Swipe left on the main screen to change the capture mode. To Power on: Hold the Power button for 3 seconds. To Power off: Hold the Power button for 4 seconds. Note: 1. To prevent loss of data, always turn off the camera before removing the battery or memory card. -
Page 5: Quick Settings
Touch Display Overview Touch Display Gestures Use these gestures to navigate the touch display. When swiping, swipe from the edge of the screen. 00:03:20 Enter the main menu, system settings and Video/Photo settings. No GPS 1080P 4:3 W Swipe Left Change capture mode. -
Page 6: Photos
Quick Settings Photos From the main screen, swipe down to enter the quick settings. Taking a photo Photo captures either Single, Sequence or Continuous photo. In quick capture mode, while the camera is powered off, hold down the shutter button to power on the camera and release until the camera start to take photos in Time Lapse mode. -
Page 7: Video
Image Size: Set the capture image size, 12MP (default), 8MP. Metering: The metering mode refers to the way in which the camera Mode: Sets the photo mode: single, continuous or sequence. determines the exposure. Various metering modes are provided to Single: Enables you to take a single photo using automatic exposure. -
Page 8: Playback
Video Mode Video Resolution (pixels) Aspect Ratio Video Settings 2160P (2880 x 2160) 16:9 Wide, Zoom Wide, Zoom 2160P (2880 x 2160) Touch to enter the main menu and select the or swipe left to Wide, Zoom 1440P (2560 x 1440) 16:9 change to video mode, then select to go to video settings. - Page 9 WDR (Wide Dynamic Range): Dynamic range is the ratio of the Conrast: Contrast is the scale of difference between black and white in brightest portion of the image to the darkest portion of the image. your video. The settings from "Low to High". High contrast video will WDR enables the camera to deliver video with near perfect exposure in have bright highlights and dark shadows, bold colours.
-
Page 10: System Settings
System Settings Playback From the main screen, select to get into system settings. From the main screen, touch to enter the main menu and select , then you will get into the playback screen. You can play back your content on the camera’s touch display, your computer, TV, or smartphone/tablet. - Page 11 Ext Power (External Power): Set Time: Set the camera to go to the Charge, Power Set the date and time for your camera. The date and time On or Recording mode while the external charger connected. are automatically updated when you connect your camera with GPS LED: Set which status lights blink.
-
Page 12: Using The Gps Module
Bluetooth Remote Control GPS OK GPS Good With the Bluetooth remote control, you can remotely control the Survey3 camera to start / stop recording, take photos. From the main screen, swipe down to enable the bluetooth features. During this time the GPS is acquiring a better lock status. Once the GPS... -
Page 13: Pwm Triggering
USB Media Triggering Management The Survey3 camera can receive and act on a couple PWM values Survey3 allows you to power on and charge the camera by when sending a PWM pulse using the optional HDMI PWM trigger connecting one end of the USB cable to the USB/FPV port and the cable. -
Page 14: Package Included
Optional Peau Productions, Inc. (dba MAPIR) warrants to the original retail purchaser of all hardware products listed for Accessories sale at www.mapir.camera (the “Product”) that at the time of purchase, this product is free from material defect in materials and workmanship. Should this Product fail during normal usage and conditions due to defective material or workmanship within one year from the date of purchase, or such longer period as is required by applicable law (“Warranty Period”), such defect(s) will be repaired or replaced at Peau...
Need help?
Do you have a question about the Survey3 and is the answer not in the manual?
Questions and answers