
Subscribe to Our Youtube Channel
Related Manuals for SecurUS BLUtag


Summary of Contents for SecurUS BLUtag
- Page 1 Active BluTag Active BluTag & & VeriTracks 11 VeriTracks 11 https://v11.veritracks.com https://v11.veritracks.com For 24/7 assistance, contact the STOP Solutions Center ® 1-866-703-STOP (7867) | techsupport@stopllc.com...
- Page 2 BluTag® BluTag complies with Part 15 of the FCC Rules. Operation is subject to the following two conditions: (1) this device may not cause interference, and (2) this device must accept any interference, including interference that may cause undesired operation of the device.
- Page 3 à la norme RSS-102 avec l'appareil BluTag émettant à son niveau de puissance certifié le plus élevé dans toutes les bandes de fréquences utilisées. La valeur de TAS la plus élevée pour BluTag pendant le test était de 3.080 W/kg . L'appareil BluTag a été conçu pour être porté à la cheville.
-
Page 4: Table Of Contents
Table of Table of Contents Contents 5 - 18 Overview Overview 42 - 49 Installation Installation 19 - 22 50 - 72 Enrollment Enrollment Supervision Supervision 23 - 30 73 - 79 Zones Zones Notifications Notifications 31 - 41 80 - 82 Schedules Schedules Unassignment... -
Page 5: Overview Overview
Overview Overview • BluTag Basics • How BluTag Uses Cellular Communication • Battery Life • VeriTracks Tracking Software • Charging • Tile Totals • BluTag Specifications • The Update Available Bar • How GPS Works • Using the Find & Search Menus •... - Page 6 Overview Overview BluTag Basics Lightweight (6oz), one-piece device Attempts GPS once every minute Calls every 10 minutes or less using Recharges in only one hour per day Or, 30 minutes twice daily...
-
Page 7: Battery Life
Overview Overview Battery Life 40-60 hour battery capacity Multi-level battery alerts to enrollee and agent Low – Approx. 10 hours left Vibrates twice every 10 minutes until charged or completely dead Critical – Approx. 4 hours left ... - Page 8 Overview Overview Charging LED Charging Indicator Amber = Charging Green = Full Off = Idle Portable charging cradle (included) Optional charging accessories (additional fees may apply): 10-Unit Multicharger (for in-office preparation) Mobile Cradle (battery-powered charger) ...
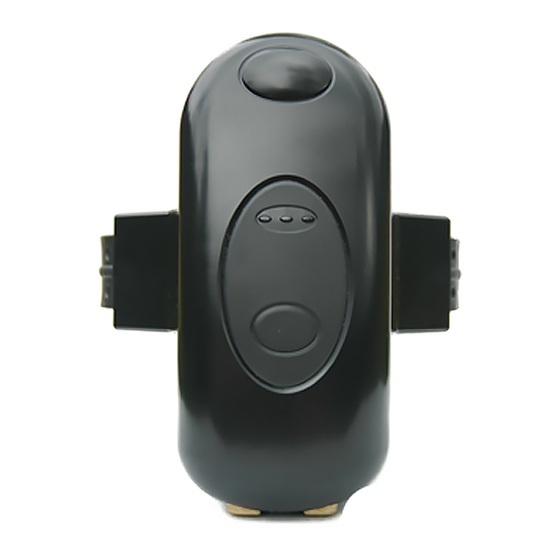
- Page 9 Overview Overview BluTag Specifications • Tamper-resistant, fiber optic strap • Status/Call Push Button • Waterproof to 50 feet • Memory capacity of 6+ days • GPS Interference Detection • Shielding Possible • Jamming Possible...
- Page 10 Overview Overview How GPS Works • GPS (Global Positioning System) is a constellation of satellites that orbit the Earth. • Reception and accuracy are best when moving and there is an open and unobstructed view of the sky. • GPS tracking is possible when at least 3 satellites can be heard.
- Page 11 Overview Preparing BluTag for GPS Begin charging BluTag at least 4 hours prior to the install. Charge BluTag in an area where it can also acquire GPS. • If GPS is not available, acquire GPS elsewhere for at least 45 minutes.
- Page 12 Overview Overview How BluTag Uses GPS • BluTag attempts to acquire GPS once every minute.
- Page 13 Overview Overview Track Types Five types of tracks may be displayed that indicate BluTag’s approximate location. Type Description Example Trackpoint A successful attempt to track BluTag’s location at a particular minute. Attempts are made once each minute. Visit Five or more consecutive minutes of tracks, no greater than 300 feet and 2 minutes apart.
- Page 14 • Rapid Reporting (below): Makes calls occur every 2 minutes for 1 hour. • Push Button: Pressing BluTag’s button until it beeps forces it to call • All other events/violations, i.e. charging, zone violations, strap tampers, etc. • Online requests can command BluTag to buzz (beep) or vibrate...
- Page 15 Overview Overview VeriTracks Tracking Software • Universal software for all hardware • Web-based application (nothing to install) • Phone & Tablet-friendly • Google maps • Multi-shape, private, global, and hidden zone options • Crime Scene Correlation...
- Page 16 Overview Overview Tile Totals Tile totals reflect the following: Enrollee Number of assigned enrollees for the selected agency Events Number of open events Zones Number of existing zones (assigned & unassigned) Reports Number of processed reports...
- Page 17 Overview Overview The Update Available Bar The Update Available bar displays above enrollee cards when an update is available for an enrollee listed on the current page of cards. Clicking the bar is optional, as updated enrollee data will display upon navigating between tabs and tiles.
- Page 18 Overview Overview Using the Find & Search Menus Each Tile has its own Find / Search menu. Each is designed to display results that are based on default search criteria or that chosen by the agent. Find / Search menus remember their settings from session to session.
-
Page 19: Enrollment Enrollment
Enrollment Enrollment • Creating an Enrollee Profile • Adding Enrollee Addresses... - Page 20 Enrollment Enrollment Creating an Enrollee Profile 1. Click the Enrollees tile. 4. Confirm or change the Organization, Agent, and Risk Level. 2. Click Add. 5. Click Save. 3. Fill in the required fields: Primary ID, First Name, and Last Name.
- Page 21 Enrollment Enrollment Adding Enrollee Addresses 1. Under the profile, click Addresses. 2. Click Add. 3. In the Type list, choose Home, Work or Other. 4. Enter a Title for the address (e.g. Home, Work, etc.). 5. Fill in the Street 1 box.
- Page 22 Enrollment Enrollment Adding Enrollee Addresses (continued) 7. Click the Geocode button to view the approximate address. 8. To adjust the address placement, drag its icon. 9. Click Save.
-
Page 23: Zones Zones
Zones Zones • Inclusion Zones • Editing an Auto-Generated Zone from the Addresses tab • Exclusion Zones • Using the Zones Tile • Zone Categories • Editing Zones via the Zones Tile • Creating a Zone from the Addresses tab... - Page 24 Zones Zones Inclusion Zones An inclusion zone is requires an enrollee to be present during scheduled times. Inclusion hours are the time of the day in which the enrollee must remain within the zone.
- Page 25 Zones Zones Exclusion Zones An exclusion zone is placed where an enrollee must stay away. Exclusion hours are the time of the day in which the enrollee is to remain outside the zone – typically 24/7.
- Page 26 Zones Zones Zone Categories An active zone is programmed in the tag’s on-board memory. The tag will sense when it is in violation and immediately notify VeriTracks (and the ® Active agent, if subscribed). Its immediate notification will read: +IZ (inclusion) or +EZ (exclusion) A 911 zone is programmed in the tag’s on-board memory.
- Page 27 Zones Zones Creating a Zone from the Addresses tab 1. Below the completed profile, click the Addresses tab. 2. Click the Create Zone icon for the preferred address. 2a. An auto-generated Inclusion Zone will be created with a name consisting of the enrollee’s Primary ID, Address Title, and Last Name.
- Page 28 Zones Zones Editing an Auto-Generated Zone from the Addresses tab 1. To edit an auto-zone, click the Addresses tab. 2. Click the Edit Zone icon for the preferred address. You will be taken to the Zones tile.
- Page 29 Zones Zones Using the Zones Tile From the Zones tile, you can view or change the following: • Zone Name • Type • Radius • Description • Shape • Address • Organization • Map Visibility • Center point • Agent •...
- Page 30 Zones Zones Editing Zones via the Zones Tile 1. To search for the zone, if necessary, use the Find Zones menu on the left. 2. Click Edit. 3. To correct the zone’s location, drag its center point. 4. To adjust the Radius, type a new size and click Apply. (Or, drag one of its outer points.) 5.
-
Page 31: Schedules Schedules
Schedules Schedules • Schedule Types • Editing One or More Scheduled Days • Inclusion Zone Scheduling • Creating an Override Schedule • Overnight Schedules • Exclusion Zone Scheduling • Creating a Reoccurring Schedule... - Page 32 Schedules Schedules Schedule Types Reoccurring Schedules Override Schedules This default method ensures that the This date-based method allows a temporary schedule repeats weekly. schedule to run and expire on a specific date. It can be used alone or to temporarily suppress/override a reoccurring schedule.
- Page 33 Schedules Schedules Inclusion Zone Scheduling Inclusion schedules determine the days/times to be within the zone. Examples: Enrollee is to be home, 6 pm – 6 am, Monday through Friday. Enrollee is on lock down each and every weekend.
- Page 34 Schedules Schedules Overnight Inclusion Zone Schedules Upon saving an overnight schedule, it will automatically split into two portions – one running until 11:59 pm and the other from 12 AM until its portion ends. Overnight schedules do not need to be input as two separate parts, as VeriTracks performs the separation automatically.
- Page 35 Schedules Schedules Exclusion Zone Scheduling Exclusion schedules determine when to stay away from zone – typically 24/7. Enrollee must stay out of this zone, 24/7.
- Page 36 Schedules Creating a Reoccurring Schedule 1. Access the enrollee’s Schedule tab. From the Enrollees tile, open the Profile and click the Schedules tab. Or, in the Zones tile, click Add Schedule. 2. Type a Description. 3. Select the Days of the Week to be scheduled.
- Page 37 Schedules Creating a Reoccurring Schedule (continued) 5. In the Time boxes, click to set the times the zoned area is to be monitored. 6. Click Set to confirm each choice. 7. Under Schedule Target, type or select the name of the zone. (Auto-generated zones are listed by PID –...
- Page 38 Schedules Schedules Viewing the Schedule Calendar A schedule calendar is available via the View Schedule button in the Profile and the Dashboard. Month Details Single-click...
- Page 39 Schedules Editing One or More Scheduled Days Part A: Remove the scheduled days that will differ from the others 1. In the enrollees Profile, click the Schedules tab. 2. Select a schedule segment. 3. Click Edit to change it. 4. Clear the boxes for the days you wish to schedule differently than others.
- Page 40 Schedules Editing One or More Scheduled Days (continued) Part B: Create new schedules for the days not like the others 6. Click Add. 7. Select the Day to reschedule. 8. Confirm or change the Zone Category. 9. Select the new Start / End Times. 10.
- Page 41 Schedules Schedules Creating an Override Schedule 1. Click Add. 2. Type a Description, e.g. Extended Curfew, etc. 3. From the Schedule Type list, choose Override. 4. Select the Date to override. 5. In the Time boxes, select the times that the schedule will run (e.g.
-
Page 42: Installation Installation
Installation Installation • Preparing BluTag for Installation • Enrollee Instructions for Wearing BluTag • Verify BluTag Readiness • Verifying a Successful Device Assignment • Attach BluTag to Enrollee • Assigning a Device... - Page 43 Installation Preparing BluTag for Installation Begin charging BluTag at least 4 hours prior to the install. Charge BluTag in an area where it can also acquire GPS. • If GPS is not available, acquire GPS elsewhere for at least 45 minutes.
- Page 44 Installation Verify BluTag Readiness Prior to assignment, BluTag will regularly call, acquire GPS, and note its battery level – allowing you to verify its readiness. 1. Click the Enrollees tile. 2. Select the enrollee’s profile. 3. Click the Device Assignments tab.
- Page 45 1. Locate the strap, bridge clips, strap clips, cutter, and cutting plate. 2. Lay the square hole of the bridge clip across the center of BluTag. 3. Firmly press down on the bridge clip to 2 – 4 fully insert its legs. Once fully inserted, the bridge clip will lay flush against the BluTag surface.
- Page 46 Installation Attach BluTag to Enrollee (continued) 9. Make note of BluTag’s serial number. 10. Place BluTag on the outside of the ankle and wrap the strap around. 11. Insert two fingers inside the strap, opposite the device. 10 / 11 12.
- Page 47 Installation Installation Assigning a Device To be completed after installation 1. In VeriTracks, click the Enrollees tile. 2. Select the enrollee’s profile. 3. Click the Device Assignments tab. 4. Click Change Assignment. 5. Type or select the desired device. 6. Click the Save button.
- Page 48 Do not charge while sleeping or driving. • If the tag vibrates or beeps, contact the agency. • Do not submerge BluTag in water (baths, pools, large • If the light shines or blinks when off the charger, contact bodies of water).
- Page 49 Installation Installation Verifying a Successful Device Assignment 1. Within the Enrollees tile, select the enrollee’s profile. 2. Click their Contact tab to verify that a recent contact was made. 3. Click their Events tab to confirm that there is not a Master Tamper. 4.
- Page 50 Supervision • Two Ways to View Track Data • Online Event Confirmation & Notes • Map: Zoom, Map Size, Time Controls, and • Find Enrollees, View Events, and New Note Track Count • Finding Enrollees in the Dashboard • Map: Date/Time and Contact Options •...
-
Page 51: Supervision Supervision
Supervision Supervision Two Ways to View Track Data There are two ways to view track data in VeriTracks 11. The Enrollee’s Map tab: Displays all The Events tile: Displays track data track data for a chosen time period. from 20 minutes before and up to 20 minutes after) an event’s duration. - Page 52 Supervision Supervision Features of the Map Tab Zoom, Map Size, Time Controls, and Track Count 1. Enrollee Card – Click to zoom & center the map on all tracks for the chosen time frame. 2. Expand Map – Click to conceal both side bars and again to display them.
- Page 53 Supervision Supervision Features of the Map Tab Date/Time and Contact Options 1. Start/End Date & Time – The date range displayed. Click to change. 2. Duration – The amount of time displayed. Click to change. 3. Contact Cluster – Contact options for the bracelet.
- Page 54 Supervision Supervision Features of the Map Tab Trackpoint & Visit Toggles 1. Toggle Visits – Click to show\hide Visits. 2. Toggle Visit Points – Click to show\hide the points within a Visit. 3. Toggle Trackpoints – Click to show\hide trackpoints. 4.
- Page 55 Supervision Supervision Features of the Map Tab Print, Export, Report, Refresh 1. Print - Creates a printable version of the map with trackpoint details. 2. Export KML – Creates a copy of the map that is viewable in Google Earth. 3.
- Page 56 Supervision Supervision Features of the Map Tab Visit Points, Display Two Enrollees, Map Legend, Find Map Objects menu 1. Expand All Visits - Click once to expand all visits displayed and reveal their associated points (visit points). Click again to hide them. 2.
- Page 57 Supervision Supervision Expanding a Visit 1. Select the Visit. 2. Click the Expand button. 3. The Visit Points will display in the Map and Map Cards.
- Page 58 Supervision Supervision Features of the Map Tab Playback, Search, Measure, Locate Address 1. Playback bar – Animates the movement of the trackpoints and visits, in the order each was acquired. 2. Search bar – Searches 1500 feet around the center of the map for matches to search criteria, e.g.
- Page 59 Supervision Supervision Features of the Map Tab Changing a Zone 1. Select the zone. 2. Click the Edit button that appears in the top-left corner of the Map. 3. To change the size – drag an outer point in or out. (A reset arrow button appears to return it to its original size, if needed.) 4.
- Page 60 BluTag has missed multiple calls. (Default period is 6 hours.) NO GPS (NGPS) BluTag is not reporting GPS. (Default period is 6 hours.) BluTag has lost GPS reception and suspects that an object (shielding) or INTERFERENCE (SHIELD / JAMM) signal (jamming) could be the culprit.
- Page 61 Supervision Supervision Online Event Monitoring Dashboard Events tile This is the homepage of VeriTracks Allows filtering and display of events and provides an at-a-glance by type, enrollee (one or many), communication and violation status. status (open/closed; confirmed or Single or multiple enrollees can be not), for one or many caseloads, by viewed at once (for one or many assignment status, by date range,...
- Page 62 Supervision Supervision Online Event Confirmation & Notes Event confirmation shows acknowledgement of its occurrence. Events also allow one to attach a note, regardless of confirmation. Three areas allow for both. Events tile Dashboard Events tab...
- Page 63 Supervision Supervision Getting to Know the Dashboard Find Enrollees, View Events, and New Note Click the Dashboard tab. The following options will be available: Find Enrollees View Events New Note...
- Page 64 Supervision Supervision Finding Enrollees in the Dashboard 1. Search by Enrollee Name 2. Search by Primary ID 3. Search by Agent 4. Search by Organization (ORI) 5. Search by Assigned Status 6. Search by Caseload: a. Both for all caseloads b.
- Page 65 Supervision Supervision Confirming Events & Adding Event Notes via the Dashboard 1. From the Enrollees tile, select the enrollee. 2. Click the View Events. 3. Select the event(s) to be confirmed. No open or Open Either Open OR unconfirmed or 4. If desired, enter a Note Unconfirmed events events Unconfirmed events...
- Page 66 Supervision Supervision Adding Case Notes via the Dashboard Notes not related to an event can be added to the enrollee’s Profile as a Case Note 1. Click the New Note button. 2. Add a Note. 3. Click Save.
- Page 67 Supervision Supervision Accessing Enrollee Profiles via the Dashboard By clicking the Profile icon for the selected enrollee, you are taken to their Map of their most recent position in the Enrollees tile.
- Page 68 Supervision Supervision Viewing the Enrollee’s Last Track via the Dashboard By clicking the Last Track icon for the selected enrollee, you are presented with their status.
- Page 69 Supervision Supervision Dashboard Views There are four views. Each displays an enrollee’s name, Primary ID, and risk level. General: Enrollee’s BluTag’s serial number. GPS only: Serial number, recent call and GPS dates/times, battery level, critical violation status Events Only: Number of notes, critical...
- Page 70 Supervision Supervision Viewing Events via the Events Tab Click the Enrollees tile. Select the enrollee’s Profile. Click the Events tab. By default, the last 7 days of events and any events in progress are displayed. Use the Find Events menu to view specific events and/or dates.
- Page 71 Supervision Supervision Mapping an Event via the Events tab 1. Within an enrollee’s Profile, click their Events tab. 2. Click the Location icon for the event you wish to view. 3. You will be taken to the Events tile containing a Map of the event, displaying 20 trackpoints before and up to 20 trackpoints after the event’s start/end.
- Page 72 Supervision Supervision Viewing & Confirming Events via the Events Tile 1. Click the Events tile. 2. Use the Find Events menu to select the enrollee. 3. Click the Confirm button to acknowledge the event.
-
Page 73: Notifications Notifications
Notifications Notifications • Notification Preferences • Closing a Master Tamper via the Enrollee Profile • Reading the Daily Report • Closing a Master Tamper via the • Reading Immediate Notifications Events Tile • BluTag Events... - Page 74 Notifications Notifications Notification Preferences There are two standard notification methods, Daily Reports and Immediate Notifications. The Daily Report arrives each morning, typically at 6:30 am, displaying 36 hours of data, per enrollee. Immediate Notifications can be received via email or text messaging upon the start and end of an event.
- Page 75 Supervision Supervision Reading the Daily Report 1. Report Run Date/Time 2. The Last Call and Trackpoint received as of the report Date/Time 3. Points: Number of tracks captured during the violation 4. Distance: Zone footage 5. Type: Inclusion / Exclusion 6.
- Page 76 Supervision Supervision Reading Immediate Notifications 1. Event Status & Code 5. Enrollee’s Primary Phone Number 6. Event’s Start or Stop Date/Time indicates an in-progress event Indicates a closed event 7. Enrollee’s Time Zone 2. Primary ID 8. Agent 3. Enrollee Name 9.
- Page 77 BluTag has missed multiple calls. (Default period is 6 hours.) NO GPS (NGPS) BluTag is not reporting GPS. (Default period is 6 hours.) BluTag has lost GPS reception and suspects that an object (shielding) or INTERFERENCE (SHIELD / JAMM) signal (jamming) could be the culprit.
- Page 78 Supervision Supervision Closing a Master Tamper via the Enrollee Profile Master Tamper requires the agent/officer to rectify the original cause of the violation by thoroughly inspecting and/or replacing the strap. The event can then be closed in VeriTracks. 1. In the Enrollees tile, locate the enrollee’s profile. 2.
- Page 79 Supervision Supervision Closing a Master Tamper via the Events Tile Master Tamper requires the agent/officer to rectify the original cause of the violation by thoroughly inspecting and/or replacing the strap. The event can then be closed in VeriTracks. 1. Click the Events tile. 2.
-
Page 80: Unassignment Unassignment
Unassignment Unassignment • Unassign BluTag • Remove BluTag From Enrollee... - Page 81 Unassignment Unassignment Unassign BluTag Unassign BluTag prior to cutting the strap to avoid causing a false tamper event. 1. Click the Enrollees tile. 2. Select the enrollee’s profile. 3. Click the Device Assignments tab. 4. Click Unassign Devices. 5. In the Type list, click the arrow...
- Page 82 • If you had to unassign the enrollee and plan to reuse the bracelet, make sure to place BluTag back on the charger to power it back on. • If you sense a problem with the device, send it back to STOP.
Need help?
Do you have a question about the BLUtag and is the answer not in the manual?
Questions and answers