Table of Contents
Advertisement
Available languages
Available languages
Quick Links
Advertisement
Chapters
Table of Contents

Related Manuals for Novus NDR-HA4208


Summary of Contents for Novus NDR-HA4208
- Page 1 U s e r ’s m a n u a l NDR-HA4208 NDR-HA4416...
- Page 2 NDR-HA4208 / NDR-HA4416 1.2 version - User’s manual COMMENTS AND WARNINGS EMC (2004/108/EC) and LVD (2006/95/EC ) Directives CE Marking Our products are manufactured to comply with requirements of following directives and national regulations implementing the directives: • Electromagnetic compatibility EMC 2004/108/EC.
- Page 3 RESPONSIBILITY MANUFACTURER FOR THE RESULTS OF SUCH AN ACTION SHELL BE EXCLUDED. 1. The installation of NDR-HA4208, NDR-HA4416 should be made by a qualified service person or a professional safety system installer. 2. Recorders mustn’t be placed in places where ventilating holes are partially or fully covered.
-
Page 4: Table Of Contents
NDR-HA4208 / NDR-HA4416 1.2 version - User’s manual TABLE OF CONTENT 1. FOREWORD INFORMATION ....................6 1.1 Main Characteristics ......................6 1.2 Recorder’s technical data ....................7 2. STARTING THE DEVICE....................... 8 2.1 Getting the device ready to work ..................8 2.2 Electrical connection and other back panel elements ............ - Page 5 NDR-HA4208 / NDR-HA4416 1.2 version - User’s manual TABLE OF CONTENT 4.6 Image adjustment ......................52 4.7 Event monitoring ......................53 4.8 Covert cameras ........................ 53 4.9 Spot monitor ........................53 4.10 Recording video ......................54 4.11 Recording audio ......................54 4.12 Playing recorded video ....................
-
Page 6: Foreword Information
• Possibility of copying files onto the USB or DVD drives. The list of recommended disk models and their capacity is available on Novus Security website in the Compatible Disks and DVD file in the product tab All rights reserved © NOVUS Security Sp. z o.o. -
Page 7: Recorder's Technical Data
NDR-HA4208 / NDR-HA4416 1.2 version - User’s manual FOREWORD INFORMATION 1.2. RECORDER’S TECHNICAL DATA Model NDR-HA4208 NDR-HA4416 Operation Mode QUADRUPLEX Operating System Linux Video Input 8 x BNC, loop-through 16 x BNC, loop-through Video Output Main Monitor (1 x BNC, 1 x VGA), Spot Monitor (1 x BNC) -
Page 8: Starting The Device
NDR-HA4208 / NDR-HA4416 1.2 version - User’s manual STARTING THE DEVICE STARTING THE DEVICE 2.1. Getting ready to work Unpack the device carefully. After unpacking please ensure that package contains the following items: NDR-HA4208 / NDR-HA4416 recorder. Remote controller Rack mounting bracket with screws for install- Power cord. -
Page 9: Electrical Connection And Other Back Panel Elements
NDR-HA4208 / NDR-HA4416 1.2 version - User’s manual STARTING THE DEVICE 2.2. Electrical connection and other rear panel elements NDR-HA4416 rear view Fan cooling power supply unit, please do not cover! 1,2. VIDEO IN/LOOP: video inputs with loop-through outputs, for connecting video signal sources with the DVR ( 16 or 8 channels depending on the model). - Page 10 NDR-HA4208 / NDR-HA4416 1.2 version - User’s manual STARTING THE DEVICE NDR-HA4416 rear view NETWORK: RJ-45 connector for connecting the DVR to the computer network in 10/100Mb/s standard. RS-232 PORT: Allows for connection of modems for remote video preview, connection o f...
- Page 11 NDR-HA4208 / NDR-HA4416 1.2 version - User’s manual STARTING THE DEVICE Widok NDR-HA4416 SPOT 1 BNC outputs for SPOT monitor allowing for full screen display of any camera or sequence of cameras; VIDEO OUT, Main monitor connectors, BNC or VGA type. VGA output allows for connecting the main monitor in the computer mode.
-
Page 12: Connecting Of Peripheral Equipment
NDR-HA4208 / NDR-HA4416 1.2 version - User’s manual STARTING THE DEVICE 2.3. Connecting peripherals System connection should be performed only by qualified personnel. Please familiarize yourself with the scheme located below, depicting possible implementation of the DVR in the system, before installation. -
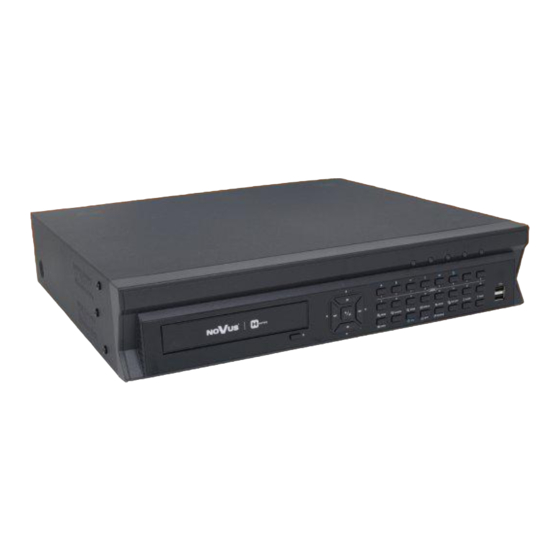
Page 13: Front Panel Description
NDR-HA4208 / NDR-HA4416 1.2 version - User’s manual STARTING THE DEVICE 2.4. Front panel description NDR-HA4416 View Some buttons of the front panel are used for different functions. Below, you have the description of all buttons and their functions. NOTE: a mouse with USB interface can be used for recorder’s control and setting. All the details can be found in the following chapters of the manual. - Page 14 NDR-HA4208 / NDR-HA4416 1.2 version - User’s manual STARTING THE DEVICE PLAY / PAUSE Press the PLAY/PAUSE button to play stored images at normal speed. Pressing the button in the Playback mode pauses the video. Used for navigating through OSD menu, and changing parameter values with buttons.
- Page 15 NDR-HA4208 / NDR-HA4416 1.2 version - User’s manual STARTING THE DEVICE Press the ZOOM button to zoom the currently displayed image. 11. ZOOM/PTZ A rectangular PIP displays the zoomed-in area. Please use the arrow buttons to move the rectangle through the screen.
-
Page 16: Remote Controller
NOTE: For simplicity, the button descriptions in this manual refer to the front panel buttons. 2.5 HDD installation DVR’s NDR-HA4208 i NDR-HA4416 supports up to 4 hard disks (3 HDDs with DVD burner). NOTE: To obtain the latest info on compatible disks together with their maximum supported capacities please contact your supplier or visit the www.novuscctv.com website. - Page 17 NDR-HA4208 / NDR-HA4416 1.2 version - User’s manual STARTING THE DEVICE Before installing a hard drive (HDD), DVD drive (ODD), please make sure the power is disconnected from the DVR. A factory recommended HDD, ODD should be used for this installation.
- Page 18 NDR-HA4208 / NDR-HA4416 1.2 version - User’s manual STARTING THE DEVICE 3. Install the ODD in the ODD rack using screws provided by ODD manufacturer. Connect power and SATA cables to the ODD. 4. Connect HDD, ODD to the motherboard of the DVR with the included SATA cables.
-
Page 19: Recorder's Menu
NDR-HA4208 / NDR-HA4416 1.2 version - User’s manual RECORDERS MENU RECORDER’S MENU NDR-HA4208 and NDR-HA4416 digital multiplexers feature an multilingual OSD menu allowing for adjusting the settings of the device. The difference between 8– and 16-channel versions lies in the number of channels and recording speed. -
Page 20: System Menu
NDR-HA4208 / NDR-HA4416 1.2 version - User’s manual RECORDER’S MENU 3.1. System menu After pressing MENU button and entering user password the following screen appears: System menu contains six sub-menus regarding the system settings. 3.1.1. Information After choosing this sub-menu and pressing... -
Page 21: System Log
NDR-HA4208 / NDR-HA4416 1.2 version - User’s manual RECORDER’S MENU Highlight the box next to Language text and press button. Available languages should be displayed in the drop-down list. Highlight the desired language and press button. To upgrade the software, connect a USB device with upgrade package file to the DVR. Highlight Upgrade…... -
Page 22: Date /Time
NDR-HA4208 / NDR-HA4416 1.2 version - User’s manual RECORDER’S MENU 3.1.1.2. Recorded data RECORDED DATA field informs about time frame in which the recordings were made. Selecting and confirming CLEAR ALL DATA field deletes all recordings currently stored on the HDD. -
Page 23: Disks
NDR-HA4208 / NDR-HA4416 1.2 version - User’s manual RECORDER’S MENU NOTE: Movable feasts should be updated each year. To add a new holiday, please select + icon. Current date (as set in the DVR) should appear on the list. Please select desired month and day using navigation buttons. By pressing previously entered date may be deleted. - Page 24 NDR-HA4208 / NDR-HA4416 1.2 version - User’s manual RECORDER’S MENU TYPE column describes type of storage device (internal disk, external disk with USB interface). Capacity of the storage device is displayed in the CAPACITY column. FORMAT column informs if the device is used for recording (Record) or not. Unformatted indicates that device is not formatted.
- Page 25 NDR-HA4208 / NDR-HA4416 1.2 version - User’s manual RECORDER’S MENU Highlight the Status tab, and the Storage Status screen displays: TYPEcolumn displays the type of storage device. DISK BAD displays information about percentage of bad sectors existing on the HDD.
-
Page 26: Users
NDR-HA4208 / NDR-HA4416 1.2 version - User’s manual RECORDER’S MENU 3.1.4. Users Highlight User in the System menu and press button. User setup screen displays authorized groups and users. You can add and delete groups and users. When adding a group, you can assign privileges to the group. - Page 27 NDR-HA4208 / NDR-HA4416 1.2 version - User’s manual RECORDER’S MENU A group of users can be assigned the following privileges: • Authority — If selected, a given user has all authority levels. • Shutdown — The user can shut the local system down.
-
Page 28: System Shutdown
NDR-HA4208 / NDR-HA4416 1.2 version - User’s manual RECORDER’S MENU 3.1.5. System shutdown Highlight Shutdown in the System menu and press button. The Shutdown screen displays asking you to confirm whether or not you want to shut the system down: After confirming the intent of shutting the system down, a message informing about the possibility of safe switching off the device is displayed. -
Page 29: Network
NDR-HA4208 / NDR-HA4416 1.2 version - User’s manual RECORDER’S MENU 3.2. Network NETWORK menu contains two submenus allowing for configuring network settings and event confirmation. 3.2.1.1. Network Highlight Network in the Network menu and press button. Network setup screen appears. -
Page 30: Lan
NDR-HA4208 / NDR-HA4416 1.2 version - User’s manual RECORDER’S MENU 3.2.1.2. After selecting LAN tab, the following setup screen appears: Highlight box next to Type field and press button. You can select type of the network configuration from: Manual, DHCP and ADSL (with PPPoE). Select desired type and press button. -
Page 31: Modem
NDR-HA4208 / NDR-HA4416 1.2 version - User’s manual RECORDER’S MENU NOTE: Do NOT use the same port number for two different programs, otherwise, DVR cannot be connected with a PC running RASPlus. Changing port settings, you must change the port settings on the PC running RASPlus as well. Refer to the RASPlus manual for details. -
Page 32: Notifying
NDR-HA4208 / NDR-HA4416 1.2 version - User’s manual RECORDER’S MENU 3.2.2. Notification The DVR can be set up to send emails or to contact a computer running RASPlus (Remote Administration System) when an event occurs. 3.2.2.1. E-mail After selecting NOTIFICATION the following screen appears: Please check ENABLE box, to activate the e-mail notifying setup. -
Page 33: Devices
NDR-HA4208 / NDR-HA4416 1.2 version - User’s manual RECORDER’S MENU 3.3. Devices You can configure the video, audio, alarm, display and remote control devices connected to the DVR. 3.3.1. Cameras Highlight Camera in the Devices menu and press button. The Camera setup screen appears. - Page 34 485 port. To connect the keyboards and speed domes cameras simultaneously you need to use RS232 / RS485 converter. In Product box choose one telemetry protocol from list (e.g. Novus-C, Pelco-P and Pelco-D) which is in accordance with PTZ camera settings.
-
Page 35: Audio
NDR-HA4208 / NDR-HA4416 1.2 version - User’s manual RECORDER’S MENU 3.3.2. Audio After selecting AUDIO submenu, the following window appears on the screen: DVR can record up to four audio inputs. ASSOCIATED CAMERA column allows for assigning any audio channel to any video channel. - Page 36 NDR-HA4208 / NDR-HA4416 1.2 version - User’s manual RECORDER’S MENU Each alarm output can be by highlighting the box in the TITLE column and pressing button. A virtual keyboard appears allowing you to enter the title. Highlighting the boxes under the TYPE header allows to set the alarm output either as NO or NC (normally open or normally closed).
-
Page 37: Display
NDR-HA4208 / NDR-HA4416 1.2 version - User’s manual RECORDER’S MENU 3.3.4. Display Highlight DISPLAY in the DEVICES menu and press button. The DISPLAY screen allows you to select what information are displayed on the monitor. Highlighting an item and pressing button toggles that item On and Off , visually represented as checking/unchecking them. - Page 38 NDR-HA4208 / NDR-HA4416 1.2 version - User’s manual RECORDER’S MENU You can adjust the transparency level for the menus by highlighting Transparency and using the Left and Right arrow buttons to adjust the value. Once the OSD Margin tab is highlighted, the following screen will appear: You can adjust the horizontal and vertical margins so the text and icons won’t disappear beyond the...
-
Page 39: Remote Control
NDR-HA4208 / NDR-HA4416 1.2 version - User’s manual RECORDER’S MENU Highlight the Spot monitor tab to display the following screen: This tab allows for setting which cameras are sequentially displayed on the Spot Monitor. Please highlight the box in the Channels column for the Spot Monitor and press button. -
Page 40: Recording
NDR-HA4208 / NDR-HA4416 1.2 version - User’s manual RECORDER’S MENU 3.4. Recording RECORD menu is divided into three submenus controlling the record settings. 3.4.1. Record Highlight Record in the Record menu and press button. The Record setup screen appears. Checking the RECYCLE box will result in oldest materials being overwritten by most recent ones, during recording process. - Page 41 NDR-HA4208 / NDR-HA4416 1.2 version - User’s manual RECORDER’S MENU NOTE: When the storage device does not have enough space to record video data longer than the preset Limit Time-Lapse Recording period, the DVR records over the oldest video data (time-lapse or event video) as it would in the Recycle mode even if this feature is turned On.
-
Page 42: Schedule
NDR-HA4208 / NDR-HA4416 1.2 version - User’s manual RECORDER’S MENU 3.4.2. Schedule Highlight the Schedule submenu and the following screen will appear: Highlight the Schedule Mode box and press the button. You can select between Simple Mode and Advanced Mode. Selecting Advanced Mode allows you to set up individual recording schedule for each event. -
Page 43: Pre-Event
NDR-HA4208 / NDR-HA4416 1.2 version - User’s manual RECORDER’S MENU SETTINGS field allows for selecting the recording speed, ranging from 0.1 to 25 fps, and the quality of the recordings: VERY HIGH, HIGH, STANDARD, LOW. Selecting the results in deletion of the particular line of schedule. -
Page 44: Event
NDR-HA4208 / NDR-HA4416 1.2 version - User’s manual RECORDER’S MENU 3.5. Event The DVR has the ability to detect various event types. Depending on settings, various actions may be taken as a result. 3.5.1. Alarm-in. Highlight Alarm-In in the Event menu and press button. - Page 45 NDR-HA4208 / NDR-HA4416 1.2 version - User’s manual RECORDER’S MENU After selecting ACTIONS tab, the following screen appears: ACTIONS tab allows for setting the response of the DVR after a certain alarm input has been activated. RECORD column allows for selecting cameras that will be recording pictures, when a particular alarm output is activated.
-
Page 46: Motion Detection
NDR-HA4208 / NDR-HA4416 1.2 version - User’s manual RECORDER’S MENU 3.5.2. Motion detection Highlight Motion Detection in the Event menu and press button. The Motion Detection setup screen appears: This DVR has built-in video motion detection. NO. column check boxes activate/deactivate motion detection function for a desired channel. -
Page 47: Video Loss
NDR-HA4208 / NDR-HA4416 1.2 version - User’s manual RECORDER’S MENU Press button to display the menu screen. The menu on the setup screen has the following functions • SELECT– selects all cells in the field, • CLEAR - clears all cells in the field, •... -
Page 48: Video Blind
NDR-HA4208 / NDR-HA4416 1.2 version - User’s manual RECORDER’S MENU 3.5.4. Video Blind Highlight Video Blind in the Event menu and press the button. The Video Blind setup screen appears. The DVR checks for picture obscuration. Highlighting the box under the Sensitivity heading allows you to adjust the DVR’s... - Page 49 NDR-HA4208 / NDR-HA4416 1.2 version - User’s manual RECORDER’S MENU Highlight the box beside Disk Almost Full Notify, and press the button. Select the percentage level of disk usage at which you want the DVR to trigger an alert. Percentage levels range from 80% to 99%.
-
Page 50: Recorder's Operation
NDR-HA4208 / NDR-HA4416 1.2 version - User’s manual RECORDER’S OPERATION MULTIPLEXER’S OPERATION 4.1. Live monitoring After finishing the system initialisation, live pictures from camera are displayed on the main monitor, together with audio feed via speakers. Simultaneous display of all camera inputs is the default mode (16 or 8, depending on the DVR model). -
Page 51: Active Cameo Mode
NDR-HA4208 / NDR-HA4416 1.2 version - User’s manual RECORDER’S OPERATION 4.2. Active Cameo Mode You can enter the Active Cameo mode by pressing MENU button during any split-screen display mode. Yellow outline surrounding the video frame indicates active cameo. Pressing arrow buttons moves active cameo. -
Page 52: Image Adjustment
NDR-HA4208 / NDR-HA4416 1.2 version - User’s manual RECORDER’S OPERATION To program a preset, direct the camera at a selected scene and press . When the PTZ dialog box appears, select the number you want assign the preset to and press the button. -
Page 53: Event Monitoring
NDR-HA4208 / NDR-HA4416 1.2 version - User’s manual RECORDER’S OPERATION 4.7. Event monitoring If EVENT MONITORING ON is checked in the MAIN MONITOR tab, the picture from a selected camera will be displayed on the main monitor. The display mode depends on the amount of cameras linked to the event, and on the number of events that are simultaneously taking place in the system. -
Page 54: Recording Video
NDR-HA4208 / NDR-HA4416 1.2 version - User’s manual RECORDER’S OPERATION 4.10. Recording video Maximum recording speed of images in 360 x 288 resolution (PAL) is 400(200) images / s. for the complete system. Maximum recording speed of images in 720 x 288 resolution (PAL) is 200(100) images / s. for the complete system. -
Page 55: Searching Video
NDR-HA4208 / NDR-HA4416 1.2 version - User’s manual RECORDER’S OPERATION PLAYBACK - Press PLAYBACK button in the Playback mode to return DVR to the Live Monitoring mode. Press SEARCH/STOP button in Live Monitoring mode to return DVR to the Search mode. -
Page 56: Event Log Search
NDR-HA4208 / NDR-HA4416 1.2 version - User’s manual RECORDER’S OPERATION Days with recorded video display are colored white in the calendar. You can highlight the days with recorded video using arrow buttons. Once you have highlighted a day, press button to select it. - Page 57 NDR-HA4208 / NDR-HA4416 1.2 version - User’s manual RECORDER’S OPERATION You can search video from the first to last recorded images, or you can set the start and stop times and dates. For this last purpose serve the From and To options.
-
Page 58: Motion Search
NDR-HA4208 / NDR-HA4416 1.2 version - User’s manual RECORDER’S OPERATION 4.13.4 Motion search Once Event log search option is selected, following screen appears: The Motion Search can be selected from the Search menu while the DVR displays the camera full screen. -
Page 59: Go To The Date/Time
NDR-HA4208 / NDR-HA4416 1.2 version - User’s manual RECORDER’S OPERATION 4.13.1. Go to Selecting (Go To) in the Search menu displays the following Go to menu. • Go to the First: Selecting Go to the First displays the first recorded image. -
Page 60: Record Table Search
NDR-HA4208 / NDR-HA4416 1.2 version - User’s manual RECORDER’S OPERATION 4.13.1. Record Table Search Information about recordings are displayed on the recording status bar. A grey vertical line indicates the current search position. To search specific video, move the vertical... -
Page 61: Clip Copy
NDR-HA4208 / NDR-HA4416 1.2 version - User’s manual RECORDER’S OPERATION 4.14. Clip Copy Video clips can be copied on an internal DVD RW drive, or external USB hard disk / flash drive. The copied video clips can be viewed on computers running Microsoft Windows 98, ME, 2000, XP or Vista. - Page 62 NDR-HA4208 / NDR-HA4416 1.2 version - User’s manual RECORDER’S OPERATION When no free space is currently available on the target device, a message informing about lack of free space will be displayed, together with question if the amount of data copied should match the free space left on the memory device.
-
Page 63: Playback
NDR-HA4208 / NDR-HA4416 1.2 version - User’s manual RECORDER’S OPERATION 4.15. Playback You do not need to install any special software on your personal computer to review the video clips. The copied video clip contains the ClipPlayer program. NOTE: It is suggested that the computer used for the ClipPlayer program has at least a 800MHz Pentium III. - Page 64 NDR-HA4208 / NDR-HA4416 1.2 version - User’s manual RECORDER’S OPERATION Next, select the ADVANCED button and TROUBLESHOOTING tab, then select the maximum value of hardware acceleration. To check version number of the libraries installed, please enter „dxdiag” in the RUN bar, located in the START menu, and press ENTER.
- Page 65 NDR-HA4208 / NDR-HA4416 1.2 version - User’s manual RECORDER’S OPERATION Playback software description: closes the software. Pressing Pressing moves to the beginning of the recording. Pressing plays the recording fast backwards. Pressing moves to a previous frame of the recording.
-
Page 66: Ptz Cameras Control And Connection
PTZ CAMERAS CONTROL AND CONNECTION 5. PTZ CAMERAS CONTROL AND CONNECTION NDR-HA4208 and NDR-HA4416 are able to control up to 16 cameras through RS-485 port connected in daisy chain. Daisy chain cannot exceed 1200m total length and 1.5m taps from the main line. - Page 67 NDR-HA4208 / NDR-HA4416 1.2 version - User’s manual PTZ CAMERAS CONTROL AND CONNECTION Appendix 1: Novus camera connection View of NDR-HA4416 UTP 5 max 1200m camera Novus CAMA I camera Novus CAMA I nr 9 (16) nr 1 All rights reserved © NOVUS Security Sp. z o.o.
-
Page 68: Connecting Devices To Alarm Inputs And Outputs
6. CONNECTING DEVICES TO ALARM INPUTS AND OUTPUTS Connecting devices to alarm inputs and outputs. NDR-HA4208 and NDR-HA4416 recorders feature 8 or 16 alarm inputs and out allowing you to connect external devices. Wiring connectors are equipped with clamp terminals. -
Page 69: Recorder's Operating From Nv-Kbd60 Sytem Keyboard
MULTIPLEXER’S OPERATING FROM THE LEVEL OF NV-KBD60 SYTEM KEYBOARD MULTIPLEXER’S OPERATING FROM SYTEM KEYBOARD NDR-HA4208 and NDR-HA4416 may be remotely controlled using NV-KBD70 keyboard. System is controlled via RS-485 port located in the device. Controlling large systems is possible in such a connection (up to 10 DVRs). -
Page 70: Displaying Text On The Image
DISPLAYING TEXT ON THE IMAGE 8.1 Displaying text on the image NDR-HA4208 and NDR-HA4416 feature the possibility of displaying both the images from the cameras and ASCII text generated by external devices, such as cash registers, ATM machines or a PC computers with access control software installed. - Page 71 DISPLAYING TEXT ON THE IMAGE After selecting TEXT-IN, the following screen appears: NDR-HA4208 and NDR-HA4416 may be programmed in such way that the device starts a desired action (i.e. starts recording, enables internal buzzer, activates relay outputs, or sends notifying mes- sages) whenever it receives some pre-defined text string.
- Page 72 NDR-HA4208 / NDR-HA4416 1.2 version - User’s manual DISPLAYING TEXT ON THE IMAGE After highlighting Settings the below tab appears on the screen: PORT position allows for defining the input the text data are sent to. RS-485, RS-232 or one of four USB inputs are selectable.
-
Page 73: Transaction Search
NDR-HA4208 / NDR-HA4416 1.2 version - User’s manual DISPLAYING TEXT ON THE IMAGE In the Ignore position you define strings, whose detection is totally ignored by the system. If there are both small and capital letters of different characteristic in the system you need to tick off Case Sensitive. - Page 74 NDR-HA4208 / NDR-HA4416 1.2 version - User’s manual DISPLAYING TEXT ON THE IMAGE After choosing a required result and choosing the first image of a registered transaction with an associated keyword is displayed. By choosing you can start playback of the registered material connected with the transaction.
-
Page 75: System Status
NDR-HA4208 / NDR-HA4416 1.2 version - User’s manual DISPLAYING TEXT ON THE IMAGE 9. SYSTEM STATUS Highlight Show Event Status and press button to display the Event Status screen: The Event Status window contains information about the current status of the DVR, together with the status of its inputs. -
Page 76: Using A Mouse
NDR-HA4208 / NDR-HA4416 1.2 version - User’s manual DISPLAYING TEXT ON THE IMAGE 10. USING A MOUSE You can use a mouse instead of the front panel buttons to perform many of the DVR functions. In the Live Monitoring mode or Search mode, moving the mouse pointer to the left edge of the screen displays the following Mouse Display menu. - Page 77 NDR-HA4208 / NDR-HA4416 1.2 version - User’s manual NOTES All rights reserved © NOVUS Security Sp. z o.o.
- Page 78 NDR-HA4208 / NDR-HA4416 1.2 version - User’s manual NOTES All rights reserved © NOVUS Security Sp. z o.o.
- Page 79 NDR-HA4208 / NDR-HA4416 1.2 version - User’s manual NOTES All rights reserved © NOVUS Security Sp. z o.o.
- Page 80 NDR-HA4208 / NDR-HA4416 1.2 version - User’s manual 2010-10-18 All rights reserved © NOVUS Security Sp. z o.o. AAT Holding sp. z o.o., 431 Pulawska St., 02-801 Warsaw, Poland tel.: +4822 546 07 00, fax: +4822 546 07 59 www.novuscctv.com...
- Page 81 ł u g i NDR-HA4208 NDR-HA4416...
- Page 82 środowisko naturalne. Informacja Urządzenie, jako element profesjonalnego systemu telewizji dozorowej słuŜącego do nadzoru i kontroli, nie jest przeznaczone do samodzielnego montaŜu w gospodarstwach domowych przez osoby nie posiadające specjalistycznej wiedzy. Wszelkie prawa zastrzeŜone © NOVUS Security Sp. z o.o.
- Page 83 Przed wykonaniem czynności, która nie jest przewidziana dla danego Produktu w instrukcji obsługi, innych dokumentach dołączonych do Produktu lub nie wynika ze zwykłego przeznaczenia Produktu, naleŜy, pod rygorem wyłączenia odpowiedzialności Producenta za następstwa takiej czynności, Wszelkie prawa zastrzeŜone © NOVUS Security Sp. z o.o.
- Page 84 SPIS TREŚCI ..........................4 1. INFORMACJE WSTĘPNE ......................6 1.1. Charakterystyka ogólna ....................... 6 1.2. Dane techniczne rejestratora cyfrowego NDR-HA4208, NDR-4416 .........7 2. URUCHAMIANIE URZĄDZENIA ..................8 2.1. Przygotowanie urządzenia do pracy ................. 8 2.2. Złącza elektryczne i inne elementy panelu tylnego ............9 2.3.
-
Page 85: Spis Treści
8.2. Wyszukiwanie po transakcjach ..................74 9. ZDARZENIA - STAN SYSTEMU ..................76 10. STEROWANIE REJESTRATOREM ZA POMOCĄ MYSZY USB ......77 10.2. Sterowanie za pomocą pilota zdalnego sterowania ............77 NOTATKI ........................... 80 Wszelkie prawa zastrzeŜone © NOVUS Security Sp. z o.o. -
Page 86: Informacje Wstępne
* Lista zalecanych modeli nagrywarek DVD i dysków HDD dostępna jest na stronie www.novuscctv.pl w załączniku „Kompatybilne dyski i nagrywarki DVD”. Rejestrator umoŜliwia zainstalowanie 3 HDD oraz 1 napędu DVD-RW. MoŜliwość zamontowania 4 HDD dostępna jest po dokupieniu odpowiedniego zestawu montaŜowego. Wszelkie prawa zastrzeŜone © NOVUS Security Sp. z o.o. -
Page 87: Dane Techniczne Rejestratora Cyfrowego Ndr-Ha4208, Ndr-4416
5°C ~ 40°C Wilgotność względna 0% ~ 80% (bez kondensacji) Wymiary (mm) 430 (szer) x 88 (wys) x 405 (gł) Masa 7,6 kg (bez dysków) tak, 2U120 Mocowanie w szafie rack Wszelkie prawa zastrzeŜone © NOVUS Security Sp. z o.o. -
Page 88: Uruchamianie Urządzenia
Kondensacja zawartej w powietrzu pary wodnej moŜe spowodować zwarcia i w konsekwencji uszkodzenie urządzenia. Uwaga: Przed uruchomieniem urządzenia naleŜy zapoznać się z opisem i rolą poszczególnych wejść znajdujących się na panelu tylnym. Wszelkie prawa zastrzeŜone © NOVUS Security Sp. z o.o. -
Page 89: Złącza Elektryczne I Inne Elementy Panelu Tylnego
ARI i GND moŜe kasować aktywne wyjścia przekaźnikowe oraz wewnętrzny brzęczyk urządzenia. Minimalne napięcie podanego sygnału powinno mieć wartość 0,3V i trwać około 0,5s, aby został wykryty. Wszelkie prawa zastrzeŜone © NOVUS Security Sp. z o.o. - Page 90 Jedno wyjście audio do podłączenia głośnika ze wzmacniaczem. Wyjście głośnikowe nie posiada w torze audio wzmacniacza i dlatego naleŜy stosować głośniki ze wzmacniaczem. Wszelkie prawa zastrzeŜone © NOVUS Security Sp. z o.o.
- Page 91 230 V AC, naleŜy upewnić się, Ŝe wtyczka jest właściwie włoŜona i zapewnia stabilne połączenie między stykami oraz podłączona jest do sieci z uziemieniem, nie naleŜy nadmiernie zginać kabla zasilającego. Wszelkie prawa zastrzeŜone © NOVUS Security Sp. z o.o.
-
Page 92: Podłączanie Urządzeń Peryferyjnych
W zaleŜności od wymagań, konkretny system będzie składał się z róŜnej liczby urządzeń peryferyjnych. Monitory, kamery i inne urządzenia naleŜy zakupić oddzielnie w zaleŜności od potrzeb. Opis podłączania niektórych urządzeń zewnętrznych znajduje się rozdziałach 5, 6, 7 i 8 instrukcji. Wszelkie prawa zastrzeŜone © NOVUS Security Sp. z o.o. -
Page 93: Opis Płyty Czołowej
W trybie PTZ wciśnięcie przycisku 1 powoduje przybliŜenie obrazu , przycisk 2 powoduje oddalenie obrazu, , p r z y c i s k 3,4 umoŜliwiają ustawienie ostrości ,przycisk 5 powoduje przejście do PRESETU, 6 zapisuje PRESET Wszelkie prawa zastrzeŜone © NOVUS Security Sp. z o.o. - Page 94 10. PLAYBACK Wciśnięcie przycisku PLAYBACK powoduje przejście do trybu odtwarzania. Ponowne wciśnięcie PLAYBACK powoduje powrót do trybu podglądu na Ŝywo. Wszelkie prawa zastrzeŜone © NOVUS Security Sp. z o.o.
- Page 95 Wciśnięcie i przetrzymanie przycisku przez 2 s umoŜliwia uruchomienie sekwencyjnego wyświetlania obrazów z kamer. 14. CLIP COPY Przycisk umoŜliwia kopiowanie wybranego materiału na CD/ DVD lub Flash USB. Wszelkie prawa zastrzeŜone © NOVUS Security Sp. z o.o.
-
Page 96: Instalacja Dysków Twardych
17. USB Port USB do podłączenia myszy USB i pamięci Flash 2.5. Instalacja dysków twardych Rejestratory NDR-HA4208 i NDR-HA4416 pozwalają na zainstalowanie 3 dysków twardych SATA oraz nagrywarki DVD.. MoŜliwość zamontowania 4 HDD dostępna jest po dokupieniu odpowiedniego zestawu montaŜowego. - Page 97 W celu zamontowania nagrywarki DVD i/lub dysków HDD NaleŜy: 1. Zdjąć górną cześć obudowy rejestratora. 2. Zainstalować dyski w specjalnym koszyku śrubami dołączonymi w zestawie. Podłączyć kable zasilające oraz kable SATA. Wszelkie prawa zastrzeŜone © NOVUS Security Sp. z o.o.
- Page 98 SATA. Śruby do zamontowania DVD-RW dostarczane są przez producenta nagrywarki. 4. Podłączyć dyski i nagrywarkę DVD-RW do płyty głównej rejestratora kablami SATA. 5. ZałoŜyć górną cześć obudowy i skręcić obudowę rejestratora. Wszelkie prawa zastrzeŜone © NOVUS Security Sp. z o.o.
-
Page 99: Menu Rejestratora
NDR-HA4208, NDR-HA4416 - Instrukcja obsługi wer. 1.2 MENU REJESTRATORA MENU REJESTRATORA Rejestratory NDR-HA4208 i NDR-HA4416 posiadają wielopoziomowe menu wyświetlane na ekranie monitora słuŜące do programowania ustawień. Menu urządzenia jest wielojęzyczne i wyświetlane w jednym z poniŜszych języków: angielski, niemiecki, hiszpański, francuski, włoski, polski, rosyjski, węgierski i czeski. -
Page 100: Informacje
ID. JeŜeli więcej niŜ jeden rejestrator posiada adres ID równy 0 to mogą być sterowane równocześnie z poziomu pilota zdalnego sterowania. Wszelkie prawa zastrzeŜone © NOVUS Security Sp. z o.o. -
Page 101: Rejestr Systemu
Import ustawień z niewłaściwymi parametrami sieci moŜe spowodować utratę komunikacji z rejestratorem. Zaleca się dokonywanie importu ustawień bez ustawień sieci TCP/IP. 3.1.1.1. Rejestr systemu Po wybraniu pozycji REJESTR SYSTEMU pojawi się poniŜszy ekran: Wszelkie prawa zastrzeŜone © NOVUS Security Sp. z o.o. -
Page 102: Zakres Nagrań
W zakładce DNI SPECJALNE naleŜy zdefiniować dni świąteczne lub inne dni szczególne, kiedy rejestrator będzie pracował w innym aniŜeli podstawowy trybie. Zdefiniowane dni świąteczne mogą zostać wykorzystane m.in. do programowania harmonogramu. Wszelkie prawa zastrzeŜone © NOVUS Security Sp. z o.o. - Page 103 Funkcja synchronizacji czasu jest szczególnie przydatna w rozproszonych systemach monitoringu, gdzie istnieje konieczność synchronizacji wewnętrznego zegara innymi urządzeniami np. bankomatami lub kasami fiskalnymi. W przypadku stosowania nazwy domenowej w ustawieniach sieciowych naleŜy dokonać ustawień serwera DNS. Wszelkie prawa zastrzeŜone © NOVUS Security Sp. z o.o.
-
Page 104: Dyski
W kolumnie INFORMACJE wyświetlana jest informacja czy dysk jest aktualnie wykorzystywany. Komunikat INNY wskazuje, Ŝe dysk uprzednio był uŜywany w innym urządzeniu. kolumny INFORMACJE dla wybranego dysku wyświetla Wybranie i zatwierdzenie przyciskiem czas rejestracji obrazów z kamer. Wszelkie prawa zastrzeŜone © NOVUS Security Sp. z o.o. - Page 105 Uwaga: Funkcje TEMPERATURA i S.M.A.R.T. są aktywne tylko dla dysków twardych, których technologia wspiera automonitoring pracy dysku. W przypadku komunikatu BAD zaleca się natychmiastową wymianę twardego dysku. Szczegółowe informacje dotyczące twardego dysku zawarte są w pod-menu INFORMACJE. Wszelkie prawa zastrzeŜone © NOVUS Security Sp. z o.o.
-
Page 106: Uŝytkownicy
Aby dodać grupę lub uŜytkownika naleŜy wybrać pozycję +Grupa lub +UŜytkownicy oraz za pomocą wirtualnej klawiatury zdefiniować nazwy (maksymalnie 15 znaków alfanumerycznych). Hasło uŜytkownika naleŜy wpisać wykorzystując przyciski wyboru kamery 1~9 (maksymalnie 8 cyfr). Wszelkie prawa zastrzeŜone © NOVUS Security Sp. z o.o. - Page 107 W pozycji AUTO-LOGOWANIE moŜna dokonać wyboru uŜytkownika, który po włączeniu systemu automatycznie będzie logowany. W pozycji AUTO-WYLOGOWANIE moŜna dokonać wyboru okresu czasu bezczynności (od wyłączenia funkcji do 1 godziny), po którym uŜytkownik zostanie automatycznie wylogowany. Wszelkie prawa zastrzeŜone © NOVUS Security Sp. z o.o.
-
Page 108: Zamknięcie Systemu
Aby wylogować uŜytkownika z systemu naleŜy wybrać i potwierdzić pozycję WYLOGUJ (ostatnia pozycja na pasku menu). Na ekranie monitora zostanie wyświetlony poniŜszy komunikat: Po potwierdzeniu zamiaru wylogowania uŜytkownika z systemu nastąpi automatyczne wyjście z ustawień menu i zostanie wyświetlony obraz z kamer. Wszelkie prawa zastrzeŜone © NOVUS Security Sp. z o.o. -
Page 109: Sieć
Wysoka, Standardowa, Niska. Dokonane w tej pozycji ustawienia nie wpływają na jakość rejestracji obrazów w urządzeniu. NiŜsza jakość transmitowanych przez sieć obrazów zapewnia przy tej samej szerokości pasma większą częstotliwość odświeŜania. Wszelkie prawa zastrzeŜone © NOVUS Security Sp. z o.o. -
Page 110: Lan, Ochrona Sieci
Wybór pozycji USTAWIENIA PORTÓW pozwala na przyporządkowanie numerów portów wybranym usługom. Numery portów, na których działają poszczególne usługi mogą być zmieniane przez uŜytkownika w zakresie od 8000 do 12000. Po zmianie numerów portów następuje automatyczny restart systemu. Wszelkie prawa zastrzeŜone © NOVUS Security Sp. z o.o. -
Page 111: Dvrns
ADSL jak i DHCP. W zakładce ochrona sieci ustawiamy port przez który logujemy się do rejestratora przeglądarką Internet Explorer np. http://192.168.1.1: 12088 3.2.1.3. DVRNS Funkcja nieaktywna dla aktualnej wersji firmware’u. Wszelkie prawa zastrzeŜone © NOVUS Security Sp. z o.o. -
Page 112: Powiadamianie
RAS+ naleŜy zaznaczyć opcję LAN oraz wpisać adresy IP hostów (max. 5). W pozycji ILOŚĆ PRÓB naleŜy wybrać, ile razy urządzenie ma próbować nawiązać połączenie ze zdalnym hostem z zainstalowanym oprogramowaniem RAS+. Wszelkie prawa zastrzeŜone © NOVUS Security Sp. z o.o. -
Page 113: Urządzenia
• Ukryta 2 - obraz z kamery jest ukryty zarówno w trybie wyświetlania „na Ŝywo” jak i odtwarzania, wyświetlana jest jedynie nieaktywna nazwa kamery. Wszelkie prawa zastrzeŜone © NOVUS Security Sp. z o.o. - Page 114 Aby równocześnie podłączyć klawiaturę i kamery szybkoobrotowe naleŜy zastosować konwerter RS232 - RS485. W kolumnie TYP kamery naleŜy wybrać protokół telemetrii spośród dostępnych (m.in. Novus-C, Pelco-P i Pelco-D) zgodny z ustawieniami w kamerze obrotowej. W kolumnie ADRES naleŜy ustawić numer kamery obrotowej w sieci sterowania zgodny z ustawieniami dokonanymi w kamerze.
-
Page 115: Audio
Odtwarzanie nagranego dźwięku moŜliwe jest tylko przy normalnej prędkości odtwarzania obrazu (dźwięk nie jest odtwarzany przy spowolnionym odtwarzaniu ani przy przyspieszonym „przewijaniu”). 3.3.3. Wyjścia alarmowe Po wybraniu podmenu WYJŚCIA ALARMOWE zostanie wyświetlony poniŜszy ekran: Wszelkie prawa zastrzeŜone © NOVUS Security Sp. z o.o. - Page 116 W kolumnie KANAŁY definiowane są wyjścia alarmowe oraz dodatkowo wewnętrzny sygnał akustyczny urządzenia, których dotyczą dokonane ustawienia harmonogramowe. W kolumnie USTAWIENIA określane są parametry nagrywania harmonogramu i zdarzeń takie jak jakość i prędkość. Wszelkie prawa zastrzeŜone © NOVUS Security Sp. z o.o.
-
Page 117: Monitory
• TRANSAKCJA - dane tekstowe z urządzeń peryferyjnych są wyświetlane na ekranie przez zdefiniowany czas w polu CZAS WYŚWIETLANIA. • PRZEŹROCZYSTOŚĆ / MARGINESY — definiuje przezroczystość i marginesy menu OSD Wszelkie prawa zastrzeŜone © NOVUS Security Sp. z o.o. - Page 118 W trybie wyświetlania 4x4 dla rejestratora 16-kanałowego oraz trybu 3x3 dla rejestratora 8-kanałowego nie jest moŜliwe włączenie funkcji sekwencji. Wybranie pozycji WYŚWIETLANIE KAMER ALARMOWYCH powoduje, Ŝe wszystkie zdarzenia powiązane z daną kamerą są wyświetlane pełnoekranowo na monitorze głównym. Wszelkie prawa zastrzeŜone © NOVUS Security Sp. z o.o.
-
Page 119: Klawiatura
BITY STOPU, PARZYSTOŚĆ. W pozycji TYP KLAWIATURY naleŜy wybrać pozycje: KLAWIATURA, aby sterować rejestratorem klawiaturą NV-KBD30 protokołem D2 Widok dla NV-DVR1600 lub NV-KBD70 protokołem D2B. KLAWIATURA2, aby sterować rejestratorem klawiaturą NV-KBD70 protokołem D2E. Wszelkie prawa zastrzeŜone © NOVUS Security Sp. z o.o. -
Page 120: Nagrywanie
Widok dla NV-DVR1600 aŜ do zapełnienia dysku. Przy odpowiednio dobranej pojemności dysków moŜna uzyskać np. nagrywania ciągłe z ostatniego tygodnia a nagrania ze zdarzeń nawet z paru miesięcy. Wszelkie prawa zastrzeŜone © NOVUS Security Sp. z o.o. -
Page 121: Nagrywanie Napadowe
Uwaga: Maksymalna prędkość rejestracji dla rozdzielczości najwyŜszej (720 x 576) wynosi 100 kl/s wysokiej (720 x 288) wynosi 200 kl/s, dla rozdzielczości standardowej wynosi (360 x 288) 400 kl/s. (W zaleŜności od modelu rejestratora) Widok dla NV-DVR1600 Wszelkie prawa zastrzeŜone © NOVUS Security Sp. z o.o. -
Page 122: Harmonogram
Ŝadne ikona w Ŝółtym kolorze. W przypadku wystąpienia zdarzenia rejestrator wyświetla ikony lewym górnym rogu obrazu. W pozycji KANAŁY naleŜy wybrać kamery, dla których mają być realizowane dokonane ustawienia nagrywania. Wszelkie prawa zastrzeŜone © NOVUS Security Sp. z o.o. - Page 123 W pozycji USTAWIENIA dla zdefiniowanego przedziału czasowego dokonuje się szczegółowych ustawień pracy rejestratora (prędkość zapisu, jakość, czas trwania) w trybie ciągłym oraz w trybach alarmowych: alarmy zew., ruch, utrata sygnału oraz transakcja dla kaŜdej kamery niezaleŜnie. Wszelkie prawa zastrzeŜone © NOVUS Security Sp. z o.o.
-
Page 124: Ustawienia Nagrywania Przedalarmowego
W pozycji CZAS trwania definiuje się czas nagrywania przed-alarmowego w zakresie od 5 sekund do 30 minut. Uwaga: JeŜeli rejestrator pracuje w trybie nagrywania HARMONOGRAM lub nagrywania Widok dla NV-DVR1600 HARM & ZDARZENIA ustawienia nagrywania przed-alarmowego nie są aktywne. Wszelkie prawa zastrzeŜone © NOVUS Security Sp. z o.o. -
Page 125: Zdarzenie
Nagrywanie alarmowe trwa tak długo jak pobudzane jest wejście alarmowe, nie zostanie naciśnięty przycisk PANIC na panelu czołowym rejestratora lub wygaśnie okres czasu nagrywania alarmowego ustawiony w rejestratorze. Wszelkie prawa zastrzeŜone © NOVUS Security Sp. z o.o. - Page 126 KOMUNIKAT NA EKRANIE - wyświetlenie na monitorze głównym okna wizualizacji stanu rejestratora. Uwaga: Działanie funkcji automatycznego nawiązywania połączenia z centrum monitorowania zaleŜy od poprawności ustawień w programie sieciowym RAS+. Widok dla NV-DVR1600 Wszelkie prawa zastrzeŜone © NOVUS Security Sp. z o.o.
- Page 127 . Prędkościom odtwarzania towarzyszą wyświetlane na ekranie monitora następujące znaki graficzne: FORWARD - naciśnięcie przycisku powoduje w trybie pauzy przejście do kolejnego obrazu. BACKWARD - naciśnięcie przycisku powoduje w trybie pauzy przejście do poprzedniego obrazu. Wszelkie prawa zastrzeŜone © NOVUS Security Sp. z o.o.
- Page 128 W kolumnie MONITOR POMOCNICZY w chwili aktywacji dowolnego alarmu wybrane kamery mogą być wyświetlane na monitorze pomocniczym przez czas trwania alarmu. Widok dla NV-DVR1600 Wszelkie prawa zastrzeŜone © NOVUS Security Sp. z o.o.
-
Page 129: Detekcja Ruchu
• ZAZNACZ WSZYSTKO - uaktywnia wszystkie pola siatki, • SKASUJ WSZYSTO - dezaktywuje wszystkie pola siatki, • ODWRÓĆ WSZYSTKO - uaktywnia wszystkie pola dezaktywowane i dezaktywuje wszystkie pola aktywne, Wszelkie prawa zastrzeŜone © NOVUS Security Sp. z o.o. -
Page 130: Utrata Sygnału, Oślepianie
Ustawienia w zakładkach DZIAŁANIE 1, DZIAŁANIE 2 są identyczne z ustawieniami zakładek DZIAŁANIE 1, DZIAŁANIE 2 podmenu ustawień alarmowych ALARMY ZEW. W menu OŚLEPIANIE KAMERY definiuje się jaki poziomy przysłonięcia lub oślepienia kamery jest przez rejestrator interpretowany jako oślepienie. Widok dla NV-DVR1600 Wszelkie prawa zastrzeŜone © NOVUS Security Sp. z o.o. -
Page 131: Zdarzenia Systemowe
W kolumnie STAN wyświetlana jest informacja statusowa o wybranym elemencie. Po wybraniu zakładki DYSKI wyświetlany jest poniŜszy ekran: Widok dla NV-DVR1600 W pozycji GDY BŁĘDY PRZEKROCZĄ definiuje się jaki poziom uszkodzonych sektorów dysku powoduje uruchomienie funkcji powiadamiania. Wszelkie prawa zastrzeŜone © NOVUS Security Sp. z o.o. - Page 132 DYSKÓW, BŁĘDY NA DYSKU, PRZEGRZANIE, ALARM OD S.M.A.R.T. moŜliwe jest zdefiniowanie akcji alarmowania i powiadamiania identycznie jak w zakładce DZIAŁANIE podmenu ustawień alarmowych ALARMY ZEW. Dla pozycji SYSTEM moŜliwe jest tylko ustawienie powiadamiania e-mail. Widok dla NV-DVR1600 Wszelkie prawa zastrzeŜone © NOVUS Security Sp. z o.o.
-
Page 133: Obsługa Rejestratora
(jeśli pozwalają na to ustawienia menu). Aby wyświetlić kamery sekwencyjnie na monitorze pomocniczym naleŜy nacisnąć przycisk SPOT w , przetrzymać 2s i wybrać funkcję wyświetlania sekwencyjnego z menu. Widok dla NV-DVR1600 Wszelkie prawa zastrzeŜone © NOVUS Security Sp. z o.o. -
Page 134: Komponowanie Obrazów Z Kamer W Podziale
Za pomocą przycisków moŜna dokonać ustawienia ostrości kamery (Focus + Focus -). Aby sterować kamerą w płaszczyźnie poziomej i pionowej naleŜy uŜyć klawiszy nawigacyjnych ▼▲◄►. Widok dla NV-DVR1600 Wszelkie prawa zastrzeŜone © NOVUS Security Sp. z o.o. -
Page 135: Ustawienia Parametrów Obrazu
• KONTRAST • ODCIEŃ • NASYCENIE Uwaga: Dokonane zmiany dotyczą zarówno obrazu wyświetlanego na Ŝywo jak i zapisywanego. Menu ustawień parametrów obrazu jest aktywne tylko dla kanałów z podłączonym sygnałem wizji. Wszelkie prawa zastrzeŜone © NOVUS Security Sp. z o.o. -
Page 136: Monitory Pomocnicze
Zostanie wyświetlona lista kamer (z wyróŜnionymi dla monitora kamerami uaktywnionymi w menu) oraz dodatkowo pozycja SEKWENCJA do sekwencyjnego wyświetlania kamer na monitorze pomocniczym. Czas przełączania sekwencyjnego definiowany jest w menu rejestratora. Wszelkie prawa zastrzeŜone © NOVUS Security Sp. z o.o. -
Page 137: Wyszukiwanie Materiału
Uwaga: Podczas wyszukiwania materiału prędkość nagrywania moŜe ulec zmniejszeniu. Do trybu odtwarzania wchodzi się po naciśnięcie przycisku MENU a następnie wybraniu ikony WYSZUKIWANIE . Menu moŜna wywołać przesuwając mysz w prawy górny róg ekranu monitora Wszelkie prawa zastrzeŜone © NOVUS Security Sp. z o.o. -
Page 138: Wyszukiwanie Po Dacie I Czasie
JeŜeli dla ustawionego czasu nie ma zarchiwizowanych obrazów zostanie wyświetlony komunikat informujący o braku zarchiwizowanych materiałów. 4.13.2. Wyszukiwanie za pomocą kalendarza Po wybraniu funkcji wyszukiwania za pomocą kalendarza pojawi się poniŜszy ekran: Wszelkie prawa zastrzeŜone © NOVUS Security Sp. z o.o. -
Page 139: Wyszukiwanie Zarejestrowanych Obrazów Powiązanych Ze Zdarzeniami
Uwaga: W przypadku braku obrazów odtwarzanych na ekranie naleŜy przejść w tryb wyświetlania 4x4 w celu szybkiego wyszukania zarejestrowanych obrazów. W celu wyfiltrowania Ŝądanych zdarzeń naleŜy skorzystać z pozycji OPCJE. Wszelkie prawa zastrzeŜone © NOVUS Security Sp. z o.o. - Page 140 Zaznaczenie poniŜszych opcji pozwala na wyszukanie zdarzeń autodiagnostycznych w systemie. • NAGRYWANIE NAPADOWE • STAN NAGRYWANIA • STAN WEJŚĆ ALARM. • DYSK PRAWIE PEŁNY • BŁĘDY NA DYSKU • PRZEGRZANIE • ALARM OD S.M.A.R.T. • BŁĄD WENTYLATORA Wszelkie prawa zastrzeŜone © NOVUS Security Sp. z o.o.
-
Page 141: Wyszukiwanie Ruchu
Po naciśnięciu przycisku WYSZUKAJ rezultaty wyszukiwania wyświetlane są na ekranie i oznaczone datą i czasem. Wybór zdarzenia i naciśnięcie przycisku powoduje wyświetlenie pierwszej klatki segmentu. Naciśnięcie przycisku MENU powoduje przejście w tryb pełnoekranowy odtwarzania wybranego segmentu. Wszelkie prawa zastrzeŜone © NOVUS Security Sp. z o.o. -
Page 142: Kopiowanie Nagrań
NDR-HA4208, NDR-HA4416 - Instrukcja obsługi wer. 1.2 OBSŁUGA REJESTRATORA 4.14. Kopiowanie nagrań Rejestratory NDR-HA4208 i NDR-HA4416 zapewniają wiele moŜliwości kopiowania sekwencji wideo tworząc w ten sposób kopię zapasową danej partii nagrań. Zarejestrowane materiały mogą być kopiowane za pomocą wbudowanej nagrywarki na dysk CD/DVD- RW lub na zewnętrzne nośniki. - Page 143 Aby rejestrator powrócił do normalnej pracy naleŜy urządzenie uruchomić ponownie. W przypadku uszkodzenia systemu plików na dysku zewnętrznym z interfejsem USB naleŜy sformatować urządzenie lub uŜyć odpowiedniego oprogramowania odzyskiwania danych. Wszelkie prawa zastrzeŜone © NOVUS Security Sp. z o.o.
-
Page 144: Odtwarzanie Skopiowanych Materiałów
Dwukrotne naciśnięcie lewym przyciskiem myszy na nagranym pliku rozpoczyna odtwarzanie. Uwaga: Poprawne odtwarzanie nagranej sekwencji wideo uzaleŜnione jest od ustawień komputera PC. W przypadku problemów z odtwarzaniem naleŜy we właściwościach Ekranu ustawić 32-bitową rozdzielczość kolorów. Wszelkie prawa zastrzeŜone © NOVUS Security Sp. z o.o. - Page 145 NaleŜy zaktualizować sterowniki kary graficznej polecane przez producenta. W przypadku dalszych problemów z odtwarzaniem naleŜy rozwaŜyć wymianę karty graficznej. Zalecane są karty graficzne oparte o chipset ATI. Wszelkie prawa zastrzeŜone © NOVUS Security Sp. z o.o.
- Page 146 Kliknięcie kursorem myszki na wybranym obrazie z kamery powoduje jej wyświetlenie w trybie pełnoekranowym. Uwaga: Nie naleŜy uruchamiać więcej niŜ jednego pliku kopii, poniewaŜ moŜe to powodować nie prawidłowa pracę programu. Wszelkie prawa zastrzeŜone © NOVUS Security Sp. z o.o.
- Page 147 PODŁĄCZANIE I STEROWANIE KAMERAMI OBROTOWYMI (PTZ) 5. PODŁĄCZANIE I STEROWANIE KAMERAMI OBROTOWYMI (PTZ) Rejestratory NDR-HA4208 i NDR-HA4416 pozwalają sterować do 8 lub 16 kamer poprzez magistralę RS-485 połączonych kaskadowo. Mogą to być kamery szybkoobrotowe, stacjonarne z zoomem optycznym lub cyfrowym. Sterowanie kamerami odbywa się z poziomu przycisków na płycie czołowej, z poziomu przeglądarki Internet Explorer lub z poziomu oprogramowania RAS+.
- Page 148 NDR-HA4208, NDR-HA4416 - Instrukcja obsługi wer. 1.2 PODŁĄCZANIE I STEROWANIE KAMERAMI OBROTOWYMI (PTZ) Widok dla NDR-HA4416 Skrętka UTP 5 max Kamera Novus CAMA I Kamera Novus CAMA I nr 9 (16) nr 1 Wszelkie prawa zastrzeŜone © NOVUS Security Sp. z o.o.
-
Page 149: Podłączanie Urządzeń Do Wejść I Wyjść Alarmowych
6. PODŁĄCZANIE URZĄDZEŃ DO WEJŚĆ I WYJŚĆ ALARMOWYCH Podłączanie urządzeń do wejść i wyjść alarmowych Rejestrator NDR-HA4208 (NDR-HA4416) posiada 8 (16) wejść alarmowych i 1 (2) wyjść alarmowych przekaźnikowych, pozwalających na podłączenie urządzeń zewnętrznych. Złącza do podłączania przewodów wyposaŜone są w wygodne terminale zaciskowe. -
Page 150: Obsługa Rejestratora Z Poziomu Klawiatur Systemowych
7. OBSŁUGA REJESTRATORA Z POZIOMU KLAWIATUR SYSTEMOWYCH Obsługa rejestratora z poziomu klawiatur systemowych NV-KBD70 i NV-KBD30. Rejestratory NDR-HA4208 i NDR-HA4416 mogą być zdalnie sterowane z poziomu klawiatury systemowej NV-KBD70 lub NV-KBD30. Sterowanie odbywa się poprzez port RS-422. Dzięki temu moŜliwe jest sterowanie z jednej klawiatury wieloma rejestratorami (do 10). Łączna długość magistrali nie moŜe przekroczyć... -
Page 151: Przechwytywanie Danych Tekstowych
8. PRZECHWYTYWANIE DANYCH TEKSTOWYCH 8.1. Przechwytywanie danych tekstowych Rejestratory serii NDR-HA4208 i NDR-HA4416 posiadają moŜliwość powiązania i równoczesnego wyświetlania zarejestrowanych obrazów z kamer oraz tekstu wygenerowanego w formacie ASCII przez urządzenia peryferyjne typu kasy fiskalne, bankomaty lub komputer PC z zainstalowanym oprogramowaniem zarządzającym systemem kontroli dostępu. - Page 152 POS. MoŜliwe jest zaprogramowanie systemu tak aby wykonywał operacje (Działanie 1, Działanie 2) wraz z pojawieniem sie tekstu z terminala POS. MoŜliwe operacje przedstawione sa na poniŜszych ekranach . Wszelkie prawa zastrzeŜone © NOVUS Security Sp. z o.o.
- Page 153 NDR-HA4208, NDR-HA4416 - Instrukcja obsługi wer. 1.2 WKLUCZOWYWANIE TEKSTU Rejestratory NDR-HA4208 i NV i NDR-HA4216 moŜna zaprogramować, aby w przypadku otrzymania z urządzeń peryferyjnych zdefiniowanego ciągu znaków podjęły określone działanie tzn. rozpoczęły nagrywanie lub uruchomiły wyjścia przekaźnikowe i wewnętrzny brzęczyk urządzenia lub rozpocząć...
-
Page 154: Wyszukiwanie Po Transakcjach
Po zaznaczeniu pozycji UWZGLEDNIJ WIELKOŚĆ LITER kryterium wyszukiwania uwzględni wielkość liter zdefiniowanego słowa kluczowego przy przeszukiwaniu bazy danych transakcji. Po wybraniu pozycji WYSZUKAJ i naciśnięciu przycisku ENTER zostanie wyświetlony ekran z wynikami wyszukiwania: Wszelkie prawa zastrzeŜone © NOVUS Security Sp. z o.o. - Page 155 Naciśnięcie przycisku PLAYBACK powoduje przejście do trybu podglądu na Ŝywo. Uwaga: Informacje tekstowe będą wyświetlane na obrazie tylko w przypadku ich odtwarzania z prędkością standardową x1 i w trybie pełnoekranowym. Wszelkie prawa zastrzeŜone © NOVUS Security Sp. z o.o.
-
Page 156: Zdarzenia - Stan Systemu
USB. W zakładce wyświetlana jest informacja o stanie twardego dysku i wielkości w procentach uszkodzonych sektorów, aktualnej temperaturze pracy oraz ocena dysku przez system S.M.A.R.T. (Self-Monitoring Analysis and Reporting System). Wszelkie prawa zastrzeŜone © NOVUS Security Sp. z o.o. -
Page 157: Sterowanie Rejestratorem Za Pomocą Myszy Usb
• naciśnięcie i przytrzymanie lewego klawisza pozwala na przesunięcie obszaru powiększonego. Ponowne naciśnięcie lewego klawisza myszy pozwala na wybór krotności funkcji zoom. Wszelkie prawa zastrzeŜone © NOVUS Security Sp. z o.o. - Page 158 Wybierając z menu sterowania myszą funkcję ODTWARZANIE rejestrator przechodzi w tryb odtwarzania. Najechanie kursorem myszy górne na dół powoduje wyświetlenie menu nawigacji po nagraniach. Wszelkie prawa zastrzeŜone © NOVUS Security Sp. z o.o.
-
Page 159: Sterowanie Za Pomocą Pilota Zdalnego Sterowania
Przyciski na pilocie zebrane są w logicznych grupach w zaleŜności od pełnionej funkcji. Funkcje przycisków pilota odpowiadają funkcjom przycisków na panelu czołowym zgodnie z ich opisem. Podczas odtwarzania brak jest tarczy JOG / SHUTTLE. Wszelkie prawa zastrzeŜone © NOVUS Security Sp. z o.o. - Page 160 2010-10-18 RR AAT Holding sp. z o.o., ul. Puławska 431, 02-801 Warszawa, Polska tel.: 22 546 07 00, faks: 22 546 07 59 www.novuscctv.com...
Need help?
Do you have a question about the NDR-HA4208 and is the answer not in the manual?
Questions and answers