Table of Contents
Advertisement
Advertisement
Table of Contents

Related Manuals for GoPro HERO6 Black


Summary of Contents for GoPro HERO6 Black
- Page 1 USER MANUAL...
- Page 2 JOIN THE GOPRO MOVEMENT facebook.com/GoPro youtube.com/GoPro twitter.com/GoPro instagram.com/GoPro...
-
Page 3: Table Of Contents
Capturing Video and Photos Customizing Your GoPro Settings for Your Activities Important Messages QuikCapture Resetting Your Camera Controlling Your GoPro with Your Voice Mounting Playing Back Your Content Removing the Side Door Using Your Camera with an HDTV Maintenance Battery Information... -
Page 4: Your Hero6 Black
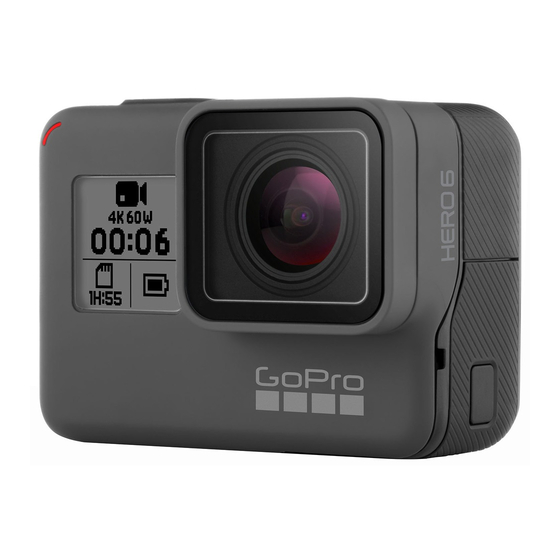
YOUR HERO6 BLACK YOUR HERO6 BLACK 6. Latch Release Button 10. Speaker 1. Shutter Button [ 7. USB-C Port 11. Mode Button [ 2. Camera Status Light 8. Micro HDMI Port 12. Battery 3. Camera Status Screen (cable not included) 13. -
Page 5: Getting Started
GETTING STARTED GETTING STARTED Welcome to your new HERO6 Black! Let’s get started. 2. Insert a microSD card with the label facing the battery, then close the door. MICROSD CARDS To capture video and photos, you need a microSD card (sold separately). - Page 6 The battery charges to 100% in about 2 hours. For more information, Battery Information (page 94). PRO TIP: For fastest charging, use GoPro’s Supercharger (sold separately) and its included cable. You can also charge your camera with a USB-compatible wall charger or auto charger.
- Page 7 GETTING STARTED GETTING STARTED UPDATING YOUR CAMERA SOFTWARE To get the latest features and best performance from your GoPro, make sure your camera is always using the most current software. Updating with the GoPro App When you connect your camera to the GoPro app, you are automatically notified if an update is available.
- Page 8 GETTING STARTED GETTING STARTED TOUCH DISPLAY CAMERA STATUS SCREEN The touch display’s main screen contains the following information about You can see the basics for your current setting on the front screen of the camera: modes and settings. The settings that appear vary by mode. 00:00 100% 00:00...
-
Page 9: Navigating Your Gopro
Swipe Left capture mode, see Time Lapse Mode: Capture Modes (page 63). Accesses advanced settings (if available) for For a visual map of your GoPro's modes and settings, see Map of Modes the current mode. and Settings (page 22). Swipe Right Displays your media. - Page 10 NAVIGATING YOUR GOPRO NAVIGATING YOUR GOPRO NAVIGATING WITH THE TOUCH DISPLAY If you select a video resolution (RES) that does not support the 1. From the main screen, tap the icon in the lower left corner. frames per second (FPS) setting that is selected, a message appears that tells you how to select a new FPS setting.
- Page 11 NAVIGATING YOUR GOPRO NAVIGATING YOUR GOPRO CHANGING MODES WITH THE MODE BUTTON 3. Press the Shutter button [ ] to move through the options within a The Mode button lets you quickly cycle through the capture modes that setting. To select an option, leave the option highlighted.
-
Page 12: Map Of Modes And Settings
MAP OF MODES AND SETTINGS MAP OF MODES AND SETTINGS Auto Low Light Looping Rate Time Lapse Video Burst Manual Audio Control RAW Format Video Mode / Video Night Photo Resolution (RES) Video Stabilization Night Lapse Photo Shutter High Dynamic Range Photo Mode / Photo Time Lapse Mode (HDR) -
Page 13: Capturing Video And Photos
2. If needed, select different settings. For details about settings, PRO TIP: You can also add HiLight Tags during recording with the Video Mode: Capture Modes (page 45), Photo Mode: Capture GoPro app, Voice Control, or the Smart Remote. Modes (page 57), or Time Lapse Mode: Capture Modes (page... -
Page 14: Settings For Your Activities
SETTINGS FOR YOUR ACTIVITIES SETTINGS FOR YOUR ACTIVITIES For best results, use the guidelines below when capturing specific Activity Video Setting Photo Capture Mode activities. Motorcycle, • 1080p60, Time Lapse Photo motocross SuperView FOV (2-second Interval), Activity Video Setting Photo Capture Mode Wide FOV •... -
Page 15: Quikcapture
QuikCapture is the easiest way to capture video or time lapse photos CAPTURING TIME LAPSE PHOTOS WITH QUIKCAPTURE with HERO6 Black. Because the camera is powered on only when it is In addition to showing how a scene changes over time, time lapse photos capturing, you also conserve battery power. -
Page 16: Controlling Your Gopro With Your Voice
CONTROLLING YOUR GOPRO WITH CONTROLLING YOUR GOPRO WITH YOUR VOICE YOUR VOICE You can control your HERO6 Black with your voice using a set of specific LIST OF VOICE COMMANDS commands (see list below). Two types of commands are available with Voice Control: •... - Page 17 POWERING ON YOUR GOPRO WITH YOUR VOICE GoPro turn off Powers off the camera With this setting, your GoPro responds to voice commands when it is powered off. This setting is in effect for 8 hours after you power off your GoPro edit my story Moves video and photos from your GoPro.
-
Page 18: Playing Back Your Content
(continuous, burst, time lapse, night lapse). • Video - Displays videos. Swipe up to scroll through the PRO TIP: While playing back your video with the GoPro app, you can mark thumbnails. the best moments by tapping [ ] to add a HiLight Tag. -
Page 19: Using Your Camera With An Hdtv
PLAYING BACK YOUR CONTENT USING YOUR CAMERA WITH AN HDTV SAVING A PHOTO FROM A SERIES VIEWING VIDEOS AND PHOTOS ON AN HDTV You can save an individual photo from a burst, time lapse photo, or night You can connect your camera to an HDTV and view your content on the photo series. -
Page 20: Connecting To Other Devices
QuikStory —an awesome video with ™ effects and music. You can also use the app to control your GoPro, create connected to an HDTV or monitor. short clips, share your favorites, and more. 1. Power on the camera. -
Page 21: Offloading Your Content
QuikStories automatically copies video and photos from your camera about your activity. That data is then automatically added to your video to to your mobile device. Then the GoPro app serves up an edited video, create a more engaging record of your activity. - Page 22 AUTO UPLOADING YOUR CONTENT TO THE CLOUD 2. Connect your camera to a power outlet. With a subscription to GoPro Plus, you can use Auto Upload to upload 3. From the main screen, swipe down. your content to the cloud. You can then view, edit, and share it from any 4.
-
Page 23: Video Mode: Capture Modes
1080p60 Wide, with Video Stabilization and Auto Low Light both turned require an end user license agreement (such as the network in a on. For more information, see these topics: hotel). HERO6 Black Video Resolutions (page 51) 3. If needed, enter the password. 4. Tap [ ] to save the new network. -
Page 24: Video Mode: Settings
So, a video with resolution of 4K is considered higher quality than 1080p because it consists of 3840 lines, each with a Interval (Video) (page 54) width of 2160 pixels. PRO TIP: Automatically create GoPro-style videos using QuikStories. 4K 4:3 For details, see Creating a QuikStory (page 41). - Page 25 ASPECT RATIO fluid slow motion. GoPro video resolutions use two aspect ratios: either 16:9 or 4:3. Standard televisions and editing programs use 16:9. Footage shot in 4:3 is 33% Recommended for body-mounted shots. Aspect taller, but must be cropped to 16:9 for playback on a TV.
- Page 26 VIDEO MODE: SETTINGS VIDEO MODE: SETTINGS FIELD OF VIEW (FOV) HERO6 BLACK VIDEO RESOLUTIONS The field of view (FOV) refers to how much of the scene can be captured Video through the camera lens. For Video mode, SuperView FOV captures the...
- Page 27 Video Resolution (page 47) video clips when in stationary use, and/or limit your use of features that increase power consumption, such as the GoPro app. To control your Frames Per Second (FPS) (page 49) camera remotely at higher temperatures, use a GoPro remote or Remo...
-
Page 28: Video Mode: Advanced Settings
VIDEO MODE: SETTINGS VIDEO MODE: ADVANCED SETTINGS INTERVAL (LOOPING VIDEO) VIDEO STABILIZATION The Interval setting applies to Looping and determines the length of each This setting adjusts the footage to offset for motion during capture. The result is smoother footage, especially in activities with relatively small captured segment. -
Page 29: Photo Mode: Capture Modes
VIDEO MODE: ADVANCED SETTINGS PHOTO MODE: CAPTURE MODES Photo mode contains three capture modes: Photo, Night, and Burst. All MANUAL AUDIO CONTROL photos are captured at 12MP. Each capture mode has its own settings. By default, this setting is off and your camera automatically switches PHOTO between recording in stereo and filtering wind noise to achieve the best Photo captures either single or continuous photos. -
Page 30: Photo Mode: Settings
PHOTO MODE: CAPTURE MODES PHOTO MODE: SETTINGS BURST SHUTTER (NIGHT PHOTO) Burst captures up to 30 photos in 1 second, so it is perfect for capturing fast-moving activities. The default FOV for Burst is Wide, with the Rate In Photo mode, Shutter applies only to Night. This setting lets you set to 30 photos in 1 second. -
Page 31: Photo Mode: Advanced Settings
• RAW Format and Exposure Control must be turned off. • If Protune is turned on, HDR is available only if Exposure Value Compensation is less than zero and Color is set to GoPro Color. The options for this setting are Off (default) and On. To access this... -
Page 32: Time Lapse Mode: Capture Modes
.jpg image for immediate viewing on your camera or sharing TIME LAPSE VIDEO with the GoPro app. RAW photos are saved as .gpr files, which are based Time Lapse Video creates video from frames captured at specific on the Adobe .dng format. These files can be used in Adobe Camera Raw intervals. -
Page 33: Time Lapse Mode: Settings
TIME LAPSE MODE: CAPTURE MODES TIME LAPSE MODE: SETTINGS NIGHT LAPSE PHOTO TIME LAPSE VIDEO RESOLUTION Night Lapse Photo captures a series of photos at set intervals when there In Time Lapse mode, resolution and FOV apply only to Time Lapse Video. is minimal light. - Page 34 TIME LAPSE MODE: SETTINGS TIME LAPSE MODE: SETTINGS SHUTTER (TIME LAPSE) INTERVAL (TIME LAPSE) In Time Lapse mode, this setting applies only to Night Lapse Photo. The Interval setting determines the amount of time that passes between Shutter lets you determine the amount of time that the shutter is open. each captured frame.
-
Page 35: Time Lapse Mode: Advanced Settings
.jpg image for immediate viewing on your camera or sharing stars with minimal ambient or street light with the GoPro app. RAW photos are saved as .gpr files, which are based on the Adobe .dng format. These files can be used in Adobe Camera Raw (ACR), version 9.7 or later. -
Page 36: Advanced Controls
ADVANCED CONTROLS ADVANCED CONTROLS ZOOM ExPOSURE CONTROL The Zoom setting lets you adjust how close or far away the subject By default, your camera uses the entire image to determine the appears in your video or photo. The default is no zoom. appropriate exposure level. - Page 37 ADVANCED CONTROLS ADVANCED CONTROLS Using Exposure Control with Locked Exposure Canceling Exposure Control With this option, the camera locks the exposure. That exposure level Exposure Control is automatically canceled when you select a different remains until you cancel it. capture mode or restart the camera. You can also cancel this setting manually (below).
- Page 38 Color Setting Resulting Color Profile Quik desktop app, and other video and photo editing software. GoPro Color Provides GoPro color-corrected profile (same Protune enables manual control of color, white balance, shutter speed, (default) great color as when Protune is turned off).
- Page 39 ADVANCED CONTROLS ADVANCED CONTROLS ISO Minimum Shutter ISO Maximum The Shutter setting in Protune applies only to the Video and Photo capture modes. This setting determines the amount of time that the ISO Minimum and ISO Maximum let you set a range for the camera’s shutter is open.
- Page 40 ADVANCED CONTROLS ADVANCED CONTROLS RAW Audio Exposure Value Compensation (EV Comp) This setting applies only to the Video capture mode and creates a separate Exposure Value Compensation affects the brightness of your video or photo. Adjusting this setting can improve image quality when shooting in .wav file for your video, in addition to the standard .mp4 audio track.
-
Page 41: Connecting To An Audio Accessory
DATE AND TIME Option Description The date and time are automatically updated when you connect your camera to the GoPro app or the Quik desktop app. However, you can Standard Mic Supports non-powered mics manually change these settings, if needed. - Page 42 (Auto Image Rotation) Camera automatically AUTO OFF selects Up or Down, based on the orientation Powers off your GoPro after a period of inactivity to save battery life. The Auto of the camera when recording begins. options are 5 minutes, 15 minutes (default), 30 minutes, and Never.
-
Page 43: Important Messages
For details, visit gopro.com/help. down. Simply let it sit and cool before attempting to use it LANGUAGE again. -
Page 44: Resetting Your Camera
Follow the steps below to reset all settings, clear your connections, and The Frame during certain activities, even if the camera is not mounted. deregister the camera from your GoPro Plus account. This option is useful HERO6 Black is waterproof to 33’ (10m) with the doors closed—no if you are reselling your camera and want to reset it to its original state. -
Page 45: Mounting
Be sure the front of the camera sits flush against it. c. Close the door. d. Lock the latch. PRO TIP: If you mount your HERO6 Black upside down, the camera automatically changes the orientation of your image to be right-side up. For more information, see Auto-Rotation (page 83). -
Page 46: Removing The Side Door
In some situations, such as charging the camera within The Frame, other debris reduce adhesion, which can result in a weak bond and connecting to audio or HDMI accessories, or connecting to a GoPro risk of losing the camera should the connection fail. -
Page 47: Maintenance
REMOVING THE SIDE DOOR MAINTENANCE REATTACHING THE SIDE DOOR Follow these guidelines to get the best performance from your camera: 1. Hold down the Latch Release button and extend the tab on the door. • The camera is waterproof to 33’ (10m)—no housing needed. Ensure that the doors are closed before using the camera in or around water, dirt, or sand. -
Page 48: Battery Information
GoPro camera battery and could If the battery reaches 0% while recording, the camera saves the file and result in fire or leakage. With the exception of the GoPro Supercharger (sold separately), only use chargers marked: powers off. -
Page 49: Troubleshooting
Do not use the camera or the battery if it has been damaged—for example, if cracked, Make sure your GoPro is charged. To charge your camera, use the punctured or harmed by water. Disassembling or puncturing included USB-C cable and a computer. -
Page 50: Customer Support
TROUBLESHOOTING CUSTOMER SUPPORT I FORGOT MY CAMERA’S USERNAME OR PASSWORD GoPro is dedicated to providing the best possible service. To reach GoPro Swipe down, then tap Connections > Name & Password. Customer Support, visit gopro.com/help. I DON’T KNOW WHAT SOFTWARE VERSION I HAVE From the main screen, swipe down. -
Page 51: Regulatory Information
WITH HEVC ENCODED CONTENT IS DEEMED ACCEPTANCE OF THE LIMITED AUTHORITY TO USE AS NOTED ABOVE REGULATORY INFORMATION To see the complete list of country certifications, refer to the Important Product + Safety Instructions included with your camera or visit gopro.com/help. 130-23120-000 REVA...
Need help?
Do you have a question about the HERO6 Black and is the answer not in the manual?
Questions and answers