Vuly 360 Pro Assembly Manual
Hide thumbs
Also See for 360 Pro:
- Assembly manual (24 pages) ,
- Assembly manual (3 pages) ,
- Manual (40 pages)
Table of Contents
Advertisement
Quick Links
Advertisement
Table of Contents

Related Manuals for Vuly 360 Pro


Summary of Contents for Vuly 360 Pro
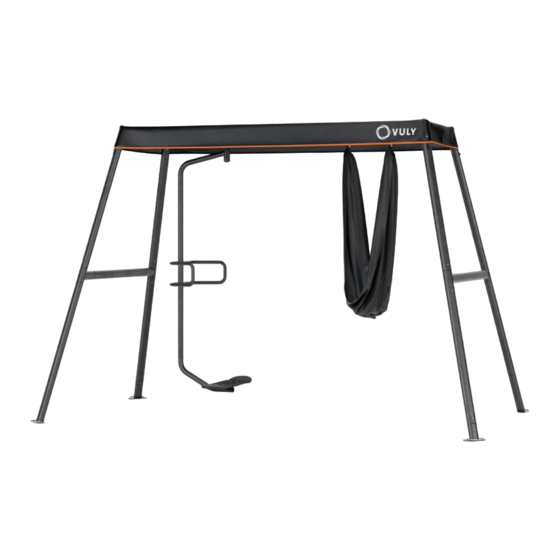
- Page 1 360 Pro Swing Set ASSEMBLY MANUAL...
- Page 2 Maximum user weight per swing station – 80 kg (60 kg on Spin Swing). Maximum combined user weight on entire swing set – 150 kg. Adult assembly required. Adult supervision required at all times. Ensure that 360 Pro is secured with anchors or bolts before use.
-
Page 3: Table Of Contents
1.0. Care and Maintenance 2.0. Usage and Behaviour 3.0. Installation 3.1. Pre-assembly 3.2. Parts checklist 3.3. Assembly instructions – Vuly 360 Pro 4.0. Warranty 4.1. Warranty periods 4.2. Inclusions 4.3. Exclusions 4.4. Warranty Claims 4.5. -
Page 4: Care And Maintenance
Ensure that all moving metal components remain well oiled with an appropriate lubricant. ○ Replace any parts showing evidence of deterioration, rusting or defectiveness immediately and only through Vuly. • Remove textile components (i.e. Yoga Swing) whenever not in use. Store in a cool, dry and dark place. -
Page 5: Parts Checklist
3.2. Parts checklist Frame 6x Frame Tubes 4x Frame Legs 2x Top Joiners 1x Swing Rail 12x Anchors 2x Frame Joiners (Left) 18x Frame Bolts 2x Frame Joiners (Right) 1 required for size M; Upsize Kit (if purchased) 2 required for size L. 2x Frame Bolts 1x Swing Rail 1x Rail Joiner... -
Page 6: Assembly Instructions - Vuly 360 Pro
3.3. Assembly instructions – Vuly 360 Pro Frame STEP Remove all parts from the packaging, and lay out the components on the ground. ENSURE THAT AS YOU FOLLOW THESE INSTRUCTIONS, YOU FIRMLY SECURE ALL PARTS WITH NUTS AND BOLTS. STEP Note: If you purchased the Spin Swing, replace Insert one end of the Swing Rail into the centre of a Top Joiner. - Page 7 Skip this section if you are assembling a size S swing set (without any Upsize Kits). Warning: Never use more than two Upsize Kits with your 360 Pro Frame. Creating a size larger than L will dramatically reduce the structural integrity of the design and may cause injury.
- Page 8 TO ASSEMBLE A LARGE SIZE – 2X UPSIZE KIT: STEP Insert the additional Swing Rail from your Upsize Kit into the centre of the remaining Top Joiner. Lock the two together with a nut and bolt. STEP Take the other Swing Rail from your second Upsize Kit, and insert both Rail Joiners from your Upsize Kits to either end. Lock them in with nuts and bolts.
- Page 9 STEP Insert four Frame Tubes into the bottoms of each Top Joiner, as though you are ‘standing up’ the frame. Lock them into place with nuts and bolts. SHADE COVER STEP Skip this section if you do not wish to attach your Shade Cover. STEP Lay your Shade Cover out on top of your partially-assembled swing set.
- Page 10 STEP Pull two corners down over the Top Joiners, and insert the toggles. Go to the other side of the swing set and repeat for the other two corners. STEP Connect two Frame Joiners onto either end of one Frame Tube, and lock them into place with nuts and bolts.
- Page 11 Note: Vuly recommends fixing 360 Pro to concrete footings using Dynabolts, if the ground in your backyard is soft or has low-density soil. CONGRATULATIONS! You have assembled your Vuly 360 Pro Frame! See your Swing instructions to attach your chosen Swings.
-
Page 12: Warranty
Damage to the product that results from weather events – customer to purchase a Vuly product instead of those of such as rain or wind – are not covered under the warranty. our competitors. -
Page 13: Warranty Claims
The customer must contact these external 4.4. Warranty Claims companies to make a warranty claim; Vuly itself will not If a customer believes that a Vuly product is faulty or assess claims made against non-Vuly products. defective, they must discontinue use and submit a Warranty Claim. - Page 16 vulyplay.com...
Need help?
Do you have a question about the 360 Pro and is the answer not in the manual?
Questions and answers