Table of Contents
Advertisement
Quick Links
Instruction Manual of DYS Elf Micro Brushless Drone
Thanks for purchasing the DYS Elf Micro Brushless drone.The brushless system with high power for RC model can be
very dangerous, so we strongly suggest you read this manual carefully. Any claims arising from the operating, failure or
malfunctioning etc. will be denied. We assume no liability for personal injury, property damage or consequential
damages resulting fromour product or our workmanship. As far as is legally permitted, the obligation to compensation is
limited to the invoice amount of the affected product. At the same time, We do notassumeany liabilityarising
frommodificationsdue to unauthorizedproduct. We reserve the right tochangewithoutnotice aboutproduct
design,appearance,performanceandoperationalrequirements.
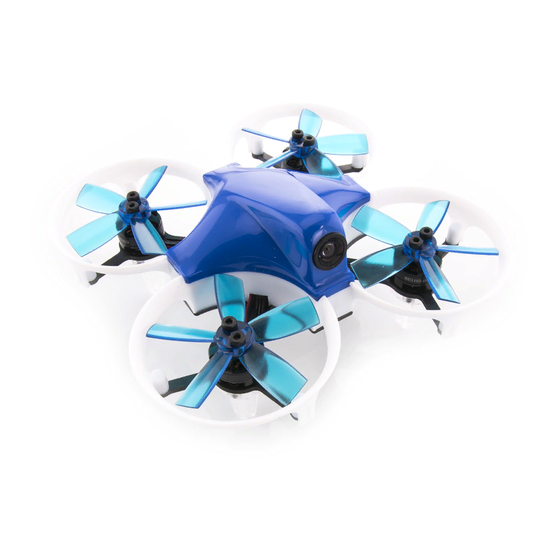
Brief Introduction of Elf:
*Elf micro brushless drone is specialized for people who loves FPV race, Free style etc.
*The new design concept of built‐in PCB board will come with the great functional F3, sensor, new generation CPU, OSD,
section board.
*The wide angle HD camera will give you clear view. The built‐in 5.8G VTX 25‐200MW 22CH and 3DBI antenna can
extend the range.
*The great high‐end carbon fiber come with the lighter weight, high strength and firm shape, which is perfect to match
with the brushless motor and ESC to get great flight experience.
*Elf micro drone has the propeller protect bracket to lower the damage of indoor/outdoor flight when it hit something.
Function introduction:
*Easy control with popular Opentx Firmware in remote control
*Neat design of built‐in F3/OSD/Section board
*Betaflight firmware FC can easily be programmed by users' needs
*Support Dshot ESC
*D8R receiver protocol, compatible with its protocol Frsky remote control (including X9D etc)
*LED shiny flight for FPV race and easy eye‐catching at night
*Built‐In Beeper warning
*VTX 25MW‐200mw adjustable, control distance 300M
*2.4G remote control offer high speed and stable connection experiences
*170 degree wide angle camera with strong back‐lighting arithmetic can easily handle all kind of conditions
Basic info of Elf Micro brushless drone:
Wheel base: 83mm
Weight: 80g(with battery)
FC: F3
Motor: BE1102‐10000KV
ESC: 4 in 1 Blheli_SDshot F10A
Prop: Micro 5 blades prop(1735)
Camera: 170°PAL/NTSC AUTO
VTX: 5.8G/22CH/25‐200MW
VTX distance: 300M
Antenna: 3DBI
Lipo: 2S 7.4V 25C 600mah
Lipo size: 45*25*15mm
Flight time: Around 6 minutes
Remote control: 2.4G
Remote control distance: 300m
Advertisement
Table of Contents

Related Manuals for DYS Elf

Summary of Contents for DYS Elf
- Page 1 Instruction Manual of DYS Elf Micro Brushless Drone Thanks for purchasing the DYS Elf Micro Brushless drone.The brushless system with high power for RC model can be very dangerous, so we strongly suggest you read this manual carefully. Any claims arising from the operating, failure or malfunctioning etc. will be denied. We assume no liability for personal injury, property damage or consequential damages resulting fromour product or our workmanship. As far as is legally permitted, the obligation to compensation is limited to the invoice amount of the affected product. At the same time, We do notassumeany liabilityarising frommodificationsdue to unauthorizedproduct. We reserve the right tochangewithoutnotice aboutproduct design,appearance,performanceandoperationalrequirements. Brief Introduction of Elf: *Elf micro brushless drone is specialized for people who loves FPV race, Free style etc. *The new design concept of built‐in PCB board will come with the great functional F3, sensor, new generation CPU, OSD, section board. *The wide angle HD camera will give you clear view. The built‐in 5.8G VTX 25‐200MW 22CH and 3DBI antenna can extend the range. *The great high‐end carbon fiber come with the lighter weight, high strength and firm shape, which is perfect to match with the brushless motor and ESC to get great flight experience. *Elf micro drone has the propeller protect bracket to lower the damage of indoor/outdoor flight when it hit something. Function introduction: *Easy control with popular Opentx Firmware in remote control *Neat design of built‐in F3/OSD/Section board *Betaflight firmware FC can easily be programmed by users’ needs *Support Dshot ESC *D8R receiver protocol, compatible with its protocol Frsky remote control (including X9D etc) *LED shiny flight for FPV race and easy eye‐catching at night *Built‐In Beeper warning *VTX 25MW‐200mw adjustable, control distance 300M *2.4G remote control offer high speed and stable connection experiences *170 degree wide angle camera with strong back‐lighting arithmetic can easily handle all kind of conditions Basic info of Elf Micro brushless drone: Wheel base: 83mm Weight: 80g(with battery) FC: F3 Motor: BE1102‐10000KV ESC: 4 in 1 Blheli_SDshot F10A Prop: Micro 5 blades prop(1735) Camera: 170°PAL/NTSC AUTO VTX: 5.8G/22CH/25‐200MW VTX distance: 300M Antenna: 3DBI Lipo: 2S 7.4V 25C 600mah ...
- Page 2 Diagrams (1)Elf front view (2)Elf rear vew ...
- Page 3 Dimension of Elf Diagram of Remote control (1)Front view ...
- Page 4 (2)Rear view Remote Control: It is in using OPENTX firmware, compatible Frsky receiver (D8R) Function Introduction: Switch: (Default setting of SWA, SWB, SWC and SWB stay upward position means off) (1)SWA: downward to disarm the drone (For ready to flight and landing) (2)SWB: flight mode: Upward: Angle Middle: Horizon Downward: manual (3)SWC: OSD display, Middle means On, upward and backward means Off. (4)SWD: Beeper. Backward for Beeping to search the drone when you lose the version of it. Stick: Default Setting is Mode 2(left throttle). 1. Left stick: up and down is throttle, left and right is direction(Yaw). 2. Right stick: up and down is Pitch, left and right is Roll. Battery: It is using the 4 cells AA batteries Trimming: You need to adjust the trimming key in the RC, to make your quad hover steady Power switch: Switch On‐Off ...
- Page 5 Basic Operation: 1. Get Ready to fly: (1)Make sure the SWA/B/C/D, stick (left stick/right stick) in right position. (Default setting: SWA/B/C/D stay upward,Left stick stay backward,right stick stay middle) (2)Please check battery of drone and remote control is fully charged. (3)Turn on the remote control (4)Plug‐in the battery of Elf (5)VTX Channel setting (6)Please put the Elf on the flat land 2. Start to fly (1)SWA go downward to disarm the drone (With Di Di sound) (2)Slightly push the throttle to slowly fly the drone Note: A. SWB is for the flight mode. Different flight mode will have different experience. B. SWC is for OSD display switch. Off only shows the Camera view. C. SWD is Beeper warning to search the drone when you are not sure where it goes. 3. Landing (1)Unplug the battery and disconnect the power wire with the drone. (2)Turn off the remote control. Note: Before disarm, the throttle need to stay the lowest and the drone is at level position. VTX setting It needs to choose the right frequency to display at FPV equipment ( FPV goggle or FPV screen) Frequency band and channel is very important to the VTX. The Frequency band ABEFR is FR blue LED, Channel 12345678 is Red LED. (For example, FR blue LED continue to flash 3 times, CH Red LED continue to flash 5 times means Frequency band E , Channel 5.) 1. Channel Setting: Plug‐in the Elf first, If the CH Red LED is constantly flash. It means that it is for frequency point setting. Short press 5.8G key, and CH red LED will flash for choosing the channel that you need. 2. Frequency Band Setting: Long press button for 3 seconds till FR blue LED constantly flash, then short press to change another frequency band. The blue LED flash times is according to the frequency band that you need. 3. At FR blue LED mode, long press for 3 seconds till the Red LED flash to change the CH channel switch mode. 4. 10 seconds of none‐operation at 5.8G key, it will automatically change to the channel setting. 5. Auto‐saving: Any operation will be save automatically after its done, as it is with non‐volatile memory. Sketch Map: ...
- Page 6 Power cable: plug‐in drone’s power socket Balance charge: for 7.4V charger socket 2. Introduction of Charger Red light is power, Green light is battery charging power 1) Red light: constantly lighting means power supply working properly. 2) Green light: slowly lighting means charging, constantly lighting means fully charge. When is charging the battery, red light constantly lighting means the charger is working properly. After the Green light is constantly lighting means is fully charged. Lipo: 1. Please do not tear apart the battery or the charger, and do not cut any battery wire, as in this case it will be damaged and short circuit. 2. Please use default charger to charge the battery. Any improperly way or the other none‐recognized charger will probably lead to nonfunctional or breakdown. 3. Please stay away from the heat.It is wrong to charge the battery after it used. Because it will destroy the battery. Please wait till it is cool down,then you can charge the battery. 4. Please take out the battery of the RC when you are not using it , as it is good to protect the RC just in case if the liquid of battery would leak out. 5. It is forbidden to put the battery in the heat, because it will lead to explosion or big dangerous damage. Safety Note: 1. Please do not fly the Elf in public roads for not to effect the others safety. 2. To protect yours & others property,please do not fly it at the crowd. Also, do not fly near the people and the animals. 3. Please stay away from the river, pond and lake in order not to lose your drone inside the water. 4. It is important to make sure that there is no same VTX channel of the same area. Because in this case it will cause the out of the control of the RC and image lost.It can destroy the equipment or harmful to the people who is near you. 5. Before you start to fly the Elf, Please follow below steps to operate. (1)Start the RC (2)Make sure the switches/sticks are all at correct position. (3)Plug in the battery of the Elf 6. After you finish the flight, please follow below steps (1)Unplug the battery of the Elf (2)Turn of f the RC 7. Please check your battery is fully charged before you start to fly. 8. Please do not touch the Elf during the flight. 9. Please do not flight at the rainy day as it will cause electronic failure. 10. Please take out the battery of the RC/Elf after you don’t use it for a long time, and keep it in good condition. ...
- Page 7 FCC Statement This equipment has been tested and found to comply with the limits for a Class B digital device, pursuant to part 15 of the FCC rules. These limits are designed to provide reasonable protection against harmful interference in a residential installation. This equipment generates, uses and can radiate radio frequency energy and, if not installed and used in accordance with the instructions, may cause harmful interference to radio communications. However, there is no guarantee that interference will not occur in a particular installation. If this equipment does cause harmful interference to radio or television reception, which can be determined by turning the equipment off and on, the user is encouraged to try to correct the interference by one or more of the following measures: ‐Reorient or relocate the receiving antenna. ‐Increase the separation between the equipment and receiver. ‐Connect the equipment into an outlet on a circuit different from that to which the receiver is connected. ‐Consult the dealer or an experienced radio/TV technician for help. To assure continued compliance, any changes or modifications not expressly approved by the party. Responsible for compliance could void the user’s authority to operate this equipment. (Example‐ use only shielded interface cables when connecting to computer or peripheral devices). This equipment complies with Part 15 of the FCC Rules. Operation is subject to the following two conditions: (1) This device may not cause harmful interference, and (2) This device must accept any interference received, including interference that may cause undesired operation. ...
Need help?
Do you have a question about the Elf and is the answer not in the manual?
Questions and answers