Table of Contents
Advertisement
Advertisement
Table of Contents

Subscribe to Our Youtube Channel
Related Manuals for Pruveeo F5-Dual


Summary of Contents for Pruveeo F5-Dual
- Page 1 PRUVEEO USER MANUAL © 2017 PRUVEEO All Rights Reserved.
-
Page 2: Safety Information
Pruveeo Dash Cam is not intended to be touched, modified, or calibrated while operating a vehicle. Pruveeo is not responsible for any damages resulting from the user's misuse of the camera. Do not use damaged power cords or plugs, or loose electrical sockets. Faulty connections can cause electric shock or fire. - Page 3 - Use only the manufacturer-approved charger specifically designed for your device. Using an incompatible charger can cause serious personal injury or damage to your device. - Pruveeo cannot be responsible for the user's safety when using accessories or supplies that are not approved by Pruveeo.
- Page 4 If you notice strange smells or sounds coming from your device, or if you see smoke or liquid leaking from the device, stop using the device immediately and take it to a Pruveeo Service Center. Failure to do so may result in fire or explosion.
- Page 5 Do not attempt to disassemble, repair, or modify your device. - Any changes or modifications to your device can void your manufacturer's warranty. If your device needs servicing, take it to an authorized Pruveeo Service Center. © 2017 PRUVEEO All Rights Reserved.
-
Page 6: Correct Disposal Of This Product
Business users should contact their supplier and check the terms and conditions of the purchase contract. This product and its electronic accessories should not be mixed with other commercial wastes for disposal. © 2017 PRUVEEO All Rights Reserved. - Page 7 "THIRD PARTY CONTENT AND SERVICES ARE PROVIDED "AS IS." PRUVEEO DOES NOT WARRANT CONTENT OR SERVICES SO PROVIDED, EITHER EXPRESSLY OR IMPLIEDLY, FOR ANY PURPOSE.
- Page 8 Third party services may be terminated or interrupted at any time, and Pruveeo makes no representation or warranty that any content or service will remain available for any period of time. Content and services are transmitted by third parties by means of networks and transmission facilities over which Pruveeo has no control.
-
Page 9: Warm Prompt
5. The dash cam supports the card from 8GB to the highest 128GB, Class 10 only. 6. Adjust the position of the lens to ensure that you correctly record what you want. 7. We recommend a 32 GB Class 10 Memory Card for this dash cam. © 2017 PRUVEEO All Rights Reserved. - Page 10 15. All dash cam models must be continuously connected to either a 12 or 24 Volt power supply via a 5V 1A Charger because a LCD colour screen consumes a considerable amount of power. That is why mobile phone / dash cam screens automatically go © 2017 PRUVEEO All Rights Reserved.
- Page 11 500 times before experiencing failures. If the micro SD card is broken, the dash cam will not work properly. We recommend using a MLC NAND card which can overwrite itself 1500 to 3000 times. © 2017 PRUVEEO All Rights Reserved.
-
Page 12: Product Specifications
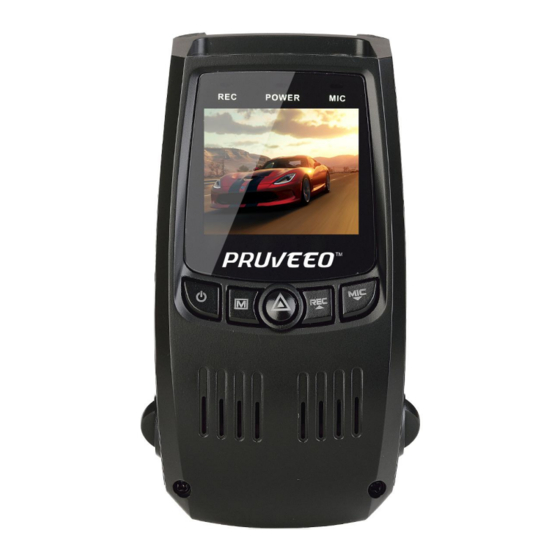
1 min / 2 min / 3 min / OFF Screen Saver 1 min / 3 min / OFF Auto Power Off 1 min / 3 min / 5 min / OFF Microphone Mute ON / OFF © 2017 PRUVEEO All Rights Reserved. - Page 13 GETTING STARTED-Device Layout © 2017 PRUVEEO All Rights Reserved.
- Page 14 To connect the rear lens to host with adapter cable to get Rear Lens Slot rear image Microphone Record audio with microphone while recording TF Card Slot The maximum supported is 128G RESET Press to restart in case of system crash. © 2017 PRUVEEO All Rights Reserved.
-
Page 15: Status Icons
Video Resolution Wide Dynamic Range Charging via USB Charger Battery Power Level Microphone Mute Microphone On Video Recording Mode Video Playback Mode Photo Mode Loop Recording Memory Card Inserted White Balance License plate number © 2017 PRUVEEO All Rights Reserved. -
Page 16: Installation
Clean windshield before apply mount, do not attach camera for at least 20 minutes. 2. Mounting the rear camera Mount the rear camera as shown below, using rear camera extension cable, connect rear camera to the main unit. © 2017 PRUVEEO All Rights Reserved. - Page 17 Class 10 memory card with a capacity of at least 8GB. 4. Connecting the charger to the car's 12V DC outlet Be sure to connect only the Pruveeo-approved charger designed and supplied specifically for use with your device. Using an incompatible charger can cause serious personal injury or damage to your device.
-
Page 18: Charging The Battery
Charging the battery Charge the device by connecting the camera via the USB car charger port. Use only Pruveeo-approved chargers. Using unapproved chargers or cables can damage the device or cause the battery to explode. Connect the car charger’s jack to the USB charging port, and then plug the charger into the car cigarette lighter or 12V DC power outlet. -
Page 19: Inserting The Memory Card
Reformatting a memory card keeps important elements of data and file structure clean, helping to prevent error messages and missing images. Reformatting also restores the memory card, which can help prevent it from becoming corrupted. © 2017 PRUVEEO All Rights Reserved. -
Page 20: Removing The Memory Card
Do not remove the memory card while the device is transferring or accessing information. Doing so can result in data loss or corruption, or damage to the memory card or device. Pruveeo is not responsible for losses that result from the use of damaged memory cards, including the loss of data. -
Page 21: Formatting The Memory Card
ON/OFF button for a few seconds to turn on / off the device. A welcome message will be displayed on screen as shown in the image below. Note: The Dashboard Camera will switch on and off automatically if you keep it permanently connected to the car charger. © 2017 PRUVEEO All Rights Reserved. -
Page 22: Loop Recording
1. Press MENU once to enter Video Settings 2. Press the UP or DOWN button to navigate to the "Loop Recording" option © 2017 PRUVEEO All Rights Reserved. - Page 23 3. Press OK to view the current selection: +0.0, +1/3, -1/3, etc. 4. Press the UP or DOWN button to make your selection 5. Press OK to confirm your entry 6. Press MENU to exit Video Settings © 2017 PRUVEEO All Rights Reserved.
-
Page 24: Recording Audio
3. Press OK to view the current ON/OFF status for this feature 4. Press the UP or DOWN button to enable or disable this feature 5. Press OK to confirm your entry 6. Press MENU to exit Video Settings © 2017 PRUVEEO All Rights Reserved. -
Page 25: Date/Time Setup
2. Press the UP or DOWN button to navigate to the "Auto Power Off" option 3. Press OK to view the current selection: 3min/5min/10min/OFF 4. Press the UP or DOWN button to make your selection 5. Press OK to confirm your entry © 2017 PRUVEEO All Rights Reserved. -
Page 26: Beep Sound
2. Press the UP or DOWN button to navigate to the "LIGHT FREQ" option 3. Press OK to view the current selection: 50Hz / 60Hz 4. Press the UP or DOWN button to make your selection © 2017 PRUVEEO All Rights Reserved. -
Page 27: Screen Saver
3. Press OK to view YES / NO confirmation for this operation 4. Press the UP or DOWN button to make your selection 5. Press OK to confirm your entry 6. Press MENU to exit System Settings © 2017 PRUVEEO All Rights Reserved. -
Page 28: Default Settings
6. Press MENU to exit Video Settings Playback Mode You can play back recorded video on your device using the following steps: 1. Press REC to stop recording 2. Press MODE twice to switch from Recording to Playback Mode © 2017 PRUVEEO All Rights Reserved. -
Page 29: Deleting Files
4. Press the DOWN button once to select "Delete" 5. Press OK once to view delete options for "Current MOV" file or "ALL" files. Select "ALL" and press OK 6. Press OK again to delete all files © 2017 PRUVEEO All Rights Reserved. -
Page 30: General Troubleshooting
Charge the battery. Take Device will your unit inside and use an Battery may be AC adapter (any USB depleted turn on compatibly plug) to charge for a full 3 hours © 2017 PRUVEEO All Rights Reserved. - Page 31 1. Use a different SD Card 1. SD Card may not be 2. Restore to default Keeps compatible settings Turning off 2. Might not be getting 3. Get a replacement power continuous power. cord © 2017 PRUVEEO All Rights Reserved.
- Page 32 1. Turn Loop Recording on after 20-40 minutes Stops Recording at SD Card is not 1. Use a different SD card random Compatible 2. Restore default settings intervals Not Looping SD Card full 1. Format SD card © 2017 PRUVEEO All Rights Reserved.
Need help?
Do you have a question about the F5-Dual and is the answer not in the manual?
Questions and answers