Table of Contents
Advertisement
IMPORTANT MANUAL
OPERATOR'S MANUAL
MODEL:
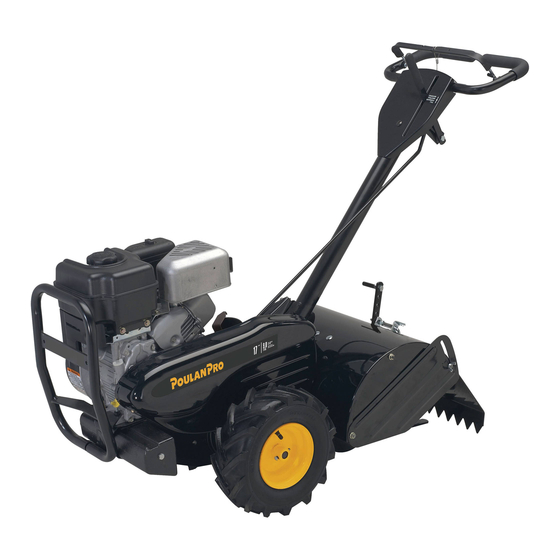
PPCRT
REAR TINE TILLER
ALWAYS WEAR EYE PROTECTION DURING OPERATION
Visit our website: www.poulanpro.com
Gasoline containing up to 10% ethanol (E10) is acceptable for use in this machine.
The use of any gasoline exceeding 10% ethanol (E10) will void the product warranty.
115 78 55-32 Rev. 3
17
Do Not Throw Away
WARNING:
Read this Man u al and follow all Warn-
ings and Safety Instructions. Fail ure
to do so can re sult in serious in ju ry.
10.11.17 SR
Printed in U.S.A.
Advertisement
Table of Contents

Related Manuals for Poulan Pro PPCRT17


Summary of Contents for Poulan Pro PPCRT17
- Page 1 IMPORTANT MANUAL Do Not Throw Away OPERATOR'S MANUAL MODEL: WARNING: PPCRT Read this Man u al and follow all Warn- ings and Safety Instructions. Fail ure to do so can re sult in serious in ju ry. REAR TINE TILLER ALWAYS WEAR EYE PROTECTION DURING OPERATION Visit our website: www.poulanpro.com Gasoline containing up to 10% ethanol (E10) is acceptable for use in this machine.
-
Page 2: Safety Rules
SAFETY RULES SAFE OPERATION PRACTICES FOR POWERED WALK-BEHIND ROTARY TILLERS AND HAND-SUPPORTED CULTIVATORS TRAINING OPERATION • Read, understand, and follow all instructions on the • Do not allow hands, feet, or other body parts or cloth- machine and in the manual(s) before starting. Be ing near the rotating tines or any other moving part. -
Page 3: Maintenance And Storage
SAFETY RULES SAFE OPERATION PRACTICES FOR POWERED WALK-BEHIND ROTARY TILLERS AND HAND-SUPPORTED CULTIVATORS • Never pick up or carry a machine while the engine (motor) is running. • Do not operate the tiller while under the influence of alcohol or drugs. •... - Page 4 PRODUCT SPECIFICATIONS CUSTOMER RESPONSIBILITIES • Read and observe the safety rules. GASOLINE CAPACITY: 1.47 Quarts (1,4 L) • Follow a regular schedule in maintaining, caring for Unleaded Reg u lar and using your tiller. OIL (API SJ–SN): SAE 30 (Above 32°F/0°C) •...
- Page 5 ASSEMBLY Your new tiller has been assembled at the factory with exception of those parts left unassembled for shipping purposes. To ensure safe and proper operation of your tiller all parts and hardware you assemble must be tightened securely. Use the correct tools as necessary to insure proper tightness.
- Page 6 ASSEMBLY UNPACKING CARTON (See Fig. 2) CAUTION: Be careful of exposed sta ples when handling or disposing of carton- HANDLE ASSEMBLY ing material. "UP" POSITION IMPORTANT: WHEN UN PACK ING AND AS SEM BLING TILLER, BE CAREFUL NOT TO STRETCH OR KINK CABLES. •...
-
Page 7: Check Tire Pressure
ASSEMBLY INSERT CABLE CLIP (See Fig. 6) REMOVE TILLER FROM CRATE • Insert plastic cable clip into hole on the back of handle • Adjust handle assemby to lowest position. Be sure column. Push cables into clip. lock lever is tightened securely. •... -
Page 8: Know Your Tiller
OPERATION KNOW YOUR TILLER READ THIS OWNER'S MANUAL AND SAFETY RULES BEFORE OPERATING YOUR TILLER. Compare the illustrations with your tiller to familiarize yourself with the location of various controls and adjustments. Save this manual for future reference. These symbols may appear on your Tiller or in literature supplied with the product. Learn and understand their meaning. - Page 9 OPERATION The operation of any tiller can result in foreign objects thrown into the eyes, Use ear protec- which can result in severe eye damage. Always wear safety glasses or eye tors to avoid shields before starting your tiller and while tilling. We recommend a wide d a m a g e vision safety mask over spectacles or standard safety glasses.
- Page 10 OPERATION TILLING (See Fig. 11) • Move throttle control to desired speed. • Release depth stake pin. Pull the depth stake up for AROUND TOWN increased tilling depth. Place depth stake pin in hole • Disconnect spark plug wire. of depth stake to lock in position. •...
- Page 11 OPERATION TO START ENGINE (See Fig. 13) ADD GASOLINE • Fill fuel tank to bottom of filler neck. Do not overfill. CAUTION: KEEP TINE CONTROL IN “OFF” Use fresh, clean, regular un lead ed gasoline with a PO SI TION WHEN STARTING ENGINE. minimum of 87 octane.
- Page 12 OPERATION TILLING HINTS CULTIVATING Cultivating is destroying the weeds between rows to pre vent CAUTION: Until you are accustomed to them from robbing nourishment and moisture from the handling your tiller, start actual field use plants. At the same time, breaking up the upper layer of with throttle in slow position (mid-way soil crust will help retain moisture in the soil.
-
Page 13: Maintenance Schedule
MAINTENANCE MAINTENANCE SCHEDULE FILL IN DATES AS YOU COMPLETE SERVICE DATES REGULAR SERVICE Check Engine Oil Level Change Engine Oil Oil Pivot Points Inspect Spark Arrester / Muffler Inspect Air Screen Clean or Replace Air Cleaner Cartridge Clean Engine Cylinder Fins Replace Spark Plug RH Gear Case Grease Fitting (1oz.) 1 - Change more often when operating under a heavy load or in high ambient temperatures. - Page 14 MAINTENANCE Disconnect spark plug wire before performing any maintenance to prevent accidental start ing of engine. Prevent fires! Keep the engine free of grass, leaves, spilled oil, or fuel. Re- move fuel from tank before tipping unit for maintenance. Clean muffler area of DRAIN all grass, dirt, and debris.
- Page 15 MAINTENANCE MUFFLER Do not operate tiller without muffler. Do not tamper with exhaust system. Damaged mufflers or spark arresters could create a fire hazard. Inspect pe ri odi cally and re place if nec es sary. If your engine is equipped with a spark arrester BLOWER screen assembly, re move every 50 hours for cleaning and HOUSING...
-
Page 16: Service And Adjustments
SERVICE AND ADJUSTMENTS TO REMOVE WHEEL (See Fig. 21) CAUTION: Disconnect spark plug wire • Place blocks under trans mis sion to keep tiller from from spark plug and place wire where tipping. it cannot come into contact with plug. •... - Page 17 SERVICE AND ADJUSTMENTS TO REPLACE GROUND DRIVE BELT GROUND DRIVE BELT ADJUSTMENT (See Figs. 22 and 23) (See Fig. 23) • Remove belt guard (See “TO REMOVE BELT GUARD” For proper belt tension, the extension spring should have in this section of this manual). about 5/8 inch stretch when drive control bar is in “EN- •...
- Page 18 SERVICE AND ADJUSTMENTS TRANS MIS SION TINE TINE 3-1/2" (9 cm) MAX Fig. 25 COUNTER HAIRPIN CLIP TINE ROTATION HAIRPIN CLIP SHARP EDGE SHARP EDGES SHARP EDGE SHARP SHARP EDGES EDGE SHEAR SHEAR PIN Fig. 26 ENGINE IMPORTANT: NEVER TAMPER WITH THE ENGINE GOVERNOR, WHICH IS FACTORY SET FOR PROPER ENGINE SPEED.
-
Page 19: Fuel System
STORAGE Immediately prepare your tiller for storage at the end of the ENGINE OIL season or if the unit will not be used for 30 days or more. Drain oil (with engine warm) and replace with clean oil. (See “ENGINE” in the Maintenance section of this man ual). WARNING: Never store the tiller with gasoline in the tank inside a build ing CYLINDER(S) - Page 20 TROUBLESHOOTING POINTS PROBLEM CAUSE CORRECTION Will not start 1. Out of fuel. 1. Fill fuel tank. 2. Fuel valve "OFF". 2. Turn fuel valve to the "ON" position. 3. Engine Switch "OFF". 3. Turn engine switch to the "ON" position. 4.
Need help?
Do you have a question about the PPCRT17 and is the answer not in the manual?
Questions and answers
Whatever the clutch cable is attached to isnt going back when you realize the handle. So tiller wants to keep going & can’t shift gears
A clutch cable issue on a Poulan Pro PPCRT17 tiller that prevents it from shifting gears could be due to improper tension adjustment. The cable clip screw securing the drive control cable may need to be loosened, and the cable should be slid forward for less tension or rearward for more tension until about 5/8 inch stretch is obtained while the drive control bar is engaged. After adjustment, the cable clip screw should be tightened securely.
This answer is automatically generated