Table of Contents
Advertisement
Quick Links
Chapter 2
Chapter 3
LOAD$
Table of Contents
1
1
2
3
3
4
4
4
5
5
7
7
9
9
10
12
12
15
16
17
18
18
20
20
20
21
21
21
22
22
23
24
24
24
25
26
26
iii
Advertisement
Table of Contents

Related Manuals for Commodore 2031


Summary of Contents for Commodore 2031
-
Page 1: Table Of Contents
Chapter 2 Preparing Your Disk Drive Connecting the Disk Drive To The Computer Performing the Power-On Test Inserting The Diskette Into The 2031 The 2031 Performance Test Chapter 3 Learning How To Use Your Floppy Disk Drive The Block Availability Map (BAM) - Page 2 Closing the Data Channel PRINT# INPUT # GET# RECORD# Quickload Feature (BASIC 4.0) Moving A Tape Program to Disk Chapter 5 Advanced Disk Programming Commodore Disk Operating System (DOS) Disk Utility Command Set BLOCK-READ BLOCK-WRITE BLOCK-EXECUTE BUFFER POINTER BLOCK-ALLOCATE MEMORY MEMORY-WRITE...
- Page 3 Creating A Relative File Expanding A Relative File Accessing A Relative File Chapter 7 Simplifying The Use Of Commodore Disk Related Commands Loading The DOS Support Program Using The DOS Support Symbols: > and @ Loading the Program With The /...
- Page 4 List of Tables Table Title Page Suggested Reading List Specifications: Model 2031 Single Drive Floppy Disk Standard Jump Table Block Distribution By Track 2031 BAM Format 2031 Directory Header Directory Format Directory Entry Format Sequential Format Program File Format Relative File Format...
-
Page 5: Chapter1
GENERAL DESCRIPTION INTRODUCTION With the purchase of your Commodore 2031 Floppy Disk Drive, you have greatly enhanced the computing power of your disk-oriented Commodore Computer system. The system has been designed around the central concept of providing you, the user, with large file-handling capabilities supported by BASIC programming commands and further simplified by Disk Operating Sys- tem (DOS) Support command abbreviations. -
Page 6: The Manual - A Learning Tool
To get the most out of your system you should study your Computer User's Guide and, if necessary, obtain selected manuals listed in Table 1. You will benefit most if you first read through this entire manual before attempting to operate the Disk Drive. -
Page 7: General Hardware Information
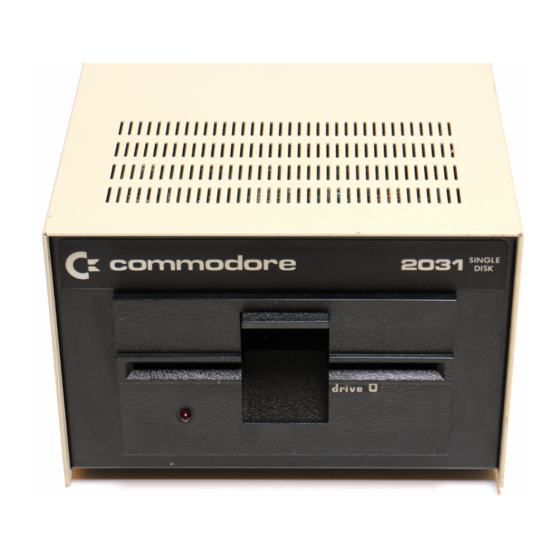
GENERAL HARDWARE INFORMATION The CBM model 2031 Floppy Disk Drive, described in this manual, is a 170 K-byte capacity storage device. Its primary components consist of read/write controls, drive motor electronics, one drive mechanism, one read/write head, and a track positioning mechanism. -
Page 8: Back Panel
ON/OFF switch. There is also a "slow blow" fuse, and the AC power cord. Interior Configuration The interior of your 2031 contains a disk drive and all the necessary logic for disk operation. The mechanical device is, for the most part, located beneath the disk spindle. -
Page 9: Specifications
If you should experience a hardware failure, contact your Commodore dealer. Any attempt to correct the problem yourself could result in voiding the warranty. -
Page 10: Specifications: Model 2031 Single Drive Floppy Disk
Table 2. SPECIFICATIONS: MODEL 2031 SINGLE DRIVE FLOPPY DISK STORAGE Total capacity 174848 bytes Sequential 168656 bytes Relative 167132 bytes; 65536 records per file Directory entries Sectors per track 17 to 21 Bytes per sector Tracks Blocks IC's: Controller and Interface... -
Page 11: Care Of The Diskettes
5. Do not expose diskettes to heat or sunlight. 6. Do not touch or attempt to clean the diskette surface. Abrasions will cause loss of stored data. 7. Before applying power to the 2031, insure that there is no diskette in the drive. UNPACKING THE DISK DRIVE Before unpacking the disk drive, inspect the shipping carton for signs of external damage. - Page 12 Figure 1. Model 2031 Rear View...
-
Page 13: Preparing Your Disk Drive
Use this cable if the disk drive is to be the only (or first) IEEE device connected to your computer. 2. IEEE-to-IEEE cable, P/N 905080 Use this cable if your disk drive is to be connected ("daisy chained") to another peripheral device such as the Commodore Model 2022, or any other suitable interfaced printer. -
Page 14: Performing The Power-On Test
Follow these steps to connect the disk drive to you computer: STEP 1. Turn power OFF to the computer. STEP 2. Place the disk in a convenient location as close as possible to the computer. DO NOT connect the disk drive to a power outlet at this time (see Figure 2). -
Page 15: Tab, Write Protect
STEP 3. Apply power to the disk drive. The LED flashes to indicate a faulty condition. The number of flashes determine which component is faulty. The following lists the components and their respective number of flashes. Flash Code Component zero page, U3B, U3D ROM U5F ROM U5H RAM U3B, U3C, U3D, U3E... -
Page 16: Inserting The Diskette Into The 2031
INSERTING THE DISKETTE INTO THE 2031 Caution NEVER APPLY POWER TO THE DISK DRIVE IF A DISKETTE IS PRESENT (LOCKED AND SEATED). STEP 1. Ensure that the power to the disk drive is OFF and DO NOT apply power until you complete this step. Open the disk drive door and ensure that no diskette is present in the drive. - Page 17 The program instructs you to place a blank diskette into the drive. The Performance Test Program executes a shortened version of the test used by Commodore in final inspection of the 2031. The purpose of this test is to ensure that the unit is functioning correctly and will take approximately seven minutes to complete.
- Page 18 If any problems have been encountered during this phase of the test, return to step 1 and repeat the entire procedure. If problems persist and you do not reach a satisfactory conclusion to the Performance Test, contact your Commodore dealer.
-
Page 19: Learning How To Use Your Floppy Disk Drive
Chapter LEARNING HOW TO USE YOUR FLOPPY DISK DRIVE Your CBM Floppy Disk Drive, which enhances your computing power with added storage and file handling capability, is controlled directly with: * BASIC commands entered via the keyboard * BASIC statements within programs * Special disk commands In this chapter you will learn how to apply those commands and statements. -
Page 20: The Block Availability Map (Bam)
Chapter: Block Availability Map (BAM) and Disk Operating System (DOS). Although these are conventional terms, they will be briefly discussed as they relate to the Commodore Floppy Disk Drive. THE BLOCK AVAILABILITY MAP (BAM) The BAM is a disk memory representation of available and allocated space on a disk. -
Page 21: The Disk Operating System (Dos)
RETURN will cause DOS SUPPORT to load that program into memory. Replacing certain disk commands with DOS Support special symbols can simplify learning about your Commodore computer by providing a faster method to communicate with the disk. -
Page 22: Disk Maintenance Commands
DISK MAINTENANCE COMMANDS The following disk commands permit the user to perform file manipulation and disk maintenance. BASIC 4.0 DIRECT COMMAND FUNCTION COMMAND Formats a disk HEADER INITIALIZE Prepare diskette for use ---- Diskette Level LOAD"$0" Read disk directory DIRECTORY VALIDATE Reconstruct Block Avail- COLLECT... - Page 23 Before using the NEW command to format the diskette and initialize the disk drive, enter the command: PRINT#15,"commandstring" where 15 is the logical file number of a file which has been opened to the disk command channel (primary address 8, secondary address 15). The format for NEW is: "NEWdr:fn,xx"...
-
Page 24: Header (Basic 4.0 Direct Command)
= device number (Defaults to 8) Initializing the 2031 The 2031 uses a hardware feature to detect the removal or insertion of a diskette, so it is not necessary to initialize since this is an automatic function. THE DIRECTORY Confirm that the newly formatted disk has the correct ID and disk name by using one of the following methods to list the directory. -
Page 25: Load
LOAD$ This procedure will destroy any program currently in computer memory when the directory is LOADed. (Refer to the description of the >$ DOS Support command in Chapter 7 which is a non-destructive directory display procedure.) STEP 1: Place a formatted disk in the drive. STEP 2: Type: LOAD"$0",8 (or LOAD"$",8) then press RETURN. -
Page 26: Validate
VALIDATE The VALIDATE command traces through each block of data contained in all files on the diskette. If this trace is successful, a new BAM is generated in the disk memory and written to the diskette. Any blocks which have been allocated but are not associated with a file name, as in the case of direct access files will be freed for use. -
Page 27: Copy
COPY The COPY command allows you to reproduce files on the diskette or to create multiple copies (under different names). This command can also be used to concatenate data files. Up to four files can be concatenated into the destination file. -
Page 28: Copy (Basic 4.0 Direct Command)
CONCAT direct command are valid only for DOS 2. For further information regarding use of BASIC COPY and CONCAT com- mands, refer to the Commodore BASIC 4.0 Reference Manual. RENAME The RENAME command renames an existing file. A file can not already exist with the file name specified in the command or the FILE EXISTS error message will be generated. -
Page 29: Rename (Basic 4.0 Direct Command)
The format for RENAME is: PRINT#1fn,"RENAMEdr:nfn=ofn" Where: dr = the disk drive on which the diskette is located (0). nfn = the new name of the file. ofn = the old name of the file. 1fn = a logical file number. You assign this number arbitrarily and it may be any whole number between 1 and 255. -
Page 30: Scratch
To erase one file, enter the entire name of the file: Example: PRINT#1,"S0:ACCT" To erase several files with unrelated names, enter the entire name of each file to be deleted: Example: PRINT#1,"S0:ACCT,0:CUSTOMER,0:INV" To erase several files at one time where names have something in common, refer to the rules in APPENDIX B concerning pattern matching. -
Page 31: Basic Commands For Data Handling
BASIC COMMANDS ASSOCIATED WITH FLOPPY DISK DRIVES The BASIC commands described in this chapter, allow the user to communicate with and transfer data to and from the disk drive. These commands are available for ALL versions of Commodore BASIC: OPEN1fn,8,sa,"dr:fn,t,r/w" VERIFY"dr:fn",8 CLOSE1fn PRINT#1,fn LOAD"dr:fn",8... -
Page 32: Save And Dsave (Writing A Program To A Diskette)
(Writing A Program To A Diskette) If a program is in computer memory, it can be moved to a diskette for storage. This is accomplished with the SAVE (any Commodore BASIC) or DSAVE (BASIC 4.0) commands. Any data transferred with the SAVE or DSAVE commands are automatically designated by the DOS as a program (PRG) file. -
Page 33: Load And Dload
SAVE"0:TESTPROG",8 VERIFY"0:TESTPROG",8 The DSAVE command performs the same function as SAVE, but is valid only with a Commodore disk system and BASIC 4.0. The format is: DSAVE"fn"Ddr On Udn This command will save a file named "fn" on the floppy disk in drive 0. The file name, "fn", may be any name of 16 characters or less. -
Page 34: Verify
The DLOAD command transfers performs the same function as LOAD, but is specifically designed for a Commodore disk unit using BASIC 4.0. The device number will default to 8 if not specified. The drive number will default to 0 if not specified. -
Page 35: Open
In order to perform verification of the last file saved without re-typing the filename, confirm by following these steps: STEP 1: Write a short program and save it. STEP 2: Clear the screen. STEP 3: Type VERIFY"*",8 The VERIFY function will be performed comparing the last file saved to the contents of memory. -
Page 36: Dopen
The contents of an existing file may be replaced by preceding the drive number with an at sign (@) in the OPEN command. OPEN3,8,5,"@0:JDATA,USR,WRITE" If the specified file does not exist, then normal OPENing procedures are illustrated in these examples: Example 1: FL$="0:FILEA,SEQ,READ"... -
Page 37: Dclose
Always close a file after working with it. You are not allowed to have more than ten open files in the computer and five in the disk drives, so it is prudent to make a habit of closing files as soon as possible. This way you will always have the maximum number of files available for use. -
Page 38: Closing The Data Channel
Example: OPEN1,8,15 The command channel is opened. OPEN3,8,2,"0:FILE1,SEQ,WRITE" Data Channels are opened for OPEN4,8,2,"0:FILE2,SEQ,WRITE" writing. PRINT#3,"IMPORTANT DATA" PRINT#4,"MORE DATA" OPEN3,4 A channel is opened to the printer by mistake. ?FILE OPEN ERROR? An error message is displayed on the screen. READY. - Page 39 Where: lfn = a file previosly opened using secondary address 15 "commandstring" = disk handling or disk file handling commands. These disk commands are discussed in detail in Chapter 3 of this manual. PRINT# may also be used to transmit data to previously-opened sequential or relative file.
-
Page 40: Input
INPUT# The INPUT# command is used to transfer information from an IEEE device such as the disk drive into computer memory. INPUT# is valid only when used in a program and only when referencing a logical file that has been OPENed for input. -
Page 41: Get
GET# The GET# command is used to transfer individual bytes of information from an IEEE device such as the disk drive into computer memory. GET# is valid only when used in a program and only when referencing a file that has been OPENed. The format for GET# is: GET#lfn,A$ Where:... -
Page 42: Quickload Feature (Basic 4.0)
STEP 3: Simultaneously press the SHIFT and RUN/STOP keys. The computer will initialize the disk, search for the first program, and load it. *** commodore basic 4.0 *** 31743 bytes free ready dL"* searching for 0:* loading ready. -
Page 43: Moving A Tape Program To Disk
MOVING A TAPE PROGRAM TO DISK This example illustrates a session with the computer, a tape cassette and a disk drive. The purpose is to copy a cassette program to a diskette. The program is then read from the diskette to the computer's memory and printed. It is assumed that the BASIC program was previously stored on the cassette. -
Page 45: Advanced Disk Programming
COMMODORE DISK OPERATING SYSTEM (DOS) The DOS file interface controller is responsible for managing all information between the disk controller and the IEEE-488 bus. Most disk I/O is performed on a pipelined basis, resulting in a faster response to a requested operation. -
Page 46: Disk Utility Command Set
The job queue is the vital link between the two controllers. Jobs are initiated on the file side by providing the disk controller with sector header and type of operation information. The disk controller seeks the optimum job and attempts execution. - Page 47 adl = the low byte of the address*. adh = the high byte of the address*. nc = the number of characters: 1 through 34. data = the actual data in hexadecimal. This is transmitted by using the CHR$ function, i.e. CHR$(1) would send the binary equivalent of hexadecimal 01, (decimal 1).
-
Page 48: Block-Read
The use of these characters permits sending both ASCII strings and integers. Parameters not within the confines of quotation marks should be separated by semicolons (;). In the following discussions, a PRINT# is assumed in all examples. BLOCK-READ This diskette utility command provides direct access to any block on a diskette in either disk drive. -
Page 49: Block-Execute
BLOCK-EXECUTE This command allows part of the DOS or user designed routines to reside on disk and be loaded into disk drive memory and executed. B-E is really a B-R with an addition. The file Interface Controller begins execution of the contents after the block is read into a buffer. -
Page 50: Memory
BLOCK error. If there are no blocks available that are greater in number than the one requested, zeroes are displayed as track and sector parameters. The format “B-A”dr;t;s is illustrated in the following example. Example: “B-A”0;10;0 Requests that block (sector)0 of track 10 be flagged as allocated on the diskette. -
Page 51: Memory-Read
The format “M-W”adl/adh/nc/data is illustrated in the following example. Example: “M-W”CHR$(00)CHR$(13)CHR$(4)CHR$(32)CHR$(0)CHR$(17)CHR$(96) Writes four bytes to buffer 2 ($1200 or decimal 4608). MEMORY-Read The byte pointed to by the address in the command string may be accessed with this command. Variables from the DOS or the contents of the buffers may also be read with this command. -
Page 52: Standard Jump Table
The special USER commands U1 (or UA) and U2 (or UB) can be used to replace the BLOCK-READ and the BLOCK-WRITE commands. The format for U1 is: “U1:”ch;dr;t;s U1 forces the character count (buffer pointer) to 255 and reads an entire block into memory. -
Page 53: File Types
(Refer to Chapter 6 for further description). Block, Directory and BAM Formats A data block is addressed by track and sector. A 2031 diskette contains 35 tracks (or rings) numbered 1 to 35. The number of sectors per track will vary (as illustrated in Table 4) due to differences in track circumference and recording frequency. -
Page 54: Block Distribution By Track
Any block on a diskette may be examined by using the program DISPLAY T&S, provided on the TEST/DEMO diskette. Tables 5 and 6 will assist the user in interpreting information obtained using the DISPLAY T&S program. Table 5 2031 BAM FORMAT Track 18, Sector 0. Byte Contents Definition... -
Page 55: Prg (Program) File
Table 6 2031 DIRECTORY HEADER Track 18, Sector 0. Byte Contents Definition 144-161 Disk name padded with shifted spaces. 162-163 Disk ID. Shifted space. 165,166 50,65 ASCII representation for 2A which is DOS version and format type. 166-167 Shifted spaces. - Page 56 Table 8 FORMAT OF DIRECTORY ENTRY Byte Contents Definition 128+type file type OR'ed with $80 to indicate prop- erly closed file. TYPES: 0 = DELeted 1 = SEQuential 2 = ProGram 3 = UseR 4 = RELative Track and sector of 1 data block.
- Page 57 Figure 4 illustrates an expanded view of a single sector on a diskette formatted for the 2031. In addition to other information, each sector contains a data block consisting of 256 stored characters. Blocks within the same file are linked together by means of a two-character block pointer.
-
Page 59: Advanced File Handling
Chapter ADVANCED FILE MANAGEMENT In the preceding chapters, you learned how to manipulate files on the disk, and were shown the format of commands used to create and update files. In this chapter, you will utilize these skills in a file handling application using random or relative access. -
Page 60: Random Access Example
If the buffers are not available, a NO CHANNEL error condition is generated. The explicit buffer allocation can be used to reserve a buffer for position dependent code as in the case of an EXECUTE command. Execute a GET# statement to find the number of the allocated buffer. The byte transmitted is the buffer number. -
Page 61: To Create A File
Two sequential files are used to support the random access file in this example. Each file bears the name of the file name given in the CREATE file code (lines 1100 to 1180) plus a six-character extension. Since primary file names are ten or less characters, the file names are padded with spaces. -
Page 62: To Add A Record
The screen displays: “WHOSE RECORD DO YOU WISH TO SEE”? Press RETURN. The screen displays: “**** ADD RECORD ****” NAME? STEP 2. Type: COMMODORE and press RETURN The screen displays: “PHONE”? STEP 3. Type: 727-1130 and press RETURN The screen displays: “ADDRESS”? STEP 4. -
Page 63: To See A Record
ADDRESS”? Enter the address: 4086 AMBER WAY SAN JOSE CA. 95117 and press RETURN COMMENTS”? Enter a comment. For example: MANUFAC- TURES COMPUTERS and press RETURN To See A Record: The computer displays: “WHOSE RECORD TO YOU WISH TO SEE”? Enter: COMMODORE and press RETURN... -
Page 64: To Change A Record
To Change A Record: After displaying the record, the screen displays: “ANY MODS”? STEP 1. Type YES and press RETURN The screen displays: “WHICH FIELD”? Enter the number of the field you wish to change, STEP 2. Type: 4 and press RETURN The computer displays that field: US HEADQUARTERS STEP 3. -
Page 65: Relative File Components
A file may contain up to six side sectors and each side sector may contain pointers to 120 data blocks. Therefore, the largest file on the 2031 Disk would be 182,880 bytes (120 pointers/side sector*6 side sectors*254 bytes/block) which happens to be larger than the total storage capacity of that particular disk. -
Page 66: Format
Table 11 RELATIVE FILE FORMAT DATA BLOCK Byte Definition Track and sector of next data block. 2-255 254 bytes of data. Empty records contain FF (all binary ones) in the first byte followed by 00 (binary all zeros) to the end of the record. Partially filled records are padded with nulls (00). -
Page 67: Print Termination
The relative channel requires three memory buffers form the system, whereas sequential files only require two. Since there are twelve channels in the system and two of these are used in directory searches and internal functions, only three relative channels can be open at one time. The highest number of buffers that can be used is ten, which limits the total number of channels which can be open at any one time. -
Page 68: Creating A Relative File
size and the DOS will position to the next record in sequence. If the print statement contains less characters than the record size, the remaining positions within that record will be filled with nulls. Consequently, when positioning to a record for input the EOI signal is generated from the DOS to the computer when the last non-zero is transmitted. -
Page 69: Expanding A Relative File
Line 130 positions the file pointer to record number 100 which does not yet exist. The message 50 RECORD NOT PRESENT will occur at this point, but should be interpreted as a warning rather than an error condition. This message is normally expected to occur as a warning when a new record is positioned to for the first time and indicates that no INPUT or GET operation should be attempted. -
Page 70: Accessing A Relative File
NOTE When DOPEN is used on an existing file, specifica- tion of the record length is optional. If specified, it must match the record length set at the time the file was created or an error condition will result. When a file is expanded in this manner, the required side sectors are also created. - Page 71 The following program illustrates the feature which permits access to individual bytes within a record: 110 DOPEN#1,”FILE1”,D0 120 GOSUB 900 130 RECORD#1,25,1 140 GOSUB 900 150 PRINT#1,”FIELD 1” 160 GOSUB 900 170 RECORD#1,25,10 180 GOSUB 900 190 PRINT#1,”FIELD 2” 200 GOSUB 900 210 RECORD#1,25,30 220 GOSUB 900 230 PRINT#1,”FIELD 3”...
- Page 72 110 DOPEN#1,”FILE1”,D0 120 GOSUB 290 130 RECORD#1,25 140 GOSUB 290 150 RECORD#1,25,1:GOSUB 290 160 INPUT#1,A$:GOSUB 290 170 RECORD#1,25,10:GOSUB 290 180 INPUT#1,B$:GOSUB 290 190 RECORD#1,25,30::GOSUB 290 200 INPUT#1,C$:GOSUB 290 210 DCLOSE#1 220 END 290 IF DS<20 THEN RETURN 300 PRINT DS$ 310 STOP Lines 160, 180, and 200 cause the stored values on disk to be read and stored in A$, B$, and C$, respectively.
- Page 73 already dimensioned D$ as an array which contains 100 elements. These ele- ments are to be written to the disk in records number 1 through 100 of file FILE1. This could be accomplished with the following program segment: 110 DOPEN#1,”FILE1”,D0 120 GOSUB 190 130 FOR I=1 TO 100 150 PRINT#1,D$(I)
-
Page 75: Loading The Dos Support Program
PORT. This program, when loaded into memory, takes care of the tasks menti- oned above. If your computer has Commodore BASIC 4.0 you can use the quick load procedure to load the DOS SUPPORT program. For those of you not... -
Page 76: Using The Dos Support Symbols: > And
Start with a cold start condition by resetting both the computer and disk drive and insert the TEST/DEMO disk in drive 0. STEP 1. Type: LOAD”*”,8 and press RETURN. The screen displays: READY. LOAD”*”,8 SEARCHING FOR * LOADING READY. STEP 2. Type: RUN and press RETURN. -
Page 77: Loading And Running A Program With Up Arrow
NOTE To avoid scrolling the directory, press the space bar to stop the listing. To continue the listing, press any key on the keyboard. To stop a directory listing and return to BASIC, press RUN/STOP. The third use of > is the request of error messages. Example: >... -
Page 78: Changing Device Number
DOS Support may only be used when communicating with the disk in direct mode. That is, they may NOT be used in a program. The disk directory may be printed on the printer by giving these commands: LOAD “$0”,8 OPEN 4,4:CMD4:LIST PRINT#4:CLOSE4 4. -
Page 79: Requesting Error Messages: Commodore Disk Drives
CHAPTER ERROR MESSAGES - PATTERN MATCHING FILE NAMES - DISK COMMANDS REQUESTING ERROR MESSAGES: COMMODORE DISK DRIVES The execution of the following programs displays the error on the computer screen and resets the device error indicator:... - Page 80 CBM Series 2001 CBM Series 8000 CBM Series 3000 CBM Series 4000 with with BASIC 3.0 BASIC 4.0 10 OPEN 1,8,15 PRINT DS$ 20 INPUT#1,A,B$,C,D 30 PRINT A,B$,C,D where A = error message number B$ = error message C = track D = sector SUMMARY OF CBM FLOPPY ERRROR MESSAGES OK, no error exists.
- Page 81 DESCRIPTION OF DOS ERROR MESSAGES NOTE Error message numbers less than 20 should be ignored with the exception of 01 which gives infor- mation about the number of files scratched with the SCRATCH command. READ ERROR (block header not found) The disk controller is unable to locate the header of the requested data block.
- Page 82 READ ERROR (checksum error in header) The controller has detected an error in the header of the requested data block. The block has not been read into the DOS memory. This message may also indicate grounding problems. WRITE ERROR (long data block) The controller attempts to detect the sync mark of the next header after writing a data block.
- Page 83 RECORD NOT PRESENT Result of disk reading past the last record through INPUT#, or GET# commands. This message will also occur after positioning to a record beyond end of file in a relative file. If the intent is to expand the file by adding the new record (with a PRINT# command), the error message may be ignored.
-
Page 84: Pattern Matching
This message may also appear after power up. DRIVE NOT READY An attempt has been made to access the 2031 Disk Drive without a diskette present. PATTERN MATCHING Pattern matching of file names is available on all Commodore floppies. - Page 85 The asterisk is used at the end of a string of characters to indicate that the rest of the name is insignificant. For example: FIL* could refer to files named FILE1 FILEDATA FILLER any other file name starting with the letters FIL. The question mark may be used anywhere within the string of characters to indicate that the character in that particular position should be disregarded.
-
Page 86: User's Quick Reference: Disk Commands
The user's quick reference guide will assist the user in becoming familiar with the various commands used in both BASIC 3.0 and BASIC 4.0, and with the DOS SUPPORT utility as well as with all Commodore disk units. In order to make BASIC 4.0 easier to use, disk commands have been incorpo- rated into the language. - Page 87 NOTE Assume that OPEN1,8,15 has already been typed for all of the PRINT# commands in the following formats. Commands may be spelled out or abbre- viated by the first letter as illustrated. INITIALIZE PRINT#1,”Ix” >Ix PRINT#1,”Ix” VALIDATE PRINT#1,”Vdr” >Vdr COLLECT Ddr,Udn SCRATCH PRINT#1,”Sdr:fn”...
- Page 89 6 under the heading of Random Access Example. [Editor's Note on following program: The original was heavily crunched. I have added spaces to make the code more reader friendly.] 1 REM 2031 RANDOMEXAMPLE 2 REM 3 REM SUBROUTINES TO MANAGE RANDOM ACCESS FILES 4 REM VARIABLES ARE SET FROM DATA OF DESCRIPTION FILE &...
- Page 90 40 ID$=””: REM RANDOM DISK ID 45 NR=0: REM # RECORDS IN R-FILE 46 CR=0: REM CURRENT RECORD # 47 FR=0: REM 1ST FREE RECORD UNUSED 50 NF=0: REM # FIELDS IN RECORD 51 CF=0: REM CURRENT FIELD # 55 RB=0: REM # RECORDS PER BLOCK 56 RS=0: REM RECORD SIZE IN BYTES...
- Page 91 410 PRINT#CC,”U1:”C0;D;T;S 415 GOSUB 1000:IF E THEN 1900 420 PRINT#CC,”B-P:”C0;FP%(CF)+RP 425 GOSUB 500 :REM UPDATE FIELD 430 PRINT#CC,”U2:”C0;D;T;S 435 GOSUB 1000:IF E THEN 1900 440 RETURN 450 REM ************************** 451 REM READ FIELD(CF) OF RECORD CR, SINGLE FIELD READ 452 REM 455 GOSUB 900 460 PRINT#CC,”U1:”C0;D;T;S 470 GOSUB 1000:IF E THEN 1900...
- Page 92 900 REM ************************ 901 REM SET RECORD'S TRACK, SECTOR & RECORD POINTER FROM INDEX ARRAYS 902 REM 905 D=RD 910 E=0 915 IF AS=-1 THEN RP=CR*RS+1:GOTO 950 920 RP=INT((CR-1)/RB+EP):IF RP> NB OR RP<0 THEN EN=41:GOTO 1900 930 T=IT%(RP):S=IS%(RP) 940 RP=INT(((CR-1)/RB-RP+EP)*RS*RB)+1 950 IF RP>254 THEN EN=41:GOTO 1900 960 RETURN 1000 REM ***********************...
- Page 93 1215 OPEN C1,DN,C1,A$:GOSUB 1000:IF E THEN 1900 1220 INPUT#C1,ID$,T,S 1225 OPEN C0,DN,C0,”#”:GOSUB 1000:IF E THEN 1900 1226 GOSUB 1280 1227 PRINT#CC,”B-R:”;C0;RD;T;S:GOSUB 1000:IF E THEN 1900 1230 INPUT#C0,NR,FR,NB,RS,RB,NF 1235 GOSUB 100:FT%(0)=T:FS%(0)=S 1240 FOR A=0 TO NF:GOSUB 1298:FS%(A0)=ASC(A$) 1245 GOSUB 1298:FT%(A0)=ASC(A$) 1250 INPUT#C1,FH$(A0):NEXT 1255 FOR A0=0 TO NB-1:GOSUB 1298:IT%(A0)=ASC$(A$) 1260 GOSUB 1298:IS%(A0)=ASC(A$):NEXT 1265 GOSUB 1000:IF E THEN 1900...
- Page 94 2170 FOR II=1 TO RR:IF K$(II)<>RR$ THEN NEXT:GOTO 2300 2175 CR=RR%(II):GOSUB 300 2180 FOR I=1 TO NF:PRINT I;”)”FH$(I)”:”,F$(I):NEXT:PRINT 2190 INPUT “ANY MODS N”;A$:IF LEFT$(A$,1)<>”Y” THEN 2220 2195 INPUT “WHICH FIELD”;A 2200 PRINT “ “F$(A):PRINT “”;:INPUT F$(A)=VAL(F$(A)) 2210 FF=1:GOTO 2190 2220 IF FF=0 THEN 2160 2222 IF A=1 THEN K1$(II)=F$(A) 2225 GOSUB 200 2230 GOTO 2160...
-
Page 95: Index
Chapter INDEX BACKUP BLOCK-READ command....44 (BASIC 4.0 direct commands..22 BLOCK-WRITE command...44 BASIC commands Block pointer....41 CLOSE command....32 Buffer number....45 DCLOSE command....33 BUFFER-POINTER command..45 DLOAD command....29 Business keyboard.....13 DOPEN command....32 Cables......9 DSAVE command....28 PET to IEEE....9 GET# command....37 IEEE to IEEE....9 INPUT# command....36 CHR$ function....35,43 LOAD$ command....21... - Page 96 Data handling......45 BUFFER-POINTER....45 BASIC commands for....27 BLOCK-ALLOCATE....45 DCLOSE command.....33 MEMORY-WRITE....46 DEMO MEMORY-READ....47 diskette...(see TEST/DEMO diskette) MEMORY-EXECUTE....47 Description of DOS error messages..77 USER......48 Descriptor (.DESC)....57 Diskettes Device number....21,74 Care of......5 Direct Access......55 Inserting diskettes..7,12 Special OPEN and CLOSE DLOAD command....29 statements.......55 DOPEN command....32 DIRECTORY (command)....21 DOS.....17,41,71,72,73,77...
- Page 97 Loading RENAME DOS support......71 (BASIC 4.0 direct command)..25 a program with the slash(/) RENAME command....24 symbol.........73 Requesting error messages..75 running a program with the up arrow ( ) ↑ Safety feature, HEADER command.20 symbol.........73 SAVE command....28 Maintenance commands, disk....18 SCRATCH MEMORY commands......46 (BASIC 4.0 direct command)..26 MEMORY-WRITE command....46...
Need help?
Do you have a question about the 2031 and is the answer not in the manual?
Questions and answers