Table of Contents
Advertisement
Quick Links
Download this manual
See also:
Operating Manual
Advertisement
Table of Contents

Related Manuals for Zoom ARQ AR-48

Summary of Contents for Zoom ARQ AR-48
- Page 1 Aero RhythmTrak Quick Guide The Operation Manual can be downloaded from the ZOOM website (www.zoom.co.jp/). © 2017 ZOOM CORPORATION Copying or reprinting this manual in part or in whole without permission is prohibited.
-
Page 2: Table Of Contents
Contents Using the A ......3 EFFECT area EFFECT area overview ....19 Connecting other devices ......Effect settings .......20 Preparations Turning the power on and off ..4 REC/PLAY area REC/PLAY area overview .....21 Base Station power ........Ring Controller power ....... Ring Controller Installing SD cards and Ring Controller overview ....22... -
Page 3: Using The A
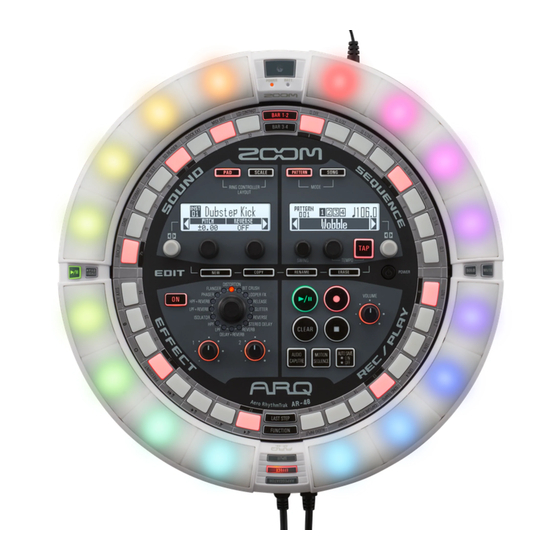
Using the A The A consists of a Base Station and a Ring Controller. Ring Controller Base Station With the Base Station, you can create and save patterns, songs and other musical pieces, as well as edit tones, for example. Use the Ring Controller for input when creating music. Since the Ring Controller can be detached from the Base Station, you can hold it in your hand and play it like an instrument. -
Page 4: Turning The Power On And Off
Preparations Turning the power on and off Base Station power Ring Controller power ■ When connected by USB Connect the included AC adapter When the Ring Controller is connected to the Base Station or a computer by USB, it will to the Base Station. - Page 5 Turning the power on and off (continued) ■ Turning the Ring Controller on Install the batteries. Be sure to orient the batteries correctly. Press W for at least 2 seconds. This turns on the Ring Controller. ■ Turning the Ring Controller off Press W for at least 2 seconds.
-
Page 6: Installing Sd Cards And Bta-1 Units
Installing SD cards and BTA-1 units ■ Loading and removing SD cards Remove the BTA-1 connector covers on the Ring Controller and Turn the power off. Base Station. Open the SD card slot cover on the Base Station. Insert the SD card into the slot. To eject an SD card: Push the card further into the slot and then pull it out. -
Page 7: The 4 Base Station Areas
The 4 Base Station areas The Base Station is divided into four areas according to use. SOUND SEQUENCE area area EFFECT REC/PLAY area area Sound area: Used to control the parameters of instruments assigned to pads. Parameters related to the instrument are shown on the display. Sequence area: Use to set the tempo and other sequence parameters. -
Page 8: Sequence Area Overview
SEQUENCE area overview The A can save up to 384 patterns and 99 songs. In patterns, you can use up to 16 instruments (sound sources) and record sequences that are 1–4 bars long. The instruments, sequences, parameters controlled by the Ring Controller, quantization and other settings are saved for each pattern separately. -
Page 9: Creating Patterns
Creating patterns In PATTERN mode, use the Ring Control- PAD layout SCALE layout ler to play instruments. U s e W a n d X t o s w i t c h Selected instrument between PAD layout for playing multiple Selected instrument Instruments... -
Page 10: Creating Songs
Creating songs In SONG mode, the pads on the Ring Controller are assigned 16 patterns. You can change the patterns assigned to each pad. Tapping a pad starts playback of its assigned pattern. Pattern Enter SONG mode Press Z to enter SONG mode. Select a song Turn H in the SEQUENCE area to select a song. -
Page 11: Sound Area Overview
SOUND area overview In PATTERN mode, you can use up to 16 instruments to perform. A variety of sound sources, including drum sets, percussion instruments, basses and synthesizers, are already prepared for use. You can also use WAV files saved on an SD card by a computer as instruments. In addition to selecting sounds, various settings are available in each instrument. -
Page 12: Instrument Block Structure
Instrument block structure Use H, ! and " in the SOUND area to edit instruments and change their sounds. The instruments are made of the following blocks, which can each be specifically set. Oscillator Insert SCALE layout Noise Effect Filter settings Set the scale and This sets the basic... - Page 13 Volume Effect MIDI settings envelope Output mixer send amount LED settings This sets how This sets the These set the This sets the pad Use this to set quickly sound starts panning (stereo amounts sent to the color and lighting the MIDI channel when a pad is position) and level.
-
Page 14: Editing Instruments
Editing instruments Common operations ■ Changing the scale (Scale) The layout of notes on the Ring Controller changes according to the scale set. CONTROLLER Tap the pad for the This allows you to assign only notes from the desired scale to the Ring Controller. instrument to be edited. -
Page 15: Oscillator
■ Changing the key (Key) NOTE When an audio file is selected as an oscillator, You can change the key when the scale is set to the filter and other parameters will be reset to anything other than Chromatic. default values. You can select from C, C#, D, D#, E, F, F#, G, G#, A, A# and B. -
Page 16: Noise
Editing instruments (continued) Noise ■ Phaser (PHASER) This effect adds a bubbly swaying to the sound. Noise can be added to the sound. ■ Chorus (CHORUS) ■ Type of noise (Type) This effect mixes the original sound with the You can change the type of noise. effect sound that has fluctuating pitch to add Select Off, White or Pink. -
Page 17: Filter
Filter Volume envelope (ADSR) The frequency and other parameters can be set This sets how quickly the sound starts and how for the filter. quickly it becomes silent, for example. ■ Type (TYPE) ■ Attack (Attack) You can change the filter type. This changes how fast the sound starts. -
Page 18: Effect Send Amount
Editing instruments (continued) Effect send amount MIDI settings The amount of sound sent to the master effect Use this to set the MIDI channel for playing can be changed. instrument sounds by USB MIDI and for output- ting playing sequences from the MIDI OUT. ■ Send amount (Amount) ■ Channel (Channel) The volume sent to the effect can be changed. -
Page 19: Effect Area Overview
EFFECT area overview During the playback of patterns and songs, master effects can be applied to the overall output. Use the EFFECT area to adjust this effect. Turn the effect ON/OFF. This lights when the effect is ON. The Ring Controller EFFECT key func- tions the same way. -
Page 20: Effect Settings
Effect settings ■ Effect list Parameter 1 Parameter 2 Category Type name Parameter name Setting values Parameter name Setting values FREQUENCY 20–20000 RESONANCE 0–100 FREQUENCY 20–20000 RESONANCE 0–100 Filter ISOLATOR 0–100 0–100 LPF + REVERB FREQUENCY 20–20000 REVERB MIX 0–100 HPF + REVERB FREQUENCY 20–20000... -
Page 21: Rec/Play Area Overview
REC/PLAY area overview Use the REC/PLAY area to control sequences, including playback and recording. Use for real-time input of patterns and songs. Adjust the level output from the headphone and OUTPUT jacks. Play/pause the pattern or song. Stop playback of the pattern or song. Clear the pattern or song sequence. -
Page 22: Ring Controller
Ring Controller overview The A Ring Controller surface has 16 pressure-sensitive touchpads. Using these pads, you can input and edit patterns and songs and perform in real-time, for example. Touchpad locations Pressure-sensitive touchpads with multicolor LED indicators Ring Controller operation buttons GRIP button Set grip area that does not respond to touch... -
Page 23: Using The Ring Controller
Using the Ring Controller Arpeggiator Turn T to change the arpeggiator This function can be used to make an instru- style. ment play automatically when triggered by a The STYLE can be set to REPEAT, pad. Pressing multiple pads will trigger multiple SEQUENCE, UP, DOWN, UP&DOWN, or instruments in order. -
Page 24: Setting The Pad Split
Ring Controller overview (continued) Setting the pad split Using the effect When pad layout is selected, you can change Press E. CONTROLLER the number of instruments assigned to the Ring Controller. E lights when the effect is ON. By default, you can play 16 instruments with the After releasing E, the effect will Ring Controller. -
Page 25: Soloing
Soloing Using the grip area You can solo the playback of just the selected You can set a grip area that does not respond instrument. to touch in order to prevent pads from being pressed unintentionally when using the Ring CONTROLLER While pressing S, Controller separately from the Base Station. -
Page 26: Step Key Setting Items
STEP key setting items While pressing F, press a 0 to make a setting. Function name Function Q:OFF These set the shortest note length that can be input into sequences. Q:1/32 This sets timing correction during real-time input and when input can occur during step input. When is pressed, the for the current quantize setting will light. -
Page 27: Specifications
Specifications Base Station Input AUDIO INPUT Connector type Stereo mini jack (unbalanced) Input gain +10 to −65 dB Input impedance 10 kΩ Outputs OUTPUT L/R Connector type Standard mono phone jacks (unbalanced) Output impedance 100 Ω PHONES Connector type Stereo mini jack (20mW × 2 into 32Ω load) Output impedance 10 Ω... - Page 28 ZOOM CORPORATION 4-4-3 Kanda-surugadai, Chiyoda-ku, Tokyo 101-0062 Japan www.zoom.co.jp Z2I-3018-01...
Need help?
Do you have a question about the ARQ AR-48 and is the answer not in the manual?
Questions and answers