
Related Manuals for GE WPRB9250


Summary of Contents for GE WPRB9250
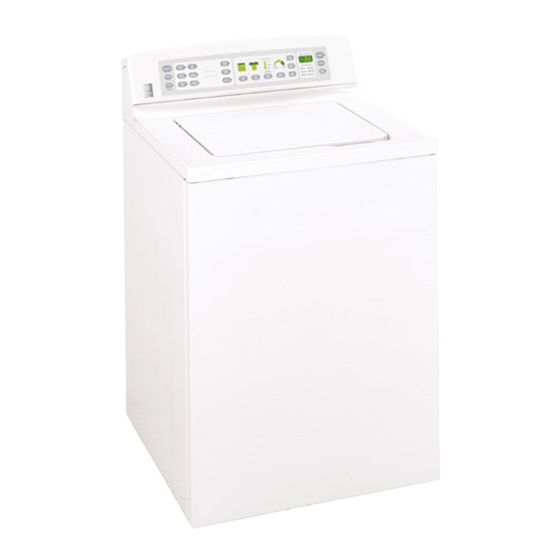
- Page 1 GE Consumer Home Services Training TECHNICAL SERVICE GUIDE Profile Stainless Steel Washer MODEL SERIES: WPRB9250 WPRB9220 PUB # 31-9095 10/02...
- Page 2 If grounding wires, screws, straps, clips, nuts, or washers used to complete a path to ground are removed for service, they must be returned to their original position and properly fastened. GE Consumer Home Services Training Technical Service Guide Copyright © 2002 All rights reserved.
-
Page 3: Table Of Contents
Table of Contents Accelerometer ......................... 30 Agitator ..........................19 Automatic Temperature Control (ATC) ................24 Choke ..........................27 Component Locator Views ....................15 Control Clothes Care Cycles ..................... 5 Control EMI Filter ......................27 Control Features ....................... 4 Control One Touch Selections ..................9 Control Panel ........................ -
Page 4: Nomenclature
Nomenclature W H S B 9 0 0 0 B 0 W W GE Washer Back Splash Color Feature Pack Body Color Common Brand Features Exceptions: H = Energy Star P = Profile™ Engr. Revision N = Special Model Year... -
Page 5: Warranty
Any part of the washer which fails due to a defect in materials or workmanship. During this full From the date of the one-year warranty, GE will also provide, free of charge, all labor and in-home service to replace the original purchase defective part. -
Page 6: Control Features
Control Features WPRB9250 WPRB9220 – 4 –... - Page 7 START ■ After you have selected a new cycle, press once to start the cycle. ■ Press twice to select the last cycle used and start the washer. ■ If the washer is running, press once to pause the cycle; press again to continue the cycle.
- Page 8 SOIL LEVEL The SOIL LEVEL setting determines the amount of agitation time. The highest SOIL LEVEL is the Stain Wash cycle, which adds a 30 minute soak and agitation at the beginning of the selected wash cycle. DRAIN & SPIN You can drain and spin any cycle at any time.
-
Page 9: Control Quick Start Selections
Control Quick Start Selections (Model 9250) Add detergent. Add diluted fabric softener (on models with a fabric softener dispenser). Loosely load clothes no higher than the top row of holes in the washer basket. The water level should just cover the clothes. Select one of the three wash methods: ■... - Page 10 Control Quick Start Selections (Model 9220) Add detergent. Add diluted fabric softener (on models with a fabric softener dispenser). Loosely load clothes no higher than the top row of holes in the washer basket. The water level should just cover the clothes. Select the wash cycle and other wash options.
-
Page 11: Control One Touch Selections
Control One Touch Selections (Model 9250) WASH CYCLES The Wash Cycles are optimized according to load type. The chart below will help you match the wash cycle setting with your clothing. Cycle Wash Speed Description WHITES Fast For heavy to lightly soiled white cottons, household linens, work and play clothes. -
Page 12: Cycle Options
Control One Touch Selections (Model 9220) Cycle Wash Speed Description WHITES Fast For heavy to lightly soiled white cottons, household linens, work and play clothes. COLORS Fast For heavy to lightly soiled colorfast cottons, household linens, work and WARM play clothes. COLORS Medium For non-colorfast cottons and blends, and items that are labeled cold... -
Page 13: Cycle Status
Cycle Status Cycle Status Indicators On some models, cycle status indicator lights show what part of the cycle the washer is in. On models without indicator lights, the cycle status will show in the display. Flood Protection The Profile model is equipped with a flood protection feature. If the low level pressure switch is opened while the washer is in idle mode, the electronic control will activate the drain pump to extract any water in the tub. -
Page 14: Cycle Charts
Cycle Charts l l i s t i c i l l l a l l a t i n c i t l l a l l a l l a l l a l l a l l a l l a l l a l l a... - Page 15 t i n l a i t i n l a i t i n l a i t i n l a i t i n l a i l i o l i o l i o l i o t i t t i n l a i...
- Page 16 * * l t i n l a i t i n l a i – 14 –...
-
Page 17: Component Locator Views
Component Locator Views Control EMI Filter Control EMI Filter Water Valve Water Valve Electronic Control Board Electronic Control Board Water Level Switch Water Level Switch Speed Sensor Rod and Spring Assembly Leg and Platform Accelerometer Assembly Inverter Transmission Motor (Behind Motor) Choke Belt Drain Pump... -
Page 18: Control Panel
Washer Components Leveling Legs The front legs are a screw type and are adjusted by turning the legs clockwise to decrease leg extension and counterclockwise to increase leg extension. The rear legs should be adjusted after the front of the machine is level from side to side. To adjust the rear legs, tilt the washer forward (pivot on front legs) about 4 to 6 inches. -
Page 19: Cover/Lid Assembly
Front Panel The front panel is a removable, galvanized sheet Align Putty Knife metal section. The front panel is fastened at the To Groove In Lid top by 2 metal spring clips, and at the bottom by 2 metal tabs which protrude from the base of the unit into slots in the panel bottom. -
Page 20: Drain Pump
Drain Pump Warning: • The pump may not be grounded. Unplug the unit before servicing to avoid electric shock. • The pump may begin operation without any advanced notice. • This model is equipped with flood protection. If the low pressure switch opens while the washer is in idle mode, the electronic control board will activate the drain pump. -
Page 21: Agitator
Agitator The agitator is a dual-action, 2-piece, ratcheting type which sets on an air bell coupling. Remove the agitator by grasping the bottom and sharply pulling up (use agitator strap WX5X1326). To align the agitator for reassembly, match the grooves in the air bell to the grooves inside the agitator. -
Page 22: Suspension
3. Remove the tub cover by lifting the 8 tabs. 4. Remove the agitator. Use agitator strap (PN WX5X1326). 5. Remove the 7/16-in. hex head bolt and air bell coupling from the transmission spline shaft. Note: Lid Switch • The 1-11/16 in. hub nut is Stainless Steel and has been torqued to 150 ft. -
Page 23: Transmission
Transmission Note: • The tub must be removed when replacing the transmission. • Replace the tub seal (PN WH02X10032) when replacing the transmission. • The speed sensor and magnet collar must be transferred to the replacement transmission. Squeeze To remove the transmission: Belt 1. -
Page 24: Lid Switch
Tub With Motor and Transmission 3 Locking Tabs 3 Locking Tabs Note: The motor can be replaced without removing the tub. Refer to the Motor section. The tub must be removed when replacing the transmission. Left To remove the tub with motor and transmission: Handed Thread 1. -
Page 25: Lid Lock
To remove the lid switch: Lid Switch Latch 1. Remove the front panel (see Front Panel). Lid Switch Lid Switch 2. Reach under the lid assembly and locate the lid switch. Squeeze the lid switch latch in to release it while gently pushing the switch upward, then guide the lid switch through the opening. -
Page 26: Automatic Temperature Control (Atc)
To remove the lid lock: 1. Place the control panel in the service position (see Control Panel). 2. Disconnect the lid lock harness connector. 3. Remove the front panel (see Front Panel). 2 Lock Clips Lock Connector 4. Remove 2 screws securing the lid lock to the top panel. -
Page 27: Water Level (Load Size) Diagnostics
Water Level Switch Note: Also refer to Water Level (Load Size) Diagnostic. The water level switch has two switches in one housing and is located inside the control panel. The water level switch is connected by a hose to an air reservoir near the bottom of the outer 3 2 1 tub. -
Page 28: Electronic Control Board
Note: Before disconnecting hose from water level switch, be sure water level in machine is below bottom of wash basket. After reconnecting hose, put machine in spin for at least 1 minute before checking operation of switch. Remove Screw To remove water level switch: and Disconnect Wires 1. -
Page 29: Choke
To remove the electronic control board: Caution: • When replacing the control panel, remove the protective coating from the overlay prior to power- up to prevent electrostatic discharge (ESD) from damaging the new board. • To prevent electrostatic discharge, ground yourself to the washer cabinet or use an ESD wristband. -
Page 30: Motor
Motor WARNING: • The motor is not grounded. Unplug the unit before servicing to avoid electric shock. • Motor temperature may reach 176 °F. Use care to avoid severe burns. Note: • The motor is mounted on 4 ceramic insulators that insulate the motor from cabinet ground. •... -
Page 31: Inverter
Inverter The inverter converts line-in, single-phase, 60 Hz, 120 VAC into 3-phase, varying frequency, 230 VAC. The inverter controls motor speed, torque, and direction. It also provides motor over- current and thermal overload protection. Motor speed is regulated by Pulse Width Modulation (PWM). -
Page 32: Accelerometer
board. To test the speed sensor: 1. Place the unit in service mode and index to the Spin Fast Test. 2. Press the START pad and monitor the DSSD. An rpm displayed on the DSSD indicates an operating speed sensor. No rpm displayed on the DSSD indicates a faulty speed sensor or faulty wiring. - Page 33 changes, this indicates a good accelerometer. No display change indicates a faulty accelerometer. To replace the accelerometer: CAUTION: • The accelerometer is prone to damage if exposed to electrostatic discharge. Do not splice the wiring of a new accelerometer to the wiring of the old accelerometer. •...
-
Page 34: Motor Tachogenerator Test
Place tape at 6 in. increments. 9. Starting at the end of the section taped in step 8, tape the new accelerometer wiring harness on the washer wiring harness. Tape the 2 harnesses together for a distance of 4 inches. 10. - Page 35 Notes – 33 –...
-
Page 36: Service Mode
Service Mode Service Mode Service Mode enables individual machine functions to be selected and performed apart from the unit’s normal operation. Service Mode also allows error codes to be displayed. To enter Service Mode: 1. Turn the unit off at the POWER pad. 2. - Page 37 To index to the next function within Service Mode, press the CUSTOM 2 pad. To index back to the previous function, press the CUSTOM 1 pad. The table below describes the Service Mode functions. A Service Mode in flowchart and a detailed definition of each function can be found on the following pages.
- Page 38 Note: Press CUSTOM 2 to index to next function. Press CUSTOM 1 to index to previous function. To enter service mode: 1. Turn power off. 2. Remove power from unit. 3. Restore power to unit and within 30 seconds of power-up, simultaneously press and hold POWER and START buttons for 3 seconds.
- Page 39 Model Display Test: Displays the model type (S r or Jr) on the Digital Seven Segment Display (DSSD) upon entry. The washer will display the model and the model selector group number on the DSSD when the START pad is pressed and held during this test. Software Version Number Test Upon entering this test, the 3-digit software version number will be displayed on the DSSD.
- Page 40 Cold Water Test: Upon entering this test, the cold water valve will open and cld will be displayed on the DSSD. Opens the cold water valve and displays cld on the DSSD upon entering. The washer shall close the cold water valve as the Cold Water Test is exited.
- Page 41 Agitate Slow Test: Upon entering this test, A S will be displayed on the DSSD and the washer will begin to agitate at 30 strokes per minute. The washer shall stop agitation as the test is exited. Agitate Fast Test: Upon entering this test, A F will be displayed on the DSSD and the washer will begin to agitate at 155 strokes per minute.
-
Page 42: Error Codes
Error Codes Error Codes Refer to the steps below to check error codes. Refer to the Error Codes Table for a listing and description of all error codes and the procedure to correct the error. To check error codes: 1. Enter Service Mode. 2. - Page 43 Error Codes Table Note: VSD = Inverter – 41 –...
-
Page 44: Troubleshooting Guide
Troubleshooting Guide PERFECTEMP PLUS Possible Causes What To Do PerfecTemp Plus wash The washer is in a cold rinse cycle • This is normal. The PerfecTemp Plus feature is designed temperature is incorrect not to activate during a cold rinse cycle to improve the energy efficiency of your washer. - Page 45 PERFORMANCE (cont.) Possible Causes What To Do Pilling • While this is not caused by the washer, you can slow the Result of normal wear on poly-cotton blends and pilling process by washing garments inside out. fuzzy fabrics Snags, holes, tears, rips •...
- Page 46 WATER Possible Causes What To Do Too many suds • Switch to a lower sudsing detergent brand and follow Type of detergent instructions on package. • Try less detergent. Very soft water • Measure your detergent carefully. Use less soap if you Too much detergent have soft water, a smaller load or a lightly soiled load.
- Page 47 NOISE Possible Causes What To Do Washer is noisy • To level the front of the washer, adjust the front leveling Washer is uneven legs by rotating the individual leg in the proper direction for up or down. To level back of washer, lift back of machine 4″...
- Page 48 t i n o l f y t l . y r o l f . t n y t l d i l c t i d i l c t i y t l d i l c t i i l c c t i .
-
Page 49: Schematic
Schematic – 47 –...
Need help?
Do you have a question about the WPRB9250 and is the answer not in the manual?
Questions and answers