
Related Manuals for iPECS ES-3052G

Summary of Contents for iPECS ES-3052G
-
Page 1: User Manual
ES-3052G / ES-3052GP UIDE User Manual iPECS is an Ericsson-LG Brand Please read this manual carefully before operating your set. Retain it for future reference. - Page 2 ANUAL ES-3052 Series ES-3052G M 52-P GE S ANAGED WITCH Layer 2 Managed Switch with 48 10/100/1000BASE-T (RJ-45) Ports, and 4 Gigabit SFP Ports ES-3052GP M 52-P GE P ANAGED WITCH Layer 2 Managed Switch with 48 10/100/1000BASE-T (RJ-45) PoE Ports,...
-
Page 3: About This Guide
BOUT UIDE ES-3052 Series This guide gives specific information on how to operate and use the URPOSE management functions of the switch. The guide is intended for use by network administrators who are UDIENCE responsible for operating and maintaining network equipment; consequently, it assumes a basic working knowledge of general switch functions, the Internet Protocol (IP), and Simple Network Management Protocol (SNMP). - Page 4 BOUT UIDE ES-3052 Series This section summarizes the changes in each revision of this guide. EVISION ISTORY 2013 R PRIL EVISION This is the first version of this guide. This guide is valid for software release v1.2.16.0. – 4 –...
-
Page 5: Table Of Contents
ONTENTS ES-3052 Series BOUT UIDE ONTENTS IGURES ABLES ECTION ETTING TARTED NTRODUCTION Key Features Description of Software Features System Defaults NITIAL WITCH ONFIGURATION Connecting to the Switch Configuration Options Required Connections Remote Connections Basic Configuration Console Connection Setting Passwords Setting an IP Address Downloading a Configuration File Referenced by a DHCP Server Enabling SNMP Management Access Managing System Files... -
Page 6: Contents
ONTENTS ES-3052 Series Navigating the Web Browser Interface Home Page Configuration Options Panel Display Showing Status Information Main Menu ASIC ANAGEMENT ASKS Displaying System Information Displaying Switch Hardware/Software Versions Configuring Support for Jumbo Frames Displaying Bridge Extension Capabilities Managing System Files Copying Files via FTP/TFTP or HTTP Saving the Running Configuration to a Local File Setting The Start-Up File... - Page 7 ONTENTS ES-3052 Series Performing Cable Diagnostics Trunk Configuration Configuring a Static Trunk Configuring a Dynamic Trunk Displaying LACP Port Counters Displaying LACP Settings and Status for the Local Side Displaying LACP Settings and Status for the Remote Side Configuring Trunk Mirroring Saving Power Traffic Segmentation Enabling Traffic Segmentation...
- Page 8 ONTENTS ES-3052 Series Configuring Global Settings for STA Displaying Global Settings for STA Configuring Interface Settings for STA Displaying Interface Settings for STA Configuring Multiple Spanning Trees Configuring Interface Settings for MSTP ONGESTION ONTROL Rate Limiting Storm Control Automatic Traffic Control Setting the ATC Timers Configuring ATC Thresholds and Responses 10 C...
- Page 9 ONTENTS ES-3052 Series Configuring AAA Authorization Configuring User Accounts Web Authentication Configuring Global Settings for Web Authentication Configuring Interface Settings for Web Authentication Network Access (MAC Address Authentication) Configuring Global Settings for Network Access Configuring Network Access for Ports Configuring Port Link Detection Configuring a MAC Address Filter Displaying Secure MAC Address Information Configuring HTTPS...
- Page 10 ONTENTS ES-3052 Series Configuring 802.1X Port Authentication Configuring 802.1X Global Settings Configuring Port Authenticator Settings for 802.1X Configuring Port Supplicant Settings for 802.1X Displaying 802.1X Statistics IP Source Guard Configuring Ports for IP Source Guard Configuring Static Bindings for IP Source Guard Displaying Information for Dynamic IP Source Guard Bindings DHCP Snooping DHCP Snooping Configuration...
- Page 11 ONTENTS ES-3052 Series Setting Community Access Strings Configuring Local SNMPv3 Users Configuring Remote SNMPv3 Users Specifying Notification Managers Remote Monitoring Configuring RMON Alarms Configuring RMON Events Configuring RMON History Samples Configuring RMON Statistical Samples Switch Clustering Configuring General Settings for Clusters Cluster Member Configuration Managing Cluster Members Setting A Time Range...
-
Page 12: Console Connection
ONTENTS ES-3052 Series Layer 2 IGMP (Snooping and Query) Configuring IGMP Snooping and Query Parameters Specifying Static Interfaces for a Multicast Router Assigning Interfaces to Multicast Services Setting IGMP Snooping Status per Interface Displaying Multicast Groups Discovered by IGMP Snooping Filtering and Throttling IGMP Groups Enabling IGMP Filtering and Throttling Configuring IGMP Filter Profiles... - Page 13 ONTENTS ES-3052 Series CLI Command Groups 19 G ENERAL OMMANDS prompt reload (Global Configuration) enable quit show history configure disable reload (Privileged Exec) show reload exit 20 S YSTEM ANAGEMENT OMMANDS Device Designation hostname System Status show access-list tcam-utilization show memory show process cpu show running-config show startup-config...
- Page 14 ONTENTS ES-3052 Series Line line databits exec-timeout login parity password password-thresh silent-time speed stopbits timeout login response disconnect show line Event Logging logging facility logging history logging host logging on logging trap clear log show log show logging SMTP Alerts logging sendmail logging sendmail host logging sendmail level...
- Page 15 ONTENTS ES-3052 Series clock timezone clock timezone-predefined calendar set show calendar Time Range time-range absolute periodic show time-range Switch Clustering cluster cluster commander cluster ip-pool cluster member rcommand show cluster show cluster members show cluster candidates 21 SNMP C OMMANDS snmp-server snmp-server community snmp-server contact...
- Page 16 ONTENTS ES-3052 Series show nlm oper-status show snmp notify-filter 22 R EMOTE ONITORING OMMANDS rmon alarm rmon event rmon collection history rmon collection rmon1 show rmon alarms show rmon events show rmon history show rmon statistics 23 A UTHENTICATION OMMANDS User Accounts enable password username...
- Page 17 ONTENTS ES-3052 Series aaa authorization exec aaa group server server accounting dot1x accounting exec authorization exec show accounting Web Server ip http port ip http server ip http secure-server ip http secure-port Telnet Server ip telnet max-sessions ip telnet port ip telnet server show ip telnet Secure Shell...
- Page 18 ONTENTS ES-3052 Series dot1x port-control dot1x re-authentication dot1x timeout quiet-period dot1x timeout re-authperiod dot1x timeout supp-timeout dot1x timeout tx-period dot1x re-authenticate dot1x identity profile dot1x max-start dot1x pae supplicant dot1x timeout auth-period dot1x timeout held-period dot1x timeout start-period show dot1x Management IP Filter management show management...
- Page 19 ONTENTS ES-3052 Series clear network-access show network-access show network-access mac-address-table show network-access mac-filter Web Authentication web-auth login-attempts web-auth quiet-period web-auth session-timeout web-auth system-auth-control web-auth web-auth re-authenticate (Port) web-auth re-authenticate (IP) show web-auth show web-auth interface show web-auth summary DHCP Snooping ip dhcp snooping ip dhcp snooping database flash ip dhcp snooping information option...
- Page 20 ONTENTS ES-3052 Series ip arp inspection validate ip arp inspection vlan ip arp inspection limit ip arp inspection trust show ip arp inspection configuration show ip arp inspection interface show ip arp inspection log show ip arp inspection statistics show ip arp inspection vlan Denial of Service Protection flow tcp-udp-port-zero 25 A...
- Page 21 ONTENTS ES-3052 Series ACL Information show access-group show access-list 26 I NTERFACE OMMANDS interface alias capabilities description flowcontrol giga-phy-mode negotiation shutdown speed-duplex switchport packet-rate clear counters show interfaces counters show interfaces status show interfaces switchport show interfaces transceiver test cable-diagnostics show cable-diagnostics power-save show power-save...
- Page 22 ONTENTS ES-3052 Series power inline time-range show power inline status show power inline time-range show power poe 29 P IRRORING OMMANDS Local Port Mirroring Commands port monitor show port monitor RSPAN Mirroring Commands rspan source rspan destination rspan remote vlan no rspan session show rspan 30 R...
- Page 23 ONTENTS ES-3052 Series 32 A DDRESS ABLE OMMANDS mac-address-table aging-time mac-address-table static clear mac-address-table dynamic show mac-address-table show mac-address-table aging-time show mac-address-table count 33 S PANNING OMMANDS spanning-tree spanning-tree cisco-prestandard spanning-tree forward-time spanning-tree hello-time spanning-tree max-age spanning-tree mode spanning-tree pathcost method spanning-tree priority spanning-tree mst configuration spanning-tree transmission-limit...
- Page 24 ONTENTS ES-3052 Series spanning-tree loopback-detection release spanning-tree protocol-migration show spanning-tree show spanning-tree mst configuration 34 VLAN C OMMANDS GVRP and Bridge Extension Commands bridge-ext gvrp garp timer switchport forbidden vlan switchport gvrp show bridge-ext show garp timer show gvrp configuration Editing VLAN Groups vlan database vlan...
- Page 25 ONTENTS ES-3052 Series protocol-vlan protocol-group (Configuring Interfaces) show protocol-vlan protocol-group show interfaces protocol-vlan protocol-group Configuring IP Subnet VLANs subnet-vlan show subnet-vlan Configuring MAC Based VLANs mac-vlan show mac-vlan Configuring Voice VLANs voice vlan voice vlan aging voice vlan mac-address switchport voice vlan switchport voice vlan priority switchport voice vlan rule switchport voice vlan security...
- Page 26 ONTENTS ES-3052 Series description match rename policy-map class police flow police srtcm-color police trtcm-color set cos set ip dscp set phb service-policy show class-map show policy-map show policy-map interface 37 M ULTICAST ILTERING OMMANDS IGMP Snooping ip igmp snooping ip igmp snooping proxy-reporting ip igmp snooping querier ip igmp snooping router-alert-option-check ip igmp snooping router-port-expire-time...
- Page 27 ONTENTS ES-3052 Series ip igmp snooping vlan static show ip igmp snooping show ip igmp snooping group Static Multicast Routing ip igmp snooping vlan mrouter show ip igmp snooping mrouter IGMP Filtering and Throttling ip igmp filter (Global Configuration) ip igmp profile permit, deny range ip igmp filter (Interface Configuration)
- Page 28 ONTENTS ES-3052 Series lldp basic-tlv system-name lldp dot1-tlv proto-ident lldp dot1-tlv proto-vid lldp dot1-tlv pvid lldp dot1-tlv vlan-name lldp dot3-tlv link-agg lldp dot3-tlv mac-phy lldp dot3-tlv max-frame lldp dot3-tlv poe lldp med-location civic-addr lldp med-notification lldp med-tlv ext-poe lldp med-tlv inventory lldp med-tlv location lldp med-tlv med-cap lldp med-tlv network-policy...
- Page 29 ONTENTS ES-3052 Series ip dhcp restart client ipv6 dhcp restart client vlan show ip dhcp client-identifier show ipv6 dhcp duid show ipv6 dhcp vlan 41 IP I NTERFACE OMMANDS IPv4 Interface Basic IPv4 Configuration ip address ip default-gateway show ip default-gateway show ip interface traceroute ping...
- Page 30 ONTENTS ES-3052 Series 1011 ECTION PPENDICES 1013 OFTWARE PECIFICATIONS Software Features 1013 Management Features 1014 Standards 1015 Management Information Bases 1015 1017 ROUBLESHOOTING Problems Accessing the Management Interface 1017 Using System Logs 1018 1019 ICENSE NFORMATION The GNU General Public License 1019 1023 LOSSARY...
- Page 31 IGURES ES-3052 Series Figure 1: Home Page Figure 2: Front Panel Indicators Figure 3: Displaying Configuration Settings or Status Information Figure 4: System Information Figure 5: General Switch Information Figure 6: Configuring Support for Jumbo Frames Figure 7: Displaying Bridge Extension Configuration Figure 8: Copy Firmware Figure 9: Saving the Running Configuration Figure 10: Setting Start-Up Files...
- Page 32 IGURES ES-3052 Series Figure 32: Configuring Remote Port Mirroring Figure 33: Configuring Remote Port Mirroring (Source) Figure 34: Configuring Remote Port Mirroring (Intermediate) Figure 35: Configuring Remote Port Mirroring (Destination) Figure 36: Showing Port Statistics (Table) Figure 37: Showing Port Statistics (Chart) Figure 38: Performing Cable Tests Figure 39: Configuring Static Trunks Figure 40: Creating Static Trunks...
- Page 33 IGURES ES-3052 Series Figure 68: Configuring GVRP for an Interface Figure 69: Showing Dynamic VLANs Registered on the Switch Figure 70: Showing the Members of a Dynamic VLAN Figure 71: QinQ Operational Concept Figure 72: Enabling QinQ Tunneling Figure 73: Adding an Interface to a QinQ Tunnel Figure 74: Configuring Protocol VLANs Figure 75: Displaying Protocol VLANs Figure 76: Assigning Interfaces to Protocol VLANs...
- Page 34 IGURES ES-3052 Series Figure 104: Adding a VLAN to an MST Instance Figure 105: Displaying Members of an MST Instance Figure 106: Configuring MSTP Interface Settings Figure 107: Displaying MSTP Interface Settings Figure 108: Configuring Rate Limits Figure 109: Configuring Storm Control Figure 110: Storm Control by Limiting the Traffic Rate Figure 111: Storm Control by Shutting Down a Port Figure 112: Configuring ATC Timers...
- Page 35 IGURES ES-3052 Series Figure 140: Configuring Remote Authentication Server (RADIUS) Figure 141: Configuring Remote Authentication Server (TACACS+) Figure 142: Configuring AAA Server Groups Figure 143: Showing AAA Server Groups Figure 144: Configuring Global Settings for AAA Accounting Figure 145: Configuring AAA Accounting Methods Figure 146: Showing AAA Accounting Methods Figure 147: Configuring AAA Accounting Service for 802.1X Service Figure 148: Configuring AAA Accounting Service for Exec Service...
- Page 36 IGURES ES-3052 Series Figure 176: Configuring an Extended IPv4 ACL Figure 177: Configuring a Standard IPv6 ACL Figure 178: Configuring an Extended IPv6 ACL Figure 179: Configuring a MAC ACL Figure 180: Configuring a ARP ACL Figure 181: Binding a Port to an ACL Figure 182: Configuring Global Settings for ARP Inspection Figure 183: Configuring VLAN Settings for ARP Inspection Figure 184: Configuring Interface Settings for ARP Inspection...
- Page 37 IGURES ES-3052 Series Figure 212: Configuring LLDP Timing Attributes Figure 213: Configuring LLDP Interface Attributes Figure 214: Configuring the Civic Address for an LLDP Interface Figure 215: Showing the Civic Address for an LLDP Interface Figure 216: Displaying Local Device Information for LLDP (General) Figure 217: Displaying Local Device Information for LLDP (Port) Figure 218: Displaying Remote Device Information for LLDP (Port) Figure 219: Displaying Remote Device Information for LLDP (Port Details)
- Page 38 IGURES ES-3052 Series Figure 248: Configuring an RMON History Sample Figure 249: Showing Configured RMON History Samples Figure 250: Showing Collected RMON History Samples Figure 251: Configuring an RMON Statistical Sample Figure 252: Showing Configured RMON Statistical Samples Figure 253: Showing Collected RMON Statistical Samples Figure 254: Configuring a Switch Cluster Figure 255: Configuring a Cluster Members Figure 256: Showing Cluster Members...
- Page 39 IGURES ES-3052 Series Figure 284: Multicast Filtering Concept Figure 285: Configuring General Settings for IGMP Snooping Figure 286: Configuring a Static Interface for a Multicast Router Figure 287: Showing Static Interfaces Attached a Multicast Router Figure 288: Showing Current Interfaces Attached a Multicast Router Figure 289: Assigning an Interface to a Multicast Service Figure 290: Showing Static Interfaces Assigned to a Multicast Service Figure 291: Showing Current Interfaces Assigned to a Multicast Service...
- Page 40 IGURES ES-3052 Series – 40 –...
- Page 41 ABLES ES-3052 Series Table 1: Key Features Table 2: System Defaults Table 3: Options 60, 66 and 67 Statements Table 4: Options 55 and 124 Statements Table 5: Web Page Configuration Buttons Table 6: Switch Main Menu Table 7: Port Statistics Table 8: LACP Port Counters Table 9: LACP Internal Configuration Information Table 10: LACP Internal Configuration Information...
- Page 42 ABLES ES-3052 Series Table 32: Supported Notification Messages Table 33: Address Resolution Protocol Table 34: Show IPv6 Neighbors - display description Table 35: Show IPv6 Statistics - display description Table 36: General Command Modes Table 37: Configuration Command Modes Table 38: Keystroke Commands Table 39: Command Group Index Table 40: General Commands Table 41: System Management Commands...
- Page 43 ABLES ES-3052 Series Table 68: AAA Commands Table 69: Web Server Commands Table 70: HTTPS System Support Table 71: Telnet Server Commands Table 72: Secure Shell Commands Table 73: show ssh - display description Table 74: 802.1X Port Authentication Commands Table 75: Management IP Filter Commands Table 76: General Security Commands Table 77: Management IP Filter Commands...
- Page 44 ABLES ES-3052 Series Table 104: RSPAN Commands Table 105: Rate Limit Commands Table 106: ATC Commands Table 107: Address Table Commands Table 108: Spanning Tree Commands Table 109: Recommended STA Path Cost Range Table 110: Default STA Path Costs Table 111: VLAN Commands Table 112: GVRP and Bridge Extension Commands Table 113: Commands for Editing VLAN Groups Table 114: Commands for Configuring VLAN Interfaces...
- Page 45 ABLES ES-3052 Series Table 140: show dns cache - display description Table 141: show hosts - display description Table 142: DHCP Commands Table 143: DHCP Client Commands Table 144: IP Interface Commands Table 145: IPv4 Interface Commands Table 146: Basic IP Configuration Commands Table 147: Address Resolution Protocol Commands Table 148: IPv6 Configuration Commands Table 149: show ipv6 interface - display description...
- Page 46 ABLES ES-3052 Series – 46 –...
-
Page 47: Getting Started
ECTION ES-3052 Series ETTING TARTED This section provides an overview of the switch, and introduces some basic concepts about network switches. It also describes the basic settings required to access the management interface. This section includes these chapters: "Introduction" on page 49 ◆... - Page 48 | Getting Started ECTION ES-3052 Series – 48 –...
-
Page 49: Key Features
NTRODUCTION ES-3052 Series This switch provides a broad range of features for Layer 2 switching. It includes a management agent that allows you to configure the features listed in this manual. The default configuration can be used for most of the features provided by this switch. -
Page 50: Description Of Software Features
| Introduction HAPTER Description of Software Features ES-3052 Series Table 1: Key Features (Continued) Feature Description Spanning Tree Algorithm Supports standard STP, Rapid Spanning Tree Protocol (RSTP), and Multiple Spanning Trees (MSTP) Virtual LANs Up to 256 using IEEE 802.1Q, port-based, protocol-based, private VLANs, voice VLANs, and QinQ tunnel Traffic Prioritization Default port priority, traffic class map, queue scheduling, IP... - Page 51 | Introduction HAPTER Description of Software Features ES-3052 Series ACLs provide packet filtering for IP frames (based on address, protocol, CCESS ONTROL TCP/UDP port number or TCP control code) or any frames (based on MAC ISTS address or Ethernet type). ACLs can be used to improve performance by blocking unnecessary network traffic or to implement security controls by restricting access to specific network resources or protocols.
- Page 52 | Introduction HAPTER Description of Software Features ES-3052 Series The switch supports IEEE 802.1D transparent bridging. The address table IEEE 802.1D B RIDGE facilitates data switching by learning addresses, and then filtering or forwarding traffic based on this information. The address table supports up to 16K addresses.
- Page 53 | Introduction HAPTER Description of Software Features ES-3052 Series The switch supports up to 256 VLANs. A Virtual LAN is a collection of IRTUAL network nodes that share the same collision domain regardless of their physical location or connection point in the network. The switch supports tagged VLANs based on the IEEE 802.1Q standard.
-
Page 54: System Defaults
| Introduction HAPTER System Defaults ES-3052 Series Differentiated Services (DiffServ) provides policy-based management UALITY OF ERVICE mechanisms used for prioritizing network resources to meet the requirements of specific traffic types on a per-hop basis. Each packet is classified upon entry into the network based on access lists, IP Precedence or DSCP values, or VLAN lists. - Page 55 | Introduction HAPTER System Defaults ES-3052 Series Table 2: System Defaults (Continued) Function Parameter Default Web Management HTTP Server Enabled HTTP Port Number HTTP Secure Server Disabled HTTP Secure Server Port SNMP SNMP Agent Enabled Community Strings “public” (read only) “private”...
- Page 56 | Introduction HAPTER System Defaults ES-3052 Series Table 2: System Defaults (Continued) Function Parameter Default Traffic Prioritization Ingress Port Priority Queue Mode Strict-WRR Queue Weight Queue: 0 1 2 3 Weight: 1 2 4 6 Class of Service Enabled IP Precedence Priority Disabled IP DSCP Priority Disabled...
-
Page 57: Initial Switch Configuration
NITIAL WITCH ONFIGURATION ES-3052 Series This chapter includes information on connecting to the switch and basic configuration procedures. ONNECTING TO THE WITCH The switch includes a built-in network management agent. The agent offers a variety of management options, including SNMP, RMON and a web- based interface. -
Page 58: Required Connections
| Initial Switch Configuration HAPTER Connecting to the Switch ES-3052 Series Control port access through IEEE 802.1X security or static address ◆ filtering Filter packets using Access Control Lists (ACLs) ◆ Configure up to 256 IEEE 802.1Q VLANs ◆ Enable GVRP automatic VLAN registration ◆... -
Page 59: Remote Connections
| Initial Switch Configuration HAPTER Connecting to the Switch ES-3052 Series Set flow control to none. ■ Set the emulation mode to VT100. ■ When using HyperTerminal, select Terminal keys, not Windows ■ keys. Once you have set up the terminal correctly, the console login screen will be displayed. -
Page 60: Basic Configuration
At the Password prompt, also enter “admin.” (The password characters are not displayed on the console screen.) The session is opened and the CLI displays the “ES-3052G#” prompt indicating you have access at the Privileged Exec level. If this is your first time to log into the CLI program, you should define new... - Page 61 ES-3052G(config)#username admin password 0 [password] ES-3052G(config)# * This manual covers the ES-3052G and ES-3052GP Gigabit Ethernet switches. Other than the difference in support for PoE (ES-3052GP), there are no other significant differences. Therefore nearly all of the screen display examples are based on the ES-3052G.
- Page 62 To set the IP address of the default gateway for the network to which the switch belongs, type “ip default-gateway gateway,” where “gateway” is the IP address of the default gateway. Press <Enter>. ES-3052G(config)#interface vlan 1 ES-3052G(config-if)#ip address 192.168.1.5 255.255.255.0 ES-3052G(config-if)#exit ES-3052G(config)#ip default-gateway 192.168.1.254 SSIGNING AN DDRESS This section describes how to configure a “link local”...
- Page 63 Type “ipv6 address” followed by up to 8 colon-separated 16-bit hexadecimal values for the ipv6-address similar to that shown in the example, followed by the “link-local” command parameter. Then press <Enter>. ES-3052G(config)#interface vlan 1 ES-3052G(config-if)#ipv6 address FE80::260:3EFF:FE11:6700 link-local ES-3052G(config-if)#ipv6 enable ES-3052G(config-if)#end ES-3052G#show ipv6 interface VLAN 1 is up IPv6 is enabled.
- Page 64 To set the IP address of the IPv6 default gateway for the network to which the switch belongs, type “ipv6 default-gateway gateway,” where “gateway” is the IPv6 address of the default gateway. Press <Enter>. ES-3052G(config)#interface vlan 1 ES-3052G(config-if)#ipv6 address 2001:DB8:2222:7272::/64 ES-3052G(config-if)#exit...
- Page 65 Wait a few minutes, and then check the IP configuration settings by typing the “show ip interface” command. Press <Enter>. Then save your configuration changes by typing “copy running-config startup-config.” Enter the startup file name and press <Enter>. ES-3052G(config)#interface vlan 1 ES-3052G(config-if)#ip address dhcp ES-3052G(config-if)#end ES-3052G#show ip interface...
- Page 66 To generate an IPv6 link local address for the switch, complete the following steps: From the Global Configuration mode prompt, type “interface vlan 1” to access the interface-configuration mode. Press <Enter>. Type “ipv6 enable” and press <Enter>. ES-3052G(config)#interface vlan 1 ES-3052G(config-if)#ipv6 enable ES-3052G(config-if)#end ES-3052G#show ipv6 interface VLAN 1 is up IPv6 is enabled.
-
Page 67: Downloading A Configuration File Referenced By Adhcp Server
| Initial Switch Configuration HAPTER Basic Configuration ES-3052 Series ES-3052G(config-if)#end ES-3052G#show ipv6 interface VLAN 1 is up IPv6 is enabled. Link-local address: FE80::212:CFFF:FE0B:4600/64 Global unicast address(es): 2005::212:CFFF:FE0B:4600, subnet is 2005:0:0:0::/64 3FFE:501:FFFF:100:212:CFFF:FE0B:4600, subnet is 3FFE:501:FFFF:100::/64 Joined group address(es): FF01::1/16 FF02::1/16 FF02::1:FF0B:4600/104 MTU is 1500 bytes. -
Page 68: Table 3: Options 60, 66 And 67 Statements
| Initial Switch Configuration HAPTER Basic Configuration ES-3052 Series To successfully transmit a bootup configuration file to the switch the DHCP daemon (using a Linux based system for this example) must be configured with the following information: Options 60, 66 and 67 statements can be added to the daemon’s ◆... -
Page 69: Enabling Snmp Management Access
| Initial Switch Configuration HAPTER Basic Configuration ES-3052 Series subnet 192.168.255.0 netmask 255.255.255.0 { range 192.168.255.160 192.168.255.200; option routers 192.168.255.101; option tftp-server-name "192.168.255.100";#Default Option 66 option bootfile-name "bootfile"; #Default Option 67 class "Option66,67_1" { #DHCP Option 60 Vendor class match if option vendor-class-identifier = "iPECS_ES-3050_Op.bix"; #option 43 option vendor-class-information code 43 = encapsulate dynamicProvision;... - Page 70 To remove an existing string, simply type “no snmp-server community string,” where “string” is the community access string to remove. Press <Enter>. ES-3052G(config)#snmp-server community admin rw ES-3052G(config)#snmp-server community private ES-3052G(config)# If you do not intend to support access to SNMP version 1 and 2c clients, we recommend that you delete both of the default community strings.
-
Page 71: Managing System Files
ES-3052G(config)#snmp-server view mib-2 1.3.6.1.2.1 included ES-3052G(config)#snmp-server view 802.1d 1.3.6.1.2.1.17 included ES-3052G(config)#snmp-server group r&d v3 auth mib-2 802.1d ES-3052G(config)#snmp-server user steve group r&d v3 auth md5 greenpeace priv des56 einstien ES-3052G(config)# For a more detailed explanation on how to configure the switch for access from SNMP v3 clients, refer to "Simple Network Management Protocol"... -
Page 72: Saving Or Restoring Configuration Settings
| Initial Switch Configuration HAPTER Managing System Files ES-3052 Series “startup1.cfg” that contains system settings for switch initialization, including information about the unit identifier, and MAC address for the switch. The configuration settings from the factory defaults configuration file are copied to this file, which is then used to boot the switch. - Page 73 To save the current configuration settings, enter the following command: From the Privileged Exec mode prompt, type “copy running-config startup-config” and press <Enter>. Enter the name of the start-up file. Press <Enter>. ES-3052G#copy running-config startup-config Startup configuration file name []: startup \Write to FLASH Programming. \Write to FLASH finish.
- Page 74 | Initial Switch Configuration HAPTER Managing System Files ES-3052 Series – 74 –...
-
Page 75: Web Configuration
ECTION ES-3052 Series ONFIGURATION This section describes the basic switch features, along with a detailed description of how to configure each feature via a web browser. This section includes these chapters: "Using the Web Interface" on page 77 ◆ "Basic Management Tasks" on page 95 ◆... - Page 76 | Web Configuration ECTION ES-3052 Series – 76 –...
-
Page 77: Using The Web Interface
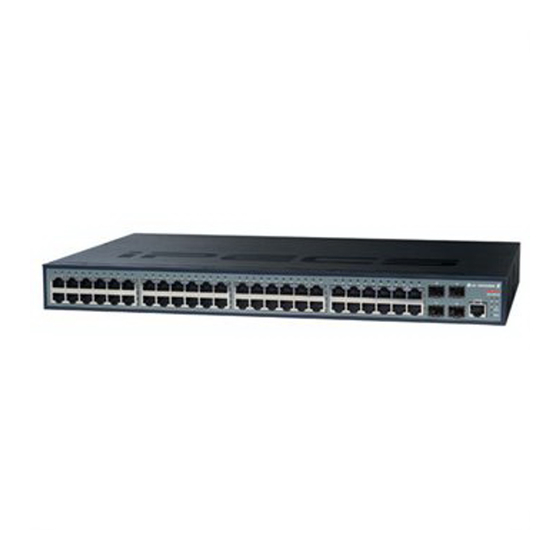
SING THE NTERFACE ES-3052 Series This switch provides an embedded HTTP web agent. Using a web browser you can configure the switch and view statistics to monitor network activity. The web agent can be accessed by any computer on the network using a standard web browser (Internet Explorer 5.0 or above, or Mozilla Firefox 2.0.0.0 or above). - Page 78 Other than the difference in support for PoE (ES-3052GP), there are no other significant differences. Therefore nearly all of the screen display examples are based on the ES-3052G. The panel graphics for all of switch types are shown on the following page.
-
Page 79: Table 5: Web Page Configuration Buttons
ISPLAY set to display different information for the ports, including Active (i.e., up or down), Duplex (i.e., half or full duplex), or Flow Control (i.e., with or without flow control). Figure 2: Front Panel Indicators ES-3052G ES-3052GP – 79 –... - Page 80 | Using the Web Interface HAPTER Navigating the Web Browser Interface ES-3052 Series There are various web pages which display configuration settings or the HOWING TATUS status of specified processes. Many of these pages will not display any NFORMATION information unless the switch is properly configured, and in some cases the interface to which a command applies is up.
-
Page 81: Table 6: Switch Main Menu
| Using the Web Interface HAPTER Navigating the Web Browser Interface ES-3052 Series Using the onboard web agent, you can define system parameters, manage and control the switch, and all its ports, or monitor network conditions. The following table briefly describes the selections available from this program. Table 6: Switch Main Menu Menu Description... - Page 82 | Using the Web Interface HAPTER Navigating the Web Browser Interface ES-3052 Series Table 6: Switch Main Menu (Continued) Menu Description Page Statistics Shows Interface, Etherlike, and RMON port statistics Chart Shows Interface, Etherlike, and RMON port statistics Cable Test Performs cable diagnostics for selected port to diagnose any cable faults (short, open etc.) and report the cable length Trunk...
- Page 83 | Using the Web Interface HAPTER Navigating the Web Browser Interface ES-3052 Series Table 6: Switch Main Menu (Continued) Menu Description Page Configure Session Configures the uplink and down-link ports for a segmented group of ports VLAN Trunking Allows unknown VLAN groups to pass through the specified interface VLAN Virtual LAN...
- Page 84 | Using the Web Interface HAPTER Navigating the Web Browser Interface ES-3052 Series Table 6: Switch Main Menu (Continued) Menu Description Page MAC Address Static Configures static entries in the address table Show Displays static entries in the address table Dynamic Configure Aging Sets timeout for dynamically learned entries...
- Page 85 | Using the Web Interface HAPTER Navigating the Web Browser Interface ES-3052 Series Table 6: Switch Main Menu (Continued) Menu Description Page Auto Traffic Control Sets thresholds for broadcast and multicast storms which can be used to trigger configured rate limits or to shut down a port Configure Global Sets the time to apply the control response after traffic has exceeded the upper threshold, and the time to release the control...
- Page 86 | Using the Web Interface HAPTER Navigating the Web Browser Interface ES-3052 Series Table 6: Switch Main Menu (Continued) Menu Description Page VoIP Voice over IP Configure Global Configures auto-detection of VoIP traffic, sets the Voice VLAN, and VLAN aging time Configure OUI Maps the OUI in the source MAC address of ingress packets to the VoIP device manufacturer...
- Page 87 | Using the Web Interface HAPTER Navigating the Web Browser Interface ES-3052 Series Table 6: Switch Main Menu (Continued) Menu Description Page Show Information Shows the configured authorization methods, and the methods applied to specific interfaces User Accounts Configures user names, passwords, and access levels Show Shows authorized users Modify...
- Page 88 | Using the Web Interface HAPTER Navigating the Web Browser Interface ES-3052 Series Table 6: Switch Main Menu (Continued) Menu Description Page Add Rule Configures packet filtering based on IP or MAC addresses and other packet attributes Show Rule Shows the rules specified for an ACL Configure Interface Binds a port to the specified ACL and time range ARP Inspection...
- Page 89 | Using the Web Interface HAPTER Navigating the Web Browser Interface ES-3052 Series Table 6: Switch Main Menu (Continued) Menu Description Page Remote Configures the logging of messages to a remote logging process SMTP Sends an SMTP client message to a participating server Configure Server Configures a list of recipient SMTP servers Adds a recipient SMTP server...
- Page 90 | Using the Web Interface HAPTER Navigating the Web Browser Interface ES-3052 Series Table 6: Switch Main Menu (Continued) Menu Description Page Configure View Add View Adds an SNMP v3 view of the OID MIB Show View Shows configured SNMP v3 views Add OID Subtree Specifies a part of the subtree for the selected view Show OID Subtree...
- Page 91 | Using the Web Interface HAPTER Navigating the Web Browser Interface ES-3052 Series Table 6: Switch Main Menu (Continued) Menu Description Page Show Details History Shows sampled data for each entry in the history group Statistics Shows sampled data for each entry in the history group Cluster Configure Global Globally enables clustering for the switch;...
- Page 92 | Using the Web Interface HAPTER Navigating the Web Browser Interface ES-3052 Series Table 6: Switch Main Menu (Continued) Menu Description Page IP Service Domain Name Service General Configure Global Enables DNS lookup; defines the default domain name appended to incomplete host names Add Domain Name Defines a list of domain names that can be appended to incomplete host names...
- Page 93 | Using the Web Interface HAPTER Navigating the Web Browser Interface ES-3052 Series Table 6: Switch Main Menu (Continued) Menu Description Page Interface Configure Configures IGMP snooping per VLAN interface Show Shows IGMP snooping settings per VLAN interface Forwarding Entry Displays the current multicast groups learned through IGMP Snooping Filter...
- Page 94 | Using the Web Interface HAPTER Navigating the Web Browser Interface ES-3052 Series – 94 –...
- Page 95 ASIC ANAGEMENT ASKS ES-3052 Series This chapter describes the following topics: Displaying System Information – Provides basic system description, ◆ including contact information. Displaying Switch Hardware/Software Versions – Shows the hardware ◆ version, power status, and firmware versions Configuring Support for Jumbo Frames –...
- Page 96 System Contact – Administrator responsible for the system. System Fan – Shows the current status of all system fans. ◆ The number of fans provided: ES-3052G - 1, 3052GP - 3 NTERFACE To configure general system information: Click System, General.
- Page 97 | Basic Management Tasks HAPTER Displaying Switch Hardware/Software Versions ES-3052 Series ISPLAYING WITCH ARDWARE OFTWARE ERSIONS Use the System > Switch page to display hardware/firmware version numbers for the main board and management software, as well as the power status of the system. CLI R EFERENCES ◆...
- Page 98 | Basic Management Tasks HAPTER Configuring Support for Jumbo Frames ES-3052 Series NTERFACE To view hardware and software version information. Click System, then Switch. Figure 5: General Switch Information ONFIGURING UPPORT FOR UMBO RAMES Use the System > Capability page to configure support for jumbo frames. The switch provides more efficient throughput for large sequential data transfers by supporting jumbo frames up to 10240 bytes for Gigabit Ethernet.
- Page 99 | Basic Management Tasks HAPTER Displaying Bridge Extension Capabilities ES-3052 Series NTERFACE To configure support for jumbo frames: Click System, then Capability. Enable or disable support for jumbo frames. Click Apply. Figure 6: Configuring Support for Jumbo Frames ISPLAYING RIDGE XTENSION APABILITIES Use the System >...
- Page 100 | Basic Management Tasks HAPTER Displaying Bridge Extension Capabilities ES-3052 Series Configurable PVID Tagging – This switch allows you to override the ◆ default Port VLAN ID (PVID used in frame tags) and egress status (VLAN-Tagged or Untagged) on each port. (Refer to "VLAN Configuration"...
- Page 101 | Basic Management Tasks HAPTER Managing System Files ES-3052 Series ANAGING YSTEM ILES This section describes how to upgrade the switch operating software or configuration files, and set the system start-up files. Use the System > File (Copy) page to upload/download firmware or OPYING ILES VIA configuration settings using FTP, TFTP or HTTP.
- Page 102 | Basic Management Tasks HAPTER Managing System Files ES-3052 Series Up to two copies of the system software (i.e., the runtime firmware) can be stored in the file directory on the switch. The maximum number of user-defined configuration files is limited only by available flash memory space.
- Page 103 | Basic Management Tasks HAPTER Managing System Files ES-3052 Series Use the System > File (Copy) page to save the current configuration AVING THE UNNING settings to a local file on the switch. The configuration settings are not ONFIGURATION TO A automatically saved by the system for subsequent use when the switch is OCAL rebooted.
- Page 104 | Basic Management Tasks HAPTER Managing System Files ES-3052 Series If you replaced a file currently used for startup and want to start using the new file, reboot the system via the System > Reset menu. Use the System > File (Set Start-Up) page to specify the firmware or ETTING TART configuration file to use for system initialization.
- Page 105 | Basic Management Tasks HAPTER Managing System Files ES-3052 Series NTERFACE To show the system files: Click System, then File. Select Show from the Action list. To delete a file, mark it in the File List and click Delete. Figure 11: Displaying System Files Use the System >...
- Page 106 | Basic Management Tasks HAPTER Managing System Files ES-3052 Series exactly as indicated here). Enter the file name for other switches described in this manual exactly as shown on the web interface. The FTP connection is made with PASV mode enabled. PASV mode is ◆...
- Page 107 | Basic Management Tasks HAPTER Managing System Files ES-3052 Series ARAMETERS The following parameters are displayed in the web interface: Automatic Opcode Upgrade – Enables the switch to search for an ◆ upgraded operation code file during the switch bootup process. (Default: Disabled) Automatic Upgrade Location URL –...
- Page 108 | Basic Management Tasks HAPTER Managing System Files ES-3052 Series Examples The following examples demonstrate the URL syntax for a TFTP server at IP address 192.168.0.1 with the operation code image stored in various locations: tftp://192.168.0.1/ ■ The image file is in the TFTP root directory. tftp://192.168.0.1/switch-opcode/ ■...
- Page 109 | Basic Management Tasks HAPTER Managing System Files ES-3052 Series NTERFACE To configure automatic code upgrade: Click System, then File. Select Automatic Operation Code Upgrade from the Action list. Mark the check box to enable Automatic Opcode Upgrade. Enter the URL of the FTP or TFTP server, and the path and directory containing the operation code.
- Page 110 | Basic Management Tasks HAPTER Setting the System Clock ES-3052 Series ETTING THE YSTEM LOCK Simple Network Time Protocol (SNTP) allows the switch to set its internal clock based on periodic updates from a time server (SNTP or NTP). Maintaining an accurate time on the switch enables the system log to record meaningful dates and times for event entries.
- Page 111 | Basic Management Tasks HAPTER Setting the System Clock ES-3052 Series NTERFACE To manually set the system clock: Click System, then Time. Select Configure General from the Action list. Select Manually from the Maintain Type list. Enter the time and date in the appropriate fields. Click Apply Figure 13: Manually Setting the System Clock Use the System >...
- Page 112 | Basic Management Tasks HAPTER Setting the System Clock ES-3052 Series NTERFACE To set the polling interval for SNTP: Click System, then Time. Select Configure General from the Action list. Select SNTP from the Maintain Type list. Modify the polling interval if required. Click Apply Figure 14: Setting the Polling Interval for SNTP Use the System >...
- Page 113 | Basic Management Tasks HAPTER Setting the System Clock ES-3052 Series NTERFACE To set the SNTP time servers: Click System, then Time. Select Configure Time Server from the Action list. Enter the IP address of up to three time servers. Click Apply.
- Page 114 | Basic Management Tasks HAPTER Setting the System Clock ES-3052 Series Hours (0-13) – The number of hours before/after UTC. The ■ maximum value before UTC is 12. The maximum value after UTC is Minutes (0-59) – The number of minutes before/after UTC. ■...
- Page 115 | Basic Management Tasks HAPTER Setting the System Clock ES-3052 Series This configuration page sets the summer-time time zone relative to the ◆ currently configured time zone. To specify a time corresponding to your local time when summer time is in effect, you must indicate the number of minutes your summer-time time zone deviates from your regular time zone (that is, the offset).
- Page 116 | Basic Management Tasks HAPTER Configuring the Console Port ES-3052 Series Figure 17: Summer Time Settings ONFIGURING THE ONSOLE Use the System > Console menu to configure connection parameters for the switch’s console port. You can access the onboard configuration program by attaching a VT100 compatible device to the switch’s serial console port.
- Page 117 | Basic Management Tasks HAPTER Configuring the Console Port ES-3052 Series Data Bits – Sets the number of data bits per character that are ◆ interpreted and generated by the console port. If parity is being generated, specify 7 data bits per character. If no parity is required, specify 8 data bits per character.
- Page 118 | Basic Management Tasks HAPTER Configuring Telnet Settings ES-3052 Series Figure 18: Console Port Settings ONFIGURING ELNET ETTINGS Use the System > Telnet menu to configure parameters for accessing the CLI over a Telnet connection. You can access the onboard configuration program over the network using Telnet (i.e., a virtual terminal).
- Page 119 | Basic Management Tasks HAPTER Configuring Telnet Settings ES-3052 Series specified amount of time (set by the Silent Time parameter) before allowing the next logon attempt. (Range: 0-120; Default: 3 attempts) Silent Time – Sets the amount of time the management interface is ◆...
- Page 120 | Basic Management Tasks HAPTER Displaying CPU Utilization ES-3052 Series CPU U ISPLAYING TILIZATION Use the System > CPU Utilization page to display information on CPU utilization. CLI R EFERENCES "show process cpu" on page 540 ◆ ARAMETERS The following parameters are displayed in the web interface: Time Interval –...
- Page 121 | Basic Management Tasks HAPTER Displaying Memory Utilization ES-3052 Series ISPLAYING EMORY TILIZATION Use the System > Memory Status page to display memory utilization parameters. CLI R EFERENCES "show memory" on page 539 ◆ ARAMETERS The following parameters are displayed in the web interface: Free Size –...
- Page 122 | Basic Management Tasks HAPTER Resetting the System ES-3052 Series OMMAND SAGE ◆ This command resets the entire system. To retain all configuration information stored in non-volatile memory, ◆ click the Save button prior to resetting the system. ◆ When the system is restarted, it will always run the Power-On Self-Test. ARAMETERS The following parameters are displayed in the web interface: System Reload Configuration...
- Page 123 | Basic Management Tasks HAPTER Resetting the System ES-3052 Series Monthly - Day of the month at which to reload. (Range: 1-31) ■ Save Current Settings Save – Click this button to save the current configuration settings. ◆ Use Factory Default Settings and Reboot Factory Default Settings &...
- Page 124 | Basic Management Tasks HAPTER Resetting the System ES-3052 Series Figure 23: Restarting the Switch (In) Figure 24: Restarting the Switch (At) – 124 –...
- Page 125 | Basic Management Tasks HAPTER Resetting the System ES-3052 Series Figure 25: Restarting the Switch (Regularly) – 125 –...
- Page 126 | Basic Management Tasks HAPTER Resetting the System ES-3052 Series – 126 –...
-
Page 127: I Nterface C Onfiguration
NTERFACE ONFIGURATION ES-3052 Series This chapter describes the following topics: Port Configuration – Configures connection settings, including auto- ◆ negotiation, or manual setting of speed, duplex mode, and flow control. Local Port Mirroring – Sets the source and target ports for mirroring on ◆... - Page 128 | Interface Configuration HAPTER Port Configuration ES-3052 Series OMMAND SAGE ◆ Auto-negotiation must be disabled before you can configure or force an interface to use the Speed/Duplex mode or Flow Control options. When using auto-negotiation, the optimal settings will be negotiated ◆...
- Page 129 | Interface Configuration HAPTER Port Configuration ES-3052 Series FC - Flow control can eliminate frame loss by “blocking” traffic from ■ end stations or segments connected directly to the switch when its buffers fill. When enabled, back pressure is used for half-duplex operation and IEEE 802.3-2005 (formally IEEE 802.3x) for full- duplex operation.
- Page 130 | Interface Configuration HAPTER Port Configuration ES-3052 Series Use the Interface > Port > General (Configure by Port Range) page to ONFIGURING BY enable/disable an interface, set auto-negotiation and the interface ANGE capabilities to advertise, or manually fix the speed, duplex mode, and flow control.
- Page 131 | Interface Configuration HAPTER Port Configuration ES-3052 Series Use the Interface > Port > General (Show Information) page to display the ISPLAYING current connection status, including link state, speed/duplex mode, flow ONNECTION TATUS control, and auto-negotiation. CLI R EFERENCES "show interfaces status" on page 759 ◆...
- Page 132 | Interface Configuration HAPTER Port Configuration ES-3052 Series Use the Interface > Port > Mirror page to mirror traffic from any source ONFIGURING OCAL port to a target port for real-time analysis. You can then attach a logic IRRORING analyzer or RMON probe to the target port and study the traffic crossing the source port in a completely unobtrusive manner.
- Page 133 | Interface Configuration HAPTER Port Configuration ES-3052 Series NTERFACE To configure a local mirror session: Click Interface, Port, Mirror. Select Add from the Action List. Specify the source port. Specify the monitor port. Specify the traffic type to be mirrored. Click Apply.
- Page 134 | Interface Configuration HAPTER Port Configuration ES-3052 Series Use the Interface > Port > RSPAN page to mirror traffic from remote ONFIGURING EMOTE switches for analysis at a destination port on the local switch. This feature, IRRORING also called Remote Switched Port Analyzer (RSPAN), carries traffic generated on the specified source ports for each session over a user- specified VLAN dedicated to that RSPAN session in all participating switches.
- Page 135 | Interface Configuration HAPTER Port Configuration ES-3052 Series Set up all intermediate switches on the RSPAN configuration page, entering the mirror session, the switch’s role (Intermediate), the RSPAN VLAN, and the uplink port(s). Set up the destination switch on the RSPAN configuration page by specifying the mirror session, the switch’s role (Destination), the destination port , whether or not the traffic exiting this port will be...
- Page 136 | Interface Configuration HAPTER Port Configuration ES-3052 Series Operation Status – Indicates whether or not RSPAN is currently ◆ functioning. Switch Role – Specifies the role this switch performs in mirroring ◆ traffic. None – This switch will not participate in RSPAN. ■...
- Page 137 | Interface Configuration HAPTER Port Configuration ES-3052 Series NTERFACE To configure a remote mirror session: Click Interface, RSPAN. Set the Switch Role to None, Source, Intermediate, or Destination. Configure the required settings for each switch participating in the RSPAN VLAN. Click Apply.
-
Page 138: Table 7: Port Statistics
| Interface Configuration HAPTER Port Configuration ES-3052 Series Figure 35: Configuring Remote Port Mirroring (Destination) Use the Interface > Port/Trunk > Statistics or Chart page to display HOWING ORT OR standard statistics on network traffic from the Interfaces Group and RUNK TATISTICS Ethernet-like MIBs, as well as a detailed breakdown of traffic based on the... - Page 139 | Interface Configuration HAPTER Port Configuration ES-3052 Series Table 7: Port Statistics (Continued) Parameter Description Transmitted Errors The number of outbound packets that could not be transmitted because of errors. Received Unicast Packets The number of subnetwork-unicast packets delivered to a higher- layer protocol.
- Page 140 | Interface Configuration HAPTER Port Configuration ES-3052 Series Table 7: Port Statistics (Continued) Parameter Description Internal MAC Receive A count of frames for which reception on a particular interface fails Errors due to an internal MAC sublayer receive error. Internal MAC Transmit A count of frames for which transmission on a particular interface Errors fails due to an internal MAC sublayer transmit error.
- Page 141 | Interface Configuration HAPTER Port Configuration ES-3052 Series NTERFACE To show a list of port statistics: Click Interface, Port, Statistics. Select the statistics mode to display (Interface, Etherlike, RMON or Utilization). Select a port from the drop-down list. Use the Refresh button at the bottom of the page if you need to update the screen.
- Page 142 | Interface Configuration HAPTER Port Configuration ES-3052 Series To show a chart of port statistics: Click Interface, Port, Chart. Select the statistics mode to display (Interface, Etherlike, RMON or All). If Interface, Etherlike, RMON statistics mode is chosen, select a port from the drop-down list.
- Page 143 | Interface Configuration HAPTER Port Configuration ES-3052 Series Potential conditions which may be listed by the diagnostics include: ◆ OK: Correctly terminated pair ■ Open: Open pair, no link partner ■ Short: Shorted pair ■ Not Supported: This message is displayed for any Gigabit Ethernet ■...
- Page 144 | Interface Configuration HAPTER Trunk Configuration ES-3052 Series NTERFACE To test the cable attached to a port: Click Interface, Port, Cable Test. Click Test for any port to start the cable test. Figure 38: Performing Cable Tests RUNK ONFIGURATION This section describes how to configure static and dynamic trunks. You can create multiple links between devices that work as one virtual, aggregate link.
- Page 145 | Interface Configuration HAPTER Trunk Configuration ES-3052 Series OMMAND SAGE Besides balancing the load across each port in the trunk, the other ports provide redundancy by taking over the load if a port in the trunk fails. However, before making any physical connections between devices, use the web interface or CLI to specify the trunk on the devices at both ends.
- Page 146 | Interface Configuration HAPTER Trunk Configuration ES-3052 Series However, note that the static trunks on this switch are Cisco EtherChannel compatible. To avoid creating a loop in the network, be sure you add a static trunk ◆ via the configuration interface before connecting the ports, and also disconnect the ports before removing a static trunk via the configuration interface.
- Page 147 | Interface Configuration HAPTER Trunk Configuration ES-3052 Series To configure connection parameters for a static trunk: Click Interface, Trunk, Static. Select Configure General from the Step list. Select Configure from the Action list. Modify the required interface settings. (Refer to "Configuring by Port List"...
- Page 148 | Interface Configuration HAPTER Trunk Configuration ES-3052 Series Use the Interface > Trunk > Dynamic (Configure Aggregator) page to set ONFIGURING A the administrative key for an aggregation group, enable LACP on a port, YNAMIC RUNK and configure protocol parameters for local and partner ports. Figure 43: Configuring Dynamic Trunks dynamically enabled...
- Page 149 | Interface Configuration HAPTER Trunk Configuration ES-3052 Series ARAMETERS These parameters are displayed in the web interface: Configure Aggregator Admin Key – LACP administration key is used to identify a specific link ◆ aggregation group (LAG) during local LACP setup on the switch. (Range: 0-65535) Configure Aggregation Port - General Port –...
- Page 150 | Interface Configuration HAPTER Trunk Configuration ES-3052 Series NTERFACE To configure the admin key for a dynamic trunk: Click Interface, Trunk, Dynamic. Select Configure Aggregator from the Step list. Set the Admin Key for the required LACP group. Click Apply. Figure 44: Configuring the LACP Aggregator Admin Key To enable LACP for a port: Click Interface, Trunk, Dynamic.
- Page 151 | Interface Configuration HAPTER Trunk Configuration ES-3052 Series To configure LACP parameters for group members: Click Interface, Trunk, Dynamic. Select Configure Aggregation Port from the Step list. Select Configure from the Action list. Click Actor or Partner. Configure the required settings. Click Apply.
- Page 152 | Interface Configuration HAPTER Trunk Configuration ES-3052 Series To configure the connection parameters for a dynamic trunk: Click Interface, Trunk, Dynamic. Select Configure Trunk from the Step list. Select Configure from the Action list. Modify the required interface settings. (Refer to "Configuring by Port List"...
-
Page 153: Table 8: Lacp Port Counters
| Interface Configuration HAPTER Trunk Configuration ES-3052 Series To show the port members of dynamic trunks: Click Interface, Trunk, Dynamic. Select Configure General from the Step list. Select Show Member from the Action list. Figure 49: Showing Members of Dynamic Trunks Use the Interface >... -
Page 154: Table 9: Lacp Internal Configuration Information
| Interface Configuration HAPTER Trunk Configuration ES-3052 Series NTERFACE To display LACP port counters: Click Interface, Trunk, Dynamic. Select Configure Aggregation Port from the Step list. Select Show Information from the Action list. Click Counters. Select a group member from the Port list. Figure 50: Displaying LACP Port Counters Use the Interface >... - Page 155 | Interface Configuration HAPTER Trunk Configuration ES-3052 Series Table 9: LACP Internal Configuration Information (Continued) Parameter Description LACPDUs Interval Number of seconds before invalidating received LACPDU information. Admin State, Administrative or operational values of the actor’s state parameters: Oper State Expired –...
-
Page 156: Table 10: Lacp Internal Configuration Information
| Interface Configuration HAPTER Trunk Configuration ES-3052 Series NTERFACE To display LACP settings and status for the local side: Click Interface, Trunk, Dynamic. Select Configure Aggregation Port from the Step list. Select Show Information from the Action list. Click Internal. Select a group member from the Port list. - Page 157 | Interface Configuration HAPTER Trunk Configuration ES-3052 Series Table 10: LACP Internal Configuration Information (Continued) Parameter Description Partner Oper Operational port number assigned to this aggregation port by the Port Number port’s protocol partner. Port Admin Priority Current administrative value of the port priority for the protocol partner.
- Page 158 | Interface Configuration HAPTER Trunk Configuration ES-3052 Series Use the Interface > Trunk > Mirror page to mirror traffic from any source ONFIGURING RUNK trunk to a target port for real-time analysis. You can then attach a logic IRRORING analyzer or RMON probe to the target port and study the traffic crossing the source trunk in a completely unobtrusive manner.
- Page 159 | Interface Configuration HAPTER Trunk Configuration ES-3052 Series NTERFACE To configure a local mirror session: Click Interface, Trunk, Mirror. Select Add from the Action List. Specify the source trunk. Specify the monitor port. Specify the traffic type to be mirrored. Click Apply.
- Page 160 | Interface Configuration HAPTER Saving Power ES-3052 Series AVING OWER Use the Interface > Green Ethernet page to enable power savings mode on the selected port. CLI R EFERENCES "power-save" on page 764 ◆ ◆ "show power-save" on page 765 OMMAND SAGE IEEE 802.3 defines the Ethernet standard and subsequent power...
- Page 161 | Interface Configuration HAPTER Saving Power ES-3052 Series ARAMETERS These parameters are displayed in the web interface: Port – Power saving mode only applies to the Gigabit Ethernet ports ◆ using copper media. ◆ Power Saving Status – Adjusts the power provided to ports based on the length of the cable used to connect to other devices.
- Page 162 | Interface Configuration HAPTER Traffic Segmentation ES-3052 Series RAFFIC EGMENTATION If tighter security is required for passing traffic from different clients through downlink ports on the local network and over uplink ports to the service provider, port-based traffic segmentation can be used to isolate traffic between clients on different downlink ports.
- Page 163 | Interface Configuration HAPTER Traffic Segmentation ES-3052 Series Use the Interface > Traffic Segmentation (Configure Session) page to ONFIGURING PLINK assign the downlink and uplink ports to use in the segmented group. Ports OWNLINK ORTS designated as downlink ports can not communicate with any other ports on the switch except for the uplink ports.
- Page 164 | Interface Configuration HAPTER VLAN Trunking ES-3052 Series VLAN T RUNKING Use the Interface > VLAN Trunking page to allow unknown VLAN groups to pass through the specified interface. CLI R EFERENCES "vlan-trunking" on page 856 ◆ OMMAND SAGE Use this feature to configure a tunnel across one or more intermediate ◆...
- Page 165 | Interface Configuration HAPTER VLAN Trunking ES-3052 Series ARAMETERS These parameters are displayed in the web interface: Interface – Displays a list of ports or trunks. ◆ Port – Port Identifier. (Range: 1-52) ◆ Trunk – Trunk Identifier. (Range: 1-12) ◆...
- Page 166 | Interface Configuration HAPTER VLAN Trunking ES-3052 Series – 166 –...
-
Page 167: Vlan C Onfiguration
VLAN C ONFIGURATION ES-3052 Series This chapter includes the following topics: IEEE 802.1Q VLANs – Configures static and dynamic VLANs. ◆ IEEE 802.1Q Tunneling – Configures QinQ tunneling to maintain ◆ customer-specific VLAN and Layer 2 protocol configurations across a service provider network, even when different customers use the same internal VLAN IDs. - Page 168 | VLAN Configuration HAPTER IEEE 802.1Q VLANs ES-3052 Series since traffic must pass through a configured Layer 3 link to reach a different VLAN. This switch supports the following VLAN features: Up to 256 VLANs based on the IEEE 802.1Q standard ◆...
- Page 169 | VLAN Configuration HAPTER IEEE 802.1Q VLANs ES-3052 Series receiving port). But if the frame is tagged, the switch uses the tagged VLAN ID to identify the port broadcast domain of the frame. Port Overlapping – Port overlapping can be used to allow access to commonly shared network resources among different VLAN groups, such as file servers or printers.
- Page 170 | VLAN Configuration HAPTER IEEE 802.1Q VLANs ES-3052 Series Figure 62: Using GVRP Port-based VLAN 10 11 15 16 Forwarding Tagged/Untagged Frames If you want to create a small port-based VLAN for devices attached directly to a single switch, you can assign ports to the same untagged VLAN. However, to participate in a VLAN group that crosses several switches, you should create a VLAN for that group and enable tagging on all ports.
- Page 171 | VLAN Configuration HAPTER IEEE 802.1Q VLANs ES-3052 Series Status – Enables or disables the specified VLAN. ◆ Remote VLAN – Reserves this VLAN for RSPAN (see "Configuring ◆ Remote Port Mirroring" on page 134). NTERFACE To create VLAN groups: Click VLAN, Static.
- Page 172 | VLAN Configuration HAPTER IEEE 802.1Q VLANs ES-3052 Series "Displaying VLAN Information" on page 857 ◆ ARAMETERS These parameters are displayed in the web interface: Modify VLAN and Member Ports VLAN – ID of configured VLAN (1-4094). ◆ VLAN Name – Name of the VLAN (1 to 32 characters). ◆...
- Page 173 | VLAN Configuration HAPTER IEEE 802.1Q VLANs ES-3052 Series Ingress Filtering – Determines how to process frames tagged for ◆ VLANs for which the ingress port is not a member. (Default: Disabled) Ingress filtering only affects tagged frames. ■ If ingress filtering is disabled and a port receives frames tagged for ■...
- Page 174 | VLAN Configuration HAPTER IEEE 802.1Q VLANs ES-3052 Series Trunk Range – Displays a list of ports. (Range: 1-12) ◆ The PVID, acceptable frame type, and ingress filtering parameters for each interface within the specified range must be configured on either the Modify VLAN and Member Ports or Edit Member by Interface page.
- Page 175 | VLAN Configuration HAPTER IEEE 802.1Q VLANs ES-3052 Series To configure static members by interface: Click VLAN, Static. Select Edit Member by Interface from the Action list. Select a port or trunk configure. Modify the settings for any interface as required. Click Apply.
- Page 176 | VLAN Configuration HAPTER IEEE 802.1Q VLANs ES-3052 Series To configure static members by interface range: Click VLAN, Static. Select Edit Member by Interface Range from the Action list. Set the Interface type to display as Port or Trunk. Enter an interface range. Modify the VLAN parameters as required.
- Page 177 | VLAN Configuration HAPTER IEEE 802.1Q VLANs ES-3052 Series Configure Interface Interface – Displays a list of ports or trunks. ◆ Port – Port Identifier. (Range: 1-52) ◆ Trunk – Trunk Identifier. (Range: 1-12) ◆ GVRP Status – Enables/disables GVRP for the interface. GVRP must be ◆...
- Page 178 | VLAN Configuration HAPTER IEEE 802.1Q VLANs ES-3052 Series NTERFACE To configure GVRP on the switch: Click VLAN, Dynamic. Select Configure General from the Step list. Enable or disable GVRP. Click Apply. Figure 67: Configuring Global Status of GVRP To configure GVRP status and timers on a port or trunk: Click VLAN, Dynamic.
- Page 179 | VLAN Configuration HAPTER IEEE 802.1Q VLANs ES-3052 Series To show the dynamic VLAN joined by this switch: Click VLAN, Dynamic. Select Show Dynamic VLAN from the Step list. Select Show VLAN from the Action list. Figure 69: Showing Dynamic VLANs Registered on the Switch To show the members of a dynamic VLAN: Click VLAN, Dynamic.
- Page 180 | VLAN Configuration HAPTER IEEE 802.1Q Tunneling ES-3052 Series IEEE 802.1Q T UNNELING IEEE 802.1Q Tunneling (QinQ) is designed for service providers carrying traffic for multiple customers across their networks. QinQ tunneling is used to maintain customer-specific VLAN and Layer 2 protocol configurations even when different customers use the same internal VLAN IDs.
- Page 181 | VLAN Configuration HAPTER IEEE 802.1Q Tunneling ES-3052 Series Figure 71: QinQ Operational Concept Customer A Customer A (VLANs 1-10) (VLANs 1-10) QinQ Tunneling Service Provider Service Provider VLAN 10 VLAN 10 (edge switch B) (edge switch A) Tunnel Access Port Tunnel Access...
- Page 182 | VLAN Configuration HAPTER IEEE 802.1Q Tunneling ES-3052 Series Layer 2 Flow for Packets Coming into a Tunnel Uplink Port An uplink port receives one of the following packets: Untagged ◆ One tag (CVLAN or SPVLAN) ◆ Double tag (CVLAN + SPVLAN) ◆...
- Page 183 | VLAN Configuration HAPTER IEEE 802.1Q Tunneling ES-3052 Series Configuration Limitations for QinQ The native VLAN of uplink ports should not be used as the SPVLAN. If ◆ the SPVLAN is the uplink port's native VLAN, the uplink port must be an untagged member of the SPVLAN.
- Page 184 | VLAN Configuration HAPTER IEEE 802.1Q Tunneling ES-3052 Series Use the VLAN > Tunnel (Configure Global) page to configure the switch to NABLING operate in IEEE 802.1Q (QinQ) tunneling mode, which is used for passing UNNELING ON THE Layer 2 traffic across a service provider’s metropolitan area network. You WITCH can also globally set the Tag Protocol Identifier (TPID) value of the tunnel port if the attached client is using a nonstandard 2-byte ethertype to...
- Page 185 | VLAN Configuration HAPTER IEEE 802.1Q Tunneling ES-3052 Series NTERFACE To enable QinQ Tunneling on the switch: Click VLAN, Tunnel. Select Configure Global from the Step list. Enable Tunnel Status, and specify the TPID if a client attached to a tunnel port is using a non-standard ethertype to identify 802.1Q tagged frames.
- Page 186 | VLAN Configuration HAPTER IEEE 802.1Q Tunneling ES-3052 Series Trunk – Trunk Identifier. (Range: 1-12) ◆ Mode – Sets the VLAN membership mode of the port. ◆ None – The port operates in its normal VLAN mode. (This is the ■...
- Page 187 | VLAN Configuration HAPTER Protocol VLANs ES-3052 Series VLAN ROTOCOL The network devices required to support multiple protocols cannot be easily grouped into a common VLAN. This may require non-standard devices to pass traffic between different VLANs in order to encompass all the devices participating in a specific protocol.
- Page 188 | VLAN Configuration HAPTER Protocol VLANs ES-3052 Series Traffic which matches IP Protocol Ethernet Frames is mapped to the VLAN (VLAN 1) that has been configured with the switch's administrative IP. IP Protocol Ethernet traffic must not be mapped to another VLAN or you will lose administrative network connectivity to the switch.
- Page 189 | VLAN Configuration HAPTER Protocol VLANs ES-3052 Series To configure a protocol group: Click VLAN, Protocol. Select Configure Protocol from the Step list. Select Show from the Action list. Figure 75: Displaying Protocol VLANs Use the VLAN > Protocol (Configure Interface - Add) page to map a APPING ROTOCOL protocol group to a VLAN for each interface that will participate in the...
- Page 190 | VLAN Configuration HAPTER Protocol VLANs ES-3052 Series Protocol Group ID – Protocol Group ID assigned to the Protocol VLAN ◆ Group. (Range: 1-2147483647) VLAN ID – VLAN to which matching protocol traffic is forwarded. ◆ (Range: 1-4093) NTERFACE To map a protocol group to a VLAN for a port or trunk: Click VLAN, Protocol.
- Page 191 | VLAN Configuration HAPTER Configuring IP Subnet VLANs ES-3052 Series To show the protocol groups mapped to a port or trunk: Click VLAN, Protocol. Select Configure Interface from the Step list. Select Show from the Action list. Figure 77: Showing the Interface to Protocol Group Mapping IP S VLAN ONFIGURING...
- Page 192 | VLAN Configuration HAPTER Configuring IP Subnet VLANs ES-3052 Series When MAC-based, IP subnet-based, and protocol-based VLANs are ◆ supported concurrently, priority is applied in this sequence, and then port-based VLANs last. ARAMETERS These parameters are displayed in the web interface: IP Address –...
- Page 193 | VLAN Configuration HAPTER Configuring MAC-based VLANs ES-3052 Series To show the configured IP subnet VLANs: Click VLAN, IP Subnet. Select Show from the Action list. Figure 79: Showing IP Subnet VLANs MAC- VLAN ONFIGURING BASED Use the VLAN > MAC-Based page to configure VLAN based on MAC addresses.
- Page 194 | VLAN Configuration HAPTER Configuring MAC-based VLANs ES-3052 Series Priority – The priority assigned to untagged ingress traffic. ◆ (Range: 0-7, where 7 is the highest priority; Default: 0) NTERFACE To map a MAC address to a VLAN: Click VLAN, MAC-Based. Select Add from the Action list.
- Page 195 | VLAN Configuration HAPTER Configuring VLAN Mirroring ES-3052 Series VLAN M ONFIGURING IRRORING Use the VLAN > Mirror (Add) page to mirror traffic from one or more source VLANs to a target port for real-time analysis. You can then attach a logic analyzer or RMON probe to the target port and study the traffic crossing the source VLAN(s) in a completely unobtrusive manner.
- Page 196 | VLAN Configuration HAPTER Configuring VLAN Mirroring ES-3052 Series NTERFACE To configure VLAN mirroring: Click VLAN, Mirror. Select Add from the Action list. Select the source VLAN, and select a target port. Click Apply. Figure 82: Configuring VLAN Mirroring To show the VLANs to be mirrored: Click VLAN, Mirror.
- Page 197 DDRESS ABLE ETTINGS ES-3052 Series Switches store the addresses for all known devices. This information is used to pass traffic directly between the inbound and outbound ports. All the addresses learned by monitoring traffic are stored in the dynamic address table. You can also manually configure static addresses that are bound to a specific port.
- Page 198 | Address Table Settings HAPTER Setting Static Addresses ES-3052 Series ARAMETERS These parameters are displayed in the web interface: VLAN – ID of configured VLAN. (Range: 1-4093) ◆ Interface – Port or trunk associated with the device assigned a static ◆...
- Page 199 | Address Table Settings HAPTER Changing the Aging Time ES-3052 Series To show the static addresses in MAC address table: Click MAC Address, Static. Select Show from the Action list. Figure 85: Displaying Static MAC Addresses HANGING THE GING Use the MAC Address > Dynamic (Configure Aging) page to set the aging time for entries in the dynamic address table.
- Page 200 | Address Table Settings HAPTER Displaying the Dynamic Address Table ES-3052 Series NTERFACE To set the aging time for entries in the dynamic address table: Click MAC Address, Dynamic. Select Configure Aging from the Action list. Modify the aging status if required. Specify a new aging time.
- Page 201 | Address Table Settings HAPTER Clearing the Dynamic Address Table ES-3052 Series NTERFACE To show the dynamic address table: Click MAC Address, Dynamic. Select Show Dynamic MAC from the Action list. Select the Sort Key (MAC Address, VLAN, or Interface). Enter the search parameters (MAC Address, VLAN, or Interface).
- Page 202 | Address Table Settings HAPTER Configuring MAC Address Mirroring ES-3052 Series NTERFACE To clear the entries in the dynamic address table: Click MAC Address, Dynamic. Select Clear Dynamic MAC from the Action list. Select the method by which to clear the entries (i.e., All, MAC Address, VLAN, or Interface).
- Page 203 | Address Table Settings HAPTER Configuring MAC Address Mirroring ES-3052 Series cannot be set to the same target ports as that used for port mirroring (see "Configuring Local Port Mirroring" on page 132). When traffic matches the rules for both port mirroring, and for ◆...
- Page 204 | Address Table Settings HAPTER Configuring MAC Address Mirroring ES-3052 Series To show the MAC addresses to be mirrored: Click MAC Address, Mirror. Select Show from the Action list. Figure 90: Showing the Source MAC Addresses to Mirror – 204 –...
- Page 205 PANNING LGORITHM ES-3052 Series This chapter describes the following basic topics: Loopback Detection – Configures detection and response to loopback ◆ BPDUs. Global Settings for STA – Configures global bridge settings for STP, ◆ RSTP and MSTP. Interface Settings for STA –...
- Page 206 | Spanning Tree Algorithm HAPTER Overview ES-3052 Series lowest cost spanning tree, it enables all root ports and designated ports, and disables all other ports. Network packets are therefore only forwarded between root ports and designated ports, eliminating any possible network loops.
- Page 207 | Spanning Tree Algorithm HAPTER Overview ES-3052 Series Figure 92: MSTP Region, Internal Spanning Tree, Multiple Spanning Tree An MST Region consists of a group of interconnected bridges that have the An MST Region consists of a group of interconnected bridges that have the same MST Configuration Identifiers (including the Region Name, Revision Level and Configuration Digest –...
- Page 208 | Spanning Tree Algorithm HAPTER Configuring Loopback Detection ES-3052 Series ONFIGURING OOPBACK ETECTION Use the Spanning Tree > Loopback Detection page to configure loopback detection on an interface. When loopback detection is enabled and a port or trunk receives it’s own BPDU, the detection agent drops the loopback BPDU, sends an SNMP trap, and places the interface in discarding mode.
- Page 209 | Spanning Tree Algorithm HAPTER Configuring Global Settings for STA ES-3052 Series Time Left – The time remaining before the shutdown expires. ◆ Release Mode – Configures the interface for automatic or manual ◆ loopback release. (Default: Auto) Release – Allows an interface to be manually released from discard ◆...
- Page 210 | Spanning Tree Algorithm HAPTER Configuring Global Settings for STA ES-3052 Series specific VLAN members may be inadvertently disabled to prevent network loops, thus isolating group members. When operating multiple VLANs, we recommend selecting the MSTP option. Rapid Spanning Tree Protocol ◆...
- Page 211 | Spanning Tree Algorithm HAPTER Configuring Global Settings for STA ES-3052 Series RSTP: Rapid Spanning Tree (IEEE 802.1w); RSTP is the default. ■ MSTP: Multiple Spanning Tree (IEEE 802.1s) ■ Priority – Bridge priority is used in selecting the root device, root port, ◆...
- Page 212 | Spanning Tree Algorithm HAPTER Configuring Global Settings for STA ES-3052 Series Forward Delay – The maximum time (in seconds) this device will wait ◆ before changing states (i.e., discarding to learning to forwarding). This delay is required because every device must receive information about topology changes before it starts to forward frames.
- Page 213 | Spanning Tree Algorithm HAPTER Configuring Global Settings for STA ES-3052 Series NTERFACE To configure global STA settings: Click Spanning Tree, STA. Select Configure Global from the Step list. Select Configure from the Action list. Modify any of the required attributes. Note that the parameters displayed for the spanning tree types (STP, RSTP, MSTP) varies as described in the preceding section.
- Page 214 | Spanning Tree Algorithm HAPTER Configuring Global Settings for STA ES-3052 Series Figure 96: Configuring Global Settings for STA (RSTP) Figure 97: Configuring Global Settings for STA (MSTP) – 214 –...
- Page 215 | Spanning Tree Algorithm HAPTER Displaying Global Settings for STA ES-3052 Series ISPLAYING LOBAL ETTINGS FOR Use the Spanning Tree > STA (Configure Global - Show Information) page to display a summary of the current bridge STA information that applies to the entire switch.
- Page 216 | Spanning Tree Algorithm HAPTER Configuring Interface Settings for STA ES-3052 Series NTERFACE To display global STA settings: Click Spanning Tree, STA. Select Configure Global from the Step list. Select Show Information from the Action list. Figure 98: Displaying Global Settings for STA ONFIGURING NTERFACE ETTINGS FOR...
- Page 217 | Spanning Tree Algorithm HAPTER Configuring Interface Settings for STA ES-3052 Series However, remember that Edge Port should only be enabled for ports connected to an end-node device. (Default: Enabled) Enabled – Manually configures a port as an Edge Port. ■...
-
Page 218: Table 11: Recommended Sta Path Cost Range
| Spanning Tree Algorithm HAPTER Configuring Interface Settings for STA ES-3052 Series port priority. (Range: 0 for auto-configuration, 1-65535 for the short path cost method , 1-200,000,000 for the long path cost method) By default, the system automatically detects the speed and duplex mode used on each port, and configures the path cost according to the values shown below. - Page 219 | Spanning Tree Algorithm HAPTER Configuring Interface Settings for STA ES-3052 Series BPDU Guard – This feature protects edge ports from receiving BPDUs. ◆ It prevents loops by shutting down an edge port when a BPDU is received instead of putting it into the spanning tree discarding state. In a valid configuration, configured edge ports should not receive BPDUs.
- Page 220 | Spanning Tree Algorithm HAPTER Displaying Interface Settings for STA ES-3052 Series ISPLAYING NTERFACE ETTINGS FOR Use the Spanning Tree > STA (Configure Interface - Show Information) page to display the current status of ports or trunks in the Spanning Tree. CLI R EFERENCES "show spanning-tree"...
- Page 221 | Spanning Tree Algorithm HAPTER Displaying Interface Settings for STA ES-3052 Series Oper Path Cost – The contribution of this port to the path cost of ◆ paths towards the spanning tree root which include this port. Oper Link Type – The operational point-to-point status of the LAN ◆...
- Page 222 | Spanning Tree Algorithm HAPTER Configuring Multiple Spanning Trees ES-3052 Series NTERFACE To display interface settings for STA: Click Spanning Tree, STA. Select Configure Interface from the Step list. Select Show Information from the Action list. Figure 101: Displaying Interface Settings for STA ONFIGURING ULTIPLE PANNING...
- Page 223 | Spanning Tree Algorithm HAPTER Configuring Multiple Spanning Trees ES-3052 Series To use multiple spanning trees: Set the spanning tree type to MSTP (page 209). Enter the spanning tree priority for the selected MST instance on the Spanning Tree > MSTP (Configure Global - Add) page. Add the VLANs that will share this MSTI on the Spanning Tree >...
- Page 224 | Spanning Tree Algorithm HAPTER Configuring Multiple Spanning Trees ES-3052 Series NTERFACE To create instances for MSTP: Click Spanning Tree, MSTP. Select Configure Global from the Step list. Select Add from the Action list. Specify the MST instance identifier and the initial VLAN member. Additional member can be added using the Spanning Tree >...
- Page 225 | Spanning Tree Algorithm HAPTER Configuring Multiple Spanning Trees ES-3052 Series To add additional VLAN groups to an MSTP instance: Click Spanning Tree, MSTP. Select Configure Global from the Step list. Select Add Member from the Action list. Select an MST instance from the MST ID list. Enter the VLAN group to add to the instance in the VLAN ID field.
- Page 226 | Spanning Tree Algorithm HAPTER Configuring Interface Settings for MSTP ES-3052 Series MSTP ONFIGURING NTERFACE ETTINGS FOR Use the Spanning Tree > MSTP (Configure Interface - Configure) page to configure the STA interface settings for an MST instance. CLI R EFERENCES "Spanning Tree Commands"...
- Page 227 | Spanning Tree Algorithm HAPTER Configuring Interface Settings for MSTP ES-3052 Series The recommended range is listed in Table 11 on page 218. The default path costs are listed in Table 12 on page 218. NTERFACE To configure MSTP parameters for a port or trunk: Click Spanning Tree, MSTP.
- Page 228 | Spanning Tree Algorithm HAPTER Configuring Interface Settings for MSTP ES-3052 Series To display MSTP parameters for a port or trunk: Click Spanning Tree, MSTP. Select Configure Interface from the Step list. Select Show Information from the Action list. Figure 107: Displaying MSTP Interface Settings –...
- Page 229 ONGESTION ONTROL ES-3052 Series The switch can set the maximum upload or download data transfer rate for any port. It can control traffic storms by setting a maximum threshold for broadcast traffic or multicast traffic. It can also set bounding thresholds for broadcast and multicast storms which can be used to automatically trigger rate limits or to shut down a port.
-
Page 230: Table 13: Effective Rate Limit
| Congestion Control HAPTER Rate Limiting ES-3052 Series For example, a Gigabit port has a 10 ms window size, so there are 100 scales per second, each scale having a bandwidth of 10 Mbps, and using an inter-packet gap of 20 bytes. Therefore, when the rate limit is set at 64 kbit/s, each scale has a shared bandwidth of 80 bytes. - Page 231 | Congestion Control HAPTER Storm Control ES-3052 Series Due to a chip limitation, the switch supports only one limit for both ingress rate limiting and storm control (including broadcast unknown unicast, multicast, and broadcast storms). ARAMETERS These parameters are displayed in the web interface: Port –...
- Page 232 | Congestion Control HAPTER Storm Control ES-3052 Series You can protect your network from traffic storms by setting a threshold for broadcast, multicast or unknown unicast traffic. Any packets exceeding the specified threshold will then be dropped. CLI R EFERENCES "switchport packet-rate"...
- Page 233 | Congestion Control HAPTER Storm Control ES-3052 Series Unknown Unicast – Specifies storm control for unknown unicast ◆ traffic. Multicast – Specifies storm control for multicast traffic. ◆ Broadcast – Specifies storm control for broadcast traffic. ◆ Status – Enables or disables storm control. (Default: Broadcast storm ◆...
- Page 234 | Congestion Control HAPTER Automatic Traffic Control ES-3052 Series UTOMATIC RAFFIC ONTROL Use the Traffic > Congestion Control > Auto Traffic Control pages to configure bounding thresholds for broadcast and multicast storms which can automatically trigger rate limits or shut down a port. CLI R EFERENCES ◆...
- Page 235 | Congestion Control HAPTER Automatic Traffic Control ES-3052 Series The traffic control response of rate limiting can be released ◆ automatically or manually. The control response of shutting down a port can only be released manually. Figure 111: Storm Control by Shutting Down a Port The key elements of this diagram are the same as that described in the preceding diagram, except that automatic release of the control response is not provided.
- Page 236 | Congestion Control HAPTER Automatic Traffic Control ES-3052 Series been shut down by a control response, it must be manually re-enabled using the Manual Control Release (see page 237). ARAMETERS These parameters are displayed in the web interface: Broadcast Apply Timer – The interval after the upper threshold has ◆...
- Page 237 | Congestion Control HAPTER Automatic Traffic Control ES-3052 Series Use the Traffic > Congestion Control > Auto Traffic Control (Configure ONFIGURING Interface) page to set the storm control mode (broadcast or multicast), the HRESHOLDS AND traffic thresholds, the control response, to automatically release a response ESPONSES of rate limiting, or to send related SNMP trap messages.
- Page 238 | Congestion Control HAPTER Automatic Traffic Control ES-3052 Series Alarm Fire Threshold – The upper threshold for ingress traffic beyond ◆ which a storm control response is triggered after the Apply Timer expires. (Range: 1-255 kilo-packets per second; Default: 128 Kpps) Once the traffic rate exceeds the upper threshold and the Apply Timer expires, a trap message will be sent if configured by the Trap Storm Fire attribute.
- Page 239 | Congestion Control HAPTER Automatic Traffic Control ES-3052 Series NTERFACE To configure the response timers for automatic storm control: Click Traffic, Congestion Control, Automatic Storm Control. Select Configure Interface from the Step field. Enable or disable ATC as required, set the control response, specify whether or not to automatically release the control response of rate limiting, set the upper and lower thresholds, and specify which trap messages to send.
- Page 240 | Congestion Control HAPTER Automatic Traffic Control ES-3052 Series – 240 –...
- Page 241 LASS OF ERVICE ES-3052 Series Class of Service (CoS) allows you to specify which data packets have greater precedence when traffic is buffered in the switch due to congestion. This switch supports CoS with four priority queues for each port. Data packets in a port’s high-priority queue will be transmitted before those in the lower-priority queues.
- Page 242 | Class of Service HAPTER Layer 2 Queue Settings ES-3052 Series frames. If the incoming frame is an IEEE 802.1Q VLAN tagged frame, the IEEE 802.1p User Priority bits will be used. If the output port is an untagged member of the associated VLAN, ◆...
- Page 243 | Class of Service HAPTER Layer 2 Queue Settings ES-3052 Series OMMAND SAGE ◆ Strict priority requires all traffic in a higher priority queue to be processed before lower priority queues are serviced. WRR queuing specifies a relative weight for each queue. WRR uses a ◆...
- Page 244 | Class of Service HAPTER Layer 2 Queue Settings ES-3052 Series Weight – Sets a weight for each queue which is used by the WRR ◆ scheduler. (Range: 1-255; Default: Weights 1, 2, 4, 6 are assigned to queues 0 - 3 respectively) NTERFACE To configure the queue mode: Click Traffic, Priority, Queue.
-
Page 245: Table 14: Ieee 802.1P Egress Queue Priority Mapping
| Class of Service HAPTER Layer 2 Queue Settings ES-3052 Series Figure 117: Setting the Queue Mode (Strict and WRR) Use the Traffic > Priority > PHB to Queue page to specify the hardware APPING ALUES output queues to use based on the internal per-hop behavior value. (For GRESS UEUES more information on exact manner in which the ingress priority tags are... -
Page 246: Table 16: Mapping Internal Per-Hop Behavior To Hardware Queues
| Class of Service HAPTER Layer 2 Queue Settings ES-3052 Series Table 15: CoS Priority Levels (Continued) Priority Level Traffic Type Voice, less than 10 milliseconds latency and jitter Network Control CLI R EFERENCES "qos map phb-queue" on page 887 ◆... - Page 247 | Class of Service HAPTER Layer 2 Queue Settings ES-3052 Series NTERFACE To map internal PHB to hardware queues: Click Traffic, Priority, PHB to Queue. Select Add from the Action list. Map an internal PHB to a hardware queue. Depending on how an ingress packet is processed internally based on its CoS value, and the assigned output queue, the mapping done on this page can effectively determine the service priority for different traffic classes.
- Page 248 | Class of Service HAPTER Layer 3/4 Priority Settings ES-3052 Series 3/4 P AYER RIORITY ETTINGS Mapping Layer 3/4 Priorities to CoS Values The switch supports several common methods of prioritizing layer 3/4 traffic to meet application requirements. Traffic priorities can be specified in the IP header of a frame, using the priority bits in the Type of Service (ToS) octet, or the number of the TCP/UDP port.
- Page 249 | Class of Service HAPTER Layer 3/4 Priority Settings ES-3052 Series ARAMETERS These parameters are displayed in the web interface: Interface – Specifies a port or trunk. ◆ Trust Mode ◆ DSCP – Maps layer 3/4 priorities using Differentiated Services Code ■...
-
Page 250: Table 17: Default Mapping Of Dscp Values To Internal Phb/Drop Values
| Class of Service HAPTER Layer 3/4 Priority Settings ES-3052 Series OMMAND SAGE ◆ Enter per-hop behavior and drop precedence for any of the DSCP values 0 - 63. This map is only used when the priority mapping mode is set to DSCP ◆... - Page 251 | Class of Service HAPTER Layer 3/4 Priority Settings ES-3052 Series NTERFACE To map DSCP values to internal PHB/drop precedence: Click Traffic, Priority, DSCP to DSCP. Select Add from the Action list. Set the PHB and drop precedence for any DSCP value. Click Apply.
- Page 252 | Class of Service HAPTER Layer 3/4 Priority Settings ES-3052 Series Use the Traffic > Priority > CoS to DSCP page to maps CoS/CFI values in APPING incoming packets to per-hop behavior and drop precedence values for RIORITIES TO priority processing. DSCP NTERNAL ALUES...
-
Page 253: Table 18: Default Mapping Of Cos/Cfi To Internal Phb/Drop Precedence
| Class of Service HAPTER Layer 3/4 Priority Settings ES-3052 Series Table 18: Default Mapping of CoS/CFI to Internal PHB/Drop Precedence (0,0) (0,0) (1,0) (1,0) (2,0) (2,0) (3,0) (3,0) (4,0) (4,0) (5,0) (5,0) (6,0) (6,0) (7,0) (7,0) NTERFACE To map CoS/CFI values to internal PHB/drop precedence: Click Traffic, Priority, CoS to DSCP. - Page 254 | Class of Service HAPTER Layer 3/4 Priority Settings ES-3052 Series To show the CoS/CFI to internal PHB/drop precedence map: Click Traffic, Priority, CoS to DSCP. Select Show from the Action list. Select an interface. Figure 124: Showing CoS to DSCP Internal Mapping –...
-
Page 255: Q Uality Of S Ervice
UALITY OF ERVICE ES-3052 Series This chapter describes the following tasks required to apply QoS policies: Class Map – Creates a map which identifies a specific class of traffic. Policy Map – Sets the boundary parameters used for monitoring inbound traffic, and the action to take for conforming and non-conforming traffic. - Page 256 | Quality of Service HAPTER Configuring a Class Map ES-3052 Series OMMAND SAGE To create a service policy for a specific category or ingress traffic, follow these steps: Use the Configure Class (Add) page to designate a class name for a specific category of traffic.
- Page 257 | Quality of Service HAPTER Configuring a Class Map ES-3052 Series Description – A brief description of a class map. (Range: 1-64 ◆ characters) Add Rule Class Name – Name of the class map. ◆ Type – Only one match command is permitted per class map, so the ◆...
- Page 258 | Quality of Service HAPTER Configuring a Class Map ES-3052 Series To show the configured class maps: Click Traffic, DiffServ. Select Configure Class from the Step list. Select Show from the Action list. Figure 126: Showing Class Maps To edit the rules for a class map: Click Traffic, DiffServ.
- Page 259 | Quality of Service HAPTER Creating QoS Policies ES-3052 Series To show the rules for a class map: Click Traffic, DiffServ. Select Configure Class from the Step list. Select Show Rule from the Action list. Figure 128: Showing the Rules for a Class Map REATING OLICIES Use the Traffic >...
- Page 260 | Quality of Service HAPTER Creating QoS Policies ES-3052 Series Policing is based on a token bucket, where bucket depth (that is, the maximum burst before the bucket overflows) is specified by the “burst” field (BC), and the average rate tokens are removed from the bucket is specified by the “rate”...
- Page 261 | Quality of Service HAPTER Creating QoS Policies ES-3052 Series if Te(t)-B ≥ 0, the packets is yellow and Te is decremented by B ■ down to the minimum value of 0, else the packet is red and neither Tc nor Te is decremented. ■...
- Page 262 | Quality of Service HAPTER Creating QoS Policies ES-3052 Series respectively. The maximum size of the token bucket P is BP and the maximum size of the token bucket C is BC. The token buckets P and C are initially (at time 0) full, that is, the token count Tp(0) = BP and the token count Tc(0) = BC.
- Page 263 | Quality of Service HAPTER Creating QoS Policies ES-3052 Series ARAMETERS These parameters are displayed in the web interface: Policy Name – Name of policy map. (Range: 1-32 characters) ◆ Description – A brief description of a policy map. (Range: 1-64 ◆...
- Page 264 | Quality of Service HAPTER Creating QoS Policies ES-3052 Series Committed Information Rate (CIR) – Rate in kilobits per ■ second. (Range: 64-1000000 kbps at a granularity of 64 kbps or maximum port speed, whichever is lower) The rate cannot exceed the configured interface speed. Committed Burst Size (BC) –...
- Page 265 | Quality of Service HAPTER Creating QoS Policies ES-3052 Series Exceeded Burst Size (BE) – Burst in excess of committed ■ burst size. (Range: 4000-16000000 at a granularity of 4k bytes) The burst size cannot exceed 16 Mbytes. Conform – Specifies that traffic conforming to the maximum ■...
- Page 266 | Quality of Service HAPTER Creating QoS Policies ES-3052 Series Peak Information Rate (PIR) – Rate in kilobits per second. ■ (Range: 64-1000000 kbps at a granularity of 64 kbps or maximum port speed, whichever is lower) The rate cannot exceed the configured interface speed. Committed Burst Size (BC) –...
- Page 267 | Quality of Service HAPTER Creating QoS Policies ES-3052 Series NTERFACE To configure a policy map: Click Traffic, DiffServ. Select Configure Policy from the Step list. Select Add from the Action list. Enter a policy name. Enter a description. Click Add. Figure 129: Configuring a Policy Map To show the configured policy maps: Click Traffic, DiffServ.
- Page 268 | Quality of Service HAPTER Creating QoS Policies ES-3052 Series To edit the rules for a policy map: Click Traffic, DiffServ. Select Configure Policy from the Step list. Select Add Rule from the Action list. Select the name of a policy map. Set the CoS or per-hop behavior for matching packets to specify the quality of service to be assigned to the matching traffic class.
- Page 269 | Quality of Service HAPTER Attaching a Policy Map to a Port ES-3052 Series To show the rules for a policy map: Click Traffic, DiffServ. Select Configure Policy from the Step list. Select Show Rule from the Action list. Figure 132: Showing the Rules for a Policy Map TTACHING A OLICY AP TO A...
- Page 270 | Quality of Service HAPTER Attaching a Policy Map to a Port ES-3052 Series NTERFACE To bind a policy map to a port: Click Traffic, DiffServ. Select Configure Interface from the Step list. Check the box under the Ingress field to enable a policy map for a port. Select a policy map from the scroll-down box.
- Page 271 IP T RAFFIC ONFIGURATION ES-3052 Series This chapter covers the following topics: Global Settings – Enables VOIP globally, sets the Voice VLAN, and the ◆ aging time for attached ports. Telephony OUI List – Configures the list of phones to be treated as VOIP ◆...
- Page 272 | VoIP Traffic Configuration HAPTER Configuring VoIP Traffic ES-3052 Series IP T ONFIGURING RAFFIC Use the Traffic > VoIP (Configure Global) page to configure the switch for VoIP traffic. First enable automatic detection of VoIP devices attached to the switch ports, then set the Voice VLAN ID for the network. The Voice VLAN aging time can also be set to remove a port from the Voice VLAN when VoIP traffic is no longer received on the port.
- Page 273 | VoIP Traffic Configuration HAPTER Configuring Telephony OUI ES-3052 Series NTERFACE To configure global settings for a Voice VLAN: Click Traffic, VoIP. Select Configure Global from the Step list. Enable Auto Detection. Specify the Voice VLAN ID. Adjust the Voice VLAN Aging Time if required. Click Apply.
- Page 274 | VoIP Traffic Configuration HAPTER Configuring Telephony OUI ES-3052 Series FF-FF-FF-FF-FF-FF specifies a single MAC address. (Default: FF-FF-FF-00-00-00) Description – User-defined text that identifies the VoIP devices. ◆ NTERFACE To configure MAC OUI numbers for VoIP equipment: Click Traffic, VoIP. Select Configure OUI from the Step list.
- Page 275 | VoIP Traffic Configuration HAPTER Configuring VoIP Traffic Ports ES-3052 Series To show the MAC OUI numbers used for VoIP equipment: Click Traffic, VoIP. Select Configure OUI from the Step list. Select Show from the Action list. Figure 136: Showing an OUI Telephony List IP T ONFIGURING RAFFIC...
- Page 276 | VoIP Traffic Configuration HAPTER Configuring VoIP Traffic Ports ES-3052 Series When OUI is selected, be sure to configure the MAC address ranges in the Telephony OUI list. Manual – The Voice VLAN feature is enabled on the port, but the ■...
- Page 277 | VoIP Traffic Configuration HAPTER Configuring VoIP Traffic Ports ES-3052 Series NTERFACE To configure VoIP traffic settings for a port: Click Traffic, VoIP. Select Configure Interface from the Step list. Configure any required changes to the VoIP settings each port. Click Apply.
- Page 278 | VoIP Traffic Configuration HAPTER Configuring VoIP Traffic Ports ES-3052 Series – 278 –...
- Page 279 ECURITY EASURES ES-3052 Series You can configure this switch to authenticate users logging into the system for management access using local or remote authentication methods. Port-based authentication using IEEE 802.1X can also be configured to control either management access to the uplink ports or client access to the data ports.
- Page 280 | Security Measures HAPTER AAA Authorization and Accounting ES-3052 Series DHCP Snooping – Filter IP traffic on insecure ports for which the source ◆ address cannot be identified via DHCP snooping. DoS Protection – Protects against Denial-of-Service attacks. ◆ The priority of execution for the filtering commands is Port Security, Port Authentication, Network Access, Web Authentication, Access Control Lists, IP Source Guard, and then DHCP Snooping.
- Page 281 | Security Measures HAPTER AAA Authorization and Accounting ES-3052 Series Define RADIUS and TACACS+ server groups to support the accounting and authorization of services. Define a method name for each service to which you want to apply accounting or authorization and specify the RADIUS or TACACS+ server groups to use.
- Page 282 | Security Measures HAPTER AAA Authorization and Accounting ES-3052 Series TACACS – User authentication is performed using a TACACS+ ■ server only. [authentication sequence] – User authentication is performed by up ■ to three authentication methods in the indicated sequence. NTERFACE To configure the method(s) of controlling management access: Click Security, AAA, System Authentication.
- Page 283 | Security Measures HAPTER AAA Authorization and Accounting ES-3052 Series RADIUS encrypts only the password in the access-request packet from the client to the server, while TACACS+ encrypts the entire body of the packet. CLI R EFERENCES "RADIUS Client" on page 626 ◆...
- Page 284 | Security Measures HAPTER AAA Authorization and Accounting ES-3052 Series Authentication Retries – Number of times the switch tries to ■ authenticate logon access via the authentication server. (Range: 1-30; Default: 2) Set Key – Mark this box to set or modify the encryption key. ■...
- Page 285 | Security Measures HAPTER AAA Authorization and Accounting ES-3052 Series When specifying the priority sequence for a sever, the server index must already be defined (see "Configuring Local/Remote Logon Authentication" on page 281). NTERFACE To configure the parameters for RADIUS or TACACS+ authentication: Click Security, AAA, Server.
- Page 286 | Security Measures HAPTER AAA Authorization and Accounting ES-3052 Series Figure 141: Configuring Remote Authentication Server (TACACS+) To configure the RADIUS or TACACS+ server groups to use for accounting and authorization: Click Security, AAA, Server. Select Configure Group from the Step list. Select Add from the Action list.
- Page 287 | Security Measures HAPTER AAA Authorization and Accounting ES-3052 Series To show the RADIUS or TACACS+ server groups used for accounting and authorization: Click Security, AAA, Server. Select Configure Group from the Step list. Select Show from the Action list. Figure 143: Showing AAA Server Groups Use the Security >...
- Page 288 | Security Measures HAPTER AAA Authorization and Accounting ES-3052 Series Exec – Administrative accounting for local console, Telnet, or SSH ■ connections. Method Name – Specifies an accounting method for service requests. ◆ The “default” methods are used for a requested service if no other methods have been defined.
- Page 289 | Security Measures HAPTER AAA Authorization and Accounting ES-3052 Series Show Information – Statistics User Name - Displays a registered user name. ◆ Accounting Type - Displays the accounting service. ◆ Interface - Displays the receive port number through which this user ◆...
- Page 290 | Security Measures HAPTER AAA Authorization and Accounting ES-3052 Series To configure the accounting method applied to various service types and the assigned server group: Click Security, AAA, Accounting. Select Configure Method from the Step list. Select Add from the Action list. Select the accounting type (802.1X, Exec).
- Page 291 | Security Measures HAPTER AAA Authorization and Accounting ES-3052 Series To configure the accounting method applied to specific interfaces, console commands entered at specific privilege levels, and local console, Telnet, or SSH connections: Click Security, AAA, Accounting. Select Configure Service from the Step list. Select the accounting type (802.1X, Exec).
- Page 292 | Security Measures HAPTER AAA Authorization and Accounting ES-3052 Series To display a summary of the configured accounting methods and assigned server groups for specified service types: Click Security, AAA, Accounting. Select Show Information from the Step list. Click Summary. Figure 149: Displaying a Summary of Applied AAA Accounting Methods To display basic accounting information and statistics recorded for user sessions:...
- Page 293 | Security Measures HAPTER AAA Authorization and Accounting ES-3052 Series AAA authentication through a RADIUS or TACACS+ server must be ◆ enabled before authorization is enabled. ARAMETERS These parameters are displayed in the web interface: Configure Method ◆ Authorization Type – Specifies the service as Exec, indicating administrative authorization for local console, Telnet, or SSH connections.
- Page 294 | Security Measures HAPTER AAA Authorization and Accounting ES-3052 Series NTERFACE To configure the authorization method applied to the Exec service type and the assigned server group: Click Security, AAA, Authorization. Select Configure Method from the Step list. Specify the name of the authorization method and server group name. Click Apply.
- Page 295 | Security Measures HAPTER AAA Authorization and Accounting ES-3052 Series To configure the authorization method applied to local console, Telnet, or SSH connections: Click Security, AAA, Authorization. Select Configure Service from the Step list. Enter the required authorization method. Click Apply. Figure 153: Configuring AAA Authorization Methods for Exec Service To display a the configured authorization method and assigned server groups for The Exec service type:...
- Page 296 | Security Measures HAPTER Configuring User Accounts ES-3052 Series ONFIGURING CCOUNTS Use the Security > User Accounts page to control management access to the switch based on manually configured user names and passwords. CLI R EFERENCES "User Accounts" on page 621 ◆...
- Page 297 | Security Measures HAPTER Configuring User Accounts ES-3052 Series NTERFACE To configure user accounts: Click Security, User Accounts. Select Add from the Action list. Specify a user name, select the user's access level, then enter a password if required and confirm it. Click Apply.
- Page 298 | Security Measures HAPTER Web Authentication ES-3052 Series UTHENTICATION Web authentication allows stations to authenticate and access the network in situations where 802.1X or Network Access authentication are infeasible or impractical. The web authentication feature allows unauthenticated hosts to request and receive a DHCP assigned IP address and perform DNS queries.
- Page 299 | Security Measures HAPTER Web Authentication ES-3052 Series NTERFACE To configure global parameters for web authentication: Click Security, Web Authentication. Select Configure Global from the Step list. Enable web authentication globally on the switch, and adjust any of the protocol parameters as required. Click Apply.
- Page 300 | Security Measures HAPTER Network Access (MAC Address Authentication) ES-3052 Series NTERFACE To enable web authentication for a port: Click Security, Web Authentication. Select Configure Interface from the Step list. Set the status box to enabled for any port that requires web authentication, and click Apply Mark the check box for any host addresses that need to be re- authenticated, and click Re-authenticate.
-
Page 301: Table 19: Dynamic Qos Profiles
| Security Measures HAPTER Network Access (MAC Address Authentication) ES-3052 Series to a switch port. Traffic received from a specific MAC address is forwarded by the switch only if the source MAC address is successfully authenticated by a central RADIUS server. While authentication for a MAC address is in progress, all traffic is blocked until authentication is completed. - Page 302 | Security Measures HAPTER Network Access (MAC Address Authentication) ES-3052 Series Table 19: Dynamic QoS Profiles (Continued) Profile Attribute Syntax Example IP ACL ip-access-group-in=ip-acl-name ip-access-group-in=ipv4acl IPv6 ACL ipv6-access-group-in=ipv6-acl- ipv6-access-group-in=ipv6acl name MAC ACL mac-access-group-in=mac-acl- mac-access-group-in=macAcl name ◆ Multiple profiles can be specified in the Filter-ID attribute by using a semicolon to separate each profile.
- Page 303 | Security Measures HAPTER Network Access (MAC Address Authentication) ES-3052 Series MAC address authentication is configured on a per-port basis, however ONFIGURING LOBAL there are two configurable parameters that apply globally to all ports on ETTINGS FOR the switch. Use the Security > Network Access (Configure Global) page to ETWORK CCESS configure MAC address authentication aging and reauthentication time.
- Page 304 | Security Measures HAPTER Network Access (MAC Address Authentication) ES-3052 Series NTERFACE To configure aging status and reauthentication time for MAC address authentication: Click Security, Network Access. Select Configure Global from the Step list. Enable or disable aging for secure addresses, and modify the reauthentication time as required.
- Page 305 | Security Measures HAPTER Network Access (MAC Address Authentication) ES-3052 Series Network Access Max MAC Count – Sets the maximum number of ◆ MAC addresses that can be authenticated on a port interface via all forms of authentication (including Network Access and IEEE 802.1X). (Range: 1-1024;...
- Page 306 | Security Measures HAPTER Network Access (MAC Address Authentication) ES-3052 Series NTERFACE To configure MAC authentication on switch ports: Click Security, Network Access. Select Configure Interface from the Step list. Click the General button. Make any configuration changes required to enable address authentication on a port, set the maximum number of secure addresses supported, the guest VLAN to use when MAC Authentication or 802.1X Authentication fails, and the dynamic VLAN and QoS assignments.
- Page 307 | Security Measures HAPTER Network Access (MAC Address Authentication) ES-3052 Series Action – The switch can respond in three ways to a link up or down ◆ trigger event. Trap – An SNMP trap is sent. ■ Trap and shutdown – An SNMP trap is sent and the port is shut ■...
- Page 308 | Security Measures HAPTER Network Access (MAC Address Authentication) ES-3052 Series There is no limitation on the number of entries used in a filter table. ◆ ARAMETERS These parameters are displayed in the web interface: Filter ID – Adds a filter rule for the specified filter. ◆...
- Page 309 | Security Measures HAPTER Network Access (MAC Address Authentication) ES-3052 Series To show the MAC address filter table for MAC authentication: Click Security, Network Access. Select Configure MAC Filter from the Step list. Select Show from the Action list. Figure 163: Showing the MAC Address Filter Table for Network Access Use the Security >...
- Page 310 | Security Measures HAPTER Network Access (MAC Address Authentication) ES-3052 Series Attribute – Indicates a static or dynamic address. ■ NTERFACE To display the authenticated MAC addresses stored in the secure MAC address table: Click Security, Network Access. Select Show Information from the Step list. Use the sort key to display addresses based MAC address, interface, or attribute.
-
Page 311: Table 20: Https System Support
| Security Measures HAPTER Configuring HTTPS ES-3052 Series HTTPS ONFIGURING You can configure the switch to enable the Secure Hypertext Transfer Protocol (HTTPS) over the Secure Socket Layer (SSL), providing secure access (i.e., an encrypted connection) to the switch’s web interface. Use the Security >... - Page 312 | Security Measures HAPTER Configuring HTTPS ES-3052 Series Users are automatically logged off of the HTTP server or HTTPS server if no input is detected for 600 seconds. Connection to the web interface is not supported for HTTPS using an IPv6 link local address.
- Page 313 The switch must be reset for the new certificate to be activated. To reset the switch, see "Resetting the System" on page 121 or type “reload” at the command prompt: ES-3052G# reload CLI R EFERENCES "Web Server" on page 641 ◆...
- Page 314 | Security Measures HAPTER Configuring the Secure Shell ES-3052 Series NTERFACE To replace the default secure-site certificate: Click Security, HTTPS. Select Copy Certificate from the Step list. Fill in the TFTP server, certificate and private key file name, and private password.
- Page 315 | Security Measures HAPTER Configuring the Secure Shell ES-3052 Series OMMAND SAGE The SSH server on this switch supports both password and public key authentication. If password authentication is specified by the SSH client, then the password can be authenticated either locally or via a RADIUS or TACACS+ remote authentication server, as specified on the System Authentication page (page...
- Page 316 | Security Measures HAPTER Configuring the Secure Shell ES-3052 Series Enable SSH Service – On the SSH Settings page, enable the SSH server on the switch. Authentication – One of the following authentication methods is employed: Password Authentication (for SSH v1.5 or V2 Clients) The client sends its password to the server.
- Page 317 | Security Measures HAPTER Configuring the Secure Shell ES-3052 Series checks whether the signature is correct. If both checks succeed, the client is authenticated. The SSH server supports up to four client sessions. The maximum number of client sessions includes both current Telnet sessions and SSH sessions.
- Page 318 | Security Measures HAPTER Configuring the Secure Shell ES-3052 Series NTERFACE To configure the SSH server: Click Security, SSH. Select Configure Global from the Step list. Enable the SSH server. Adjust the authentication parameters as required. Click Apply. Figure 167: Configuring the SSH Server Use the Security >...
- Page 319 | Security Measures HAPTER Configuring the Secure Shell ES-3052 Series client to select either DES (56-bit) or 3DES (168-bit) for data encryption. The switch uses only RSA Version 1 for SSHv1.5 clients and DSA Version 2 for SSHv2 clients. Save Host-Key from Memory to Flash – Saves the host key from ◆...
- Page 320 | Security Measures HAPTER Configuring the Secure Shell ES-3052 Series To display or clear the SSH host key pair: Click Security, SSH. Select Configure Host Key from the Step list. Select Show from the Action list. Select the host-key type to clear. Click Clear.
- Page 321 | Security Measures HAPTER Configuring the Secure Shell ES-3052 Series The SSH server uses RSA or DSA for key exchange when the client first establishes a connection with the switch, and then negotiates with the client to select either DES (56-bit) or 3DES (168-bit) for data encryption.
- Page 322 | Security Measures HAPTER Access Control Lists ES-3052 Series To display or clear the SSH user’s public key: Click Security, SSH. Select Configure User Key from the Step list. Select Show from the Action list. Select a user from the User Name list. Select the host-key type to clear.
- Page 323 | Security Measures HAPTER Access Control Lists ES-3052 Series OMMAND SAGE The following restrictions apply to ACLs: The maximum number of ACLs is 64. ◆ The maximum number of rules per system is 512 rules. ◆ An ACL can have up to 32 rules. However, due to resource restrictions, ◆...
- Page 324 | Security Measures HAPTER Access Control Lists ES-3052 Series NTERFACE To show information on TCAM utilization: Click Security, ACL. Select Configure ACL from the Step list. Select Show TCAM from the Action list. Figure 172: Showing TCAM Utilization Use the Security > ACL (Configure ACL - Add) page to create an ACL. ETTING THE AME AND CLI R...
- Page 325 | Security Measures HAPTER Access Control Lists ES-3052 Series ARP – ARP ACL specifies static IP-to-MAC address bindings used for ■ ARP inspection (see "ARP Inspection" on page 340). NTERFACE To configure the name and type of an ACL: Click Security, ACL. Select Configure ACL from the Step list.
- Page 326 | Security Measures HAPTER Access Control Lists ES-3052 Series Use the Security > ACL (Configure ACL - Add Rule - IP Standard) page to ONFIGURING A configure a Standard IPv4 ACL. 4 ACL TANDARD CLI R EFERENCES "permit, deny, redirect-to (Standard IP ACL)" on page 725 ◆...
- Page 327 | Security Measures HAPTER Access Control Lists ES-3052 Series NTERFACE To add rules to a Standard IP ACL: Click Security, ACL. Select Configure ACL from the Step list. Select Add Rule from the Action list. Select IP Standard from the Type list. Select the name of an ACL from the Name list.
-
Page 328: Table 21: Priority Bits Processed By Extended Ipv4 Acl
| Security Measures HAPTER Access Control Lists ES-3052 Series "Time Range" on page 583 ◆ OMMAND SAGE Due to a ASIC limitation, the switch only checks the leftmost six priority bits. This presents no problem when checking DSCP or IP Precedence bits, but limits the checking of ToS bits (underlined in the following example) to the leftmost three bits, ignoring the right most fourth bit. - Page 329 | Security Measures HAPTER Access Control Lists ES-3052 Series Service Type – Packet priority settings based on the following criteria: ◆ ToS – Type of Service level. (Range: 0-15) ■ Precedence – IP precedence level. (Range: 0-7) ■ DSCP – DSCP priority level. (Range: 0-63) ■...
- Page 330 | Security Measures HAPTER Access Control Lists ES-3052 Series NTERFACE To add rules to an Extended IP ACL: Click Security, ACL. Select Configure ACL from the Step list. Select Add Rule from the Action list. Select IP Extended from the Type list. Select the name of an ACL from the Name list.
- Page 331 | Security Measures HAPTER Access Control Lists ES-3052 Series Use the Security > ACL (Configure ACL - Add Rule - IPv6 Standard) page to ONFIGURING A configure a Standard IPv6ACL. 6 ACL TANDARD CLI R EFERENCES "permit, deny, redirect-to (Standard IPv6 ACL)" on page 732 ◆...
- Page 332 | Security Measures HAPTER Access Control Lists ES-3052 Series NTERFACE To add rules to a Standard IPv6 ACL: Click Security, ACL. Select Configure ACL from the Step list. Select Add Rule from the Action list. Select IPv6 Standard from the Type list. Select the name of an ACL from the Name list.
- Page 333 | Security Measures HAPTER Access Control Lists ES-3052 Series Use the Security > ACL (Configure ACL - Add Rule - IPv6 Extended) page ONFIGURING AN to configure an Extended IPv6 ACL. 6 ACL XTENDED CLI R EFERENCES "permit, deny, redirect-to (Extended IPv6 ACL)" on page 733 ◆...
- Page 334 | Security Measures HAPTER Access Control Lists ES-3052 Series 43: Routing (RFC 2460) ■ 44: Fragment (RFC 2460) ■ 50: Encapsulating Security Payload (RFC 2406) ■ 51: Authentication (RFC 2402) ■ 60: Destination Options (RFC 2460) ■ Time Range – Name of a time range. ◆...
- Page 335 | Security Measures HAPTER Access Control Lists ES-3052 Series Use the Security > ACL (Configure ACL - Add Rule - MAC) page to ONFIGURING A configure a MAC ACL based on hardware addresses, packet format, and Ethernet type. CLI R EFERENCES "permit, deny, redirect-to (MAC ACL)"...
- Page 336 | Security Measures HAPTER Access Control Lists ES-3052 Series Time Range – Name of a time range. ◆ NTERFACE To add rules to a MAC ACL: Click Security, ACL. Select Configure ACL from the Step list. Select Add Rule from the Action list. Select MAC from the Type list.
- Page 337 | Security Measures HAPTER Access Control Lists ES-3052 Series Use the Security > ACL (Configure ACL - Add Rule - ARP) page to configure ONFIGURING AN ACLs based on ARP message addresses. ARP Inspection can then use these ACLs to filter suspicious traffic (see "Configuring Global Settings for ARP Inspection"...
- Page 338 | Security Measures HAPTER Access Control Lists ES-3052 Series NTERFACE To add rules to an ARP ACL: Click Security, ACL. Select Configure ACL from the Step list. Select Add Rule from the Action list. Select ARP from the Type list. Select the name of an ACL from the Name list.
- Page 339 | Security Measures HAPTER Access Control Lists ES-3052 Series After configuring ACLs, use the Security > ACL (Configure Interface) page INDING A ORT TO AN to bind the ports that need to filter traffic to the appropriate ACLs. You can CCESS ONTROL assign one IP access list and one MAC access list to any port.
- Page 340 | Security Measures HAPTER ARP Inspection ES-3052 Series NTERFACE To bind an ACL to a port: Click Security, ACL. Select Configure Interface from the Step list. Select IP or MAC from the Type list. Select a port. Select the name of an ACL from the ACL list. Click Apply.
- Page 341 | Security Measures HAPTER ARP Inspection ES-3052 Series OMMAND SAGE Enabling & Disabling ARP Inspection ARP Inspection is controlled on a global and VLAN basis. ◆ By default, ARP Inspection is disabled both globally and on all VLANs. ◆ If ARP Inspection is globally enabled, then it becomes active only on ■...
- Page 342 | Security Measures HAPTER ARP Inspection ES-3052 Series with different MAC addresses are classified as invalid and are dropped. IP – Checks the ARP body for invalid and unexpected IP addresses. ■ These addresses include 0.0.0.0, 255.255.255.255, and all IP multicast addresses.
- Page 343 | Security Measures HAPTER ARP Inspection ES-3052 Series Src-MAC – Validates the source MAC address in the Ethernet ■ header against the sender MAC address in the ARP body. This check is performed on both ARP requests and responses. Log Message Number – The maximum number of entries saved in a ◆...
- Page 344 | Security Measures HAPTER ARP Inspection ES-3052 Series ARP Inspection uses the DHCP snooping bindings database for the list ◆ of valid IP-to-MAC address bindings. ARP ACLs take precedence over entries in the DHCP snooping bindings database. The switch first compares ARP packets to any specified ARP ACLs.
- Page 345 | Security Measures HAPTER ARP Inspection ES-3052 Series NTERFACE To configure VLAN settings for ARP Inspection: Click Security, ARP Inspection. Select Configure VLAN from the Step list. Enable ARP inspection for the required VLANs, select an ARP ACL filter to check for configured addresses, and select the Static option to bypass checking the DHCP snooping bindings database if required.
-
Page 346: Table 22: Arp Inspection Statistics
| Security Measures HAPTER ARP Inspection ES-3052 Series Setting the rate limit to “0” means that there is no restriction on the number of ARP packets that can be processed by the CPU. The switch will drop all ARP packets received on a port which exceeds the configured ARP-packets-per-second rate limit. - Page 347 | Security Measures HAPTER ARP Inspection ES-3052 Series Table 22: ARP Inspection Statistics (Continued) Parameter Description ARP packets dropped by Count of packets that failed the destination MAC address test. additional validation (Dst-MAC) Total ARP packets processed Count of all ARP packets processed by the ARP Inspection by ARP inspection engine.
-
Page 348: Table 23: Arp Inspection Log
| Security Measures HAPTER ARP Inspection ES-3052 Series Use the Security > ARP Inspection (Show Information - Show Log) page to ISPLAYING THE show information about entries stored in the log, including the associated NSPECTION VLAN, port, and address components. CLI R EFERENCES "show ip arp inspection log"... - Page 349 | Security Measures HAPTER Filtering IP Addresses for Management Access ES-3052 Series IP A ILTERING DDRESSES FOR ANAGEMENT CCESS Use the Security > IP Filter page to create a list of up to 15 IP addresses or IP address groups that are allowed management access to the switch through the web interface, SNMP, or Telnet.
- Page 350 | Security Measures HAPTER Filtering IP Addresses for Management Access ES-3052 Series NTERFACE To create a list of IP addresses authorized for management access: Click Security, IP Filter. Select Add from the Action list. Select the management interface to filter (Web, SNMP, Telnet). Enter the IP addresses or range of addresses that are allowed management access to an interface.
Need help?
Do you have a question about the ES-3052G and is the answer not in the manual?
Questions and answers