Table of Contents
Advertisement
Advertisement
Table of Contents

Related Manuals for NUTRIBULLET BALANCE


Summary of Contents for NUTRIBULLET BALANCE
- Page 1 USER G UIDE...
- Page 2 IMPORTANT SAFEGUARDS & CAUTIONARY INFORMATION • UNPLUG THE NUTRIBULLET BALANCE WHEN IT IS NOT IN USE. MAKE SURE THE POWER BASE IS UNPLUGGED BEFORE ASSEMBLING, DISASSEMBLING, ADDING FOR YOUR SAFETY, CAREFULLY READ ALL INSTRUCTIONS BEFORE OPERATING YOUR ADDITIONAL PARTS, OR CLEANING.
- Page 3 BALANCE HAS AN INTERNAL THERMAL BREAKER THAT SHUTS OFF THE UNIT WHEN • The NutriBullet Balance is not intended for use in microwave ovens. Do not place the IT OVERHEATS. THE POWER BASE WILL RESET WHEN THE UNIT IS UNPLUGGED AND NutriBullet Balance cups, power base or any accessories in a microwave as this may THE THERMAL BREAKER COOLS DOWN.
- Page 4 • The cyclonic action of your NutriBullet Balance requires the use of liquids to make NutriBlasts and other nutritious beverages. The NutriBullet Balance is not intended to be used as an ice NOTE: This equipment has been tested and found to comply with the limits for a Class B crusher, and not without liquids.
- Page 5 Slots and openings • This equipment should be installed and operated with minimum distance 20cm between on the bottom of the NutriBullet Balance are provided for ventilation to ensure reliable the radiator and your body.
- Page 6 PITS, PLUM PITS, AND PEACH PITS. CLEANING THE NUTRIBULLET BALANCE Cleaning Safeguards Everyone hates cleaning up, which is just one more reason the NutriBullet Balance is such a wonderful time saver. • RINSE BLADES (AND CUPS) IMMEDIATELY AFTER USE TO PREVENT DEBRIS FROM WARNING: DRYING AND STICKING TO VESSELS —...
- Page 7 WARP THE PLASTIC AND DAMAGE THE GASKETS. NEVER SUBMERGE Stubborn Cleanup If ingredients dry inside the NutriBullet Balance, make your cleanup a snap by filling the cup about 2/3 full with room temperature soapy water and screw on the Extractor Blade. Place SAVE THESE INSTRUCTIONS the cup assembly on the NutriBullet Balance, power base for about 20-30 seconds.
- Page 8 Let’s Get Started Table of What You Get Contents Connecting with Bluetooth Troubleshooting Using with Multiple Devices, Connecting and Disconnecting Manually, Disconnecting the Balance Blender, Start Making Your Recipes Manual Mode Cleaning the NutriBullet Balance Smart Nutrition Sensor and Well...
- Page 9 Watch recipes come to life and tweak them on the fl y to suit your taste. No more sugary treats disguised as healthy smoothies or protein shakes in name only. With NutriBullet Balance the smoothie you envision is the smoothie you can make, down to the gram, every time.
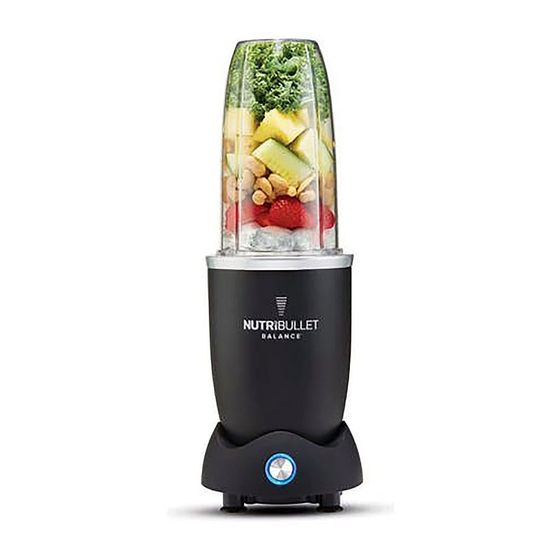
- Page 10 2 Colossal 1 Extractor 2 Flip-Top Power Base with Cups Blade To-Go Lids Download the NutriBullet Balance App from Smart Nutrition NutriBulletBalance.com/app Sensor™ or find it in either: *The 1200 watt rating of this appliance was obtained by using the...
- Page 11 Your NutriBullet Balance Blender can only connect to one device at a time. If you are having trouble connecting, make sure the Balance To connect the Balance Blender to your device: Blender is not connected to a di erent device.
- Page 12 Connecting and Disconnecting Manually The App will display a check mark You can connect to or disconnect next to the Balance Blender it is from the Balance Blender manually currently connected to. in the Balance App. Touch the Balance Blender icon to the right...
- Page 13 Making Your Recipes Disconnecting the Balance Blender Make sure your You can force the Balance Balance Blender is Blender to disconnect from the connected to the App. device it is connected to by touching and holding the button Press the icon and, on the blender.
- Page 14 View recipes and Click on the BLEND ratings quickly by button. using fi lters. Select When prompted, your recipe. remove all items from the Base. NOTE: Make sure nothing is on top of the Smart Nutrition Sensor. 26 | NutriBulletBalance.com NutriBulletBalance.com | 27...
- Page 15 When prompted, Follow the step-by- place the Balance step directions in Cup on the Power the recipe. Base, open side up. NOTE: To prevent leakage when creating NOTE: Make sure the a recipe, ALWAYS make Smart Nutrition Sensor sure that the ingredients is in place.
- Page 16 When prompted, Wait until the twist the Blade onto timer stops. the cup. Flip-over the cup, place it onto the base, then push and twist to the right. The Balance Blender will start blending. 30 | NutriBulletBalance.com NutriBulletBalance.com | 31...
- Page 17 Push and twist the Cup and Blade to the left to release them from the Power Base. Remove the Blade. Enjoy! 32 | NutriBulletBalance.com NutriBulletBalance.com | 33...
- Page 18 Manual Mode Add the liquid of your choice up to You can use the NutriBullet Balance without using the Balance App. the MAX line. (Liquid is This is called Manual Mode. This mode is used for simply blending. required! Ingredients...
- Page 19 Fit the vessel Blade-side down onto the Power Base, aligning the actuator tabs. Press down to begin extraction, gently rotating the Cup clockwise to lock the cup in place. Extract for no longer than 1 minute. If more extraction is needed, wait 1 minute, then repeat the extraction process Twist the in 1 minute intervals up to three times as needed...
- Page 20 To turn off the NutriBullet Balance — simply twist in the opposite direction (counter- CAUTION: Do not run the Power Base in excess of 1 minute per interval. Do not run the Power Base for clockwise) to release the tabs and stop more than three 1-minute intervals without allowing it to cool for 2-3 minutes after the third pressing down on the Cup.
- Page 21 Cleaning the NutriBullet Balance Smart Nutrition Sensor and Well ™ For the most part the Power Base doesn’t really get dirty, but if you neglect to twist the Blade onto the Cup tightly, liquids can leak out Step 3: and get into the Base and actuator tabs. If this happens please use the Remove the following cleaning instructions.
- Page 22 Step 4: Wipe the Smart Nutrition Sensor Step 5: ™ with a damp cloth Wipe the well in the until clean. bottom of the Power Base with a damp cloth until clean. NOTE: The Smart Nutrition Sensor is a delicately calibrated scale. Handle with care.
- Page 23 Step 6: Replace the Smart Nutrition Sensor ™ lining up the arrow on For more how-to the Disc to the arrow information, visit in the well of the NutriBulletBalance.com Power Base. Gently press down until the Disc is level. 44 | NutriBulletBalance.com NutriBulletBalance.com | 45...
- Page 24 Additional Cups 38oz Colossal Cup is for 900ml max capacity. Recipe 24oz Tall Cup is for 550ml max capacity. 32oz Colossal Cup with handle is for 700ml 38oz Colossal Cup (2) 24oz Tall Cup (2) 32oz Colossal Cup max capacity. with handle(2) Stainless Steel Cup is for 500ml max capacity.
- Page 25 The NutriBullet just got smarter with NutriBullet Balance! Born from a quest for blending excellence, NutriBullet Balance features Bluetooth 4.0 Smart Nutrition Sensor technology that sends REAL-TIME nutrition data to your smart device as you blend recipes. View carbs, calories, protein, sugar and more in real time! This provides tighter control over blends by letting you know exactly what you’re making as you’re...
Need help?
Do you have a question about the BALANCE and is the answer not in the manual?
Questions and answers