
Related Manuals for Omcan HLC300


Summary of Contents for Omcan HLC300
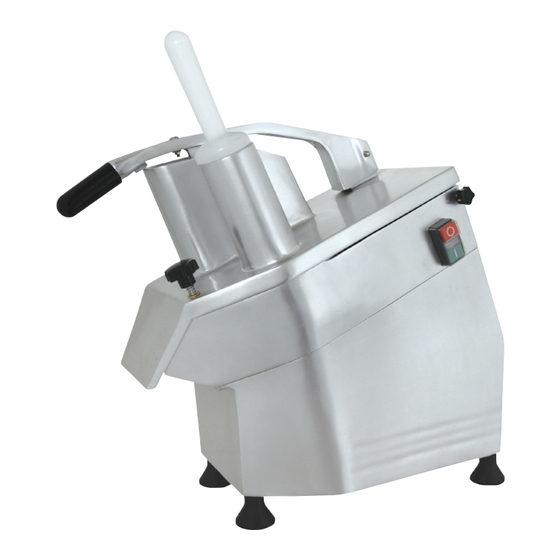
- Page 1 Vegetable Cutter Model HLC300 Instruction Manual Version 1 3115 Pepper Mill Court, Mississauga, ON, L5L 4X5 1-800-465-0234 4450 Witmer Industrial Estates, Unit 4, Niagara Falls, NY, 14305 www.omcan.com...
-
Page 2: Table Of Contents
Table of Contents Model HLC300 Section Page General Information -------------------------------------------------------------------------------- 3 Safety & Warranty ------------------------------------------------------------------------------ 3 - 4 Technical Specifications -------------------------------------------------------------------------- 4 Installation --------------------------------------------------------------------------------------- 4 - 5 Operation ----------------------------------------------------------------------------------------- 5 - 7 Maintenance ------------------------------------------------------------------------------------- 7 - 8 Troubleshooting ------------------------------------------------------------------------------------- 8... -
Page 3: General Information
General Information Omcan Manufacturing and Distributing Company Inc. and Food Machinery Of America, Inc. dba Omcan are not responsible for any harm or injury caused due to any person’s improper or negligent use of this equipment. The product shall only be operated by someone over the age of 18, of sound mind, and not under the influence of any drugs or alcohol, who has been trained in the correct operation of this machine, and is wearing authorized, proper safety clothing. -
Page 4: Technical Specifications
In any case, for suitable recycling, we suggest disposing of the products separately (differentiated waste) according to the current norms. DO NOT DISCARD ANY PACKAGING MATERIALS IN THE ENVIRONMENT! Technical Specifications 0.75 Disc Speed 270 RPM Mouth Opening 5.11” × 2.16” Electrical 110V/60/1 Weight 50.6 lbs. Dimensions (DWH) 19” × 9” × 19.70” Installation The machine connection and the setting at work must be made by skilled personnel. WARNING Both the system and location where the equipment is has to comply with all local regulations. Omcan denies any and all responsibility for direct or indirect damaged or injury which may ensue from not complying with the above mentioned regulations. Set the equipment on a wide, level, dry and fixed area. The unit must be far from heat and water sources. ELECTRIC CONNECTIONS The equipment is supplied with an electric cable to be connected to a magentothermic main switch. It is imperative that the equipment is properly grounded according and complies with all regulations. -
Page 5: Installation
Installation OMCAN DECLINES ANY AND ALL RESPONSIBILITY FOR DIRECT AND INDIRECT DAMAGES WHICH MAY ENSUE FROM NOT COMPLYING WITH THE REGULATIONS. THE CUTTING MACHINE IS MANUFACTURED INTO 110V/1/60HZ SETTINGS. WARNING: OPEN THE COVER, ROTATE THE SIDE HANDLE AND REMOVE THE CUTTING DISC (IF ANY) WITH THE MACHINE STOPPED, (OR WITH THE WHITE PLASTIC EJECTOR ONLY), THROUGH THE UPPER (ROUND) OPENING. -
Page 6: Operation
Operation SETTING THE DISCS ON THE MACHINE Rotate the knob as shown below and open the cover. First set the plastic ejecting disc (Pic. 5), then the disc selected for the cutting. Close the cover and reverse the rotation of the handle. Use the start button to automatically hook the discs in the correct position. Pic. 4 - Cover Opening Pic. 5 - Disc Position SETTING AND CUTTING THE FOOD Lift the handle and set the food inside the product opening, then close the handle. Press the green start button with your right hand and with your left hand, lightly push the handle downwards until food is fully used. Lift the handle to put in more food. The machine starts automatically when the handle is closed. Repeat these operations until all food is used. It is possible to use the two openings with a single disc. When two discs are used for cutting sticks and match-life food, the inlet opening set over the grid must be used. The smaller round opening is used to cut vegetables like carrots, vegetable marrows, etc. WARNING: NEVER USE THE HAND TO PRESS DOWN THE PRODUCT, BUT USE THE PESTLE SUPPLIED. Pic. 6... -
Page 7: Maintenance
Operation REPLACEMENT OF THE DISCS Turn off and unplug the machine. Turn the knob and lift the cover shown in Pic. 4. Turn the disc counterclockwise and cover the cutting edge with appropriate material (rubber, fabric, etc.). Then lift it by setting your hand under the disc. Lift the discs to remove it (Pic. 7 and 8). Pic. 7 Pic. 8 Maintenance Before carrying out any cleaning or maintenance operations, turn the machine off and unplug it from the socket. Clean the unit and discs every day. The discs, grid and plastic ejector can be removed for washing under a warm water jet. Clean the machine and all other areas with a wet clothe or sponge and warm water. Remove all wastes from the machine during cleaning. Open the cover and loosen the two pins, as shown before, to remove the cover and wash it under a water jet. Pic. 9... -
Page 8: Troubleshooting
Maintenance Clean the surfaces with water, alcohol or detergents that are not abrasive. Never use damaging tools to assist in the cleaning of the machine (such as steel wool). This may cause damage to the machine. Use of non-toxic products which will produce the best results. PERIODS OF INACTIVITY Should the machine be idle for a long period of time, disconnect the main wall switch and clean the machine and its accessories thoroughly. Use food grade mineral oil (27336) to protect all the machine’s components. This helps prevent moisture and dirt from getting inside the machine. It is advised to cover the machine with a nylon (or similar) cloth. Troubleshooting When the pilot light is on, but the machine does not start, check to make sure that the handle and cover are closed. These are the locations of the microswitches and the machine will not start if they are not correctly fixed. In the event of other problems, turn the machine off and unplug it. Do not try to start or tamper with the equipment. Let a qualified technician solve the problem. Contact the Omcan Service Center at 1-800-465-0324 to find a qualified technician. -
Page 9: Parts Breakdowns
Parts Breakdown HLC-300 Model HLC300 19476... -
Page 10: Parts Breakdowns
Parts Breakdown Model HLC300 19476 Item Item Item Description Position Description Position Description Position 24493 Bolt 27179 Isolated Sheath 24525 Magnet Steel 24494 Handle Bar 27179 Gear 24526 Knife 24495 Nylon Gasket 27179 Block Circle 24527 Body 24496 Pressing Piece... -
Page 11: Electrical Schematics
Electrical Schematics Model HLC300 19476... -
Page 13: Warranty Registration
1889 Maryland Avenue, Mississauga, Ontario Niagara Falls, New York Canada, L5L 4X5 USA, 14305 Purchaser’s Information Name: Company Name: Address: Telephone: City: Province or State: Postal or Zip: Email Address: Country: Type of Company: Restaurant Bakery Deli Dealer from which Purchased: Butcher Supermarket Caterer Dealer City: Dealer Province or State: Institution (specify): Invoice: Other (specify): Model Name: Model Number: Serial Number: Machine Description: Date of Purchase (MM/DD/YYYY): Date of Installation (MM/DD/YYYY): Thank you for choosing Omcan... - Page 16 Over the last 60 years, Omcan has grown to become a leading supplier to the food service industry in Canada and the USA. Our success over these many years is directly attributed to our established relationships with all of our valued customers and through providing them with Diverse, Dependable and Proven products.
Need help?
Do you have a question about the HLC300 and is the answer not in the manual?
Questions and answers