Table of Contents
Advertisement
Advertisement
Chapters
Table of Contents

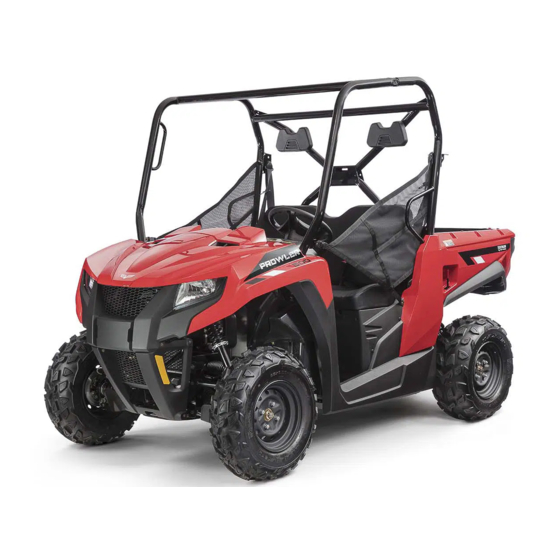
Related Manuals for Textron PROWLER 500 2018


Summary of Contents for Textron PROWLER 500 2018
- Page 2 If a label comes off or becomes hard to read, con- tact your authorized dealer for a free replacement. Contact Textron Off Road Service Department, P.O. Box 810, Thief River Falls, MN 56701, for proper registration information.
-
Page 3: Foreword
Foreword Congratulations and thank you for pur- You have chosen a quality vehicle chasing an Textron Off Road Prowler designed and manufactured to give 500. Built with American engineering dependable service. Be sure, as the and manufacturing know-how, it is... -
Page 4: Table Of Contents
Table of Contents Foreword ..........1 Hydraulic Brake ........36 Parts and Accessories......1 Gas Hoses ........... 37 Protective Rubber Boots ...... 37 Division I - Safety Battery..........38 Spark Plug..........41 Safety Alert ..........4 Air Filter/Housing Drain ......41 Warning Labels........ -
Page 5: Division I - Safety
Division I - Safety This vehicle is not a toy • Always use proper procedures if you and can be hazardous stall or roll backward when climbing to operate. a hill. To avoid stalling, maintain a steady speed when climbing a hill. If •... -
Page 6: Safety Alert
Safety Alert * Never consume alcohol or drugs before or while operating this vehi- You should be aware that THIS VEHI- cle. CLE IS NOT A TOY AND CAN BE HAZARDOUS TO OPERATE. This * Never operate this vehicle at exces- vehicle handles differently from other sive speeds. -
Page 7: Warning Labels
Warning Labels PK015B 4411-883 3411-970 4411-964 4411-965 Pour commander des Étiquettes de Mise en Garde gratuites, voyez votre concessionnaire 1436-444. agréé pour le numéro de pièce ! WARNING Indicates a hazardous situation which, if not avoided, could result in death or serious injury. -
Page 8: Warning Labels
Warning Labels TXR003B 4411-960 4411-962 4411-961 4411-963 Indicates a hazardous situation which, if not ! WARNING avoided, could result in death or serious injury. -
Page 9: Location Of Parts And Controls
Location of Parts and Controls 1. Accelerator Pedal 2. Brake Pedal 3. In-Dash Storage Compartment 4. DC Power Outlets 5. Reverse Override Switch 6. Drive Select Switch 7. Ignition/Start Switch TXR003A 8. Headlight Switch 9. Shift Lever 10. Headlights 11. Passenger Side Restraint Latch 12. -
Page 10: Warnings
Warnings ! WARNING POTENTIAL HAZARD Operating this vehicle without proper instruction. WHAT CAN HAPPEN The risk of an accident is greatly increased if the operator does not know how to operate this vehicle properly in different situations and on different types of terrain. HOW TO AVOID THE HAZARD All operators of this vehicle must read and understand this Operator’s Manual and all warning and instruction labels prior to operating this vehicle. - Page 11 ! WARNING POTENTIAL HAZARD Operating or riding in this vehicle without wearing an approved helmet, eye protection, and protective cloth- ing. WHAT CAN HAPPEN Operating or riding without an approved helmet increases your chances of a serious head injury or death in the event of an accident.
- Page 12 ! WARNING POTENTIAL HAZARD Operating or riding in the vehicle without occupant side restraints properly secured. WHAT CAN HAPPEN Serious injury or death. Occupants or their body parts can strike objects outside the vehicle, be crushed by the vehicle, or fall out of the vehicle during maneuvers or in the event of an accident.
- Page 13 ! WARNING POTENTIAL HAZARD Attempting abrupt maneuvers, sideways sliding, skidding, fishtailing, or donuts. WHAT CAN HAPPEN Increases the chance of an accident including a rollover. HOW TO AVOID THE HAZARD Never attempt abrupt maneuvers, sideways sliding, skidding, fishtailing, or donuts. Don’t try to show off.
- Page 14 ! WARNING POTENTIAL HAZARD Failing to use care in turns; turning too sharply or aggressively. WHAT CAN HAPPEN The vehicle could go out of control causing a collision, tip over, or rollover. HOW TO AVOID THE HAZARD Always follow proper procedures for turning as described in this Operator’s Man- ual.
- Page 15 ! WARNING POTENTIAL HAZARD Climbing hills improperly. WHAT CAN HAPPEN Could cause loss of control or cause the vehicle to overturn. HOW TO AVOID THE HAZARD Always follow proper procedures for climbing hills as described in this Operator’s Manual. Always check the terrain carefully before you start up any hill. Never climb hills with slippery or loose surfaces.
- Page 16 ! WARNING POTENTIAL HAZARD Improperly operating over obstacles. WHAT CAN HAPPEN Could cause loss of control or a collision. Could cause the vehicle to overturn. HOW TO AVOID THE HAZARD Before operating in a new area, check for obstacles. Never attempt to ride over large obstacles, such as large rocks or fallen trees. When you go over obstacles, always follow proper procedures as described in this Operator’s Manual.
- Page 17 ! WARNING POTENTIAL HAZARD Operating this vehicle through deep or fast flowing water. WHAT CAN HAPPEN Tires may float, causing loss of traction and loss of control, which could lead to an accident. HOW TO AVOID THE HAZARD Never operate this vehicle in fast flowing water or in water deeper than the floor- board.
-
Page 18: Warnings
! WARNING POTENTIAL HAZARD Operating through or over thick or sharp brush, timber, debris, or rocks. WHAT CAN HAPPEN Serious injury or death. Brush, branches, debris, and rocks can enter or penetrate the passenger compartment and strike occupants. Running over sharp branches, rocks, or other large objects can also cause loss of control. -
Page 19: Division Ii - Operation/Maintenance
Division II - Operation/Maintenance Specifications ENGINE Type Four-Cycle/Liquid Cooled Bore x Stroke 89 mm x 71.2 mm (3.5 x 2.8 in.) Displacement 443 cc (27.0 cu in.) Spark Plug Type NGK CR6E Spark Plug Gap 0.7-0.8 mm (0.028-0.031 in.) Brake Type Hydraulic Disc (front);... -
Page 20: Vehicle Operation
Vehicle Operation Pre-Start/Pre-Operation Checklist Item Remarks Brake System Pedal firm - near top of travel. Fluid at proper level. Check for fluid leaks. Controls Steering free - no binding - no excessive free-play. Shift lever in park. Accelerator free - no binding - returns to idle position. Fluids Coolant level to bottom of radiator neck and reservoir at least half fill. -
Page 21: Starting The Vehicle
Vehicle Operation Starting the Vehicle CAUTION Always start with the vehicle on a flat, Do not run the starter motor for more level surface. Carbon monoxide poison- than eight seconds per starting ing can kill you, so keep the vehicle out- attempt. - Page 22 3. Never “ride” the brake. Even main- NOTE: The high range is for nor- taining minimal pressure on the mal driving with light loads. The low brake pedal will cause the brake range is for carrying heavy loads or pads to drag on the disc and may trailer towing.
-
Page 23: Driving Uphill
2. Prior to descending the hill, shift ! WARNING into low range and release the accel- erator to allow maximum engine Use care in turns - turning the steer- braking. Do not use four-wheel drive ing wheel too far or too fast can result when descending a hill. -
Page 24: Driving In Reverse
1. Physically check the depth and cur- ! WARNING rent of the water, especially if you can’t see the bottom. Also, check for Striking hidden obstacles can cause boulders, logs, or any other hidden serious injury or death. Reduce speed obstacles. -
Page 25: General Information
General Information Control Locations and Functions Ignition Switch Key Two keys come with this vehicle. Keep the spare key in a safe place. An identify- ing number is stamped on each key. Use this number when ordering a replacement key. Ignition Switch PK059 The ignition switch has three positions. -
Page 26: Reverse Override Switch
Reverse Override Switch NOTE: The differential lock is intended for use where minimum This vehicle is equipped with a reverse traction is available. Steering effort speed limiter system. When additional will increase with the front differen- RPM is needed in reverse, depress and tial lock engaged. -
Page 27: Occupant Side Restraints
Tailgate Latch 1. Place the seat belt across your lap as low as possible without twisting the belt making sure the shoulder strap is below the neck and across the chest. ! WARNING Only appropriate-sized passengers may ride in this vehicle. Passengers must be able to place both feet flat on the floor while keeping their back against the back of the seat and hold-... - Page 28 2. Middle Button - Shifts middle dis- NOTE: An item can only be dis- play through speedometer, RPM, played in this position if it is not clock, odometer, trip 1, trip 2, and already being displayed in the top engine hours.
- Page 29 8. EFI Malfunction Indicator - A diag- 9. Drive Select Indicator - Displays nostic code (see list below) and 4WD when selected by the drive engine icon will be displayed on the select switch. LCD whenever an EFI error is 10.
-
Page 30: Diagnostic Trouble Codes
Diagnostic Trouble Codes Display Fault Description P0266 Cylinder #2 Fuel injector Balance/ Display Fault Description Open C0063 Tilt Sensor Circuit High P0336 Crankshaft Angle Sensor Synchroni- C0064 Tilt Sensor Circuit Low/SG/Open zation C1263 Backup/Reverse-Light Circuit Open P0337 Crankshaft Angle Sensor Circuit/SG C1264 Backup/Reverse-Light Circuit High P0339 Crankshaft Angle Sensor Intermittent/ Erratic... -
Page 31: Oil Level Stick
Oil Level Stick Load Capacity Ratings Chart There is an oil level stick for checking the engine oil level. To check the oil This vehicle must always be loaded in level, use the following procedure. accordance with the Load Capacity Rat- ings chart. -
Page 32: Transporting
1. Place the transmission in park. ! WARNING CAUTION Make sure that the load in the trailer is properly secured and will not shift Failure to place the transmission in while moving. Also, do not overload park could allow the vehicle to roll off the trailer. -
Page 33: Gasoline-Oil-Lubricant
Gasoline-Oil-Lubricant Recommended Gasoline Filling Gas Tank The recommended gasoline to use in this vehicle is 87 minimum octane regular ! WARNING unleaded. In many areas, oxygenates are added to the gasoline. Oxygenated gaso- Always fill the gas tank in a well-venti- lines containing up to 10% ethanol or 5% lated area. -
Page 34: Engine Break-In
Recommended Front During the first 10 hours of operation, always use less than ½ throttle. Varying Differential/Rear Drive the engine RPM during the break-in Lubricant period allows the components to “load” NOTE: The manufacturer recom- (aiding the engine/transmission compo- mends the use of genuine lubri- nent mating process) and then “unload”... -
Page 35: General Maintenance
General Maintenance A repair shop or person of the owner's NOTE: Proper maintenance of this choosing may maintain, replace, or repair vehicle is important for optimum per- emission-control devices and systems. formance. Follow the Maintenance Schedule and all ensuing mainte- If the owner/operator does not feel quali- nance instructions/information. -
Page 36: Liquid Cooling System
Liquid Cooling System NOTE: Use a good quality, biode- gradable glycol-based, automotive- NOTE: Debris in the engine com- type antifreeze. partment or packed between the cooling fins of the radiator can ! WARNING reduce cooling capability. Using a garden hose, wash the radiator to Never check the coolant level when remove any debris preventing air... -
Page 37: General Lubrication
4. Remove the drain plug from the bot- tom of the engine and drain the oil into a drain pan. 5. Using the oil filter wrench and a ratchet handle (or a socket or box- end wrench), remove the old oil fil- ter and dispose of properly. -
Page 38: Hydraulic Brake
Brake Fluid Rear PK028A NOTE: The lubricant level should PK030A be visible at the check plug threads. 1. Check the brake fluid level in the brake fluid reservoir. The fluid level 3. Drain the oil into a drain pan by must be maintained between the removing the drain plug from each MAX and MIN level marks. -
Page 39: Gas Hoses
3. If thickness of either brake pad fric- 4. Check the ball joint for free-play by tion material is less than 1.0 mm grasping the steering knuckle and (0.039 in.), take the vehicle to an turning it from side to side and up authorized dealer to have brake pads and down. -
Page 40: Battery
Battery 3. Be sure the charger and battery are in a well-ventilated area and ensure The battery is located under the seat on the battery charger cables will not the driver’s side. contact any battery acid. Be sure the charger is unplugged from the 110- volt electrical outlet. - Page 41 NOTE: For optimal charge and per- formance, leave the charger con- nected to the battery for a minimum 1 hour after the Maintenance Charge Indicator (D) illuminates. If the bat- tery becomes hot to the touch, stop charging. Resume after cooled.
- Page 42 ! WARNING If any of these conditions exist, DO NOT attempt a jump-start, boost, or charge the battery. An explosion could occur causing serious injury or death. 3. Inspect the vehicle to be used for jump-starting to determine if voltage and ground polarity are compatible.
-
Page 43: Spark Plug
Spark Plug Air Filter/Housing Drain This vehicle comes equipped with a spec- The air filter inside the air filter housing ified spark plug. See the specifications must be kept clean to provide good chart for the correct spark plug. A light engine power and gas mileage. -
Page 44: Draining V-Belt Cover
PK322 PK009 5. Place each element in a pan larger 14. Insert the air filter screen into the than the elements and spray all sides inner element; then secure the air fil- generously with cleaning solvent. ter holders with the Phillips screw. Let sit approximately three minutes. -
Page 45: Tires
Tires ! WARNING ! WARNING Use only approved tires when replac- ing tires. Failure to do so could result Always use the size and type of tires in unstable operation. as specified. Refer to the specifica- Tubeless Tire Repair tions chart for proper tire inflation pressure, and always maintain proper Should a leak or flat tire occur due to a tire inflation pressure. -
Page 46: Light Bulb Replacement
2. Connect the new headlight bulb to the wiring harness and insert into headlight assembly. Turn clockwise to secure the bulb. 3. Adjust the headlight (see Checking/ Adjusting Headlight Aim in this sub-section. CAUTION When replacing the headlight bulb, be PK010 careful not to touch the glass portion 2. -
Page 47: Checking/Adjusting Headlight Aim
5. Remove the reverse light housing by 1. Position the vehicle on a level floor removing the two screws and nut; so the headlights are approximately then remove the two machine 6.1 m (20 ft) from an aiming surface screws. Rotate the bulb counter- (wall or similar aiming surface). -
Page 48: Fuses
Fuses The fuses are located under the front access panel. If there is any type of elec- trical system failure, always check the fuses first. PK067A CAUTION Always use electrical accessories less than 180W. Storage Compartments/ PK012 Tools NOTE: To remove the fuse, com- A basic tool kit (located in the glove box) press the locking tabs on either side is provided with this vehicle. -
Page 49: Seat Belts
Seat Belts Inspect the seat belts for frayed or torn edges. Check that the belts extend and retract smoothly and fully without bind- ing or catching. Check that the latch plate locks securely in place in the buckle and releases when the button is pressed. Wash off any dirt and make sure the retractors are free of debris. -
Page 50: Preparation For Storage
Preparation For Storage We recommend the following procedure 6. Apply light oil to the plungers of the to prepare the vehicle for storage. An shock absorbers. authorized dealer should perform this 7. Tighten all nuts, bolts, cap screws, service; however, the owner/operator and screws. -
Page 51: Preparation After Storage
Preparation After Storage Taking this vehicle out of storage and 7. Check the entire brake systems correctly preparing it will assure many (fluid level, pads, etc.), all controls, miles and hours of trouble-free riding. headlights, taillights, brakelights, We recommend the following procedure. and headlight aim;... -
Page 52: Maintenance Record
Maintenance Record DATE MILEAGE SERVICE PERFORMED/NOTES... -
Page 53: Maintenance Record
Maintenance Record DATE MILEAGE SERVICE PERFORMED/NOTES... -
Page 54: Limited Warranty
Limited Warranty Textron Specialized Vehicles, a division of Textron, Inc. (the Company) extends a limited warranty as described below on each new vehicle it assembles and on each genuine part and accessory assembled and sold by an authorized dealer. The limited warranty on the vehicle is extended to the original retail purchaser for the time periods described below;... -
Page 55: Warranty Procedure/Owner Responsibility
Warranty Procedure/Owner Responsibility At the time of sale, an ATV Rider Training Certificate and Owner Registration form is to be completed by the selling dealer and consumer. The receipt of the form by the Company is a condition precedent to warranty coverage. It is the selling dealer’s responsibility to retain and/or submit appropriate copies of the form to the appropriate place(s) to initiate warranty coverage. -
Page 56: Epa Emission Control Statement/Warranty Coverage - Rov (U.s. Only)54
Textron Specialized Vehicles warrants to the original retail purchaser, and each subsequent purchaser, that all U.S. EPA-certified Textron Off Road vehicles are designed, built, and equipped to conform to all U.S. EPA Emission Control Regulations. Please read the following information completely. -
Page 57: Change Of Address, Ownership, Or Warranty Transfer
Change of Address, Ownership, or Warranty Transfer Textron Specialized Vehicles, a division of Textron, Inc. keeps on file the current name and address of the owner of this vehicle. This allows us to reach the current owner with any important safety information which may be necessary to protect customers from personal injury or property damage. - Page 58 Fold Back Place Stamp CHANGE OF ADDRESS/OWNERSHIP Here TEXTRON OFF ROAD PRODUCT SERVICE AND WARRANTY DEPT. P.O. BOX 810 THIEF RIVER FALLS, MN 56701...
-
Page 59: Identification Numbers Record
Identification Numbers Record This vehicle has two identification numbers: Vehicle Identification Number (VIN) and Engine Serial Number (ESN). These numbers are required by the dealer to com- plete warranty claims properly. No warranty will be allowed if the VIN or ESN is removed or mutilated in any way. - Page 60 Vehicle Capacity: 1 Operator, 1 Passenger with seat belts ©2017 Textron Specialized Vehicles, a division of Textron, Inc. ™ ®Trademarks of Textron Specialized Vehicles p/n 2261-468...
Need help?
Do you have a question about the PROWLER 500 2018 and is the answer not in the manual?
Questions and answers