
Related Manuals for optris CoolingJacket Advanced

Summary of Contents for optris CoolingJacket Advanced
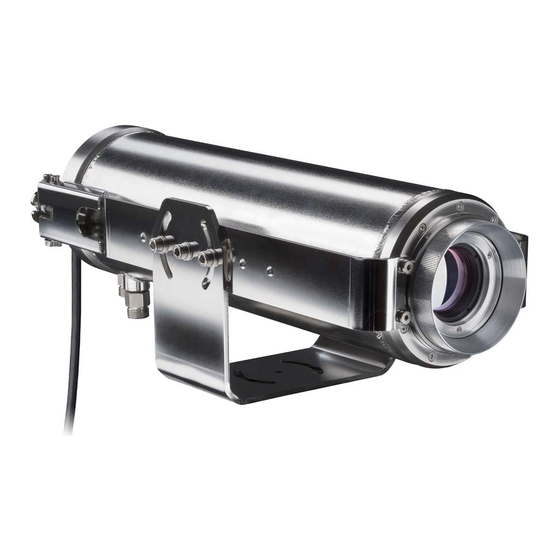
- Page 1 Operator’s Manual ® optris CoolingJacket Advanced Cooling housing for PI series, infrared video thermometer and infrared thermometer at high ambient temperatures...
- Page 2 Optris GmbH Ferdinand-Buisson-Str. 14 13127 Berlin Germany Tel.: +49 30 500 197-0 Fax: +49 30 500 197-10 E-mail: info@optris.de Internet: www.optris.de...
-
Page 3: Table Of Contents
Table of contents Table of contents Table of contents .............................. 3 General notes ............................6 Intended use ............................6 Warranty ............................. 7 Scope of supply ..........................8 1.3.1 Versions ............................8 Mounting accessories ......................... 9 1.4.1 Accessories for PI Netbox ......................9 1.4.2 Accessories for USB Server Gigabit .................. - Page 4 Accessories............................14 2.2.1 High temperature cable ......................14 2.2.2 Protection window ........................15 2.2.3 Mounting flange ........................16 2.2.4 Additional accessories ......................16 Dimensions ............................17 Fittings .............................. 26 2.4.1 Cooling water fitting ........................26 2.4.2 Air purge collar .......................... 26 2.4.3 Cable glands on the back ......................
- Page 5 Table of contents Installation ............................32 Installation of PI camera, infrared video thermometer and infrared thermometer ......33 3.2.1 Assembling of the focusing unit ....................33 3.2.2 Assembling of the front part ...................... 37 3.2.3 Assembling to the standard version ..................40 3.2.4 Assembling to the extended version ..................
-
Page 6: General Notes
Thank you for choosing the optris CoolingJacket Advanced cooling housing. ® The cooling housing CoolingJacket Advanced is intended to use for optris PI series, video thermometers CTvideo and CSvideo as well as CTlaser and CSlaser for application at high ambient temperatures. -
Page 7: Warranty
General notes 1.2 Warranty Each single product passes through a quality process. Nevertheless, if failures occur contact the customer service at once. The warranty period covers 24 months starting on the delivery date. After the warranty is expired the manufacturer guarantees additional 6 months warranty for all repaired or substituted product components. -
Page 8: Scope Of Supply
1.3 Scope of supply 1.3.1 Versions CoolingJacket Advanced (Standard or Extended) with mounting bracket and installation instructions Standard Extended CoolingJacket Advanced for PI series CoolingJacket Advanced for PI series [Part-No.: ACPIxxxCJAS], consisting of housing incl. chassis [Part-No.: ACPIxxxCJAEx], consisting of housing incl. chassis [Part-No.: ACCJAxxxxx], consisting of focusing unit or front part (PI 2xx) -
Page 9: Mounting Accessories
General notes 1.4 Mounting accessories 1.4.1 Accessories for PI Netbox Figure 1: Accessories for PI Netbox 1 Support rods for Industrial PIF (2x distance bolt SW 5,5x6 - M3x6, 2x cylinder head screw M3x10 and 2x cylinder head screw M3x5) 2 Shaft for fixing the PI Netbox 3 Holding plate (2x cylinder head screw M3x5) 4 Fastening rail (4x cylinder head screw M4x8) -
Page 10: Accessories For Usb Server Gigabit
1.4.2 Accessories for USB Server Gigabit Figure 2: Accessories for USB-Server Gigabit 1 DIN rail plate for fixing the USB server Gigabit 2 Distance rings 3 Screws 4 Support rods for Industrial PIF, with thread and without... -
Page 11: Technical Data
Technical Data 2 Technical Data 2.1 General specifications CoolingJacket Advanced Standard CoolingJacket Advanced Extended Environmental rating IP 65 IP 65 Ambient temperature up to 315 °C up to 315 °C Relative humidity 10...95 %, non-condensing 10...95 %, non-condensing Material (housing) -
Page 12: Focusing Unit And Front Part
2.1.1 Focusing unit and front part Focusing unit for 6°, 41° and 72° optics [Part-No.: ACCJAFU6] for 23° optics [Part-No.: ACCJAFU23] PI 160 Focusing unit for 13° optics [Part-No.: ACCJAFU13] for 15° optics [Part-No.: ACCJAFU15] for 29° optics (PI 4xx) and 33° optics (PI 640) [Part-No.: ACCJAFU38] for 53°... - Page 13 Technical Data Front part for 23° and 41° optics (PI 2xx) [Part-No.: ACCJAFP2XX] PI 2xx Front-part for all optics (PI 1M/ 05M) incl. protection window [Part-No.: ACCJAFP1M] PI 1M/ 05M Front part for CTlaser, CSlaser, CTvideo, CSvideo [Part-No.: ACCJAFPCTL] CTlaser, CSlaser, CTvideo, CSvideo...
-
Page 14: Accessories
2.2 Accessories 2.2.1 High temperature cable High temperature Ethernet cable cat.6 (180 °C), 10 m, incl. 2x RJ45 connector [Part-No.: ACCJAETCB10H] High temperature Ethernet cable cat.6 (180 °C), 20 m, incl. 2x RJ45 connector [Part-No.: ACCJAETCB20H] High temperature Ethernet cable cat.6 (250 °C), 10 m, incl. 2x RJ45 connector [Part-No.: ACCJAETCB10H2] High temperature Ethernet cable cat.6 (250 °C), 20 m, incl. -
Page 15: Protection Window
Technical Data 2.2.2 Protection window Adequate protection windows are available for all versions. Part-No. Description Spectral range Transmission ACCJAPWPILW Protective window (50,8 x 3 mm/ Ge) for PI450 G7, 640 G7 7,9 µm 0.96 ACCJAPWPILW Protective window (50,8 x 3 mm/ Ge) for PI160, 4xx, 640 7,5-13 µm 0.92 ACCJAPWZNS... -
Page 16: Mounting Flange
2.2.3 Mounting flange Mounting flange [Part-No.: ACCJAMF] for front mounting of the CoolingJacket Advanced (Standard and Extended) including mounting screws and washers 2.2.4 Additional accessories Industrial PIF without housing [Part-No.: ACCJAPIPIF500V2], 500 VAC isolation voltage between PI and process, 25 cm connection cable... -
Page 17: Dimensions
Technical Data 2.3 Dimensions Standard version Figure 3: CoolingJacket Advanced, standard version – side view... - Page 18 Figure 4: CoolingJacket Advanced, standard version – top view...
- Page 19 Technical Data CoolingJacket Advanced, standard version – front view Figure 5:...
- Page 20 Figure 6: CoolingJacket Advanced, standard version – complete view...
- Page 21 Technical Data Extended version Figure 7: CoolingJacket Advanced, extended version – side view...
- Page 22 Figure 8: CoolingJacket Advanced, extended version – top view...
- Page 23 Technical Data Figure 9: CoolingJacket Advanced, extended version – front view...
- Page 24 Figure 10: CoolingJacket Advanced, extended version – complete view...
- Page 25 Technical Data Mounting flange (Accessories) Figure 11: Mounting flange for CoolingJacket Advanced (Standard and Extended)
-
Page 26: Fittings
2.4 Fittings 2.4.1 Cooling water fitting The cooling water input and output has a G1/4“-internal thread and a G3/8“-external thread. The maximum cooling water pressure is 15 bar (271 psi). While connecting the hoses keep inclined the Cooling Jacket at an angle of approx. 45° to avoid air bubbles. - Page 27 Technical Data The following classes according to ISO 8573-1 are recommended for the quality of compressed air: Classes Oil content: class 2 or better Water content: class 4 or better Solid content: class 2 or better...
-
Page 28: Cable Glands On The Back
2.4.3 Cable glands on the back Figure 12: Cable glands with seal insert... -
Page 29: Cooling Properties
Technical Data 2.5 Cooling properties Flow Temperature at Temperature at Temperature at 1 l/min 2,5 l/min 5 l/min Ambient temperature Cooling water input [°C] [255 °C] Camera/ Thermometer [°C] Table 1: Cooling properties with a steady cooling water input temperature and various flow Flow Temperature at 2.5 l/min of flow Ambient temperature... - Page 30 Example (see Table 3): Ambient temperature 80 °C Relative humidity 25 % Minimum device temperature 45 °C At an ambient temperature of 80 °C and a relative humidity of 25 % the device temperature must not be below 45 °C. Otherwise condensation occurs on the lens or the electronic.
- Page 31 Technical Data Relative humidity [%] Table 3: Minimum device temperature in relation to ambient temperature and relative humidity in [°C]...
-
Page 32: Installation
3 Installation 3.1 Installation The CoolingJacket Advanced both in the standard version and in the extended version can be installed in the desired position via the mounting bracket. Figure 13: CoolingJacket Advanced with mounting bracket 1 Mounting bracket, adjustable in two axes... -
Page 33: Installation Of Pi Camera, Infrared Video Thermometer And Infrared Thermometer
Installation 3.2 Installation of PI camera, infrared video thermometer and infrared thermometer 3.2.1 Assembling of the focusing unit The focusing unit consists of two parts, external (1) and internal (2) part. The external part focuses the camera. The internal part fixes the camera. Figure 14: Focusing unit (external and internal part) External part of the focusing unit Internal part of the focusing unit... - Page 34 Figure 15: Assembling of the 6°, 9°; 23°, 26°, 29°, 33°, 39°, 41°, 53°, 72° and 80° optics...
- Page 35 Installation Figure 16: Assembling of the 13° and 15° optics...
- Page 36 Figure 17: Assembling of the 60° and 90° optics...
-
Page 37: Assembling Of The Front Part
Installation 3.2.2 Assembling of the front part Figure 18: Assembling of the PI 2xx... - Page 38 Figure 19: Assembling of the PI 1M/ 05M...
- Page 39 Installation Figure 20: Assembling of the CTlaser, CSlaser, CTvideo, CSvideo...
-
Page 40: Assembling To The Standard Version
3.2.3 Assembling to the standard version Depending on the chassis either a camera of the PI series, a laser infrared thermometer or an infrared video thermometer can be installed. Figure 21: CoolingJacket Advanced, standard version 1 Housing 2 Front part (or focusing unit) - Page 41 Installation Installation of PI camera 1. Mount the camera to the focusing unit or the front part as described in chapter 3.2.1 respectively chapter 3.2.2 (except for PI 1M/ 05M camera). 2. Seat the focusing unit or front part in the chassis (Figure 22). Position it as shown in Figure 23, by pushing it to the bottom.
- Page 42 Figure 23: Focusing unit with camera 3. Fix the camera with the provided screw on the bottom of the chassis.
- Page 43 Installation Figure 24: Mounting of the camera to the chassis 4. Then connect the PI camera with the provided USB cable and lead it out of the cable gland. 5. Slide the chassis with the camera in the housing. Put the pins of the hinges to the slits of the chassis and lock the hinge by pushing it forward (Figure 25).
- Page 44 Figure 25: Locking of the hinge 6. Move the locking lever to the left (symbol: ), so that the chassis is fitted close to the inner surface of the housing (Figure 26).
- Page 45 Installation The alternate contact of the cooling jaws with the camera/ infrared thermometer and inner housing generates an optimal cooling effect. Contact of the cooling jaws and inner housing Contact of the cooling jaws and camera/ infrared thermometer...
- Page 46 Figure 26: Back side of the CoolingJacket with locking lever Locking lever...
- Page 47 Installation 7. Dismount in reverse order. Figure 27: Unlocking of the hinge...
- Page 48 Installation of video thermometer or infrared thermometer 1. Screw the infrared thermometer in the thread (M48x1.5) of the front part (see Figure 20) and seat the front part in the chassis (Figure 28). Figure 28: Front part with infrared thermometer 2.
- Page 49 Installation Figure 29: Infrared thermometer mounted 3. Slide the chassis with the camera in the housing. Put the pins of the hinges to the slits of the chassis and lock the hinge by pushing in forward (Figure 25). 4. Move the locking lever to the left (symbol: ), so that the chassis is fitted close to the inner surface of the housing (Figure 26) 5.
-
Page 50: Assembling To The Extended Version
3.2.4 Assembling to the extended version The extended version of the CoolingJacket Advanced provides an installation of the PI series together with the PI Netbox and an industrial PIF or with the USB server Gigabit and an industrial PIF. Figure 30: CoolingJacket Advanced, extended version... - Page 51 Installation Installation of PI camera Steps 1-3, see page 41. Figure 31: Camera implemented (extended version) Assembling of PI Netbox and industrial PIF 4. Mount the holding plate (screws M3x5). Then attach the two support rods complete with the distance bolts (SW 5,5x6 - M3x6) with the provided screws (M3x10) to the bottom of the chassis.
- Page 52 Figure 32 (a-c): Mounting of the accessories for PI Netbox: a) Holding plate for PI Netbox (top view), b) Support rods for industrial PIF (view from the bottom), c) Shaft to fix the PI Netbox (view from the bottom)
- Page 53 Installation 5. Fix the industrial PIF with the screws (M3x5) as shown in Figure 33. Figure 33: Mounting of the industrial PIF (top view) 6. To mount the PI Netbox to the chassis screw it to the fastening rail (screws M4x8).
- Page 54 Figure 34: PI Netbox with fastening rail At first push the fastening rail with the PI Netbox into the left notch (1) of the shaft. Afterwards into the right notch (1) (Figure 35) until it is engaged (Figure 36). By locking the chassis the shaft pushes the PI Netbox to the inner surface of the housing.
- Page 55 Installation Figure 35: Notch to fix the PI Netbox (top view) Notch...
- Page 56 Figure 36: Fitting the PI Netbox into the chassis (right hand view) 7. Then connect the PI camera and the PI Netbox with the provided USB cable and the Industrial PIF with the camera. Combine the network connector and the PI Netbox (Figure 37).
- Page 57 Installation Figure 37: Chassis with PI camera, industrial PIF and PI Netbox Follow as step 5, page 43.
- Page 58 Assembling of USB server Gigabit and Industrial PIF 4. Mount the DIN rail plate with the screws (M3x5) to fix the USB server Gigabit. Then attach the support rods with the provided screws (M3x10) to one side of the chassis; use the distance ring on the left (Figure 38).
- Page 59 Installation 5. Fix the Industrial PIF with the screws (M3x5) as shown in Figure 39. Figure 39: Mounting of the industrial PIF (top view) 6. Engage the USB server Gigabit to the DIN rail plate (Figure 40).
- Page 60 USB server Gigabit Figure 40 (a + b): Fitting the into the chassis (top view and right hand view) 7. Then connect the PI camera and the USB server Gigabit with the provided USB cable and the Industrial PIF with the camera. Combine the network connector and the USB server Gigabit (Figure 41).
- Page 61 Installation Figure 41: Chassis with PI camera, industrial PIF and USB server Gigabit Follow as step 5, page 43.
-
Page 62: Example Of Installation
4 Example of installation PI camera HT-USB cable 3x Analog Output PIF cable 2x Analog Input 1x Digital Input Industrial PIF Cooling Jacket Standard PI camera HT-Ethernet cable Cat. 6 USB server PI Netbox Gigabit Cooling Jacket Extended... - Page 63 Example of installation PI camera HT-Ethernet cable Cat. 6 PIF cable PI Netbox USB server 3x Analog Output Gigabit 2x Analog Input Industrial-PIF 1x Digital Input Cooling Jacket Extended CTlaser HT cable CT Box Cooling Jacket Standard...
- Page 64 CTvideo HT cable video signal HT cable sensor signals + laser CT Box Cooling Jacket Standard CSlaser HT cable (analog [4-20 mA]/ digital) Cooling Jacket Standard...
- Page 65 Example of installation CSvideo HT-USB cable HT cable current loop + alarm + laser Cooling Jacket Standard CSvideo HT-cable analog HT-Ethernet cable Cat. 6 USB server Cooling Jacket Extended Gigabit *All high temperature cables are available for temperatures up to 180 °C/ 250 °C: - IR video thermometer and IR thermometer: 3 m, 8 m, 15 m - HT-Ethernet cable Cat.6: 10 m und 20 m - HT-USB cable: 5 m, 10 m...
- Page 66 Figure 42: CoolingJacket (Standard) with CSvideo Figure 44: Cooling Jacket Advanced (Extended- Figure 43: Cooling Jacket Advanced (Extended) with PI Version) with USB Server and industrial PIF Netbox and industrial PIF...
Need help?
Do you have a question about the CoolingJacket Advanced and is the answer not in the manual?
Questions and answers