Table of Contents
Advertisement
GARAGE DOOR OPENER
GARAGE DOOR OPENER
INSTALLATION MANUAL
INSTALLATION MANUAL
Please read the manual and the enclosed safety materials
carefully!
Fasten the manual near the garage door after installation.
Please read the manual and the enclosed
Periodic checks of the opener are required to ensure safe
safety materials carefully!
operation.
Fasten the manual near the garage door after
The model number label is located on the left side panel
installation.
of your opener.
Periodic checks of the opener are required to
ensure safe operation.
The model number label is located on the left
side panel of your opener.
GARAGE DOOR OPENER
INSTALLATION MANUAL
Please read the manual and the enclosed safety materials
carefully!
Fasten the manual near the garage door after installation.
Periodic checks of the opener are required to ensure safe
operation.
The model number label is located on the left side panel
of your opener.
MEN -002-B
MEN -002-B
Advertisement
Table of Contents

Related Manuals for NAS power 1000

Summary of Contents for NAS power 1000
- Page 1 MEN -002-B GARAGE DOOR OPENER MEN -002-B INSTALLATION MANUAL GARAGE DOOR OPENER GARAGE DOOR OPENER INSTALLATION MANUAL INSTALLATION MANUAL Please read the manual and the enclosed safety materials carefully! Fasten the manual near the garage door after installation. Periodic checks of the opener are required to ensure safe operation.
-
Page 2: Table Of Contents
TABLE OF CONTENTS INTRODUCTION..............3 Tools needed................5 Assemble the Rail..............6 Garage door opener assembly.........10 Hardware................10 Fasten the Rail to the garage door opener......12 Determine the Header Bracket Location......13 Install the Header Bracket...........15 Connect the Rail to the Header Bracket......17 Position the garage door opener..........18 Hang the garage door opener..........19 Attach the Emergency Release Rope and Handle....20 Install the door bracket............21... -
Page 3: Introduction
INTRODUCTION Safety Symbol and Signal Word Review This garage door opener has been designed and tested to offer safe service provided it is installed, operated, maintained and tested in strict accordance with the instructions and warnings contained in this manual. When you see these Safety Symbols and Signal Words on the following pages, they will alert you to the possibility of serious injury or death if you do not comply with the warnings that accompany them. - Page 4 5. The opener should be installed above the center of the door. If there is a torsion spring or center bearing plate in the way of the header bracket, it may be installed within 4 feet (1.2 m) to the left or right of the door center. See Installing the Header Bracket section.
-
Page 5: Tools Needed
Tools needed During assembly, installation and adjustment of the opener, instructions will call for hand tools as illustrated below. -
Page 6: Assemble The Rail
1、Assemble the Rail To avoid installation difficulties, do not run the garage door opener until instructed to do so. NOTE: If you choose the Three-pieces Sectional Rail, you may need the following installation instructions. Rail Accessories... - Page 7 Assemble the Rail...
- Page 8 Assemble the Rail Rail Assembly Rail Assembly Rail Assembly 1.1、Remove the three rail sections and place them on 1.1、Remove the three rail sections and place them on 1.1、Remove the three rail sections and place them on 1.1、Remove the three rail sections and place them on floor.
-
Page 9: Rail Assembly
Assemble the Rail Rail Assembly 1.4 Screw and lock washer installation. 1.4、Screw and lock washer installation. Rail Assembly A6 (2) 1.4、Screw and lock washer installation. A5 (2) Rail Assembly 1.4、Screw and lock washer installation. A6 (2) A5 (2) A6 (2) A5 (2)... -
Page 10: Garage Door Opener Assembly
Garage door opener assembly Hardware... - Page 11 Garage door opener assembly...
-
Page 12: Fasten The Rail To The Garage Door Opener
Garage door opener assembly 1、Fasten the Rail to the garage door opener 1.1 Place the opener on cardboard or protective surface on floor so opener does not get scratched. Chassis side of opener is facing up. 1.2 Position rail onto opener chassis by lining up rail sprocket, Make sure shaft insert into rail sprocket. -
Page 13: Determine The Header Bracket Location
Garage door opener assembly 2、Determine the Header Bracket Location Installation procedures vary according to garage door types. Follow the instructions which apply to your door. 2.1 Close the door and mark the inside vertical centerline of the garage door. 2.2 Extend the line onto the header wall above the door. You can fasten the header bracket within 4 feet (1.22 m) of the left or right of the door center only if a torsion spring or center bearing plate is in the way;... - Page 14 Garage door opener assembly...
-
Page 15: Install The Header Bracket
3、Install the Header Bracket You can attach the header bracket either to the wall above the garage door, or to the ceiling. Follow the instructions which will work best for your particular requirements. Do not install the header bracket over drywall. If installing into masonry, use concrete anchors (not provided). - Page 16 Option B CEILING INSTALLATION 3.1B Extend the vertical centerline onto the ceiling as shown. 3.2B Center the bracket on the vertical mark, no more than 6" (15 3.3B from the wall. Make sure the arrow is pointing away from the wall.
-
Page 17: Connect The Rail To The Header Bracket
4、Connect the Rail to the Header Bracket Align the rail to the header bracket, fasten with the bolts and nuts (H1) (H2) as shown below. HARDWARE B5 Cotter Pin Φ2×25(1) B6 Shouldered shaft, long Φ8×80(1) -
Page 18: Position The Garage Door Opener
5、Position the garage door opener NOTE: A 2x4 is ideal for setting the distance between the rail and the door. If the ladder is not tall enough you will need help at this point. If the door hits the trolley when it is raised, pull the trolley release arm down to disconnect the chain connector kit and trolley. -
Page 19: Hang The Garage Door Opener
6、Hang the garage door opener... -
Page 20: Attach The Emergency Release Rope And Handle
7、Attach the Emergency Release Rope and Handle NOTE: If it is necessary to cut the emergency release rope, seal the cut end with a match or lighter to prevent unraveling. Ensure that the emergency release rope and handle are above the top of all vehicles to avoid entanglement. -
Page 21: Install The Door Bracket
8、Install the door bracket Figure 1 shows one piece of angle iron as the horizontal brace. For the vertical brace, 2 pieces of angle iron are used to create a U- shaped support. The best solution is to check with your garage door manufacturer for an opener installation door reinforcement kit. - Page 22 A horizontal and vertical reinforcement is needed for lightweight garage doors (fiberglass, aluminum, steel, doors with glass panel, etc.) (not provided). horizontal reinforcement brace should be long enough to be secured to two or three vertical supports. A vertical reinforcement brace should cover height...
-
Page 23: Connect The Door Arm To The Trolley
9、Connect the door arm to the trolley HARDWARE Option SECTIONAL DOORS NOTE: If the holes in the curved door arm and the straight door arm do not align, reverse the straight door arm, select two holes (as far apart as possible) and attach using bolts (H4) and nuts (H3). - Page 24 9.2 Attach the curved door arm to the door bracket using the shouldered shaft (H2). Attach with the cotter (H5). 9.5 Pull the emergency release handle toward the chain/belt connector until they are connected, you will hear a click. NOTE: If the straight door arm is hanging down too far, you may cut 6 inches (15 cm) from the solid end.
-
Page 25: Install The Wall Control
10、Install the Wall Control INTRODUCTION Install the wall control within sight of the door at a minimum height of 5 feet (1.5 m) where small children cannot reach, and away from the moving parts of the door. Your product may look different than the illustrations. - Page 27 WALL CONTROL BATTERY REPLACEMENT...
- Page 28 11、 Wire the wall control to the garage door opener 11.1 Strip 7/16 inch (11 mm) of insulation from one end of the wire and separate the wires. 11.2 Connect the white wire to the GND terminal and the red\white wire to the PBSW terminal on garage door opener.
-
Page 29: Attach The Warning Labels
12、 Attach the warning labels 12.1 Attach the entrapment warning label on the wall near the door control with tacks or staples. 12.2 Attach the manual release/safety reverse test label in a visible location on the inside of the garage door. Install the Photo Eye Safety System Introduction IMPORTANT INFORMATION ABOUT THE SAFETY REVERSING... - Page 30 The sending sensor (with a red LED) transmits an invisible light beam to the receiving sensor (with a green LED). If an obstruction breaks the light beam while the door is closing, the door will stop and reverse to the full open position, and the garage door opener lights will flash three minutes NOTE: For energy efficiency the garage door opener will enter sleep mode when the door is fully closed.
- Page 31 Install the Photo Eye Safety System 1、Install the Safety Reversing Sensors The safety reversing sensors can be attached to the wall, The sensors should be no more than 6 inches (15 cm) above the floor. Position the mounting bracket against the wall with the curved arms facing the door.
- Page 32 Insert the white wires into the GND terminal on the garage door opener. Insert the white/red wires into the PB terminal on the garage door opener. Ensure the Safety Reversing Sensors are aligned The door will not close if the sensors have not been installed and aligned correctly.
- Page 33 Power Connect power...
- Page 34 Adjustments...
-
Page 35: Programming And Adjustment
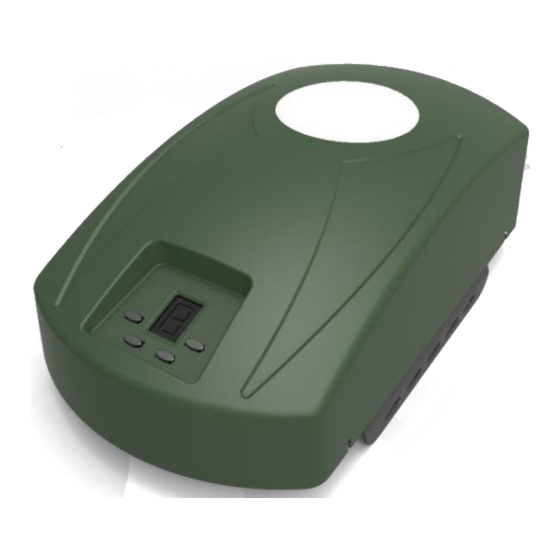
Programming and adjustment a) Programming buttons b) Preparation: Move the door to lock the trolley so that the opener can drive the door when adjustment. c) Connect Power: Puts through the power source, the LED display from “9” to “1”. If the number direction displayed on LED is opposite, press button “SETTING”, the LED displayed would be inverted, then display again from “9”... -
Page 36: Program The Travel
d) Program the travel NOTE: The UP and DOWN Buttons can be used to move the door up and down as needed. -
Page 37: Remote Control
e) Remote Control PROGRAM A REMOTE USING THE CODE BUTTON Note: Repeat up steps to code a maximum of 20 different remote controls. To open or close the garage door, press and hold button. When the garage door move, release button. To stop garage door during travel, press and hold button until door stops, the release button. -
Page 38: To Erase The Memory
To Erase the Memory Press and hold the CODE button on garage door opener, the “●” will turn on. Release the CODE button when the “●” turns off. All remote control are now erased. Reprogram any accessory you wish to use. -
Page 39: The Adjustment Of Reverse Force
g) The adjustment of reverse force The “CLOSE” position force sensitivity... - Page 40 Close door automatically Press and hold the “+ CODE SETTING ”Button until the screen show the “—” Press the UP or Down Button to select the closing CODE CODE SETTING SETTING time. The screen shows the number of the levels. Press and release the SETTING Button and the screen is flashing CODE...
-
Page 41: Circuit Board
h) Circuit board... -
Page 42: Use Photoelectric Switches
Use photoelectric switches The user can simply push a button to set or cancel the photoelectric switch function. -
Page 43: Turn Off Light Automatically
Turn off light automatically It has turned off light function so do not need to set. When the opener is running, the light is brighten automatically .If have no wall switch and press any button in 3 minutes, the light will be off automatically. -
Page 44: Door Within A Door
It is necessary for find a specialist to check and adjustment. Technical parameter a. Rated voltage: POWER 1000 110V / 50Hz b. Motor: 24VDC c. Transmission frequency and range: 433MHz / open terrain 50m d. -
Page 45: Trouble Shooting
Trouble shooting...
Need help?
Do you have a question about the power 1000 and is the answer not in the manual?
Questions and answers