Advertisement
Table of Contents
- 1 Table of Contents
- 2 Bicycle Riding Safety
- 3 Before Your First Ride
- 4 How Your Wheel Works
- 5 Installation and Setup
- 6 Single-Speed Setup
- 7 Multi-Speed Setup
- 8 Use Your Wheel
- 9 Handling and Transport
- 10 Usage, Storage and Cleaning
- 11 Maintenance and Modification
- 12 Built-In Battery and Charging
- 13 Troubleshooting and Help
- 14 Limited Warranty
- 15 Other Information
- 16 Technical Specifications
- Download this manual
Advertisement
Table of Contents

Related Manuals for Superpedestrian COPENHAGEN WHEEL

Summary of Contents for Superpedestrian COPENHAGEN WHEEL
- Page 1 COPENHAGEN WHEEL USER MANUAL...
- Page 2 Carefully read all instructions and safety information prior to installing your Copenhagen Wheel. Failure to follow these instructions could result in electric shock, fire or other injury to you or damage to your bike, the Wheel or other property.
-
Page 3: Table Of Contents
Index Bicycle Riding Safety p. 4 How Your Wheel Works Installation and Setup Single-speed Setup Multi-speed Setup Use Your Wheel Handling and Transport Usage, Storage and Cleaning Maintenance and Modification 10 Built-in Battery and Charging 11 Troubleshooting and Help 12 Other Information... -
Page 4: Bicycle Riding Safety
Copenhagen Wheel in a safe environment, sidewall. away from road traffic. • Check both the Copenhagen Wheel and front wheel Do NOT turn on your Wheel until it has been properly for any loose spokes, nuts or other damage. - Page 5 When riding a bicycle, whether or not it’s equipped with a Copenhagen Wheel, it is important to follow general safety guidelines: • Always wear a helmet when riding a bicycle. In some jurisdictions, the use of a helmet is required by law.
-
Page 6: How Your Wheel Works
SECTION 2 How Your Wheel Works The Copenhagen Wheel quickly and easily transforms As you pedal, the Wheel senses your motion and, your bicycle into a smart electric hybrid. But how using the embedded control algorithms, calculates does it do this? Magic? Genetically modified hamsters how much assistance to give. - Page 7 HOW YOUR WHEEL WORKS Li-Ion Battery Control System with Bluetooth® Electric motor Sensors...
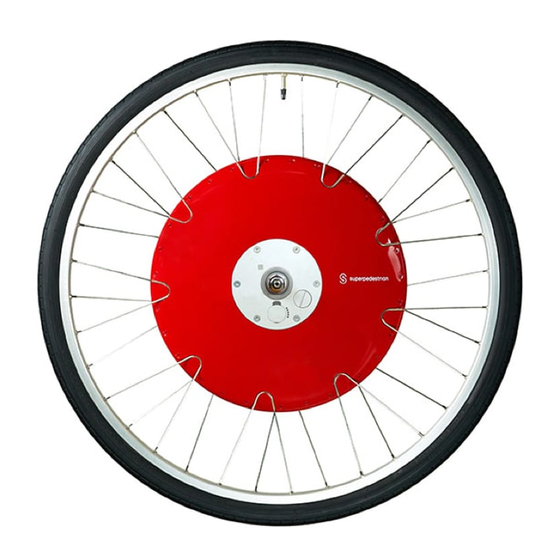
- Page 8 HOW YOUR WHEEL WORKS Meet Your Wheel DRIVE SIDE NON-DRIVE SIDE...
- Page 9 HOW YOUR WHEEL WORKS CONTROL PLATE (ZOOM) LEGEND Rim With Tire and Tube Copenhagen Wheel Hub Custom Spokes Charge Port Status LEDs Adjustable Torque Arm On/Off Switch Axle TOOLS Dropout Spacers Axle Nuts Tools Metal Straps AC Adapter (country specific)
-
Page 10: Installation And Setup
We strongly recommend the Copenhagen Wheel be General Installation professionally installed at a Superpedestrian Hub. In order to safely install the Copenhagen Wheel on Every installation will be different depending on your bicycle, you must be comfortable performing the make and model of your bike. The instructions... - Page 11 (found at 16 CFR Part 1512), EN14764 and/or ISO 4210:2014. If you are unable to do the installation and setup yourself, but do not have a Superpedestrian Hub nearby, you can take these instructions to your local bicycle mechanic to get your Copenhagen Wheel professionally installed.
-
Page 12: Single-Speed Setup
Copenhagen Wheel. If you need more information you can go to superpedestrian.com/support or contact your nearest Superpedestrian Hub. For information on how to install the Copenhagen Wheel using a bike stand please go to superpedestrian.com/support. See Section 5 for multi-speed setup. - Page 13 The following diagrams (4-10) show the bike in an upside-down position (as seen above). over so that it’s balanced on the handlebars and seat. Make sure the power switch is OFF (0) on your Remove the axle nuts from both ends of the axle. Copenhagen Wheel.
- Page 14 120 mm dropouts. Rest the chain on the axle between the cog and the Slip the Copenhagen Wheel in between the frame’s Copenhagen Wheel to prevent it from getting in the rear dropouts and insert its axle into the dropouts. way.
- Page 15 SINGLE-SPEED SETUP Place the chain over the cog and make sure the Loosely thread the axle nuts. Wheel is secure. Alternately hand-tighten axle nuts on each side. Attach the torque arm to the frame. Select the appropriately sized metal strap (included Rotate the torque arm until it rests on the underside in the box) for your chainstay.
- Page 16 SINGLE-SPEED SETUP Wrap the metal strap around the chainstay so that Slide the metal strap onto the torque arm and seat it the screw is on top of the frame underside and facing in the groove. Turn the screw with a screwdriver to take out (towards you), as shown.
- Page 17 SINGLE-SPEED SETUP Add a rubber protector to the end of the metal strap. Ensure there is NO contact between the metal strap and the Wheel hub. If contact exists, readjust the Wheel within the dropouts. Tighten axle and torque arm nuts. Tighten the torque arm nut firmly (30-44 Nm) using a Tighten the axle nuts on both sides securely (30-44 22 mm torque wrench.
- Page 18 Flip your bike right-side up. Ensure the torque arm is installed correctly on the Use caution when flipping it upright as the chainstay. Copenhagen Wheel adds additional weight to the rear of your bicycle. Readjust your brakes. Inflate your tire.
- Page 19 SINGLE-SPEED SETUP Post-installation Checks Once you have finished the installation, and before your first ride, make sure you or your bicycle mechanic perform the following checks: Ensure the torque arm is installed correctly on the chainstay. Check that both front and rear brakes are adjusted and working properly.
-
Page 20: Multi-Speed Setup
SECTION 5 Multi-speed Setup This is a general guide for installing your Copenhagen Wheel on a multi- speed bicycle, but every bicycle is different. These instructions assume you have the knowledge, skills and tools to safely install the Copenhagen Wheel. If you need more information you can go to superpedestrian.com/ support or contact your nearest Superpedestrian Hub. - Page 21 The following diagrams (4-10) show the bike in an over so that it’s balanced on the handlebars and seat. upside-down position (as seen above). Make sure the power switch is OFF (0) on your Remove the axle nuts from both ends of the axle. Copenhagen Wheel.
- Page 22 Place the chain over the smallest cog and slip Insert the axle into the dropouts and make sure the Copenhagen Wheel in between the frame’s rear the Wheel is secure. Slowly release the derailleur back dropouts.
- Page 23 MULTI-SPEED SETUP Loosely thread the axle nuts. Alternately hand-tighten the axle nuts on each side. Attach the torque arm to the frame. Select the appropriately sized metal strap (included Rotate the torque arm until it rests on the underside in the box) for your chainstay. Use the smallest size that of the chainstay.
- Page 24 MULTI-SPEED SETUP Wrap the metal strap around the chainstay such that Slide the metal strap onto the torque arm and seat it the screw is on top of the frame underside and facing in the groove. Turn the screw with a screwdriver to take out (towards you), as shown.
- Page 25 MULTI-SPEED SETUP Add a rubber protector to the end of the metal strap. Ensure there is no contact between the metal strap and the hub. If contact exists, readjust the Wheel within the dropouts. Tighten the axle and torque arm nuts. Tighten the torque arm nut firmly (30-44 Nm) using a Tighten the axle nuts on both sides securely (30-44 22 mm torque wrench.
- Page 26 Flip your bike right-side up. Ensure the torque arm is installed correctly on the Use caution when flipping it upright as the chainstay. Copenhagen Wheel adds additional weight to the rear of your bicycle. Inflate your tire. Readjust the brakes and derailleur.
- Page 27 MULTI-SPEED SETUP Post-installation Checks Once you have finished the installation, and before your first ride, make sure you or your bicycle mechanic perform the following checks: Ensure the torque arm is installed correctly on the chainstay. Check that both front and rear brakesare adjusted and working properly.
-
Page 28: Use Your Wheel
It should snap into place. You can use the magnet of the charge connector Your Copenhagen Wheel contains a rechargeable to help lift open the charge port cover. battery and comes with a battery charger. - Page 29 Wheel and prompt you to update if necessary. Once paired with the Copenhagen Wheel, your smartphone becomes its ‘key.’ You’ll need it to enable the assistance, share your Wheel with friends and get the most out of your riding experience.
- Page 30 USE YOUR WHEEL Your First Ride and Wheel Setup Riding Modes Now that your Copenhagen Wheel is installed and The Wheel app lets you vary the level of assistance charged, it’s time to get out on the road. The Wheel is provided by the Wheel.
- Page 31 Electronic Braking Assistance Connect With Your Wheel Briefly pedaling backwards activates your Wheel’s The Copenhagen Wheel isn’t just about getting you electronic braking feature. Instead of using the motor from A to B quickly and easily. It’s also about finding fun to propel you forwards, the Wheel will use it to help ways to explore your city.
-
Page 32: Handling And Transport
Do not disassemble the rear of your bicycle by the Copenhagen Wheel. An the hub of the Copenhagen Wheel and do not attempt incompatible bicycle rack can damage the Copenhagen to repair it yourself. - Page 33 Copenhagen Wheel’s power switch to the OFF (0) position before picking up the Copenhagen Wheel. If the Copenhagen Wheel is not switched off while carrying AND the pedal is rotated forward, the motor will be activated and the Wheel will spin. Anything between the spokes (e.g.
-
Page 34: Usage, Storage And Cleaning
Operating Environment Recommended Terrain Operating or storing the Copenhagen Wheel outside The Copenhagen Wheel is designed for use in urban these ranges may affect performance: environments and is not recommended for off-road use. Riding on rough terrain or unpaved trails may put... - Page 35 (ideally, 20 to 25 °C (68 to 77 °F)) and store the Copenhagen Wheel at a 40 to 60% state of charge. The Medical Conditions Copenhagen Wheel should always be stored with the...
- Page 36 For more information on long-term storage, please visit superpedestrian.com/support. Cleaning the Copenhagen Wheel When cleaning the Copenhagen Wheel hub, be sure the battery charger is unplugged, the power switch is turned to the OFF (0) position and the charging port cover is in place.
-
Page 37: Maintenance And Modification
Check tire pressure and spoke integrity prior best practice for all bicycles. If you notice buildup or to each ride. dirt on your Copenhagen Wheel or other parts of your We strongly recommend having the tension of the bicycle, cleaning is recommended as described in the spokes on the Copenhagen Wheel, as well as the previous section. - Page 38 You can find some of the best mechanics through The components of the Copenhagen Wheel that are Superpedestrian’s Partner Hubs. For help finding a Hub user-replaceable include the tire, tube and metal near you, visit: superpedestian.com/locator.
- Page 39 Accordingly, keeping your bicycle torque measurements for your bike, please visit: well lubricated will ensure it remains in good shape. superpedestrian.com/support. All bearings and other moving parts require regular lubrication (check every month or two): We recommend using a torque wrench to ensure that the correct torque is achieved when tightening these •...
- Page 40 • Clean the braking surface on the rim. tightened. • Immediately replace any dented or broken spokes. • Lubricate brake pivot bolts and adjust when Replacement spokes for the Copenhagen Wheel are necessary. available from Superpedestrian. Gear and brake cables •...
- Page 41 MAINTENANCE AND MODIFICATION Headset • Check headset for excess play or movement and tighten locknut if necessary. Pedals • If pedals are loose, retighten the pedal axle to the crank arm securely. • Check that pedal straps and toe clips are properly secured (if fitted).
-
Page 42: Built-In Battery And Charging
Superpedestrian or a Superpedestrian Hub. Discontinue use of the Output Voltage 54.6 V DC, 2.0 A Copenhagen Wheel if the Wheel is dropped or appears Wattage 109 W crushed, bent, deformed or damaged. Do not expose... - Page 43 BUILT-IN BATTERY AND CHARGING • You need to remove the Copenhagen Wheel from and remove the debris gently with a dry cotton swab or the bicycle. cloth. • The power cord or plug becomes frayed or damaged. Remember to unplug the charger before riding. Riding off with the charger still connected may result in •...
- Page 44 Electronic braking and regeneration will not function when the battery is fully charged. If the Copenhagen Wheel’s battery is low, and if the charger does not turn RED upon plugging in, the charger may need to be reset. A reset can be done by power cycling the charger (see next page).
-
Page 45: Troubleshooting And Help
Wheel fault. To check, look at the LEDs next to the charge port on the non-drive side of the Copenhagen Wheel. Get support directly from your app Tap on ‘Support’ and you will have instant access to If the Wheel’s state of charge is low, please plug in the... - Page 46 TROUBLESHOOTING AND HELP Find a Superpedestrian Hub At superpedestrian.com/locator, you can search a database listing all of our Superpedestrian Hubs, find the nearest one to you and get in touch to schedule a service appointment.
-
Page 47: Other Information
SECTION 12 Other Information End-User License Agreement Limited Warranty The Copenhagen Wheel includes a limited Use of the Copenhagen Wheel constitutes acceptance warranty found at: superpedestrian.com/legal/ of the Superpedestrian End-User License Agreement limited-warranty-for-the-copenhagen-wheel. and third-party software license terms found at: superpedestrian.com/legal/eula. - Page 48 OTHER INFORMATION vhelp conserve natural resources. When you decide radio or television reception, which can be determined to dispose of this product and/or its battery, do so by turning the equipment off and on, the user is in accordance with local environmental laws and encouraged to try to correct the interference by one or guidelines.
-
Page 49: Technical Specifications
OTHER INFORMATION brouillage, et l’utilisateur de l’appareil doit accepter communication satisfaisante. brouillage radioélectrique subi, même si le brouillage est susceptible d’en compromettre le fonctionnement. Technical Specifications Industry Canada Statement Hub Weight 7.6 kg (16.8 lbs) CAN ICES-3 (B)/NMB-3BThis Class B digital apparatus complies with Canadian ICES-003. - Page 50 +1 617 945 1604 Electromagnetic Compatibility 2014/30/EU hereby declares that the product: RoHS 2011/65/EU Copenhagen Wheel with serial numbers using The relevant provisions of the following standards were the format: XXBBYYDDDNNNNPPPPPPP applied to the product and used to verify compliance:...
- Page 51 OTHER INFORMATION...
- Page 52 The Bluetooth® word mark and logos are registered trademarks owned by Bluetooth SIG, Inc. and any use of such marks by Superpedestrian Inc. is under license. Android and Google Play are a trademark of Google Inc. Apple and the Apple logo are trademarks of Apple Inc., registered in the U.S.
Need help?
Do you have a question about the COPENHAGEN WHEEL and is the answer not in the manual?
Questions and answers