
Related Manuals for TubeDepot Tweed 5F1

Summary of Contents for TubeDepot Tweed 5F1
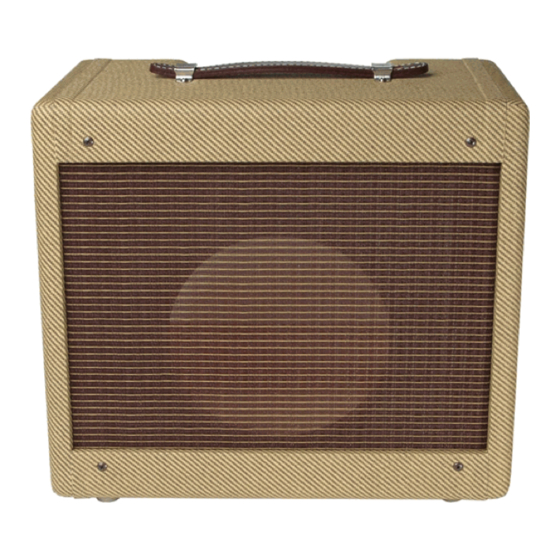
- Page 1 Learn Build Play Assembly Manual Tweed 5F1 Instructions for Assembling with the: - Printed Circuit Board (PCB) with additional modification suggestions and recommended amp settings version 17.0 May 24, 2017...
- Page 2 The Author, Publisher or Seller assume no liability with respect to the use of the information contained herein. For permission and other rights under this copyright, contact TubeDepot.com. TubeDepot.com...
-
Page 3: Table Of Contents
Table of Contents page Preface and Tweed 5F1 overview ..................iv Chapter 1 Safety ….........................1 Chapter 2 Tools and Supplies ….....................2 Chapter 3 Parts Inventory ......…................3 Chapter 4 Cabinet Preparation …....................4 Chapter 5 Circuit Assembly (PCB)…....................5 Chapter 6 Chassis Preparation and Assembly …................10 Chapter 7 Final Assembly …......................9... - Page 4 Director of Technical Services TubeDepot.com “ Champ” and “Fender” are the property of Fender Musical Instruments Corporation (FMIC). TubeDepot is not affiliated or associated with FMIC or its subsidiaries and FMIC does not sponsor or endorse any of TubeDepot’s products. TubeDepot.com...
-
Page 5: Safety
TubeDepot.com reserves the right to make changes to this manual as new construction methods are found to be more efficient and/or safer. When a particular procedure in this assembly manual differs from the assembly video, our recommendation is to follow this manual to insure the best construction possible. -
Page 6: Tools And Supplies
As with any construction project, there are certain tools and supplies that are recommended to complete the project. These are tools and supplies not provided with the kit and are instead provided by the builder. TubeDepot.com The following is our recommended list: part number... -
Page 7: Parts Inventory
PCB board, 5E1/5F1 printed circuit board transformers transformer, ClassicTone 40-18027 power transformer transformer, output tweed 5F1 4 & 8 ohm tap output transformer tubes 5Y3 rectifier tube rectifier tube 6V6GT beam power tetrode power tube 12AX7 dual triode... - Page 8 2' wire, 18 awg, stranded, hi-temp PVC – white speaker wire, + shielding 3” aluminum tape, 3" width, 10” length, self adhesive electrical and heat shielding heat shrink 1 heat shrink, 1/4" - black, 6" piece wire dressing / capping TubeDepot.com...
-
Page 9: Cabinet Preparation
Step 3 – Apply masking tape on each side of cabinet opening (photo 4.1a). Step 4 – Download and print the correct sized cabinet drilling template from our website: http://site.tubedepot.com/pdf/5F1_cabinet_drilling_template.pdf Some printers may automatically reduce the size of the template when printed. - Page 10 Step 4 – Solder the two tinned wires to the plug; white photo 4.3c to center and black to shield (photo 4.3c). Reinstall plug barrel. Step 5 – At opposite end of the twisted wire pair, strip the insulation ¼” and tin both wires. TubeDepot.com...
- Page 11 Align the edge of the tape along the bottom edge of the panel, offset by 1/8 of an inch from the bottom edge of the panel and overlapping the second strip (photo 4.4b). Proceed to chapter 5 TubeDepot.com...
-
Page 12: Circuit Assembly (Pcb)
Step 13 – Install the 100K trimmer pot (VR2, negative feedback adj.) See “Cool Mods”, chapter 10 for description on how to use this NOTE control to fine tube this amp to your sound. photo 5.1a TubeDepot.com... - Page 13 Step 9 – Repeat above for pads b. Step 10 – Repeat above for pad c except extend wire to 4”. Step 11 – Repeat above for pads f through k. Step 12 – Repeat above for pad n (photo 5.2a). TubeDepot.com Proceed to Chapter 6...
- Page 14 Chassis Preparation Drilling Mounting Holes for the Printed Circuit Board (PCB) Step 1 – Download and print the template “drilling template chassis/5F1” from: http://site.tubedepot.com/pdf/5F1_chassis_drilling_template.pdf photo 6.1a CAUTION Some printers may automatically reduce the size of the template when printing. Therefore, prior to use, always physically measure the printed template to insure proper scale is maintained.
- Page 15 Photo 6.6a Step 2 – Using a pair of needle nose pliers, carefully bend terminals 4 and 5 together. The holes of each of these terminals should meet flush TubeDepot.com against each other (photo 6.6a).
- Page 16 The two input holes on the outside of the chassis can be used as a temporary holding NOTE place and spacing template while working with the input jacks. In this way, the proper spacing is guaranteed when soldering the jacks together (photo 6.8c). TubeDepot.com...
- Page 17 Step 3 – Locate the next black grounding wire coming from pad G4a. Strip the insulation 1/4” from the end of the wire and tin the exposed strands. Step 4 – Repeat the same for the wire coming from pad G3a. TubeDepot.com...
- Page 18 (photo 6.12b). There is a specific tool that makes installing strain reliefs simple. If you find yourself installing NOTE strain reliefs on a regular basis, this tool is worth owning. See TubeDepot.com p/n TL-R-29 Proceed to 6.13 TubeDepot.com...
- Page 19 Step 6 – Fully insulate this connection with either a wire nut or with heat shrink (preferred). Step 7 – Solder the green wire from the AC power cord to the solder terminal mounted to the power transformer nearest the rectifier tube socket (photo 6.16a). Proceed to 6.15 TubeDepot.com...
- Page 20 Step 6 - The remaining black wires (which are the unused multi- voltage taps) of the power transformer should be trimmed and capped off with either electrical tape or preferably heat shrink tubing (photo 6.16c). Do not trim the green wires yet. Proceed to 6.17 TubeDepot.com...
- Page 21 (photo 6.19a). These terminals must not touch each other. Step 2 – Take the green 18awg stranded wire and photo 6.19a fold it in half. Tightly twist together the two cut ends and chuck this into an electric drill (photo 6.19b). TubeDepot.com...
- Page 22 6.19d resistors (photo 6.19g). Step 16 – Solder the other end of this black wire to the solder tab mounted to the screw of the preamp tube (photo 6.19g). photo 6.19e Proceed to Chapter 7 photo 6.19g photo 6.19f TubeDepot.com...
-
Page 23: Final Assembly
Step 1 – Properly align the 5/16” nylon cable clamp around power cord (photo 7.2a). Step 2 – With a #8 x 5/8” screw, secure the cable clamp and power cord to the inside cabinet wall. photo 7.2b photo 7.2a (photo 7.2b) Proceed to Chapter 8 TubeDepot.com... -
Page 24: Testing
Within a minute or two, the rectifier will have heated up and provided a slowly increasing high NOTE voltage to the power supply. This voltage will have properly formed the high voltage filter caps. TubeDepot.com... - Page 25 C4. The voltage here should read close to +22 +/- 3 volts (photo 8.1c). NOTE The presence of voltage at step 22 indicates that V2 is correctly sourcing current. TubeDepot.com...
- Page 26 PC board and the tube sockets; the tube sockets and the front panel controls. Move these wires back and forth until you find a spot where the squealing stops. Usually just a slight readjustment of wire routing is all that is needed to get the amp stable. TubeDepot.com...
- Page 27 Schematics TubeDepot.com...
- Page 28 = former white wire. Solid black & solid brown twisted together = former solid black wire. The two red/white striped wires are covered with heatshrink and not used. The green/yellow striped wires are also not used. All other wiring colors are correct. TubeDepot.com...
-
Page 29: Cool Modifications
8. Run this amp without negative feedback altogether by disconnecting the feedback line from speaker output jack – provides much more overall gain and distortion with the volume up. The Gibson GA5 is a nearly identical circuit to this tweed 5F1 without the feedback. - Page 30 Below are photos and descriptions of the various resistors used in this project. Carbon Composition 1/2W Metal Oxide 1W Carbon Film 1/2W Metal Oxide 2W Metalized Film 1/2W Metal Oxide 3W Carbon Film 1W TubeDepot.com...
- Page 31 Resistor Value Color Codes Resistor Types Carbon Film Metal Oxide Carbon Composition TubeDepot.com...
- Page 32 (K = +/- 10%) 2nd line: 160V= voltage rating (160V) 3rd line: 0834R = batch / date code 104 = .1ufd 684 = .68ufd 103 = .01ufd 223 = .022ufd 473 = .047ufd 102 = .001ufd 222 = .0022ufd 472 = .0047ufd TubeDepot.com...
-
Page 33: Soldering Hints
2. Establish a firm mechanical connection of the components prior to soldering. Solder should only be used to develop an electrical connection and not a mechanical one. TubeDepot.com... - Page 34 5. Feed an adequate amount of solder into the connection for the solder to flow around the components to be joined. 6. When adequate amount has been reached, remove solder and iron simultaneously. 7. Do not move connection or components until solder has solidified. 8. Clip off any excess wire lead(s). TubeDepot.com...
- Page 35 12DW7; (mixed gain – amplification factor, first triode = 100; second triode = 17) 5751; (high gain – amplification factor = 70) Power tubes: 6V6GT - 5871 - 7408 - 7184 Rectifier tubes: 5Y3GT - 5AX4 - 5CG4 - 5R4 - 5T4 - 5Z4 - 5AR4 - GZ30 - 6106 TubeDepot.com...
- Page 36 Install a solid state rectifier and get an extra watt of power and an animated dynamics in tone. Exchange the 6V6 with a 5881 for a more expansive sound scape. It is best to only run the 5881 when using the solid state rectifier. TubeDepot.com...
- Page 37 Appendix D Templates Appendix D1 is the cabinet drilling template ….............. Appendix D2 is the chassis drilling template – PCB and Turret Boards …......TubeDepot.com...
- Page 38 TubeDepot.com...
- Page 39 CAUTION: Because some printers may compress this template when printing, always insure accuracy of this template before drilling by measuring the chassis and template first. It is always better to measure twice and drill once. NOTE: We recommend For once a hole is downloading the drilling drilled, it cannot templates from the website to...
Need help?
Do you have a question about the Tweed 5F1 and is the answer not in the manual?
Questions and answers