
Subscribe to Our Youtube Channel
Related Manuals for CoLiDo X3045 Duo


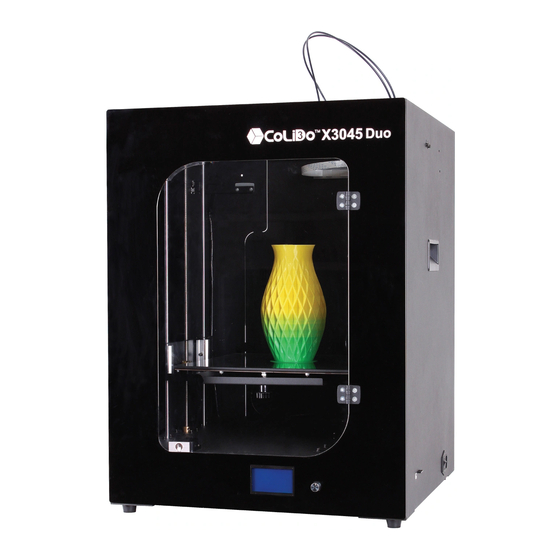
Summary of Contents for CoLiDo X3045 Duo
- Page 1 X3045 Duo Industrial 3D Printer USER MANUAL * Carefully and thoroughly read this manual before using View us at www.colido.com V1.35 All rights reserved Print-Rite...
-
Page 2: Table Of Contents
Chapter 4 Print Principle Chapter 5 Set up CoLiDo Printer 5.1 Unpack CoLiDo Printer 5.2 Accessory Checklist 5.3 CoLiDo X3045 Duo 3D Printer Structure Illustration 5.4 Unlock Printer Head and Heat Table 5.5 Install Glass Platform 12~14 5.6 Install Filament 15~17 5.7 Install camera... -
Page 3: Chapter 1 Introduction
In Chapter 6~9, you can learn how to calibrate the platform, printing, maintenance and troubleshooting. PRINT-RITE welcome you to the world of CoLiDo X3045 Duo 3D Printer. Following this manual will help you fully understand the Printer and make amazing products. -
Page 4: Chapter 2 Safety And Compliance
WARNING: HAZARDOUS MOVING PARTS, KEEP FINGERS AND OTHER BODY PARTS AWAY The moving parts of CoLiDo 3D Printer will possibly cause harm. Do not touch the CoLiDo 3D Printer inside when the printer is working. WARNING: Make sure stand by CoLiDo 3D Printer when it working. -
Page 5: Interference Of Radio And Television
Chapter 2 Safety and Compliance Interference of Radio and Electromagnetism The Printer has been tested and certified to comply with the restriction of FCC Part 15, which is related to Class B digital facility. The restriction is designed to provide reasonable protection against harmful interference in residential area when install the Printer. -
Page 6: Chapter 3 Specification
Chapter 3 Specification Printing Mechanical Print Technology: Fused Deposition Frame: Steel Modeling Nozzle Qty: 1pc with 2 feeding tubes Construction Dimension: 300*300*450mm Platform: Coated Glass Layer Resolution Setting: 0.1~0.4mm XYZ Bearing: Steel Positional Accuracy: XY: 0.011mm Stepper Motors: Z: 0.0025mm 1.8°... -
Page 7: Chapter 4 Print Principle
CoLiDo X3045 Duo Printer makes solid, three-dimensional objects by melting PRINT-RITE PLA/ABS filament. The designed 3D files are converted into CoLiDo command and sent to the Printer via SD Card or computer software “Repetier-Host”. Then, the printer head will heat up and melt the PRINT-RITE PLA/ABS filament and push it out from the nozzle to make a solid object layer by layer. -
Page 8: Chapter 5 Set Up Colido Printer
NOTE: Do not pull or twist the cable at any time. NOTE: The printer is heavy, please take out the printer carefully. CoLiDo Printer is unpacked. Please keep the packageing material in good shape. It will be re-used in the future to avoid unnecessary damage during transportation. -
Page 9: Accessory Checklist
5.2 Accessory Checklist PLA Filament 2PCS Spool Holder 2PCS SD Card 1PC Power Cable 1PC USB Cable 1PC Tools 1 Set SD Card Reader 1PC Test Sheet 1PC PLA Glass Platform 1PC ABS Glass Platform 1PC 3D printed samples 1 Set Nozzle Unit 1 Set (Spare Part) Clean nozzle tools 1 Set Camera 1PC... -
Page 10: Colido X3045 Duo 3D Printer Structure Illustration
5.3 CoLiDo X3045 Duo 3D Printer Structure Illustration Printer Head T1 & T2 Lifting Handle Front Door Power Port LCD Panel SD Card Slot LCD Knob USB Port... -
Page 11: Unlock Printer Head And Heat Table
5.4 Unlock Printer Head and Heat Table Remove the two locking brackets by unlocking the screws to release the printer head. (Use the Allen Key in the Accessory) Locking bracket Screws Reminder! Remove the locking bracket by unlocing the screws before using. -
Page 12: Install Glass Platform
5.5 Install Glass Platform 5.5.1 Power ON the printer Connect the Power Cable to the Printer. NOTE: Make sure printer switch is at “O” position. Plug-in the power cable to AC power source. NOTE: The socket-outlet should be installed near the printer and should be accessible. - Page 13 5.5 Install Glass Platform 5.5.2.1 Push the knob to go to main menu, rotate the knob to select “Prepare” 5.5.2.2 Push the knob to go to submenu, rotate the knob to select “Auto Home” and push the knob to confirm. Then, the heat table will be moved up to HOME position.
-
Page 14: Install Glass Platform
5.5 Install Glass Platform 5.5.3 Install Glass Platform Get the two glass platforms from the package. Select Glass Platform according to the selected filament material that will be used. The two platforms are coated Glass Platform which mark “PLA”or “ABS”to distinguish. Glass Platform Orientation: Matted surface of Glass Platform must be on top when installing... -
Page 15: Install Filament
5.6 Install Filament 5.6.1 Take off the two filament cartridges from packaging. 5.6.2 Insert two Spool Holders into the Spool Holder Slot located at the back of the printer and push down to lock as shown below. (Back view of the Printer) Spool Holder 5.6.3 Mount two filament cartridges on the spool holder NOTE: The black thumb pin and the printed“Note”must be facing front. - Page 16 5.6 Install Filament 5.6.5 Gently pull the filament from the cartridge. Cut the filament tip flat using scissor and make it straight for easy installation. NOTE: Do not forcedly pull out the filament from the cartridge in case the filament disorder inside the cartridge.
-
Page 17: Install Filament
5.6 Install Filament 5.6.8 Insert the filament into the T1 and T2 of the printer head until it reaches the receiver port of the nozzle. Then, insert the filament tube to the head to lock. Filament Tube Extruder2 Extruder1 NOTE: The filament from Extruder1 must be inserted to T1 as Nozzle1; The filament from Exturder2 must be inserted to T2 as Nozzle 2. -
Page 18: Install Camera
5.7 Install Camera 5.7.1 Put magnet under the camera and install camera on the corner inside the printer. -
Page 19: Chapter 6 Colido Printer Calibrate And Test
Chapter 6 CoLiDo Printer Calibrate and Test Initial display of LCD Panel 6.1 Main Menu 6.1.1 Push the knob to go to main menu and you can see three submenus (picture A). 6.1.2 Rotate the knob and select“Prepare”(picture B), then push the knob to... -
Page 20: Calibrate Mode
6.2 Calibrate Mode 6.2.1 Rotate the LCD knob and select“Calibrate Mode”(picture D), then push the LCD knob to start the calibration . NOTE: “Calibrate Mode”is to guide user to operate the printer and to check if the printer is working well. 6.2.2 The platform will move up and the printer head will go to the 1st location Point 1 (picture E) and the LCD Display screen will show as picture F. - Page 21 6.2 Calibrate Mode 6.2.3.2 Calibration Standard Condition: The test sheet must be lay down flat in the platform, and the test sheet must be touching the nozzle tip. Test Sheet Nozzle Platform/Heat Table Note: If the calibration standard condition is not met, platform level must be adjusted.
-
Page 22: Calibrate Mode
6.2 Calibrate Mode The adjusting knob location as picture H (total 3PCS). Adjusting Knob 6.2.4 After rotate the adjusting knob to meet the Calibration Standard Condition, rotate the LCD knob to select “Next Step”as picture J, then press the LCD knob to next point to calibrate. 6.2.5. -
Page 23: Nozzle & Filament Test
6.3 Nozzle & Filament Test 6.3.1 After calibration, the screen will show Picture K, push the LCD knob to select the filament you are using in extruder1. NOTE: The original default testing filament will be from Extruder1. 6.3.2 The screen will show Picture L, make sure the filament is inserted into the printer head correctly. -
Page 24: Nozzle & Filament Test
6.3 Nozzle & Filament Test Good condition: The melted filament flow out smoothly and continuously from the nozzle. Good No Good condition: The melted filament do not flow out smoothly and continuously from the nozzle. Note: If the filament flowing is in No Good condition, check the following. -
Page 25: Print Test With Sd Card
6.4 Print test with SD Card 6.4.1 After nozzle and filament inspection, the screen will show as below picture R. The printer will start to heat up the platform a few minutes. NOTE: If screen shows no test file such as picture S, means that the test file cannot be found n SD card. -
Page 26: Print Test With Sd Card
6.4 Print test with SD Card 6.4.3 Once the nozzle temperature reach the setting temperature (Picture U), the heating is done and the printer start to print the test file. PDT2.GCO 6.4.4 Finish printing the test file as picture V, the LCD Display will show as picture W. -
Page 27: Prepare Menu
6.5 Prepare Menu There are 8 submenus under “Prepare” as below picture I~III: 1. Calibrate Mode → Printer calibration and test (Refer to 6.1~6.4) 。 2. Choose Nozzle → Select the extruder1 or extruder2 to work. (Refer to 6.6) Disable Steppers→Unlock all motors, can move the position of the platform and the printer head manually. -
Page 28: Choose Nozzle
6.6 Choose Nozzle “Prepare”-“Choose Nozzle”has 2 submenus: Nozzle: T1 Nozzle: T2 Rotate the knob to select the nozzle you want to take as default nozzle, and its corresponding extruder will be taken as default to work. Push the knob to confirm the selection and return to initial display. Then, the default extruder will be changed to the one you selected. -
Page 29: Change Filament
6.7 Change Filament “Prepare”-“Change Filament”has 2 submenus: (as picture a) 1. Load Filament - Load filament into the nozzle automatically and check the filament flowing status. 2. Unload Filament - Remove filament from the nozzle. 6.7.1 Select“Load Filament”and proceed as below picture b~e. b. - Page 30 6.7 Change Filament 6.7.2 Select “Unload Filament” and proceed as below picture f~j. a. Heating up the nozzle temperature to the setting temperature as picture i. b. Once the temperature reach the setting temperature as below picture g, the default extruder will work to auto unload its filament from the nozzle. c.
-
Page 31: Color Mixing
6.8 Color Mixing “Prepare”-“Color mixing”has 3 submenus: Proportional: Gradient: Separate: 6.8.1 Proportional 6.8.1.1 Select“Proportional”, rotate the LCD knob to input the percentage number 0~100% and push the LCD knob to confirm. The percentage % means the mixing printing percentage of the default extruder such as T1. - Page 32 6.8 Color Mixing 6.8.2 Select “Gradient”, rotate the LCD knob to input the height 1~5(mm) of layer for color transition. The gradient percentage of the default extruder is 0~100%, the graident percentage of the another extruder is 100~0%. For example, the object height is 320mm and input is 3mm, the T1 is the default extruder, then: 1.
-
Page 33: Color Mixing
6.8 Color Mixing 6.8.3 Select“Separate”, rotate the LCD knob to input the interval (mm) of the object you want to print different color. For example, input 2mm and the T1 is the default extruder, then T1 filament (Black PLA) will print 0~2mm, T2 filament (Yellow PLA) print 2~4mm, T1 filament print 4~6mm again, T2 filament print 6~8mm...until finish printing. -
Page 34: Control Menu
6.9 Control Menu There are 4 submenus under “Control”: 1、Temperature →to adjust the setting temperature. 2、Printer Runprama →to refer to the printer running information. 3、Printer Info →to refer to printer basic information. 4、Password→Manufacturer setup. Forbit user to adjust. 6.9.1 “Temperature” menu can set up below parameter: Set up the nozzle1 setting temperature Set up the nozzle2 setting temperature Set up the platform setting temperature... -
Page 35: Control Menu
6.9 Control Menu 6.9.2 “Printer Runprama”menu as below. The printer total turning-on time T1 Filament total usage for the printer T2 Filament total usage for the printer 6.9.3 “Printer Info”menu as below. It is to show the printer basic information such as Printer type, Version No and License No. -
Page 36: Print From Sd Menu
6.10 Print from SD Menu “Print from SD”is to select the print file from SD Card to print. 6.10.1 The default documents when out of factory is: (it will be updated depend on the shipped printer) Remark: Print the file “Z-330.gcode”from the SD card is to move down the printer table far from the nozzle tip 330mm height (Z aixs). - Page 37 6.10 Print from SD Menu 6.10.3 Pause Printing Feature: 1. Push LCD knob and rotate to select “Pause print”; 2. Push LCD knob and rotate to select “Resuming print”to resume print. NOTE: When pause printing, the printer head will go to home position and be locked.
-
Page 38: Print From Sd Menu
6.10 Print from SD Menu 6.10.5. Adjust Printing settings Feature: During printing, rotate the LCD knob and rotate to select “Tune”. You can adjust the setting temperature, speed or switch the nozzle. a. “Speed”: the default speed is 100%. The printing speed can be adjusted base on actual condition during printing. The number increases, the printer speed also increases. -
Page 39: Chapter 7 Repetier-Host Setup, Slice And Print
If you want to print files from computer, you need install REPETIER-HOST. Computer Operation System:WINDOWS 7, MAC OS REPETIER-HOST is a software which is used to slice the 3D models (.GCO or .STL) and command CoLiDo Printer to print. 7.1 Install REPETIER-HOST (WINDOWS) Find“setupColido-RepetierHost_1_5_5.exe”in SD Card... - Page 40 7.1 Install REPETIERHOST (Cont.) Select a destination to save the software and select the components should be installed, then click “Next”and“Install”. Click“Next” Click“Next” Click“Create a desktop icon” Click“Next” Click “Next” if antivirus message appear, please Click“Install” allow the operation timely.
- Page 41 7.1 Install REPETIER-HOST (Cont.) Click “Install Arduino driver”, “Install FTDI serial driver” and “Launch Print-Rite CoLiDo Repetier-Host” and then click “Finish”. Click“Finish” Install Arduino drivers. Click“Next” Click“Finish”...
-
Page 42: Install Repetier-Host
7.1 Install REPETIER-HOST (Cont.) Install FTDI Drivers. Click“Extract” Click“Next” Click“Finish” Find the configure folder “Slice3r”in SD Card, copy it to the computer path: “C:\Users\******(User Name)\AppData\Roaming”as below. NOTE: “AppData” folder maybe will be hided in the computer. Please click “show hidden files, flolders, and drivers” in “Folder Options”. -
Page 43: Repetier-Host Setup_Single Color/Color Mixing
REPETIER-HOST Setup_Single Color/Color Mixing Connect the printer to the computer using USB Cable and Turn ON the printer. When the computer is the first time connecting the printer, there is connection reminder at the right bottom of the computer. 7.2.1 Double click ,to go into “Repetier‐Host”software. - Page 44 REPETIER-HOST Setup_Single Color/Color Mixing 7.2.4 Printer Settings as below. Connection: Select Printer: CoLiDo X3045 3D Printer; Baud rate: 115200. Select the correct Port COMx such the printer can connect witht the Repetier. NOTE: COMx dependant on different computer or 3D printer you are using.
-
Page 45: Slice_Single Color/Color Mixing
CoLiDo standard ABS - For ABS material object CoLiDo draft - For fast printing CoLiDo support - For the model adding support CoLIDo thin wall - For the thickness lower 2mm thin wall object Step 3: Select printer type “CoLiDo X3045 3D... -
Page 46: Slice_Single Color/Color Mixing
7.3 Slice_Single Color/Color Mixing Step 4: Select the nozzle and the platform heating temperature base on the filament you are using. CoLiDo ABS_110 - For ABS Filament with nozzle temp 220℃ and platform temp 110℃ CoLiDo PLA_70 - For PLA Filament with nozzle temp 205℃... -
Page 47: Printing_Single Color
7.4 Printing_Single Color 7.4.1 If want to print the file using SD Card, you can click “Save for SD Print” after slice, then save the GCO file to SD Card to print. (refer to 6.10) NOTE: The saved file name just can be English words, number, underline, blank space. - Page 48 7.4 Printing_Single Color After the printer is really connected with the Repetier software, the actual extruder and bed temperature of the printer will be shown in the bottom of the Repetier software. Also, the Temperature Curve is moving. 7.4.2.2 Click “Print”, start to print. Once the platform and the nozzle actual temperature reach the setting temperature, the printer will start to print.
-
Page 49: Printing_Single Color
7.4 Printing_Single Color 7.4.2.3 Printing. 1. During printing, you can see the temperature go up/down from “Temperature Curve”. 2. During printing, click “Manual Control”, you can see the printing track from “3D View”window. 3. During printing, you can click “Pause Print” and “Continue Printing” to pause/resume printing. -
Page 50: Printing_Color Mixing
7.5 Printing_Color Mixing 7.5.1 Load two filament into the nozzle a. Select “Prepare” - “Color mixing”- “Proportional”, input 50%. b. Select “Prepare”-”Change Filament”- “Load Filament”. (Refer to 6..7.1) to check the mixing filament flowing. NOTE: Suggest the two filaments for color mixing will be similar printing temperature to have good printing effect. - Page 51 7.5 Printing_Color Mixing a. “Proportional”: (For example T1 30% and PLA Filaments) The mixing percentage T1 30% and T2 70% will keep no change until finish printing. b. “Gradient”: The mixing percentage T1 will change from 0% to 100% progressively and T2 will change from 100% to 0% decreasingly .
-
Page 52: Repetier-Host Setup_Two Color/Two Material
,to go into “Repetier‐Host”software. 7.6.2 Click “Printer Settings”. 7.6.3 Printer Settings as below: Select “CoLiDo X3045 3D Printer”, revise the name to “CoLiDo X3045 Duo 3D Printer”; Click “Extruder”, revise “Number of Extruder:”to 2; Check the “Printer Shape” as below and “Connection” by refer to 7.2.4;... -
Page 53: Slice_Two Color
7.7 Slice_Two Color 7.7.1 Click “Load”, select the first print file that you want to print and click “Open”. Note: The print file should be .STL format. 7.7.2 Click “Load”, select the second print file that you want to print and click “Open”. - Page 54 7.7.5 Select “Slic3r” and select the settings as below: Printer Setting: Select the effect that you want to print Printer Settings: CoLiDo X3045 Duo 3D Printer Extruder 1: Extruder 2: Select the nozzle and the platform heating temperature base on the filament you are using.
-
Page 55: Slice_Two Material
7.8.3 Click “Print Settings”to revise the settings. 7.8.3.1 Setting for Two material1: Select “CoLiDo support Duo”, “Multiple Extruder”. Set one material is to print production such as T1, one material is to print support material such as T2 as below picture. Then click “save” to save the revising. - Page 56 7.8 Slice_Two Material 7.8.3.2 Setting for Two material2: Select “CoLiDo Best”, “Multiple Extruder”, set one material is to print product such as T1, another material is to print infill such as T2. Then click “Save”to save the revsing to other name such as“CoLiDo Best 1”as below picture.
- Page 57 7.8.4.2 Slice Two Material 2: Printer Setting: The saved settings such as “CoLiDo Best 1” Printer Settings: CoLiDo X3045 Duo 3D Printer Extruder 1: Extruder 2: Select the nozzle and the platform heating temperature base on the filament you are using.
-
Page 58: Printing Using Wifi Communication
7.9 Printing using WIFI communication 7.9 There are two methods of WIFI communication: A. WIFI communication: Control printer using local area network (No need internet cable, use printer WIFI hot spot to communicate with printer); B. Remote control: Control printer using internet (No need internet cable, use wireless relay to connect with print). - Page 59 7.9 Printing using WIFI communication b. Open Google Browser, input “10.10.11.1” in the address bar, then you can view CoLiDo 3D printer Control system in webpage. Click to login If login with mobile, please select “To PC” to setup relay mode.
- Page 60 7.9 Printing using WIFI communication Operation Select file During the print, can use “Pause/Start” and “Stop” button to control. Select "Upload & Print" the model .GCO will show on the list and start print automaticlly;Select "Upload" the model .Gco will show on the list only. Click "Print"...
- Page 61 7.9 Printing using WIFI communication Start Print file list 7.9.1.3 Other functions Can adjust and check the print settings and file print information. Control menu: Actual nozzle temperature/Target nozzle temperature Actual bed temperature/Target bed temperature...
- Page 62 7.9 Printing using WIFI communication Information menu: The total printer running time The total printer filament print Print Record: Printed file and filament comsume Reset function Reset button is inside the small hole located at the left side of the printer. Press the reset button 1 second, Wifi will reboot;...
- Page 63 7.9 Printing using WIFI communication Monitor function Under the WLAN Settings, select “Monitor” the click on “Start Preview” to start the monintoring the printer printing state. NOTE: Every time click on “Start Preview” only have 15 seconds for the preview. Click again to refreash the page and start again. Enter into monitoring page Click to start 15s preview, please wait for buffering...
- Page 64 Step 1. Printer wireless relay setup Refer 7.9.1.1 to connect printer with wifi, then open Google browser enter 10.10.11.1 to enter the CoLiDo 3D printer control web page. Under the “WLAN Settings”select “STA” then enter the router user name and password, click “Setup”...
- Page 65 7.9 Printing using WIFI communication Step 2. Register with email Connect with internet from router, enter “ www.colido-server.com” in Google browser go to page as Fig. shown below. Click “Register”. Click on “Register” Enter the valid email address and new password. The success message will be shown after click “Register”, and then click “OK”.
- Page 66 Enter the user name and password registered, then click “Connect” Click “OK” Step 4. Remotely control printer Connect with WAN internet, enter “ www.colido-server.com” in Google browser. Enter the bind email address and password, click“Login”. Click printer wifi enter into printer operation page.
- Page 67 7.9 Printing using WIFI communication Enter the user name and password connected with print wifi then click “Login” Click “Unbind” to unbind printer with account Select the printer Select the printer...
- Page 68 7.9 Printing using WIFI communication A a. “Print manage”page Click “Select file” to select the .Gco model want to print. Select "Upload & Print" the model .GCO will show on the list and start print automaticlly;Select "Upload" the model .Gco will show on the list only. Click "Print"...
- Page 69 7.9 Printing using WIFI communication 2. “Operation”page As Fig. A shown,click “Operation”. The operation page can setup the heated bed temperature, nozzle temperature, print speed, Gcode and so on. 3. “Monitoring” page As Fig. A shown , click “Monitoring” to check the current print state. NOTE:...
-
Page 70: Repetier-Host Basic 3D Printing
7.10 Repetier-Host Basic 3D Printing 1. 3D object can be adjusted such as scale down/up X/Y/Z, rotate X/Y/Z, copy, mirror, autoposition and split before slice. After adjusting the object, It is better to click “Center Object”. Autopostion Scale up/down View cross section Delete Add other 3D object Copy 3D model... -
Page 71: Repetier-Host Advanced 3D Printing
7.11.1 Slic3r settings For printing setting, you can click “Configuration” to review or have your customized “Print/Filament/Printer Settings”in Slic3r for advanced user. 7.11.1.1 Print Settings (For example “CoLiDo standard”) a. Layers and perimeters Lower the Layer height and higher the printing precise , but longer the printing time. -
Page 72: 7.11 Repetier-Host Advanced 3D Printing
7.11 Repetier-Host Advanced 3D Printing b. Infill Higher f ill density and longer printing time 4 f ill pattern : as right picture. Select “Only inf ill where needed”, will only print the outside single perimeter. Line Rectilinear Honeycomb Concentric c. - Page 73 7.11 Repetier-Host Advanced 3D Printing d. Support Material Select “Generate support material”, will auto print supporter on the model. Once the angle of the overhang structure OA is bigger than the “setting angle”, the support material will be auto generated. We suggest 45degree Overhang threshold:...
-
Page 74: 7.11 Repetier-Host Advanced 3D Printing
7.11 Repetier-Host Advanced 3D Printing 7.11.1.2 Filament Settings (For example “CoLiDo PLA_70”) a. Filament Adjust some object f inish, revise between 0.9~1.1 Setup the extruder and bed setting temperature NOTE: To revise the temperature, need click the up/donw narrow instead of revise the number directly. -
Page 75: 7.11 Repetier-Host Advanced 3D Printing
7.11 Repetier-Host Advanced 3D Printing 7.11.1.3 Printer Settings a. Extruder 1 If do not want Retraction, revise the “Length” to “0”. When printing many objects at the same time, revise the “Lif t Z” f rom “0” to “2~5” to avoid the nozzle cross the object.. -
Page 76: 7.11 Repetier-Host Advanced 3D Printing
7.11 Repetier-Host Advanced 3D Printing 7.11.1.4 Save the settings If you want to save the revised settings , click “Save” and have customized name. Then you can select customized name/settings when you slice. 7.11.2 Other Skills a. Design supporter on the 3D model to aviod overhang structure (the supporter can be easily removed.) b. -
Page 77: 7.11 Repetier-Host Advanced 3D Printing
7.11 Repetier-Host Advanced 3D Printing 7.11.3 CuraEngine It is another slicer software to convert 3D model to g-code. Step1: Select “CuraEngine”; Step2: Select “Print Settings”and “Filament Settings”; Step3: Click “Slice with CuraEngine”. If you want to view or customize CuraEngine settings, cilck “Configuration”. -
Page 78: Chapter 8 Maintenance
Chapter 8 Maintenance Lubricate the Z-axis Screw Rod and the X,Y Rods After printing around 50 hours, you should lubricate the Z-axis screw rod and the X,Y Rods. To lubricate Z-axis screw rod, please follow up below process: 1. Prepare the lubricate (own by customer) such as SKF Bearing Grease . 2. -
Page 79: Chapter 9 Troubleshoot 79~81
Chapter 9 Troubleshoot Consumable (Filament) Question Solution What is the PLA/ABS default 1. PLA: Nozzle temperature is 205℃,Platform temperature is 65~70℃; setting temperature? 2. ABS: Nozzle temperature is 220℃,Platform temperature is 100~110℃. How to store the filament If you do not use the the filament for a long time, keep your filament spool or cartridge in when the printer will is out of use a closed plastic bag to avoid the filament absorbing the moisture. - Page 80 Chapter 9 Troubleshoot 3D Printer Question Solution 1. Make the temperature setting correct. PLA, nozzle temperature is 205℃, platform The printed object cannot stick temperature is 70℃; ABS: nozzle temperature is 220℃, platform temperature is 110C. to the platform? Make sure the selected setting is matched with the material you are using. 2.
-
Page 81: Chapter 9 Troubleshoot
Question Solution How to do if the LCD Disply show CoLiDo printer operation temperature is 15℃~32℃, please place the printer under the “Err: MINTEMP”? right room temperature such the printer can have good printing. Once change the printer to place in the right room temperaure, need turn off and turn on back to refresh the printer.
Need help?
Do you have a question about the X3045 Duo and is the answer not in the manual?
Questions and answers