
Related Manuals for Braillo 200


Summary of Contents for Braillo 200
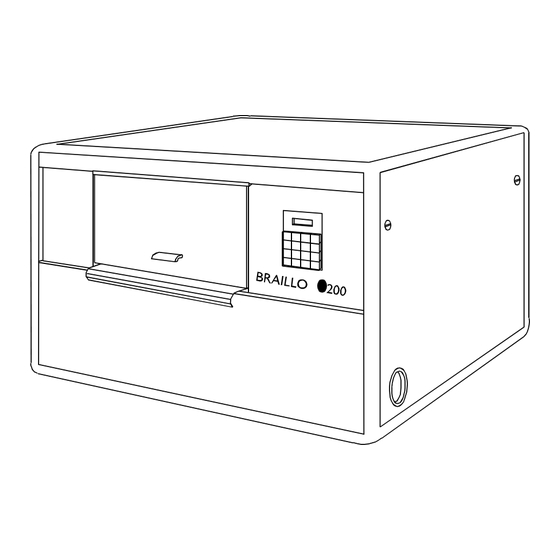
- Page 1 INSTRUCTION MANUAL BRAILLO BRAILLO NORWAY FOR BETTER BRAILLE - AND MORE Rev. 9705...
-
Page 3: Table Of Contents
Addresses and Phone Numbers ........58 May 1997, © - 97 Braillo Norway AS. - Page 4 BRAILLO NORWAY AS B 200...
-
Page 5: Installation
Make sure that your Braillo 200 has not been damaged in transport. Check if the packing is damaged; If so, it is possible that the Printer has also been damaged or scratched. If any damages are found, please... -
Page 6: Removal Of Covers
Toolkit for service and maintenance Test and packing list If any of these items are missing, please contact your distributor or Braillo Norway AS. Important ! It is very important that the Printer's specified voltage and frequency value corresponds with the local main power supply available. - Page 7 BRAILLO NORWAY AS B 200 Removal of Cover, Figures...
-
Page 8: Interfacing To Computer
Connect the enclosed cable, ensure that the computer and the Printer have exactly the same transmission settings. If not, they can be changed either on the computer or the Printer. Braillo Norway recommends a baud rate of 9600 Baud for quick and reliable communication. - Page 9 BRAILLO NORWAY AS B 200 To have one sheet (two pages) printed, one of the following sequences must be executed: Double-sided printing: Two pages full of text. More than one page of text and one FF. Less than one page of text and two FF.
- Page 10 BRAILLO NORWAY AS B 200...
-
Page 11: Operating
BRAILLO NORWAY AS B 200 OPERATING Operating Panel There is an audio alarm which sounds if a problem has occurred, and the display will show what has happened. There are three sheet counters. The one at the right-hand side of the display shows the total number of printed sheets and cannot be reset. - Page 12 BRAILLO NORWAY AS B 200 Description of Functions of Operating Panel COUNT1 / COUNT2 Selects between sheet counter (not pages!) 1 and 2. When this button is in the outer (released) position, counter 1 is displayed on the left-hand side of the display, and when the button is in (depressed), counter 2 is displayed.
- Page 13 BRAILLO NORWAY AS B 200 I/O - Input/Output Selects between serial and parallel port, and sets the data transmission values for the serial port. 1st push down: Displays which port is active. To select serial or parallel port, the button must be depressed and then released. Now, while the display still shows the active port, press SCROLL to select the other port.
- Page 14 BRAILLO NORWAY AS B 200 LAYOUT 4 Selects Page Adjust and Page Margin. Note! Please keep in mind that there is a difference in the terms “page length” and “sheet length”. By page length we mean the number of lines of text to be printed on a page, and by sheet length we mean the physical size of a sheet of paper in inches.
-
Page 15: Using The Menu Buttons
BRAILLO NORWAY AS B 200 RESET PRINTER Resets the CPU unit and clears the buffer. Must always be used if an error occurs (Printer Error in the display). RESET ALARM For alarms, the audio alarm can be reset (e.g. Printer Alarm, Out of Paper). -
Page 16: Current Values And Options
BRAILLO NORWAY AS B 200 Current Values and Options... -
Page 17: Print Values
BRAILLO NORWAY AS B 200 Print Values This function gives a printout of the settings which are currently active in the Printer; It also gives information about the 8 ASCII-tables in the Printer. When Print Values is used, the Line Length setting must be at least 36 characters. If not, this message will... - Page 18 BRAILLO NORWAY AS B 200 The remaining information in the Print Values printout tells which ASCII-tables are available in the EPROM, and might look like the list below. BRAILLO NORWAY ASCII TABLES IN PROM NO 1 = DENMARK 6 DOT 045.00 DENMARK 8 DOT 045.00...
-
Page 19: Messages/Error Messages
BRAILLO NORWAY AS B 200 Messages/Error Messages The text in the display can be divided into three groups; Messages, Alarms and Error Messages. With Messages, the Printer operates normally. With some Alarms, the Printer can be operated to a certain degree, while other Alarms are like Error Messages, in that the Printer cannot be operated, and RESET PRINTER must be used. - Page 20 BRAILLO NORWAY AS B 200 The following alarms are usually caused by a problem with the handshake in the data communication between the computer and the Printer, and it will be necessary to press RESET printer. The text which remains in the buffer during these alarms can be printed by using DUMP BUFFER.
- Page 21 BRAILLO NORWAY AS B 200 On error messages, the Printer cannot be operated, and RESET PRINTER must be used. The reason might be: Printer Error If the main motor starts, but for some reason General Failure stops because of, for example, a blown (released) motor fuse, this message appears in the display, together with the audio alarm.
-
Page 22: Inserting Paper
BRAILLO NORWAY AS B 200 Inserting Paper Paper should be inserted into the Printer in the following manner: Turn on the main switch, if the printer is not already switched on. (Red power lamp lights up.) Place a box of paper at the back of the Printer. (Opposite from the operating panel.) Insert the paper between the two knobs, and then through the slit in the paper guide. -
Page 23: Test Print
B 200 Test Print This Braillo Printer has both single-sided and double-sided (interpoint) test print patterns. See also TEST PRINT in chapter 2.1 "Operating Panel". The test print consists of a X-pattern, some full cell lines, empty cell lines, the complete ASCII-table and a pattern consisting of a character with dot 1,3,5 combined with a character with dot 2,4,6. -
Page 24: Escape-Sequences
BRAILLO NORWAY AS B 200 Escape-Sequences What is an escape-sequence? An escape-sequence is just a name for a code which is sent from the computer to the Printer to change the parameters which control the way the Printer works. All parameters that can be set via the operator panel, can also be changed with the help of escape-sequences, (except those for the data communication, i.e. - Page 25 BRAILLO NORWAY AS B 200 Overview of the escape-sequences: ESC A nn - Sheet length. nn can be from 08 to 28 (4 to14 inch). ESC B nn - Line length. nn can be from 10 to 42 characters. ESC C n - Print Format.
- Page 26 BRAILLO NORWAY AS B 200 Sheet length: ESC A nn - Sheet length. nn can be from 4 to14 inches. nn can be a number from 8 to 28, corresponding to the length of the sheet in inches times two. (A 12 inch sheet will have the number 24).
- Page 27 BRAILLO NORWAY AS B 200 Line Length 027 066 051 048 1B 42 33 30 027 066 051 055 1B 42 33 37 027 066 051 049 1B 42 33 31 027 066 051 056 1B 42 33 38 027 066 051 050...
- Page 28 BRAILLO NORWAY AS B 200 6 / 8 dot braille: ESC J n - 6 / 8 dot braille. n can be 0 or 1, 6 (0) or 8 (1) dot braille. 6 / 8 dot braille 6 / 8 dot braille...
- Page 29 BRAILLO NORWAY AS B 200 Page Adjust: ESC R n - Page adjust. n can be from 0 to 9 lines. Note! Please keep in mind that there is a difference in the terms “page length” and “sheet length”. By page length we mean the number of lines of text to be printed on a page, and by sheet length we mean the physical size of a sheet of paper in inches.
- Page 30 BRAILLO NORWAY AS B 200 Page Margin: ESC T nn - Page margin. nn can be from 0 to 20 step. Page Margin Step ASCII Step ASCII 027 084 048 048 1B 54 30 30 6.9850 027 084 049 049 1B 54 31 31 0.6350...
-
Page 31: Lines Per Page, Example
BRAILLO NORWAY AS B 200 Software Form Feed: ESC 1 - Soft Form Feed Note! This command is to be used after all text in one volume has been transmitted to the Printer. If text corresponding to less than two pages, or text with an odd number of pages is received, and not followed by FF on the last page, the Printer will wait for more text or FF. -
Page 32: Service And Maintenance
Check the characters in the text-file in your computer to find out if the error could come from the text-file and not from the Braillo Printer. However, if your text-file is OK, a problem has occurred in the Braillo Printer. - Page 33 BRAILLO NORWAY AS B 200 Possible reasons for errors See figures on page 36. If a dot from a certain printing pin is missing regularly, the reason might be one of the following: Defect magnet (7). Broken short pivot arm (9).
-
Page 34: Principal Design Of Printing Procedure
BRAILLO NORWAY AS B 200 Principal Design of Printing Procedure... - Page 35 BRAILLO NORWAY AS B 200 Observe that the same printing mechanism (magnet, long pivot arm, short pivot arm and printing pin) makes all the dots in a column downwards the page.
-
Page 36: Table Of Page Sequences
BRAILLO NORWAY AS B 200 Table of Page Sequences Page layout: Note! The table is made for Page 1 up. Normal: Page: 2-4-6-8-10-12-14-16-18-20-22-24-26-28-30 Dot 1-2-3-7 Magnet Rack A 32-34-36-38-40-42-44-46-48-50-52-54-56 Dot 4-5-6-8 Magnet Rack B /)))))))))3)))))))))3)))))))))3)))))))))3)))))))))3)))))))))1 Page: 1-3-5-7-9-11-13-15-17-19-21-23-25-27-29 Dot 1-2-3-7 Magnet Rack C... -
Page 37: Magnet Rack, Removal And Refitting
The Printer is adjusted for optimal dot quality when delivered, but different paper quality could make it necessary to make some adjustments. Our service personnel will adjust the Printer when they are on site. However, if the Printer should need adjustment and Braillo Norway service personnel is not available, it should be done like this: Turn the belt, so the marking at the end of the shafts is pointing in the opposite direction of each other (see figure below), and lock the shaft, e.g. -
Page 38: Magnet Rack, Disassembly, Assembly And Adjusting
BRAILLO NORWAY AS B 200 Magnet Rack, Disassembly, Assembly and Adjusting See figures on page 36. Remove the magnet rack as described on page 33. This is what to do if a magnet (7) is to be replaced, or a complete cleaning is to be done. -
Page 39: Magnet Rack, Figures
BRAILLO NORWAY AS B 200 Magnet Rack, Figures... - Page 40 BRAILLO NORWAY AS B 200 Magnet Rack, Figures...
-
Page 41: Magnet Rack, Printing Process
BRAILLO NORWAY AS B 200 Magnet Rack, Printing Process... -
Page 42: How To Replace Short Pivot Arms
BRAILLO NORWAY AS B 200 How to Replace Short Pivot Arms See figures on page 39. If for some reason the short pivot arms need replacement, (worn or broken) this is the procedure to follow: Short pivot arm situated on the upper unit: Remove the magnet rack (the one in front of the defect short pivot arms) as described on page 33. - Page 43 BRAILLO NORWAY AS B 200...
-
Page 44: Return Springs, Adjustment
BRAILLO NORWAY AS B 200 Return Springs, Adjustment The adjustment has to be done when the shafts are in this position. See the marks at the end of the shafts on the figure below. -
Page 45: Eccentrics, Adjustment
BRAILLO NORWAY AS B 200 3.10 Eccentrics, Adjustment After taking off the belt, it is necessary to align the eccentrics. Put the belt back on, tighten it with the belt tightening wheel (2), and check that the marks at the end of the shafts (1) are pointing towards each other. -
Page 46: Paper Shoes, Adjustment
BRAILLO NORWAY AS B 200 3.11 Paper Shoes, Adjustment Place a sheet of paper between the paper shoes (P). Turn the belt so the two points (6) at the end of the shafts (2) is pointing towards each other as shown on the figure below. -
Page 47: Main Sensor Wheel, Adjustment
BRAILLO NORWAY AS B 200 3.12 Main Sensor Wheel, Adjustment Turn the belt, so the marks at the end of the shafts (D), is pointing towards each other, as shown on the figure below. Loosen the screws (A), turn the sensor wheel (C), until the sensor (B) is situated in the middle of the open... -
Page 48: Paper Feed Mechanism, Adjustment
BRAILLO NORWAY AS B 200 3.13 Paper Feed Mechanism, Adjustment An adjustment on the relation between the top margin and the bottom margin on a page which is full of text, could be done like this: Loosen the tractor feed shaft by unscrewing the two left-hand screws (B) on the sensor wheel. -
Page 49: Inductive Sensors, Replacing And Adjusting
BRAILLO NORWAY AS B 200 3.14 Inductive Sensors, Replacing and Adjusting When replacing the sensors, the gap between the sensor wheel and the sensors can be maximum 0.6 mm. See figure below. -
Page 50: Paper Sensor, Replacing
BRAILLO NORWAY AS B 200 3.15 Paper Sensor, Replacing The paper out sensor can be replaced like this: Take the paper guide with the sensor out of the Printer. To open the box, press the two fastening clips (G) simultaneously, and pull the box a little bit open at this end. -
Page 51: Maintenance
BRAILLO NORWAY AS B 200 3.16 Maintenance The printing of paper produces paper dust which stick to the mechanical parts of the printing mechanisms and to the paper guides. Depending on the paper type used, it is necessary to clean the Printer regularly with a vacuum cleaner, e.g. -
Page 52: Spareparts
BRAILLO NORWAY AS B 200 SPAREPARTS Sparepart List Name Number of parts B02141 Stepping Motor, Paper Feed B03015 Magnets B03020 Paper Guide, Inner B03022 Inductive Sensor B03032 Fan, Cover B03035 Magnet Rack Board B03074 Motherboard B03076 Operating Panel B03079 Paper Guide In / Out... - Page 53 BRAILLO NORWAY AS B 200 Name Number of parts B04066 Support List, Pivot Arm, Magnet Rack B04067 Sponge List, Short Pivot Arm B04068 Sponge List, Magnet Rack B04072 Push Rod, Paper Shoe B04094 Paper Shoe, Lower B04095 Paper Shoe, Upper...
-
Page 54: Overview Spareparts, Side
BRAILLO NORWAY AS B 200 Overview Spareparts, Side... -
Page 55: Overview Spareparts, Front
BRAILLO NORWAY AS B 200 Overview Spareparts, Front... -
Page 56: Technical Specifications
BRAILLO NORWAY AS B 200 TECHNICAL SPECIFICATIONS Cable Connections, Fuses... -
Page 57: Electric Unit
BRAILLO NORWAY AS B 200 Electric Unit A Fuse, magnet rack A Power inlet Fuse, magnet rack B Reset switch, Motor fuse Fuse, magnet rack C Connector, ext. Alarm D Fuse, magnet rack D Motherboard Main switch Connector, Braillo Cut... -
Page 58: Motherboard
BRAILLO NORWAY AS B 200 Motherboard LED, 24 V LED, 5 V Magnet racks LED, 5 V Connectors, Magnet racks LED, -12 V EPROM socket LED, +12 V Connector, Paper Out sensor LED, -12 V Serial port Connector, Paper Feed sensors... -
Page 59: Pin Configuration Serial And Parallel Port
BRAILLO NORWAY AS B 200 Pin Configuration Serial and Parallel Port Data transmission from the computer to the Printer can be done in two ways, either serial or parallel. The serial goes through an RS 232 C interface, and the parallel is using a Centronics compatible interface. Both connectors are of the 25 pin D-sub type. - Page 60 BRAILLO NORWAY AS B 200 Wiring diagram for the enclosed serial cable Standard RS 232 C cable, 25-25 pin: 25 pin female 25 pin female CTS, DSR CTS, DSR DTR 20 DCD 8 Wiring diagram for the serial cable with 9 pins adaptor:...
-
Page 61: Technical Specifications
Standard medium 6 or 8 dot. Paper Weight: 120 - 180 g/m², Recommended 150 g/m² Printing Speed: 200 characters per second, Approx. 600 printed pages per hour. Electrical: Voltage: Single phase 220V (+/- 10 %), 50Hz Optional 220V (+/- 10 %), 60Hz Current: Approx. -
Page 62: Addresses And Phone Numbers
BRAILLO NORWAY AS B 200 Addresses and Phone Numbers Administration/Sales department Braillo Norway AS: Office: Storgt. 31 Tønsberg Mail: POB 647 3101 Tønsberg Norway Phone: +47 33 31 66 22 Telefax: +47 33 31 66 77 Telex: 70333 brail n e-mail: braillo@braillo.no...
Need help?
Do you have a question about the 200 and is the answer not in the manual?
Questions and answers