Table of Contents

Summary of Contents for Rickard MLM RF
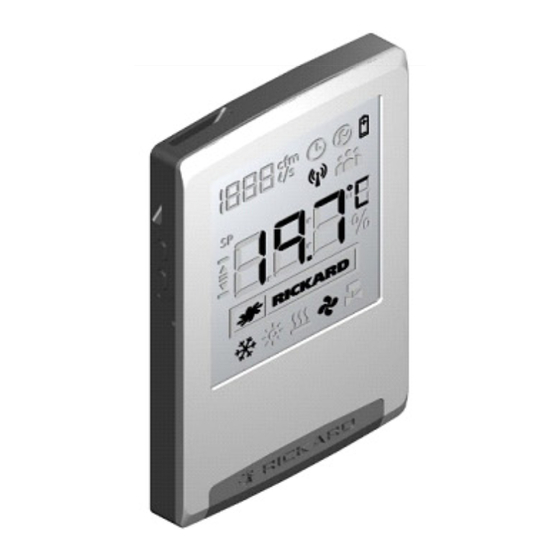
- Page 1 MLM RF OPERATION MANUAL MLM RF WIRELESS WALL MLM RF WIRELESS WALL MLM RF WIRELESS WALL MLM RF WIRELESS WALL THERMOSTAT THERMOSTAT THERMOSTAT THERMOSTAT OPERATING MANUAL OPERATING MANUAL OPERATING MANUAL OPERATING MANUAL 1 RICKARD 2017...
-
Page 2: Table Of Contents
MLM RF OPERATION MANUAL Table of Contents Table of Abbreviations MLM RF Overview Installation and Commissioning Hardware Installation Commissioning Link remote units to the correct AP Zoning of the Remote units Verify and Replace End Devices Removing an End Device... -
Page 3: Mlm Rf Overview
MLM 24 RF Remote Thermostat Installation and Commissioning The MLM RF units are fitted onto a standard MLM 24 installation. It interfaces to the MCU 2 V6.16, with the MLM Tool V8.13 (Application) used for commissioning and diagnostics. Note when reference is made in this document to the End Device it refers to both the Wallstat and Remotestat devices. -
Page 4: Link Remote Units To The Correct Ap
MLM RF OPERATION MANUAL Link remote units to the correct AP From the menu select ‘Wizard/Access Point/Add End Device’ as shown in this image. A list of Access Points will show. Select the AP you wish to bind Remote Devices to. - Page 5 MLM RF OPERATION MANUAL The paired Wallstat count will now be displayed, with ‘ED’ showing the total number of End Devices connected to the Access Point and ‘UD’ showing the number of those connected End Devices that has not been saved to the system.
- Page 6 MLM RF OPERATION MANUAL The paired Wallstat count will now be displayed, with ‘ED’ showing the total number of End Devices connected to the Access Point and ‘UD’ showing the number of those connected End Devices that has not been saved to the system.
-
Page 7: Zoning Of The Remote Units
MLM RF OPERATION MANUAL During this process the Wallstat display will now revert from Link mode to the normal operating mode. Note the RSSI indicator in the top left display and the RF icon permanently on. Once completed, the Wallstat icons are now grouped to the right of the Access Point on the Network screen. - Page 8 MLM RF OPERATION MANUAL From the listed diffusers, select a diffuser to bind to. Note the zones are also indicated to ease the selection process. Be patient while the configuration is saved. 8 RICKARD 2017...
- Page 9 MLM RF OPERATION MANUAL Notice the Wallstat icon is now to the left of the Access Point icon. It now also combines with the diffuser on the left to form the master controller for that control zone. Repeat the process to group the other two Wallstats as well. Note the bottom left two diffusers are zoned to- gether in zone 3...
-
Page 10: Verify And Replace End Devices
MLM RF OPERATION MANUAL ..as depicted in the Physical view. Verify and Replace End Devices To check the RF network status and health, select ‘Wizards/Access Point/ RF Network Status’. The Network Status Display is divided into two parts. The top part displays the Access Point status, listing the 4 Access Points on the network (one per channel). -
Page 11: Removing An End Device
MLM RF OPERATION MANUAL The bottom part lists all the End Devices on the network. To conserve power, the transmit intervals from End Devices to the Access Point is adapted to the operational requirements, alternating from a few seconds to a maximum of 10 minutes. - Page 12 MLM RF OPERATION MANUAL Press the ‘Next’ button. Note this action involves entering the ‘Link’ mode again and in the process any non- responsive End Devices will not show up on the count list. Allow up to 10 minutes for this process as the End Device’s adaptive response time could be set at 10 minutes.
-
Page 13: Moving End Device To A Different Zone
MLM RF OPERATION MANUAL Moving End Device to a different Zone To re-zone a Wallstat, click on the Wallstat icon, select Wireless/Un-Group.. and then ‘OK’. Wait for the new con- figuration to be saved. The un-zoned Wallstat is now shown to the right of the Access Point 13 ... -
Page 14: Wallstat Operation
MLM RF OPERATION MANUAL Click on the Wallstat icon. The zoning process can now proceed as indicated below. Wallstat Operation Adjust the Wallstat setpoint Press UP/DOWN Press ENTER to exit the Press the MENU bu on to go to to adjust the SP. SP mode. the SP EDIT screen. UP MENU DOWN ENTER 14 RICKARD 2017... -
Page 15: Put The Wallstat In Sleep Mode (Default State)
MLM RF OPERATION MANUAL Put the Wallstat in sleep mode (Default state) Press MENU/UP to access Press MENU to enter AP the hidden MENU ADDRESS DELETE MENU UP MENU MENU Press ENTER to delete the AP’s address from the WS and to enter low power mode again. The WS screen will blank. ENTER 15 RICKARD 2017... - Page 16 MLM RF OPERATION MANUAL Press ENTER to delete the AP’s address from the WS and to enter low power mode again. The WS screen will blank. ENTER 16 RICKARD 2017...


Need help?
Do you have a question about the MLM RF and is the answer not in the manual?
Questions and answers