Table of Contents
Advertisement
Quick Links
Advertisement
Table of Contents

Related Manuals for Sony DSC RX10 M3


Summary of Contents for Sony DSC RX10 M3
- Page 1 SONY DSC RX10 M3 HIGH-SPEED VIDEO MANUAL ...
-
Page 2: Table Of Contents
TABLE OF CONTENTS Handle with care 2 Identifying Key Parts 3 Quick Start Instructions Getting Started ... -
Page 3: Handle With Care
HANDLE WITH CARE: ● Use a soft cloth to wipe dust from the lens, LED display and viewfinder. ● Never point the camera towards the sun. ● Always wear the camera strap around your neck when handling the camera. ●... -
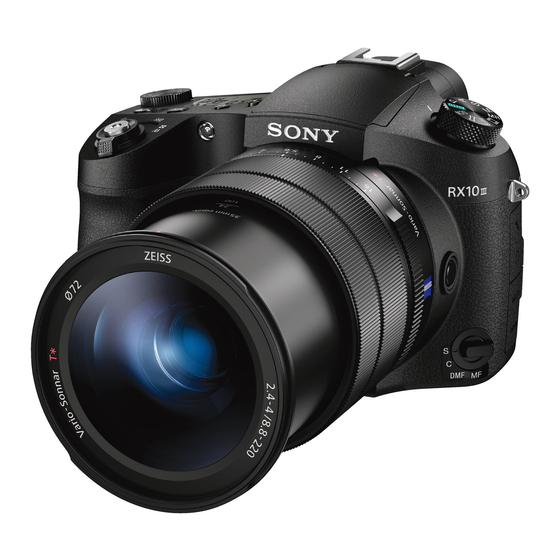
Page 4: Identifying Key Parts
IDENTIFYING KEY PARTS The key parts needed to operate the camera are labeled below. For more detailed part identification, see Identifying Parts (p. 12-15). ... -
Page 5: Getting Started
QUICK START: GETTING STARTED A. Secure the camera strap around your neck. B. Detach the lens hood from the camera (turn counterclockwise). C. Locate the red mark on the lens hood and the red mark on the lens head. Align the red marks. -
Page 6: High Frame Rate Settings
QUICK START: HIGH FRAME RATE SETTINGS A. Customize HFR settings by selecting: a. MENU button b. (Camera Settings) c. In Camera Settings, select Folder No. 2 d. Scroll down to “HFR Settings” B. -
Page 7: Steadyshot (Movie)
QUICK START: STEADYSHOT (MOVIE) A. To stabilize shaking that may occur during filming, activate Steadyshot by pressing MENU and use the control wheel to go to (Camera Settings folder). B. Go to folder No. 8 and scroll down to SteadyShot. -
Page 8: Begin Filming
QUICK START: BEGIN FILMING A. Exit folders by pressing MENU as many times as needed. B. Use the viewfinder to locate something you can practice focusing the camera on. C. Use the zoom and the focus rings to obtain a sharp picture. (Tip: rotate the focus ring sharply to the right and left and determine at which point, between the two ... -
Page 9: Movie Playback
MOVIE PLAYBACK A. Press the (playback) button to switch to playback mode. B. Use the control dial to select the desired movie and press to play the movie. C. Press the to return to MOVIE mode. -
Page 10: Photo Capture
PHOTO CAPTURE FROM RECORDED MOVIES A. Select a video by pressing the button (also Playback folder) and select video. B. Press MENU and go to the Playback folder, then to No. 3 and select Photo Capture. -
Page 11: Customize Control Wheel
CUSTOMIZE SETTINGS: THE CONTROL WHEEL A. Press MENU and go to (Custom Settings folder) then to folder No. 5. B. Scroll down to [Custom Key (Shoot.)]. C. In this setting, you may assign functions to the Left Button, Right Button and Down Button of the control wheel. -
Page 12: Identifying Parts 11-14
IDENTIFYING PARTS 1. ON/OFF (Power) switch 2. Shutter button 3. For shooting: W/T (zoom) lever For viewing: (Index) lever/Playback zoom lever 4. Self-timer lamp/AF Illuminator 5. - Page 13 IDENTIFYING PARTS 1. Microphone 2. Viewfinder 3. Eye sensor 4. Diopter-adjustment dial 5. MOVIE (Movie) button 6. (Flash pop-up) button 7. (Display panel illumination) button ...
- Page 14 IDENTIFYING PARTS 1. MENU button 2. Speaker 3. (Microphone) jack When an external microphone is connected, this product switches from the internal microphone to the external microphone. If the external microphone is a plug-...
- Page 15 IDENTIFYING PARTS You can adjust the monitor to an easily viewable angle and shoot from any position. 1. Aperture Click Switch 2.
-
Page 16: Glossary Of Terms 15-17
GLOSSARY OF TERMS Aperture: Refers to the opening of the lens’s diaphragm allowing light to pass through. The values are written in f/stops: 1.4, 2, 2.8, 4, 5.8, 8, 11, 16. The lower the f/stop, the larger the diaphragm, the more the light that passes through. - Page 17 Exposure Value (EV): Adjusts the amount of flash light from -3.0 EV to +3.0 EV. Toward +: Image becomes brighter. Toward -: Image becomes darker. 0: Appropriate exposure analyzed by the camera. ...
- Page 18 Photo Capture: Saves a scene in a movie as a still image. Playback Speed: See chart, below. 240fps 480fps 960fps 24p 50M 10 times slower 20 times slower 40 times slower ...
-
Page 19: Citations
S ony D igital C amera D igital S till C amera D SC-‐RX10M3 U ser m anual. ( n.d.). R etrieved J uly 2 7, 2 016, f rom https://docs.sony.com/release//Help_459027211.pdf ...
Need help?
Do you have a question about the DSC RX10 M3 and is the answer not in the manual?
Questions and answers