
Summary of Contents for Muztag Q10
- Page 1 Gas Fire Patio Heater Instruction Manual Please read the manual BEFORE you unpack or install the fire...
-
Page 2: Table Of Contents
TABLE OF CONTENTS Warning Getting Started What’s Included Assembly Procedures Product Drawing Heater Stand and Location Gas Requirements Leakage Test Lighting Instructions After Use and Storage Cleaning and Maintenance Troubleshooting Checklist Spare Parts Warranty Contact... -
Page 3: Warning
WARNING PLEASE READ CAREFULLY THE FOLLOWING SAFETY GUIDELINES BEFORE OPERATION AND INSTALLATION REPAIRS SHOULD ONLY BE DONE BY A QUALIFIED TECHNICIAN ONLY Do not use this appliance for indoors, as it may cause personal injury or property damage. THIS APPLIANCE ... -
Page 4: Getting Started
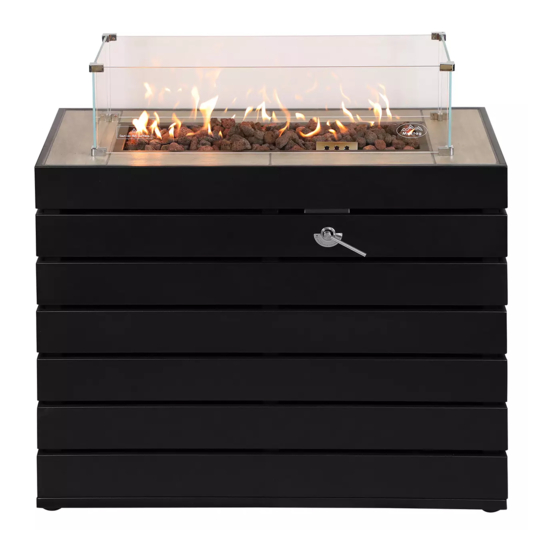
GETTING STARTED Please read instruction thoroughly before using the appliance. The gas heater will arrive in one box containing the appliance with burner already installed, adjustable feet, surrounding safety glass with brackets, valve ignition key, standard propane regulator, 60cm gas hose, glass and lava rock fuel beds and rain cover. -
Page 5: What's Included
WHAT’S INCLUDED Appliance Heater Adjustable Feet Surrounding Safety Glass and Brackets Standard Propane Regulator & 60cm Gas Hose Glass and Lava Rock Fuel Beds Rain Cover Gas Valve Safety Ignition... -
Page 6: Assembly Procedures
ASSEMBLY PROCEDURES Remove the heater body and all of the parts from carton, then follow below procedures. STEP 1 – Attach Cabinet Handle Attach cabinet screw handle in the hole in the rear panel. STEP 2 – Adding Glass or Lava Rock This should be done outside. - Page 7 STEP 3 – Installing Surrounding Safety Glass Using a HEX Key fix the surrounding safety glass together with the supplied glass brackets and screws. This will need to be done with two people. Place the safety glass around the burner area. Note: Safety glass is optional to place around the burner but we recommend that it is fitted.
-
Page 8: Product Drawing
PRODUCT DRAWING HEATER STAND AND LOCATION The heater is for outdoor use only. Always ensure that adequate ventilation is provided. Always maintain proper clearance to combustible materials of at least 2 metres. Do not place near to your house. ... -
Page 9: Gas Requirements
The Gas Hose It’s extremely important that you DO NOT route the gas hose under the directly under burner. Do not allow the hose to touch any part of the burner or heater. The hose should be located so that it is not subjected to undue strain or placed where is could be damaged. -
Page 10: Lighting Instructions
LIGHTING INSTRUCTIONS Open the cabinet door and put the gas cylinder into the cabinet. Make sure to turn the control knob clockwise to “OFF” position. Connect the regulator to the gas bottle. Turn the gas supply “ON” at the cylinder. Check with the use of soapy water for any gas leakage between the ... -
Page 11: Troubleshooting Checklist
Soot can build up on the surrounding safety glass. Carefully remove the glass from glass bracket with relative screwdriver, wipe soot with a soft, damp cloth, then carefully replace. Two people maybe required disassembly and reassembly of the surrounding safety glass. Ensure the condition of gas hose is suitable and shows no signs of cracking or general wear &... -
Page 12: Spare Parts
Propane 27mm Clip-On Regulator 37mBar GFOSP003 60mm Gas Hose GFOSP002 Gas Valve Safety Ignition Key GFOSP001 Adjustable Feet Set GFOSPGFB6.8 Glass Fuel Bed 6.8kg GFOSPLFB2.2 Lava Rock Fuel Bed 2.2kg GFOSPSG700*180 Surrounding Safety Glass 700*180*5mm GFOSPSG300*180 Surrounding Safety Glass 300*180*5mm GFOSPRC003 Q10 Rain Cover... -
Page 13: Warranty
Also, if purchased through a dealer or installer, provide name their name and contact details. Muztag Outdoor Fires Ltd make every effort to ensure all heaters leaving the factory are in perfect working order. Every heater is burn tested and leak test in accordance to CE Regulations. -
Page 14: Contact
CONTACT Muztag Outdoor Fires Ltd. Address: PO Box 318, Torquay, TQ1 9HR Tel: +(0)1803 428260 Email: sales@muztagoutdoorfires.co.uk www.muztagoutdoorfires.co.uk Serial Number: S/N _______________________...
Need help?
Do you have a question about the Q10 and is the answer not in the manual?
Questions and answers