Advertisement
Available languages
Available languages
Quick Links
4-417-646-01 (1)
1
バッテリービデオライト
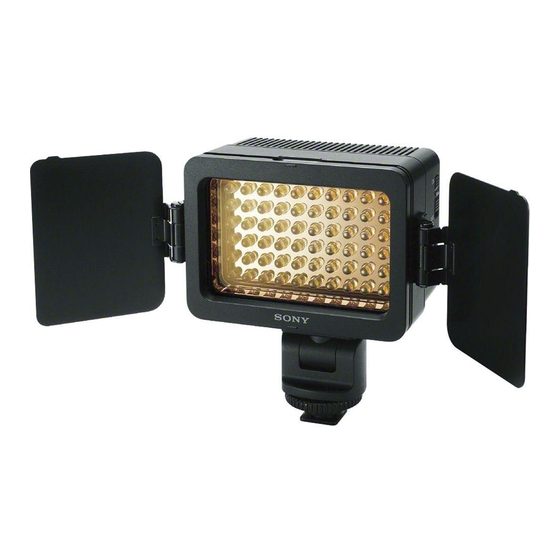
Battery Video Light
Lampe vidéo à batterie
电池摄像灯
2,3
取扱説明書 / Operating Instructions / Mode d'emploi/
お買い上げいただきありがとうございます。
電気製品は安全のための注意事項を守らないと、火
災や人身事故になることがあります。
この取扱説明書には、事故を防ぐための重要な注意事項と製品の取
り扱いかたを示しています。この取扱説明書をよくお読みのうえ、
製品を安全にお使いください。お読みになったあとは、いつでも見
られるところに必ず保管してください。
HVL-LE1
4
© 2012 Sony Corporation Printed in China
1
2
3
4
5
6
3
7
8
9
10
11
12
13
16
15
14
a
b
1
2,3
安全のために
ソニー製品は安全に充分配慮して設計されています。しかし、 誤った使いかたをす
ると、 火災や感電などにより人身事故になることがあり危険です。
事故を防ぐために次のことを必ずお守りください。
安全のための注意事項を守る
4-a
故障したら使わずに、 ソニーの相談窓口に修理を依頼する
万一、 異常が起きたら
電源を切る
変な音やにおい、
バッテリーをはずす
煙が出た場合は
ソニーの相談窓口に修理を依頼する
警告表示の意味
取扱説明書では、 次のような表示をしています。表示の内容をよく理解してか
ら本文をお読みください。
この表示の注意事項を守らないと、 火災・感電などにより死亡や
大けがなど人身事故の原因となります。
この表示の注意事項を守らないと、 感電やその他の事故によりけ
4-b
がをしたり周辺の家財に損害を与えたりすることがあります。
注意を促す記号
下記の注意事項を守らないと、
により
点灯したまま放置しない
火災の原因となります。使用しないときは必ず
a
にしてください。
点灯中はむやみにさわらない
ビデオライトの放熱孔およびその周辺などは高温になるのでやけどのおそ
れがあります。
バッテリーを取り付けたままケースなどに収納しない
ON
万一誤ってスイッチが 「
」 になると、 発煙、 発火の原因となることがあり
ます。本体が充分に冷えてから収納してください。
放熱孔をふさがない
内部の温度が上がり、 火災や故障の原因となります。
放熱孔から内部に金属の棒などを差し込まない
b
そのまま使用すると、 火災や事故、 故障の原因となります。
紙や布などの燃えやすいものを近付けない
火災の原因となります。
湿気やほこりの多い場所では使わない
感電や火災の原因となることがあります。
アルコールやベンジンなど揮発性、引火性の高い薬品を近付け
たりライトの近くに置いたりしない
発火、 発煙のおそれがあります。
分解や改造をしない
火災や感電の原因となります。
内部の点検などはご購入いただいた特約店、 またはソニー業務用商品相談
窓口にご相談ください。
内部に液体をこぼしたり、燃えやすいものや金属類を落とさない
そのまま使用すると、 火災や事故、 故障の原因となります。
下記の注意事項を守らないと、
けが
をしたり周辺の家財に
損害
を与えたりすることがあります。
点灯中はランプを直接見ない
強力な光は目をいためるおそれがあります。
バッテリーについての安全上のご注意
NP-FM
漏液、 発熱、 発火、 破裂などを避けるため、 下記のことを必ずお守り
ください。
火の中に入れないでください。ショートさせたり、 分解、 加熱しな
いでください。
NP-FV
指定された種類のバッテリーを使用してください。
バッテリー交換の場合は電源を切り、 数分待ってから取り出して
ください。バッテリーによっては、 発熱する場合があります。取
り出す際はご注意ください。
、がショートすると発熱、 発火する危険がありま
金属に触れ、
す。
との向きを正しく入れてください。
バッテリーを使い切ったとき、 長期間使用しないときは、 取り出し
ておいてください。
本機のバッテリー取り付け部は時々乾いた布などで汚れを拭き
取ってください。
電極やバッテリー端子部に皮脂などの汚れがあると、 動作時間が
極端に短くなることがあります。
もしバッテリーの液が漏れたときは、 本機のバッテリー取り付け部内の漏れた液を
よくふきとってから、 新しいバッテリーを入れてください。万一、 液が身体や衣服
についたときは、 水でよく洗い流してください。
お願い
リチウムイオン
リチウムイオン電池、 ニッケル水素電池
電池
は、 リサイクルできます。不要になった
リチウムイオン電池、 ニッケル水素電池
は、 金属部にセロハンテープなどの絶縁
物を貼って電池リサイクル協力店へお
ニッケル水素
電池
持ちください。
1
充電式電池の回収・リサイクルおよびリサイクル協力店については
一般社団法人
JBRC
ホームページ
http://www.jbrc.net/hp/contents/index.html
を参照してください。
2
主な特長
中心照度約
1,800 lux
の明るさを実現しました。 ( 距離
50 cm
の場合)
LED
本機は、 レンズ光源に高輝度白色
を使用したビデオライトです。
5,500 K, 3,200 K(
2
付属の色温度変換フィルター使用)
種類の色温度を設定でき
ます。
可動式のシューアダプターにより、 さまざまな角度で固定して照射できます。
またオートロックアクセサリーシュー搭載カメラでは簡単に着脱が可能です。
LED
10,000
白色
は約
時間と寿命が長く、 耐衝撃性や耐候性が優れているため、 メ
ンテナンスの必要がほとんどありません。
取り扱い上のご注意
本機は、 防じん、 防滴、 防水仕様ではありません。
本機は精密機械です。落としたり、 たたいたり、 強い衝撃をあたえないでくださ
い。
本機をインテリジェントアクセサリーシューに取り付けないでください。本機
のシューアダプターやインテリジェントアクセサリーシューを破損することが
あります。
0
40
本機の使用温度範囲は
℃∼
℃です。
放熱孔をふさがないでください。内部の温度が上がり、 火災や事故、 故障の原因
となります。
点灯中は白色
LED
を近距離で直接見ないようにしてください。目をいためるおそ
れがあります。
落下防止のため、 カメラに取り付けたまま本機をもって持ち運ばないでくださ
い。
アルコールやベンジンなどの揮発性、 引火性の高い薬品を近づけたり、 本機の近
くに置かないでください。発火・発煙のおそれがあります。
内部に液体をこぼしたり、 燃えやすいものや金属類を落とさないでください。そ
のまま使用すると、 火災や火事、 故障の原因となります。
使用中、 保管中にかかわらず次のような場所には置かないでください。故障や変
形の原因となります。
炎天下や、 夏場の窓を閉めきった自動車内のように異常に高温になる場所
直射日光の近く、 熱器具の近く
激しい振動のある場所
寒いところや周囲が高温の場合、 バッテリーを使用できる時間が短くなるため連
続照射時間が短くなります。バッテリーの機能が低下するためです。より長い
時間ご使用いただくために、 寒いところ (
10
℃以下) で使用するときは次のこと
をおすすめします。
バッテリーをポケットなどに入れてあたたかくしておき、 撮影の直前に本
機に取り付ける。
カイロをお使いになる場合は、 直接バッテリーに触れないようにご注意く
ださい。
充電は室温 (
10
℃∼
30
℃) で行う。
使い終わったら
POWER
スイッチを必ず 「
OFF
」 にしてください。
使用しないときや使い終わったときは、 必ずバッテリーを取りはずしてくださ
い。
使用後、 すぐにケースなどに収納しないでください。発熱で白色
LED
が破損する
ことがあります。ケースに収納する場合は、 本機の電源が 「
OFF
」 になっているこ
と、 本機が充分に冷えていることを確認してください。
本機をカメラ本体に装着した状態で撮影すると、 記録される音声に若干の影響を
与えることがあります。
カメラや他の機器に装着した状態で、 強い力や衝撃を与えないでください。
各部のなまえ
1
10
保護板
アダプター固定ダイヤル
2
フィルター差し込み部
11
ロックレバー
3
放熱孔
12
ロックダイヤル
4 POWER
スイッチ
13
フット
5 BRIGHT
ダイヤル
14
バッテリーカバー
6
15
プリエンドランプ
ディフューザー
7
バッテリーリリースボタン
16
色温度変換フィルター (
3200 K
8
シューアダプター
(オートロックアクセサリー
シュー用)
行為を禁止する記号
9
シューアダプター
(アクセサリーシュー用)
プリエンドランプについて
(バッテリー残量お知らせ機能)
火災
・
感電
死亡
や
大けが
の原因となります。
本機に取り付けたバッテリーの残量が少なくなると、 プリエンドランプがオレンジ
色に点灯します。この際は早めに充電済みのバッテリーに交換してください。
POWER
スイッチを 「
OFF
」
(表示するタイミングはおおよその目安です。使用環境や電池の老朽により異な
ります。残量の目安としてご利用ください。 )
ビデオライトを準備する
本機をカメラに取り付ける (イラスト)
1
カメラのアクセサリーシューの形状に合わせて、 付属のシューアダプターを選
ぶ。
a.
オートロックアクセサリーシュー
b.
アクセサリーシュー
ご注意
シューアダプターは本機以外には使用しないでください。
2
シューアダプターの三脚ネジを本機底面の三脚ネジ穴に差し込む。
3
シューアダプターのダイヤルを回して固定する。
4
シューの種類に合わせて、 次のようにシューアダプターをカメラのシューに取
りつける (クリップオン) 。
オートロックアクセサリーシューの場合 (イラスト
-
4
-a
)
シューアダプターのフットを矢印方向に止まるまでオートロックアクセサ
リーシューに取りつける。
シューアダプターのロックレバーを右端まで倒してカメラと確実に固定す
る。
ご注意
シューアダプターをカチッと音がするまで奥に差し込んでください。
アクセサリーシューの場合 (イラスト
-
4
-b
)
シューアダプターのフットを矢印方向に止まるまでアクセサリーシューに
保証書とアフターサービス
取りつける。
保証書は国内に限られています
シューアダプターのダイヤルを左に止まるまで回してカメラと確実に固定
本製品は、 国内仕様です。外国で万一、 故障、 不具合が生じた場合の現地でのアフ
する。
ターサービスおよびその費用については、 ご容赦ください。
ご注意
保証書
アクセサリーシュー搭載カメラへの取り付けについては、 お使いのカメラの
この製品には保証書が添付されておりますので、 お買い上げの際お買い上げ店で
取扱説明書もご確認ください。
お受け取りください。
ご使用のカメラの内蔵フラッシュがポップアップ式の場合は、 以下をご注意
所定事項の記入および記載内容をお確かめのうえ、 大切に保存してください。
ください。
保証期間は、 お買い上げ日より
必ずカメラの内蔵フラッシュを閉じてください。また内蔵フラッシュの自
動発光機能があるカメラでは自動発光機能をオフにしてください。
アフターサービス
フラッシュをお使いの際は本機をカメラから取りはずしてご使用くださ
調子が悪いときはまずチェックを
い。
この取扱説明書をもう一度ご覧になってお調べください。
撮影中の落下防止のために、 ご使用前にカメラと本機が確実に固定されてい
それでも具合の悪いときは
ることを確認してください。
ソニーの相談窓口にご相談ください。
ご相談になるときは、 次のことをお知らせください。
カメラから取りはずすには
品名:
HVL-LE
1
故障の状態:できるだけ詳しく
ご注意
購入年月日
取りはずす際は本機やカメラを落下させないようご注意ください。取りはずし
保証期間中の修理は
の際は三脚に取り付けてから行うことをおすすめします。
保証書の記載内容に基づいて修理させていただきます。
オートロックアクセサリーシューの場合 (イラスト
-a
)
詳しくは保証書をご覧ください。
本機の
POWER
スイッチを 「
OFF
」 にする
保証期間経過後の修理は
シューアダプターのロックレバーを左端へ倒してロックを解除する。
修理によって機能が維持できる場合は、 ご要望により有料修理させていただきま
ロックレバーを左へ倒したまま、 シューアダプターを手前にスライドさせる。
す。当社では本機の補修用性能部品 (製品の機能を維持するために必要な部品) を、
7
製造打ち切り後最低
年間保有しています。ただし、 故障の状況その他の事情によ
アクセサリーシューの場合 (イラスト
-b
)
り、 修理に代えて製品交換をする場合がありますのでご了承ください。
本機の
POWER
スイッチを 「
OFF
」 にする
シューアダプターのダイヤルを右に回してロックを解除する。
ロックが解除されているのを確認してから、 シューアダプターを手前にスライ
ドさせる。
ご注意
本機の使用頻度によっては、 シュー部に傷やひびが発生し、 破損、 落下の危険があ
ります。
本機をインテリジェントアクセサリーシューに取り付けないでください。シュー
部が破損することがあります。
バッテリーを取り付ける
接続する前に
POWER
スイッチが 「
OFF
」 になっていることを確認してください。
本機では以下のバッテリーをお使いになれます。
単
3
形ニッケル水素電池
4
本
NH-AA-4BKB
(推奨電池:ソニー製
)
3
4
単
形アルカリ乾電池
本
ソニー製 "インフォリチウム" バッテリー
V
シリーズ
(推奨バッテリー:
NP-FV50
、
NP-FV70
、
FV100
)
ソニー製 "インフォリチウム" バッテリー
M
シリーズ
NP-FM500H
NP-QM71D
NP-QM91D
(推奨バッテリー:
、
、
)
ご注意
Before operating the unit, please read these instructions thoroughly, and retain them
マンガン電池は使用できません。
for future reference.
アルカリ電池使用時は照射時間が極端に短くなります。
Owner's Record
電池は必ず
4
本とも同じ種類のものをご使用ください。
The model and serial numbers are located on the bottom. Record the serial number in
電池を入れるときは必ず (+) と (−) の向きを確認してください。誤った入れか
the space provided below. Refer to these numbers whenever you call upon your Sony
たをすると、 動作しません。
dealer regarding this product.
Model No. HVL-LE1 Serial No.
使い切った電池と新品または充電した電池を一緒に使用しないでください。
本機の電源を切ってから電池を取り出してください。
WARNING
To reduce fire or shock hazard, do not expose the unit to rain or moisture.
3
3
-
1
単
型ニッケル水素電池、 単
形アルカリ乾電池をお使いのとき (イラスト
)
For Customers in the U.S.A. and Canada
-
2
,
3
ソニー製 "インフォリチウム" バッテリーをお使いのとき (イラスト
)
This device complies with Part 15 of the FCC Rules. Operation is subject to the
"インフォリチウム" バッテリー
NP-FV70/QM71D
、
NP-FV100/QM91D
をお使
following two conditions:
(1) This device may not cause harmful interference, and (2) this device must accept
いの際は、 付属の電池蓋 (穴付き) をお使いください。
any interference received, including interference that may cause undesired operation.
ご注意
This Class B digital apparatus complies with Canadian ICES-003.
"インフォリチウム" バッテリー
NP-FV70/QM71D
、
NP-FV100/QM91D
をお使
For the Customers in the U.S.A.
いの際は、 カメラを三脚に取り付けてご使用ください。
CAUTION
You are cautioned that any changes or modifications not expressly approved in this
-4
manual could void your authority to operate this equipment.
"インフォリチウム" バッテリーを取りはずすときは (イラスト
)
NOTE
本機側面のバッテリーリリースボタンをスライドさせながら、 バッテリーを右へス
This equipment has been tested and found to comply with the limits for a Class B
ライドさせます。
digital device, pursuant to Part 15 of the FCC Rules. These limits are designed to
provide reasonable protection against harmful interference in a residential installation.
ビデオライトを使う
This equipment generates, uses, and can radiate radio frequency energy and, if not
installed and used in accordance with the instructions, may cause harmful interference
-1
to radio communications. However, there is no guarantee that interference will not
本機を点灯する (イラスト
)
occur in a particular installation. If this equipment does cause harmful interference to
POWER
ON
緑色のボタンを押しながらスイッチをスライドさせ、
スイッチを 「
」 に
radio or television reception, which can be determined by turning the equipment off
合わせる
and on, the user is encouraged to try to correct the interference by one or more of the
following measures:
-2
照度を調整する (イラスト
)
– Reorient or relocate the receiving antenna.
– Increase the separation between the equipment and receiver.
BRIGHT
100%
MAX)
10
MIN
照度は
ダイヤルで、
(
∼約
%(
) まで調節できます。
– Connect the equipment into an outlet on a circuit different from that to which the
receiver is connected.
ディフューザー、 色温度変換フィルターを使用する
– Consult the dealer or an experienced radio/TV technician for help.
-3
(イラスト
)
CAUTION
ディフューザーを使用するとまぶしさが低減され、 光がやわらかくなります。
Replace the battery with the specified type only. Otherwise, fire or injury may result.
3,200 K
BRIGHT
色温度変換フィルターを使用すると、 約
の色温度に変換できます。 (
Do not expose the batteries to excessive heat such as sunshine, fire or the like.
MAX
時)
< Notice for the customers in the countries applying EU Directives >
付属のディフューザーまたは色温度変換フィルターをフィルター差込部から差し
The manufacturer of this product is Sony Corporation, 1-7-1 Konan Minato-ku
込む。
Tokyo, 108-0075 Japan. The Authorized Representative for EMC and product safety is
取りはずすときはディフューザー/色温度変換フィルターの突起部を本機の下
Sony Deutschland GmbH, Hedelfinger Strasse 61, 70327 Stuttgart, Germany. For any
service or guarantee matters please refer to the addresses given in separate service or
部から押し上げて取り出します。
guarantee documents.
ご注意
Disposal of Old Electrical & Electronic Equipment (Applicable
本機を使って撮影する際、 被写体とカメラの距離が近すぎると、 被写体の影が何
in the European Union and other European countries with
重にも重なることがあります (マルチシャドー) 。
separate collection systems)
色温度は、
BRIGHT
ダイヤルの位置や、 白色
LED
の温度で若干変化するので、 撮影
This symbol on the product or on its packaging indicates that this
product shall not be treated as household waste. Instead it shall
前にホワイトバランスを確認してください。
be handed over to the applicable collection point for the recycling
フィルター使用時は照度が若干低くなり、 照射角度がやや狭くなります。
of electrical and electronic equipment. By ensuring this product
is disposed of correctly, you will help prevent potential negative
収納する
consequences for the environment and human health, which could
otherwise be caused by inappropriate waste handling of this product.
持ち運びの際は付属のポーチへ図のようにして収納してください。
The recycling of materials will help to conserve natural resources.
,
For more detailed information about recycling of this product,
収納時は本体
電池が十分冷えてから収納してください。
please contact your local Civic Office, your household waste disposal
長期間使用しない場合は、 本機から電池・バッテリーを取りはずしてください。
service or the shop where you purchased the product.
ビデオライトのお手入れ
Features
時々、 柔らかい布でから拭きしてください。汚れがひどいときは、 中性洗剤溶液を
This video light provides a center illuminance of approximately 1,800 lux. (When the
distance from the video light to the subject is 50 cm (1.6 ft.))
少しふくませた布で拭いてから、 もう一度から拭きしてください。シンナー、 ベン
The HVL-LE1 is a video light with a high-brightness white LED as its lens light
ジン、 アルコールなどは表面の仕上げをいためますので使わないでください。
source.
The video light can be set to two color temperatures, 5,500 K or 3,200 K (when using
主な仕様
the supplied color conversion filter).
Moveable shoe adaptor enables various lighting angles.
DC7.2V
V
電源
(ソニー製 "インフォリチウム" バッテリー
シリーズ)
It also enables easy attachment and removal when using a camera that has an auto
DC7.2V
(ソニー製 "インフォリチウム" バッテリー
M
シリーズ)
lock accessory shoe.
The white LED has a long lifetime of about 10,000 hours along with impact-resistant
DC4.8V
(ソニー製単
3
型ニッケル水素充電池
4
本 (別売) )
and weather-resistant qualities, and so requires almost no maintenance.
消費電力
約
4 W
最大照度
約
1,800 lux
(
0.5 m
) (
ISO3200
時)
)
Precautions
F1.4
約
10 m
The video light does not have dust-proof, splash-proof or water-proof specifications.
F2.8
約
5 m
The video light is a precision instrument. Do not drop, strike or apply a strong
F4
約
3.5 m
impact.
F5.6
2.5 m
約
Do not attach the video light to a camera with an intelligent accessory shoe. The
30
shoe adaptor of the video light or the intelligent accessory shoe may be damaged.
照射角度
約
度
The operating temperature of the video light is from 0 °C (35 °F) to 40 °C (104 °F).
70
(配光角)
(フルサイズ
mmレンズ対応)
Do not block the ventilation holes. Doing so will cause the internal temperature to
NP-FV50
1.5
連続照射時間
ソニー製
使用時:約
時間
rise which can cause a fire or an accident and cause the video light to malfunction.
NP-FM500H
2.5
Do not look at the white LED directly at close range while it is on. It may damage
ソニー製
使用時:約
時間
your eyes.
ソニー製単
3
型ニッケル水素充電池 (
NH-AA
) 使用時:約
1.5
時間
To prevent the camera from dropping, do not hold the video light attached to the
(新品満充電、
BRIGHT
ダイヤル
MAX
、 周囲温度
25
度時)
camera to carry it.
照射距離
1m
:約
450 lux
Do not place the video light near combustible or volatile solvents, such as alcohol or
3m
:約
50 lux
benzine. Doing so may cause a fire or smoke.
Do not allow any liquid into the video light or drop the combustible or metal objects
5m
:約
18 lux
on the camera. Keeping using the camera after it, doing so may cause a fire or cause
8m
7 lux
:約
the video light to malfunction.
10m
4.5 lux
:約
Do not use or store the camera in the following locations. Doing so may cause the
色温度
約
5,500 K
(色温度変換フィルター、 デフューザー未使用時)
camera to malfunction or deform:
約
3,200 K
(色温度変換フィルター使用時)
a high temperature place such as inside a closed car in summer or in strong
BRIGHT
MAX
25
sunshine
(
ダイヤル
、 周囲温度
℃の場合での初期値)
in direct sunlight or near a heater
使用温度
0
℃∼
40
℃
locations subject to intense vibrations
保存温度
-20
℃∼
+60
℃
When using the video light in low or high temperature, the battery life will be
shorter, so the lighting time is also reduced. It should be notes the battery capacity
外形寸法
約
120 mm
×
75 mm
×
63 mm(
幅
/
高さ
/
奥行き
)
decreases as temperatures changing. When using the video light at the temperature
質量 (本体のみ)約
250 g
of 10 °C (50 °F) or less, we recommend operating following steps for longer battery
同梱物
バッテリービデオライト (1)
life.
シューアダプター (オートロックアクセサリーシュー用) ( 1)
Put the battery in your pocket to warm it and attach the battery to the video light
just before use.
シューアダプター (アクセサリーシュー用) ( 1)
When putting a pocket heat pad in your pocket with the battery, be careful not to
ディフューザー (1)
touch the pocket heat pad to the battery directly.
色温度変換フィルター (1)
Charge the battery at room temperature (from 10 °C (50 °F) to 30 °C (85 °F))
電池蓋 (穴付き) ( 1)
When you have finished using the video light, be sure that the POWER switch of the
ポーチ (1)
video light is set to "OFF. "
When not using the video light or you have finished using it, be sure to remove the
印刷物一式
battery from the video light.
仕様および外観は、 改良のため予告なく変更することがありますが、 ご了承くださ
After use, do not store the video light into the case etc. immediately. The white LED
い。
may be damaged by the generated heat. When storing the video light into the case,
be sure that the power of the video light is set to "OFF, " and it has cooled sufficiently.
InfoLITHIUM
(インフォリチウム) はソニー株式会社の商標です。
Recording with the video light with attached to the camera may slightly affect the
recorded sound.
Do not apply the strong force or impact to the video light attached to the camera or
other device.
Identifying the parts
1
Protection plate
9
Shoe adaptor (for Accessory shoe)
2
Filter inserting slot
10
Adaptor lock dial
3
Ventilation holes
11
Lock lever
4
POWER switch
12
Lock dial
5
BRIGHT dial
13
Foot
6
Pre-end lamp
14
Battery lid
7
Battery release button
15
Diffuser
8
Shoe adaptor (for Auto lock
16
Color conversion filter (3,200K)
accessory shoe)
1
年間です。
Pre-end lamp (remaining battery
notice function)
When the remaining battery power is low, the pre-end lamp turns orange. In this case,
replace it promptly with a fully charged battery.
(This lamp should be used as only a rough guide of remaining battery power. The
available time of the battery pack varies depending on the frequency of use and
operating environment.)
Preparation
Attaching to the camera (illustration )
1 Select one of the provided shoe adaptors according to the shape of
the accessory shoe on the camera.
a. Auto lock accessory shoe
b. Accessory shoe
Note
Do not attach a shoe adaptor except for this unit.
2 Insert the tripod screw of the shoe adaptor into the tripod receptacle
on the bottom of the video light.
3 Turn the adaptor lock dial to lock it.
4 Attach (clip) the correct type of shoe adaptor onto the camera shoe, as
illustrated.
If using auto lock accessory shoe: (illustration -4-a)
Insert the foot of the shoe adaptor fully into the auto lock accessory shoe in the
direction illustrated.
Push the lock lever of the shoe adaptor down to the right to fix it firmly to the
camera.
Note
Insert the shoe adaptor fully until it clicks into place.
If using accessory shoe: (illustration -4-b)
Insert the foot of the shoe adaptor fully into the accessory shoe in the direction
illustrated.
Rotate the lock dial of the shoe adaptor fully to the left to fix it firmly to the
camera.
Notes
When attaching to a camera that has an accessory shoe, read the instruction
manual of the camera too.
If using a camera equipped with a pop-up built-in flash, be careful of the
following:
Always close the built-in flash of the camera. If your camera has a built-in auto
flash function, turn that function off.
Before using the flash, remove the video light from the camera.
Make sure the video light is firmly fixed to the camera before use to prevent the
video light from falling during shooting.
To remove from the camera
Note
When removing, be careful not to drop the video light or the camera. It is
recommended that you attach the camera to a tripod before removing the video
light.
When using an auto lock accessory shoe: (illustration -a)
Turn the POWER switch of the video light to OFF.
Push the lock lever of the shoe adaptor down to the left to release the lock.
Keeping the lock lever pressed to the left, slide the shoe adaptor toward you.
When using accessory shoe: (illustration -b)
Turn the POWER switch of the video light to OFF.
Rotate the lock dial of the shoe adaptor to the right to release the lock.
Check that the lock is released before sliding the shoe adaptor toward you.
Notes
Depending on the frequency of use of the video light, the shoe part may be scratched
or cracked. This can cause the video light to be damaged or fall off.
Do not attach the video light to the intelligent accessory shoe. Doing so may damage
the shoe part.
Attaching the battery
Before attaching, check that the video light's POWER switch is set to "OFF. "
The following batteries (not supplied) can be used with this unit.
Four LR6 (size AA) alkaline batteries
(recommended battery: Sony NH-AA-4BKB)
Four AA Nickel-Metal Hydride batteries
Sony "InfoLITHIUM" battery V series
(recommended batteries: NP-FV50, NP-FV70, NP-FV100)
Sony "InfoLITHIUM" battery M series
(recommended batteries: NP-FM500H, NP-QM71D, NP-QM91D)
Notes
You cannot use manganese batteries.
When using alkaline batteries, light time may be much shorter.
Always use the same kind of batteries together.
Check the polarities of the batteries when inserting them into the video light. If you
insert the batteries in the wrong direction, the video light does not work.
Do not use a new or charged battery together with a dead battery.
Turn the video light off before removing the batteries.
When using LR6 (size AA) alkaline batteries or AA Ni-MH batteries (illustration
-1)
When using Sony "InfoLITHIUM" battery (illustration -2, 3)
When using NP-FV70/QM71D or NP-FV100/QM91D, use the supplied battery lid
(with hole).
Note
When using NP-FV70/QM71D or NP-FV100/QM91D, attach the camera to a tripod
first.
To remove the "InfoLITHIUM" battery (illustration -4)
Slide the battery pack to the right while sliding the battery release button on the side
face of the video light.
Using the video light
Turning the video light on (illustration -1)
Slide the POWER switch to "ON" while pressing down on the green button on
the POWER switch.
Adjusting the illuminance of the video light(illustration
-2)
The illuminance of the video light can be adjusted between 100% (MAX) and 10%
(MIN) using the BRIGHT dial on the video light.
Using the diffuser or color conversion filter (illustration
-3)
The glare will be reduced and the light will be softer by using the diffuser.
The color temperature can be changed to about 3,200 K by using the supplied color
conversion filter (when the illuminance is set to "100%").
Insert the supplied diffuser or color conversion filter into a filter inserting slot.
To eject, push up the projection of the diffuser or color conversion filter from the
bottom of the video light, then take it out.
Notes
When recording with the video light, if the subject is too close to the camera, several
shadows of the subject may overlap (multi-shadow).
The color temperature varies slightly depending on the position of the BRIGHT dial
and temperature of the white LED. Check the white balance before recording.
When using the color conversion filter, the illuminance is reduced slightly and the
lighting angle is narrow.
Storing
When carrying, keep the video light in the supplied pouch as illustrated.
Be sure that the main unit and batteries are cool enough before putting in the pouch
or storing.
Remove the batteries if the video light will not be used for a long time.
Maintenance
Clean the video light with a soft dry cloth. If the video light get dirty, wipe with a cloth
slightly moistened with a mild detergent solution and then wipe with a soft dry cloth
again. Do not use any type of solvent such as alcohol, benzine, or thinner for cleaning.
Doing so may cause the surface of the video light to damage.
(Continued on the reverse side.)
Advertisement

Related Manuals for Sony HVL-LE1


Summary of Contents for Sony HVL-LE1
- Page 1 50 cm (1.6 ft.)) 少しふくませた布で拭いてから、 もう一度から拭きしてください。シンナー、 ベン -3) 万一、 異常が起きたら The HVL-LE1 is a video light with a high-brightness white LED as its lens light ジン、 アルコールなどは表面の仕上げをいためますので使わないでください。 各部のなまえ 電源を切る source.
- Page 2 Approx. 1,800 lux/0.5 m (1.6 ft.) (at ISO3200) La HVL-LE1 est une lampe vidéo pourvue d’une LED blanche à haute luminosité Mettez l’interrupteur POWER en position « ON » tout en appuyant sur le (25 ℃ 环境温度下,BRIGHT 转盘设为 MAX 时的默认值)...
Need help?
Do you have a question about the HVL-LE1 and is the answer not in the manual?
Questions and answers