Table of Contents
Advertisement
Advertisement
Table of Contents

Related Manuals for Electrolux EBSL70


Summary of Contents for Electrolux EBSL70
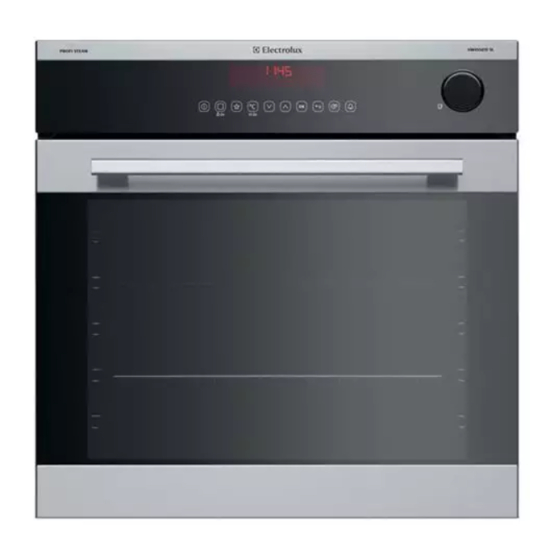
- Page 1 EBSL70 EN STEAM OVEN USER MANUAL...
-
Page 2: Table Of Contents
15. GUARANTEE ....................39 WE’RE THINKING OF YOU Thank you for purchasing an Electrolux appliance. You’ve chosen a product that brings with it decades of professional experience and innovation. Ingenious and stylish, it has been designed with you in mind. So whenever you use it, you can be safe in the knowledge that you’ll get great results every time. -
Page 3: Safety Information
ENGLISH SAFETY INFORMATION Before the installation and use of the appliance, carefully read the supplied instructions. The manufacturer is not responsible if an incorrect installation and use causes injuries and damages. Always keep the instructions with the appliance for future reference. 1.1 Children and vulnerable people safety This appliance can be used by children aged from 8 •... -
Page 4: Safety Instructions
Do not use a steam cleaner to clean the appliance. • Do not use harsh abrasive cleaners or sharp metal • scrapers to clean the glass door since they can scratch the surface, which may result in shattering of the glass. - Page 5 ENGLISH • Do not pull the mains cable to • To prevent damage or discoloration to disconnect the appliance. Always pull the enamel: the mains plug. – do not put ovenware or other • Use only correct isolation devices: line objects in the appliance directly on protecting cut-outs, fuses (screw type the bottom.
-
Page 6: Product Description
• Before maintenance, deactivate the household appliances. Do not use it for appliance and disconnect the mains house lighting. plug from the mains socket. WARNING! • Make sure the appliance is cold. There Risk of electrical shock. is the risk that the glass panels can break. -
Page 7: Control Panel
ENGLISH 3.2 Accessories Core temperature sensor Wire shelf To measure how far the food is cooked. For cookware, cake tins, roasts. Steam set Baking tray For cakes and biscuits. One unperforated and one perforated food container. Grill- / Roasting pan The steam set drains the condensing water away from the food during steam cooking. - Page 8 Use the sensor fields to operate the appliance. Sensor Function Comment field Display Shows the current settings of the appliance. ON / OFF To activate and deactivate the appliance. Heating Func- Touch the sensor field once to choose a heating tions or Vario- function or the menu: VarioGuide.
-
Page 9: Before First Use
ENGLISH Other indicators of the display: Symbol Function Minute Minder The function operates. Time of day The display shows the current time. Duration The display shows the necessary time for cooking. End Time The display shows when the cooking time is complete. Temperature The display shows the temperature. - Page 10 5.3 Preheating and smoke. This is normal. Make sure that the airflow in the room is sufficient. Preheat the empty appliance before first use. 5.4 Setting the hardness level for the water 1. Set the function: Top/Bottom Heat and the maximum temperature.
-
Page 11: Daily Use
ENGLISH 6. DAILY USE 3. Press to move to the submenu or WARNING! accept the setting. Refer to Safety chapters. At each point you can go 6.1 Navigating the menus back to the main menu with 1. Activate the appliance. 2. - Page 12 Sym- Submenu Description Set + Go When ON, in the Select Options window you can choose the function: Set + Go. Heat + Hold When ON, in the Select Options window you can choose the function: Heat + Hold.
-
Page 13: Heating Functions
ENGLISH Symbol Menu item Description SousVide VarioGuide Provides recommended oven settings for a big choice of dishes. Just look for the desired dish and start the cooking proc- ess. The temperature and times are guidelines only for a better result and can be adjusted. - Page 14 Heating function Application Grilling To grill flat food and to toast bread. Fast Grilling To grill flat food in large quantities and to toast bread. Turbo Grilling To roast larger meat joints or poultry with bones on 1 shelf position. Also to make gratins and to brown.
- Page 15 ENGLISH Heating function Application Humidity High The function is suitable for cooking delicate dishes like custards, flans, terrines and fish. 6.6 Specials Heating function Application Keep Warm To keep food warm. Plate Warming To preheat your plate for serving. Preserving To make vegetable preserves such as pickles.
- Page 16 6.7 Submenu for: VarioGuide Dish Food Category: Fish/Seafood Chicken Wings, Dish fresh Fish, baked Chicken Wings, fro- Fish Fingers Chicken Legs, Fish fillet, thin fresh Fish fillet, thick Chicken Chicken Legs, fro- Fish fillet, frozen Whole small Fish Chicken Breast,...
- Page 17 ENGLISH Dish Dish Chipolatas Hare • Leg of Hare Spare Ribs • Saddle of Hare • Saddle of Hare Pork Knuckle, pre- cooked Pork Joint Venison Game • Haunch of Veni- Loin of Pork • Saddle of Veni- Loin of Pork Pork Loin of Pork, Roast Game...
- Page 18 Dish Dish Swiss Tarte, savou- Swiss Roll Yeast Cake Quiche Lorraine Crumble Cake Savory Flan Sugar Cake Food Category: Cake/Pastry Short Pastry Flan Base Dish Flan Base Sponge Mixture Ring Cake Flan Base Apple Cake, cov- Short Pastry Fruit...
- Page 19 ENGLISH Dish Dish Broccoli, whole Eggs, soft boiled Cauliflower, Florets - Eggs, medium boiled Eggs Cauliflower, whole Eggs, hard boiled Carrots Eggs, baked Courgette Slices Food Category: Side Dishes Asparagus, green Dish Asparagus, white French Fries, thin Pepper Stripes French Fries, thick Spinach, fresh French Fries, frozen - Leek Rings...
- Page 20 6.8 Submenu for: SousVide VarioGuide Food category Dish Carrots Food category Dish Courgette Slices Sea bream fillet Asparagus, green Sea Bass fillet Asparagus, white Cod Fish Pepper Stripes Trout fillet Leek Rings Salmon fillet Fish/Seafood Vegetables Celery root Scallops...
- Page 21 ENGLISH 6.10 Water drawer A) Lid B) Wave-breaker C) Drawer body D) Water-filling hole E) Scale F) Front button You can remove the water drawer from When you fill the water drawer, insert it in the appliance. Push it gently on the front the same position.
- Page 22 6.12 SousVide Cooking If the water drawer is wet after you fill it with water, • With no evaporative losses of flavour wipe it with a soft cloth volatiles and moisture, food keeps its before you insert it in the full aroma appliance.
-
Page 23: Clock Functions
ENGLISH 6.13 Heat-up indicator Cooking with this function causes residual water on the When you activate a heating function, the vacuum bags and in the bar on the display comes on. The bar cavity. After the cooking shows that the temperature increases. process open the door carefully to avoid the water 6.14 Fast Heat Up Indicator... -
Page 24: Automatic Programmes
7.2 Setting the clock functions • The set temperature is more than 80 °C. • The function: Duration is set. • Before you use the The function: Heat + Hold keeps prepared functions: Duration, End food warm at 80 °C for 30 minutes. It... -
Page 25: Using The Accessories
ENGLISH 9. USING THE ACCESSORIES The appliance calculates an approximate WARNING! end time. The end time is different for the Refer to Safety chapters. different quantities of the food, the set oven temperatures (minimum 120 °C) and 9.1 Core temperature sensor the operating modes. -
Page 26: Additional Functions
Wire shelf and the deep pan together: Push the deep pan between the guide bars of the shelf support and the wire shelf on the guide bars above. Deep pan: Push the deep pan between the guide bars of the shelf support. - Page 27 ENGLISH The first letter flashes. To deactivate the function, press . The 7. Touch to change the letter. display shows a message. Press again 8. Press and then to confirm. The next letter flashes. 9. Do step 7 again as necessary. When you deactivate the appliance, the function also 10.
-
Page 28: Care And Cleaning
You can buy our products at • To clean metal surfaces, use a usual www.electrolux.com/shop and at the best cleaning agent. retailer shops. • To clean the bottom side in case of 11.3 Removing the shelf... - Page 29 ENGLISH Steam Cleaning Plus - the duration of the function is around 75 minutes. a) Spray a suitable detergent uniformly in the oven cavity on both enamel and steel parts. Before you start the cleaning procedure, make sure that the appliance is cold.
-
Page 30: Steam Generation System
11.6 Cleaning the water drawer 11.7 Steam generation system - Descaling Remove the water drawer from the appliance. When the steam generator operates, there is an accumulation and deposition of 1. Remove the lid of the water drawer. limestone inside because of calcium Lift the cover in correspondence with contents in the water. -
Page 31: Replacing The Lamp
ENGLISH 11.10 Removing and installing Remove the baking tray after the end of the procedure. the door If the function: Descaling is You can remove the door to clean it. not performed in the correct way, the display will show a WARNING! message to repeat it. -
Page 32: Troubleshooting
2. Remove the metal ring and clean the WARNING! glass cover. Danger of electrocution! 3. Replace the lamp with a halogen, 230 Disconnect the fuse before V, 40 W, 300 °C heat resistant lamp. you replace the lamp. 4. Attach the metal ring to the glass The lamp and the lamp glass cover. - Page 33 ENGLISH Problem Possible cause Remedy The lamp does not operate. The lamp is defective. Replace the lamp. The display shows F111. The plug of the core tem- Put the plug of the core perature sensor is not cor- temperature sensor as far rectly installed into the as possible into the socket.
- Page 34 Problem Possible cause Remedy There is no water inside the You did not fill the water Check if the a descaling baking tray after the desca- drawer to the maximum lev- agent / water is present in ling procedure.
-
Page 35: Installation
ENGLISH We recommend that you write the data here: Model (MOD.) ......... Product number (PNC) ......... Serial number (S.N.) ......... 13. INSTALLATION 13.1 Lifting the appliance WARNING! Refer to Safety chapters. To lift the appliance, do not use the door handle. -
Page 36: Electrical Connection
~50 mm N 600 A 595 A 595 585-592 mm 442 mm 115 mm N min. 550 mm A 567 115 mm N 560-568 mm A 592 mm N min. 550 mm A 567 3. Use a minimum of 2 screws to attach the oven on the 2 sides (A). -
Page 37: Energy Efficiency
L2 L3 1 = 45 mm 2 = 45 mm 3 = 60 mm 4 = 60 mm 2. Secure the cable grip. = 70 mm 14. ENERGY EFFICIENCY 14.1 Product Fiche and information according to EU 65-66/2014 Supplier's name Electrolux... - Page 38 EBSL70CN Model identification EBSL70SP Energy Efficiency Index 97.6 Energy efficiency class Energy consumption with a standard load, conven- 0.93 kWh/cycle tional mode Energy consumption with a standard load, fan- 0.83 kWh/cycle forced mode Number of cavities Heat source Electricity...
-
Page 39: Guarantee
ENGLISH GUARANTEE Customer Service Centres Point of Service Industriestrasse 10 Le Trési 6 Via Violino 11 5506 Mägenwil 1028 Préverenges 6928 Manno Morgenstrasse 131 3018 Bern Zürcherstrasse 204E 9000 St. Gallen Seetalstrasse 11 6020 Emmenbrücke St. Jakob-Turm Birsstrasse 320B 4052 Basel Comercialstrasse 19 7000 Chur Spare parts service Industriestrasse 10,... - Page 40 www.electrolux.com/shop...
Need help?
Do you have a question about the EBSL70 and is the answer not in the manual?
Questions and answers