
Related Manuals for ComNav Mariner X2

Summary of Contents for ComNav Mariner X2
- Page 1 Class B AIS Transceiver • Mariner X2 Automatic Identification System INSTALLATION MANUAL Version 1.4...
- Page 2 Thank you for buying this AIS Class B transceiver. This product has been engineered to offer you the highest level of performance and durability and we hope that it will provide many years of reliable service. We constantly strive to achieve the highest possible quality standards, should you encounter any problems with this product, please contact your dealer who will be pleased to offer whatever assistance you require.
-
Page 3: Table Of Contents
Connecting to the NMEA0183 data port........13 Configuring your Mariner X2 .............15 Figure 12 Connecting the power supply ..........14 4.1 Switching on your Mariner X2 for the first time........15 Figure 13 Indicator start up sequence ............. 15 4.2 Introduction to the proAIS software ............16 Figure 14 Entering static data into proAIS .......... -
Page 4: Notices
This equipment must be installed and 1.1 Safety warnings operated according to the instructions contained in this manual. Failure to do so can result in personal injury and / or Mariner X2 This equipment must be installed in accordance with malfunction. -
Page 5: Figure
Accuracy of this manual communications. The Mariner X2 may be upgraded from time to time and future WARNING: It is a violation of the rules of the Federal versions of the Mariner X2 may therefore not correspond exactly Communications Commission to input an MMSI that with this manual. -
Page 6: Figure
Static data is information about the vessel which must be more frequently. Class A transceivers are mandatory on all programmed into the Mariner X2. This includes: vessels over 300 gross tonnes on international voyages and • Maritime Mobile Service Identity (MMSI) certain types of passenger vessels under the SOLAS mandate. -
Page 7: Figure
AIS unit is to be installed must therefore possess a current VHF radiotelephone licence which lists the AIS system, vessel Call Sign and MMSI number. An MMSI number is required in order for the Mariner X2 to operate. Please contact the relevant authority in your country for more information. -
Page 8: Figure
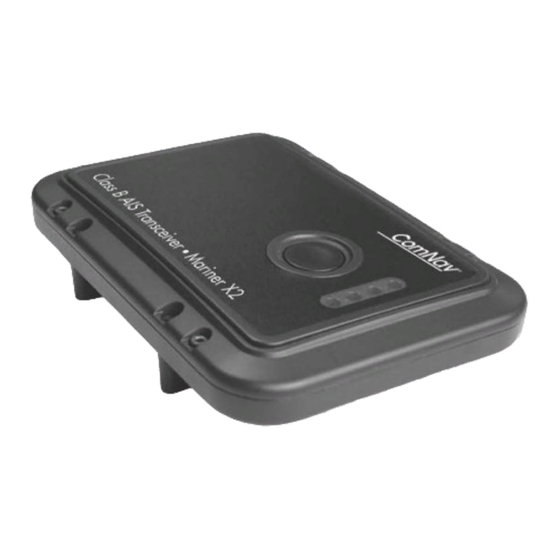
GPS Antenna start guide • Fixing screws Four fixing screws are provided with the product for mounting of the Mariner X2. Please refer to section 3.2 for details of how to mount Product manual the Mariner X2. • Mariner X2 unit Figure 2 shows an overview of the Mariner X2 unit. -
Page 9: Figure
About your AIS class B transceiver Figure 2 shows the Mariner X2 mounting holes. Please refer to Electrical connections section 3.2 for details of how to mount the Mariner X2. The Mariner X2 has the following connections provided by the... -
Page 10: Figure
Installation 3 Installation In addition to the items provided with your Mariner X2 the following items will be required for installation: 3.1 Preparing for Installation VHF antenna Connection to a suitable VHF antenna will be required for the Figure 4 shows a typical installation configuration for the Mariner Mariner X2 to operate. -
Page 11: Figure
Power and data cables The Mariner X2 unit is supplied with a one metre long power and data cable as an integral part of the Mariner X2 unit. If you require longer cables to reach your power supply, please ensure the cables are capable of carrying currents of up to 2A peak and 500mA on average. -
Page 12: Figure
Please note the following guidelines when selecting a location for your Mariner X2: • The Mariner X2 must be fitted in a location where it is at least 0.5m from a compass or any magnetic device. • There should be adequate space around the Mariner X2 for routing of cables. -
Page 13: Figure
Installation 137 mm 45 mm 150 mm Figure 5 Mariner X2 dimensions Figure 6 Mariner X2 mounting Page 10... -
Page 14: Figure 7
Installation Step 2 - Installing the GPS antenna For mounting of the GPS antenna provided with your Mariner X2 you will require a one inch 14 TPI thread pole. You should ensure the GPS antenna has a good clear view of the entire sky. -
Page 15: Figure
Route the cable from the VHF antenna to the Mariner X2 and If you require a remote external switch to activate the silent mode connect to the VHF connector on the Mariner X2 as shown in Figure feature, it is possible to connect a toggle switch to the Mariner X2 and configure the switch function accordingly. -
Page 16: Figure
Receive - Green Connection to a PC The Mariner X2 is supplied with an RS232 port for connection to a Connecting an optional NMEA0183 device PC. The RS232 connector can be connected directly to the RS232 port on the PC or via a serial to USB converter if no RS232 port is If you wish to connect a NMEA0183 device (such as a heading available. -
Page 17: Figure
Installation Step 6 - Connecting to a power supply The Mariner X2 requires a 12V power supply typically provided by Power supply + the vessel's battery. Black Power supply – Do not use a 24V power supply with the Mariner X2. -
Page 18: Configuring Your Mariner X2
4.1 Switching on your Mariner X2 for the first time A few seconds after applying power to the Mariner X2 for the first time all four indicators (green, amber, red and blue) will blink twice. The indicator sequence following this will depend on whether your transceiver is pre-configured. -
Page 19: Introduction To The Proais Software
This software is designed to be installed and used with a PC connected to the Mariner X2 via the data lead provided as standard with the Mariner X2 unit. If the PC being used for programming does not have a 9-pin serial port then a commercially available USB to serial adaptor may be required. -
Page 20: Configuration Using Proais
Follow the steps below to configure the Mariner X2: to use an external toggle switch to control silent mode). 1. Connect your Mariner X2 to the PC using the RS232 lead as • Press switch to toggle transmitter on/off (This is required if you described in section 3.2. -
Page 21: Figure
Configuring your Mariner X2 7. Set the baud rates to the required level for each of the serial ports. • Set the RS232 baud rate to the required level. The default is 38,400. This is the baud rate used when communicating with a PC via the RS232 connection. -
Page 22: Operation
Specific details of how to configure your chart plotter to make use of the switch will toggle the AIS transmitter on or off. The switch must the Mariner X2 features will be given in your chart plotter manual. If be depressed for two seconds to activate silent mode to avoid you are using charting software running on a PC, please refer to the accidental activation. -
Page 23: Using Proais With Your Mariner X2
The proAIS tool has a range of features to help monitor the being received and the dynamic data of the vessel. Satellite signals performance of your Mariner X2. To use the full range of features shown as green bars are actively being used to calculate a position your Mariner X2 must be installed as described in section 3 and fix. -
Page 24: Proais Diagnostics Page
The 'Diagnostics' page provides a range of information about the The 'Other vessels' page provides a list of all vessels from which Mariner X2's status. Referring to the information in this page may AIS messages are being received. For each vessel the MMSI,... -
Page 25: Proais Messages Page
Operation proAIS Messages page proAIS Serial data page The 'Messages' page provides a list of all text messages received The 'Serial data' page provides a view of all incoming and outgoing from other vessels. These are most likely to be safety related AIS messages. -
Page 26: Indicator Functions
(via Basestation) cease The Mariner X2 is powered up, has a position fix and has transmissions. transmitted at least one vessel information report. When the switch function is configured to activate safety The Mariner X2 has detected a system error. The likely... -
Page 27: Troubleshooting
(message 24). This is Issue Possible cause and remedy not shown on their chart not a fault of your Mariner X2. Software upgrades plotter or PC are available for many older chart plotters which will correct this issue. The other vessel should No data is being received •... -
Page 28: Specifications
25kHz GMSK (AIS, TX and RX) Dimensions 215 x 150 x 45 mm (L x W x H) 25kHz AFSK (DSC, RX only) Weight 685g (Mariner X2 unit only) Bit rate 9600 b/s ± 50 ppm (GMSK) Power DC (9.6V - 15.6V) 1200 b/s ±...
Need help?
Do you have a question about the Mariner X2 and is the answer not in the manual?
Questions and answers