Table of Contents

Advertisement

®
NanoPhotometer
NP80/N60/N50/C40
User Manual
Version 3.1
Software Version 3.1.13220

Advertisement

Table of Contents
loading

Summary of Contents for NanoPhotometer N50

  • Page 1 ® NanoPhotometer NP80/N60/N50/C40 User Manual Version 3.1 Software Version 3.1.13220...
  • Page 2 NP80/N60/N50/C40 User Guide Version 3.1 ® Declaration of conformity for the NanoPhotometer (C40/N50/N60/NP80) ® This is to certify that the Implen NanoPhotometer conforms to the requirements of the following directives: 2014/35/EU Low Voltage Equipment Safety Directive 2014/30/EU Electromagnetic compatibility (EMC) directive...
  • Page 3: Table Of Contents

    AT A LANCE ® ....................8 HOTOMETER VERVIEW ® NP80 ........................ 9 HOTOMETER ® N60 ......................... 10 HOTOMETER ® N50 ......................... 11 HOTOMETER ® C40 ......................... 12 HOTOMETER (NP80/N60/N50/C40) ................13 NSTRUMENT ANEL (NP80/N60/N50/C40) ................13 NSTRUMENT OTTOM ........................14 CCESSORIES .........................
  • Page 4 ® NanoPhotometer NP80/N60/N50/C40 User Guide Version 3.1 ......................43 ATTERY PERATION ® ..............44 HOTOMETER PPLICATIONS ........................44 UCLEIC CIDS .......................... 44 ETHOD VERVIEW ....................... 44 EASUREMENT ROTOCOL ..........................48 ALCULATIONS ........................53 ROTEIN .......................... 53 ETHOD VERVIEW ....................... 54...
  • Page 5 ® NanoPhotometer NP80/N60/N50/C40 User Guide Version 3.1 ..................86 TANDARD URVE .......................... 86 ETHOD VERVIEW ......................86 EASUREMENTS ROTOCOL ..........................89 ALCULATIONS ........................90 USTOM ......................90 TORED ESULTS ......................91 TORED ETHODS ....................92 REFERENCES ..........................92 ENERAL ..........................92 ATE AND ............................
  • Page 6 ® NanoPhotometer NP80/N60/N50/C40 User Guide Version 3.1 ....................104 AINTENANCE ..................104 AINTENANCE ECHNOLOGY ......................104 EPLACEMENT ARTS ................... 105 LEANING AND ENERAL ......................... 105 ESSAGES : ....................105 MPORTANT ARNING ESSAGES : ...................... 107 MPORTANT LERT ESSAGES ....................... 109 ARRANTY 10.
  • Page 7 ® NanoPhotometer NP80/N60/N50/C40 User Guide Version 3.1 ....................126 ÄKERHETSINFORMATION ....................127 PPACKNING OCH PLACERING 18. A 9 – I ........128 PPENDIX NSTALAÇÃO DE SPECTROFOTÓMETRO .................... 128 NFORMAÇÕES DE EGURANÇA ................129 ESEMBALAMENTO E OSICIONAMENTO 19. A ................. 131...
  • Page 8: Nano Photometer

    CCD array detector with options ranging from nanovolume to standard cuvette and all-in-one solutions. The N50, N60, and NP80 spectrophotometers measure sample volumes ranging from 0.3 - 2 µl. The NP80 model also has the capability to measure samples using a standard cuvette. The C40 is a mobile standard cuvette solution with the option to upgrade to accommodate nanovolume measurements.
  • Page 9: 
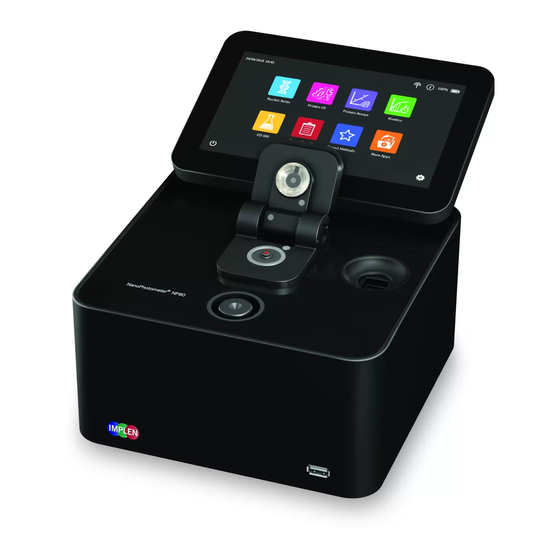
Nano Photometer ® Np80

    ® NanoPhotometer NP80/N60/N50/C40 User Guide Version 3.1 ® NP80 HOTOMETER Item Number Touchscreen Battery Pack NP80 NP80-Touch NP80-Mobile...
  • Page 10: Nano Photometer ® N60

    ® NanoPhotometer NP80/N60/N50/C40 User Guide Version 3.1 ® HOTOMETER Item Number Touchscreen Battery Pack N60-Touch N60-Mobile...
  • Page 11: Nano Photometer ® N50

    ® NanoPhotometer NP80/N60/N50/C40 User Guide Version 3.1 ® HOTOMETER Item Number Touchscreen Battery Pack N50-Touch...
  • Page 12: Nano Photometer ® C40

    ® NanoPhotometer NP80/N60/N50/C40 User Guide Version 3.1 ® HOTOMETER Item Number Touchscreen Battery Pack C40-Touch C40-Mobile...
  • Page 13: (Np80/N60/N50/C40)

    NSTRUMENT ANEL ® To boot/shut down the NanoPhotometer click shortly (< 1 second) on the power on/off button. Note: Long clicks (> 3 seconds) initiate a hard reset. Only activate a hard reset of the unit when necessary. To avoid excess hard reboots, it is recommended to power down the unit from the onboard touch screen by clicking on the power button in the bottom left corner.
  • Page 14: Accessories

    NP80/N60/N50/C40 User Guide Version 3.1 CCESSORIES TANDARD CCESSORIES  Connecting Cable ® USB connecting cable to connect the NanoPhotometer to a computer to control the ® NanoPhotometer via computer (please see page 23 Software Installation).  NanoPhotometer ® Power Adapter ®...
  • Page 15 Filter and a corresponding Excel-based software tool depending on the type of instrument. The Excel- based software produces an automated report displaying all relevant data for an audit. ® Note: The IQ/OQ documentation is not available for the NanoPhotometer N50.  Submicroliter Cell (C40 only) The submicroliter cell provides the option of upgrading the ®...
  • Page 16 15.8 cm) and the DYMO LabelWriter 450 (5.4 x 10 cm). Cryo labels can be printed with both DYMO printers using the following label format: 26 x 12.7 mm and 9.5 mm circle. Note: After starting the NanoPhotometer, plug in the DYMO printer. The home screen will be shown. Wait at least for 30 seconds for driver installation.
  • Page 17 ® NanoPhotometer NP80/N60/N50/C40 User Guide Version 3.1 Printout for DYMO LabelWriter 4XL Printout for DYMO LabelWriter 450 Note: The printouts are optimized for the label size of the DYMO LabelWriter 4XL. All other DYMO printers can be used. However, the font size will be zoomed to utilized paper size.
  • Page 18: Connectivity

     USB A ® There is a USB A port on the front as well as the rear panel of the NanoPhotometer which is compatible with standard portable USB 2.0 storage devices for direct data transfer in a variety of formats including Excel.
  • Page 19: Nano Photometer ® Specifications

    Larger datasets can be saved on the NanoPhotometer itself.  HDMI ® There is an HDMI port located on the rear panel of the NanoPhotometer which is compatible with ® HDMI 1.4 cables (or better) to connect the NanoPhotometer to HDMI compatible monitors.
  • Page 20 Bandwidth 1.8 nm (N50: 5 nm) Stray Light < 0.5% at 240 nm using NaI (N50: < 2%) and < 1% at 280 nm using Acetone (N50: < 2%) Absorbance Reproducibility < 0.002 A (0.67 mm path) @ 280 nm (N50: <...
  • Page 21: Getting Started

    WARNING: UV exposure when measuring without lid. ® Do not use damaged power cords, accessories, and other peripherals with your NanoPhotometer Use only the delivered and specified power supply/charger. ® Do not expose the NanoPhotometer to strong magnetic, electrical fields, water, chemicals or any type of liquid as heavy rain or moisture.
  • Page 22: Unpacking And Positioning

    Ensure your proposed installation site conforms to the environmental conditions for safe operation: indoor use or dry environment. ® Note: Do not expose your NanoPhotometer near liquids, chemicals, rain, moisture or dusty environments. Temperature range 10-40°C; If the cuvette heating is used the range is 10-30°C.
  • Page 23: Software Installation

    . The files need to be transferred to a computer or device where Excel or a PDF reader is installed. ® Note: Please do not connect the instrument to a computer until the NanoPhotometer NPOS software is installed on the computer.
  • Page 24: Installing Software On Computer

    WiFi connection between PC and the NanoPhotometer WiFi Hotspot (SSID: Serial ® number, password: Implenuser) and for LAN connect the NanoPhotometer to the local network via Ethernet cable or WiFi network. Note: If there is Avira installed on your computer, it is recommended to switch off the browser safety.
  • Page 25: Installing Nano Photometer ® App On Tablet Or Smartphone

    (Apple Store and Google Play Store). ® 1. Download and install the NanoPhotometer App from the app store ® 2. Connect the tablet or smartphone via WiFi Hotspot to the NanoPhotometer SSID: Serial number, password: Implenuser ® 3. Open the NanoPhotometer ®...
  • Page 26: First Steps And Configuration Wizard

    IRST STEPS AND CONFIGURATION WIZARD When starting the Implen NPOS the first time an Implen configuration wizard is shown. Please accept ® the End User License Agreement (EULA) and select the country in which the NanoPhotometer used and confirm. RINTER NSTALLATION ®...
  • Page 27: Nano Photometer ® Basics

    HOTOMETER ASICS ® The NanoPhotometer product line offers a complete solution for Nanovolume (NP80/N60/N50/C40) ® and standard cuvette (C40/NP80) applications. With the NanoPhotometer NanoVolume applications, sample volume ranges from a minimum of 0.3 μl to a maximum sample volume of 2.0 µl (5 µl for using the submicroliter cell/C40).
  • Page 28 More Apps Additional applications found on a secondary method screen Define one or multiple wavelength between Wavelength 200 – 900 nm (N50: 200 – 650 nm) for absorbance measurements Define desired full scan range anywhere between Wavescan 200 - 900 nm (N50: 200 - 650 nm)
  • Page 29: Icons

    ® NanoPhotometer NP80/N60/N50/C40 User Guide Version 3.1 CONS Icon Name Action WiFi Network WiFi network active; status of WiFi connection WiFi Hotspot WiFi hotspot active Assistance Opens the assistance page Battery Status Shows the actual battery status (only shown with optional battery pack)
  • Page 30: Buttons

    ® NanoPhotometer NP80/N60/N50/C40 User Guide Version 3.1 UTTONS Prior to any sample measurement at the start of a new method a blank measurement of either water or the buffer of the samples is required to give ® the NanoPhotometer a reference of what zero should be. It is recommended to re-apply the blank and measure it as a sample to ensure the graph of the blank spectra is a flat line.
  • Page 31: Side Tab Bar

    ® NanoPhotometer NP80/N60/N50/C40 User Guide Version 3.1 AB BAR On the left side of the measurement screen there is a vertical tab bar that contains four tabs including: parameters, data, graph, and table. The different tabs allow the user to organize the measurement screen.
  • Page 32 “More than 30 samples have been selected. Only 30 will be shown in graph.” ® Note: The overlay button is not available on the NanoPhotometer and smartphones, only on tablets and computer versions. It is possible to zoom in and out any area of the diagram (x- and y-axis). Undo the zoom by clicking the full scale icon ( Note: Maximum zoom is 20 nm for the x-axis and 0.01A for the y-axis.
  • Page 33: Data Processing Dialogs

    Note: The auto print function is not available for printing via control device (local computer/network printer) or in the Kinetics method. Cryo Label Print ® To print on cryo labels connect a DYMO printer to the NanoPhotometer and insert the specified cryo label paper (26 x 12.7 mm and 9.5 mm circle).
  • Page 34 IDS files from opened data. In these cases the IDS tick box is greyed out. ® Note: PDF and Excel files cannot be opened on the NanoPhotometer . The files need to be transferred to a computer or device where Excel or a PDF reader is installed.
  • Page 35 These backup copies can be found in ® ® the Auto Save folder of the NanoPhotometer (Stored Results/NanoPhotometer /Autosave) for up to eight days. Files contain the base name Backup, the method name, and a time/date stamp.
  • Page 36: Basic Operation

    PERATION ® The NanoPhotometer product line offers a complete solution for nanovolume (N50/N60/NP80/C40) and standard volume (C40/NP80) applications. With the ® NanoPhotometer nanovolume applications the sample volume ranges from 0.3 µl to a maximum sample volume of 2.0 µl. Standard Cuvette applications can be performed with 10 mm, 5 mm, 2 mm, 1 mm and 0.5 mm path length quartz, glass, or plastic cuvettes with a center...
  • Page 37: Cuvette Measurement Basics (C40/Np80)

    ® NanoPhotometer NP80/N60/N50/C40 User Guide Version 3.1 Note: Do not overfill the well. Note: The low energy red light (LED) illumination can be switched of in Preferences 5. Lower the sample arm and initiate a blank measurement with the blank button 6.
  • Page 38 ® NanoPhotometer NP80/N60/N50/C40 User Guide Version 3.1 Note: For the NP80 the cuvette compartment needs to be activated by the “Change to Cuvette” button in the parameter area. Once the cuvette option is activated the sample compartment door will be opened automatically and a red arrow above the cuvette compartment will appear.
  • Page 39: Submicroliter Cell Measurements Basics (C40)

    EASUREMENTS ASICS ® The Implen submicroliter cell can be used with the NanoPhotometer C40. Insert the submicroliter cell to the cell holder with the cell windows facing the light beam. We recommend facing the Implen logo to the right side. The light beam is directed from BACK to FRONT as indicated with the white arrows.
  • Page 40: Sample Handling Tips

    It is recommended to vortex every sample right before the measurement. • The sample window is illuminated (NP80/N60/N50 only) with a low energy red light to assist with accurate sample application. The red light is switched off once the sample arm is closed.
  • Page 41 Most solvents typically used in life science laboratories are compatible with the ® NanoPhotometer nanovolume sample surfaces. The following solvents are compatible for use ® with the NanoPhotometer models N50, N60, and NP80 at room temperature: • • Acetone (≤ 5%) Methylene chloride •...
  • Page 42: Data Transfer

    For Mac OS X open the "Connect to Server" dialog in the "Go" menu of the Mac OS X Finder. ® With a LAN connection enter the instrument serial number or the active NanoPhotometer address in the server address field to connect. For USB cable or WiFi connection use...
  • Page 43: Nanophotometer Np80/N60/N50/C40

    ATTERY PERATION ® The optional battery operation is only available for the NanoPhotometer NP80/N60/C40 models (NP80-Mobile, N60-Mobile and C40-Mobile). A full battery pack can be operated for approximately 10 hours within normal usage, i.e. 20-30 measurements per hour. When the battery gets low there will be a first warning message “Battery low”...
  • Page 44: Nano Photometer

    ® NanoPhotometer NP80/N60/N50/C40 User Guide Version 3.1 ® HOTOMETER PPLICATIONS ® The NanoPhotometer comes with pre-programmed applications as well as the ability to create custom applications. Any application method can be selected by tapping the icon once or clicking on the icon (computer based software).
  • Page 45 ® NanoPhotometer NP80/N60/N50/C40 User Guide Version 3.1 entered from the range of 15 - 150. 4. For NanoVolume application: Select the volume of sample to be applied. Note: 1 - 2 µl (default): automatic path length setting; 0.3 µl measures only the 0.07 mm path length (for samples with concentrations >...
  • Page 46 ® NanoPhotometer NP80/N60/N50/C40 User Guide Version 3.1 Note: A new Blank is recommended when changing the dilution lid. 5. If it is desired to heat the sample to 37°C use the toggle switch to turn on cell holder heater. When the cuvette holder has reached 37°C the toggle color changes to green.
  • Page 47 ® NanoPhotometer NP80/N60/N50/C40 User Guide Version 3.1 10. Option to set/calculate a dilution factor for manual diluted samples. 11. Apply the blank ddH 0 or buffer to the illuminated sample window for the reference measurement and select blank to initiate the reading.
  • Page 48: Calculations

    ® NanoPhotometer NP80/N60/N50/C40 User Guide Version 3.1 initiate the measurement. ALCULATIONS  Nucleic Acid Concentration To determine the concentration of nucleic acids in solution, the absorbance as measured at the wavelength of 260 nm is used. The function describing the relationship between concentration and absorbance is a modification of the Beer-Lambert law equation.
  • Page 49 ® NanoPhotometer NP80/N60/N50/C40 User Guide Version 3.1 With background and with dye correction: C = � ( A ) − �cf − A * �A − A ��� * ε * Đ max,dye C = ( A ) * ε...
  • Page 50 ® NanoPhotometer NP80/N60/N50/C40 User Guide Version 3.1 ε Extinction coefficient of dye in M *cm- Đ Manual dilution factor  Frequency of Incorporation (FOI) FOI is the degree of labeling based on dye incorporation in a labeled nucleic acid sample. It is generally expressed as the number of dye molecules incorporated per 1000 nucleotides.
  • Page 51 ® NanoPhotometer NP80/N60/N50/C40 User Guide Version 3.1 Table 2. Dye Types, Absorbance Max, Extinction coefficient, and dye-dependent correction factors ® NanoPhotometer Dye Type Absorbance Dye-dependent Dye-dependent Model maximum of ext. coeff. correction factor ε Dye (nm) in M at 260 nm cf...
  • Page 52 ® NanoPhotometer NP80/N60/N50/C40 User Guide Version 3.1 this is generally indicative of contamination with guanidinium thiocyanate, a reagent commonly used in RNA purification and which absorbs over the 230-260 nm range. If a ratio is detected out of the acceptable range an alert icon is shown in the results/table area.
  • Page 53: Protein Uv

    ® NanoPhotometer NP80/N60/N50/C40 User Guide Version 3.1 ROTEIN ETHOD VERVIEW The Protein UV method exploits the inherent absorbance of proteins at 280 nm in combination with the Beer-Lambert Law, where each protein is characterized by a protein specific extinction coefficient (ε) which can be used to determine total protein concentration of a solution. The...
  • Page 54: Measurement Protocol

    ® NanoPhotometer NP80/N60/N50/C40 User Guide Version 3.1 EASUREMENT ROTOCOL 1. Select the Protein UV icon on the home screen. 2. To change between NanoVolume and Cuvette application (NP80/C40 only) use the Change to Cuvette/NanoVolume button below the parameter area. 3. To change the protein type click on BSA and a list with available options opens on the right side.
  • Page 55 ® NanoPhotometer NP80/N60/N50/C40 User Guide Version 3.1 For cuvette application: Select the path length depending on the used cuvette. Options are: 0.5 mm, 1 mm, 2 mm, 5 mm and 10 mm For NanoVolume application with submicroliter cell (C40 only): Select Lid depending on your sample concentration (for concentration ranges of different lids see page 39 Submicroliter Cell Measurements Basics).
  • Page 56 ® NanoPhotometer NP80/N60/N50/C40 User Guide Version 3.1 color changes to green. Note: Only available for cuvette applications (NP80 and C40). 8. For dye labelled samples, tick the dye labels in the list which should be used for result calculation. Note: If the used dye is not available in the list, please go to preferences and add a custom dye to the dye list.
  • Page 57: Calculations

    ® NanoPhotometer NP80/N60/N50/C40 User Guide Version 3.1 Note: The illumination of the sample window can be switched off in the preferences. 11. Use a lint-free laboratory wipe to clean both the sample window and mirror prior to applying the next sample.
  • Page 58 ® NanoPhotometer NP80/N60/N50/C40 User Guide Version 3.1 Table 3. Protein extinction coefficients (ε prot ε Ext. Coeff. [l/g*cm] Mol. Ext. Coeff. [M MW [g/mol] [ g* cm/l] Type prot 0.667 44,289 66,400 1.50 0.670 44,220 66,000 SA Mouse 1.49 0.582...
  • Page 59 ® NanoPhotometer NP80/N60/N50/C40 User Guide Version 3.1 maximum of the dye, and a dye-specific extinction coefficient (see Table 4). The dye concentration is calculated with or without background correction for are as follows: With background correction: �(A − A ) * Ð�...
  • Page 60 Dye-dependent Dye-dependent Models maximum ext. coeff. correction ε of Dye (nm) in M factor at 280 nm NP80/N60/N50/C40 Alexa Fluor 350 19,000 0.19 NP80/N60/N50/C40 Alexa Fluor 405 34,500 0.70 NP80/N60/N50/C40 Alexa Fluor 488 71,000 0.11 NP80/N60/N50/C40 Alexa Fluor 532 81,000 0.09...
  • Page 61: Protein Assays

    A linear, linear zero or 2 order regression ® analysis of the calibration standard data points is calculated by the NanoPhotometer correlation coefficient (R ) in the range of 0.95 to 1.00 indicates a good fit to a straight line.
  • Page 62: Measurement Protocol

    3. To change the assay type click on Bradford and a list with available options opens on the right side. Options are: BCA Assay, Biuret Assay, Bradford Assay, Lowry Assay (not for N50) 4. For Cuvette Application: Select the path length depending on the used cuvette.
  • Page 63 6. The baseline correction is disabled as default. It is possible to choose between different wavelengths for the baseline correction. Options are: 377 nm, 604 nm, 650 nm, 770 nm (not N50) and 823 nm (not N50) Option to enter any wavelength between 200 nm and 900 nm (N50: 650 nm)
  • Page 64 ® NanoPhotometer NP80/N60/N50/C40 User Guide Version 3.1 7. Select curve fit type: Options are linear regression, zero regression (forces the straight line through the origin) and 2 order regression 8. Select Unit 9. Add up to 20 Concentrations by clicking on the Add Concentration button. Added concentrations can be deleted with Enter the concentrations of the standard curve.
  • Page 65 ® NanoPhotometer NP80/N60/N50/C40 User Guide Version 3.1 10. Select Replicates none, 2 or 3 11. Measure a blank and depending on the replicate selection, all required concentrations. Absorbances of the replicates will be shown in the results area and if replicates are selected a mean value for each standard. It is possible to exclude single measurements from the curve calculation by switching the toggle switch off.
  • Page 66: Calculations

    ® can be readily performed with the NanoPhotometer . The rate of a chemical reaction can be measured using spectrophotometric methods by studying the change in absorbance at a fixed wavelength as a function of time.
  • Page 67 Note: Only available for cuvette applications (NP80 and C40). Default wavelength (λ) is 340 nm but can be changed in the range of 200–900 nm (N50: 200–650 nm), depending on the application. 6. Time settings:  Enter the duration time in minutes over which measurements are to be taken. Possible range is 1–3000 minutes.
  • Page 68: Calculations

    NP80/N60/N50/C40 User Guide Version 3.1 3,600 seconds (N50: 10–3,600 sec.), depending on the duration time.  Enter the delay time in seconds before the first measurement is taken. Possible delay time is between 0–3,600 seconds, depending on the duration time.
  • Page 69 ® and use this factor within the setting “correction factor” of your NanoPhotometer Software. Note: The use of 10 mm path length disposable cuvettes is recommended for optical density measurements of cell culture solutions.
  • Page 70: Measurement Protocol

    ® NanoPhotometer NP80/N60/N50/C40 User Guide Version 3.1 Figure 1 Bacterial growth curve EASUREMENT ROTOCOL 1. Select the OD600 icon on the home screen To change between NanoVolume and cuvette application, use the Change to Cuvette/NanoVolume button below the parameter area (NP80/C40 only).
  • Page 71 5. Default wavelength is 600 nm but the wavelength can be changed in the range of 200–900 nm (N50: 200–650 nm), depending on the application. 6. Toggle switch cells/ml is disabled as default. Enable cells/ml to get the cells/ml calculated.
  • Page 72: Calculations

    ® NanoPhotometer NP80/N60/N50/C40 User Guide Version 3.1 8. Option to smooth the graph with different boxcars. Options: Off, 1 = boxcar 11 (default), 2 = boxcar 21 and 3 = boxcar 61 9. Option to set/calculate a dilution factor for manual diluted samples.
  • Page 73: More Apps

    The More Apps icon located on the home screen opens another menu screen with access to ® icons for additional applications available on the NanoPhotometer . The applications featured in this menu include: wavelength, concentration, wavescan, absorbance/ratio, standard curve and custom applications.
  • Page 74 6. Baseline correction is set to off as default. Enabling the baseline corrections shows a list with different wavelength options: 377 nm, 604 nm, 650 nm, 770 nm (N/A N50) and 823 nm (N/A N50). Option to enter any wavelength between 200 nm and 900 nm (N50: 650 nm).
  • Page 75 ® NanoPhotometer NP80/N60/N50/C40 User Guide Version 3.1 7. Option to smooth the graph with different boxcars. Options: Off, 1 = boxcar 11 (default), 2 = boxcar 21 and 3 = boxcar 61 8. Option to set/calculate a dilution factor for manual diluted samples.
  • Page 76: Calculations

    AVESCAN ETHOD VERVIEW Using the wavescan application it is possible to obtain the complete spectral scan for a defined wavelength range between 200-900 nm (NP80/N60/C40) or from 200-650 nm (N50). EASUREMENT ROTOCOL 1. Select the More Apps icon from the Home screen and the Wavescan...
  • Page 77 ® NanoPhotometer NP80/N60/N50/C40 User Guide Version 3.1 (NP80/C40 only). 3. For NanoVolume application: Select the dilution depending on the sample concentration Note: There is no automatic path length setting in this method. Select either a virtual dilution of 15 (path length 0.67 mm) or of 140 (path length 0.07 mm) For cuvette application: Select the path length depending on the used cuvette.
  • Page 78 6. Baseline correction is set to off as default. Enabling the baseline corrections shows a list with different wavelength options: 377 nm, 604 nm, 650 nm, 770 nm (N/A N50) and 823 nm (N/A N50). Option to enter any wavelength between 200 nm and 900 nm (N50: 650 7.
  • Page 79: Calculations

    ® NanoPhotometer NP80/N60/N50/C40 User Guide Version 3.1 10. Use a lint-free laboratory wipe to clean both the sample window and mirror prior to applying the next sample. Note: It can be helpful to apply the blank a second time and read it as a sample to ensure a proper blank.
  • Page 80 ® NanoPhotometer NP80/N60/N50/C40 User Guide Version 3.1 3. For NanoVolume application: Select the dilution depending on the sample concentration Note: There is no automatic path length setting in this method. Select either a virtual dilution of 15 (path length 0.67 mm) or of 140 (path length 0.07 mm).
  • Page 81 6. Baseline correction is set to off as default. Enabling the baseline corrections shows a list with different wavelength options: 377 nm, 604 nm, 650 nm, 770 nm (N/A N50) and 823 nm (N/A N50). Option to enter any wavelength between 200 nm and 900 nm (N50: 650 nm) 7.
  • Page 82: Calculations

    ® NanoPhotometer NP80/N60/N50/C40 User Guide Version 3.1 11. Apply sample to the sample window and press the sample button to initiate the measurement. ALCULATIONS The absorbance ratio is calculated from the two path lengths specified by the user in the parameters.
  • Page 83 Note: Only available for cuvette applications (NP80 and C40). 5. Default wavelength is 260 nm but can be changed in the range of 200- 900 nm (N50: 200–650 nm), depending on the sample/application. 6. Enter a factor for concentration calculation.
  • Page 84 8. Baseline correction is set to off as default. Enabling the baseline corrections shows a list with different wavelength options: 377 nm, 604 nm, 650 nm, 770 nm (N/A N50) and 823 nm (N/A N50). Option to enter any wavelength between 200 nm and 900 nm (N50: 650 9.
  • Page 85: Calculations

    ® NanoPhotometer NP80/N60/N50/C40 User Guide Version 3.1 10. Option to set/calculate a dilution factor for manual diluted samples. 11. Apply the blank ddH 0 or buffer to the illuminated sample window for the reference measurement and select blank to initiate the reading.
  • Page 86: More Apps : Standard Curve

    The construction of a calibration curve from multiple standards of known concentrations can be ® created and stored on the NanoPhotometer . The standard curve can be used to quantify samples of the same type with unknown concentrations. This application provides an extremely useful tool with which to integrate, expedite and simplify the measurement and calculations involved in determining the concentration of analytes in unknown samples.
  • Page 87 5. Baseline correction is set to off as default. Enabling the baseline corrections shows a list with different wavelength options: 377 nm, 604 nm, 650 nm, 770 nm (N/A N50) and 823 nm (N/A N50). Option to enter any wavelength between 200 nm and 900 nm (N50: 650 nm)
  • Page 88 ® NanoPhotometer NP80/N60/N50/C40 User Guide Version 3.1 6. Select the curve fit type: Options are linear regression, zero regression (forces the straight line through the origin) and 2 order regression. 7. Select Unit...
  • Page 89: Calculations

    ® NanoPhotometer NP80/N60/N50/C40 User Guide Version 3.1 8. Add up to 20 Concentrations by clicking on the Add Concentration button. Added concentrations can be deleted with Enter the concentrations of the standard curve. 9. Select Replicates none, 2 or 3 10.
  • Page 90: Custom Apps

    ® On the left side of the screen all available directories/storages are shown: NanoPhotometer Control Device and/or USB flash drive. A click on a storage folder shows on the left side the subfolders of that storage folder and on the right side the individual files. On the right side of the screen all saved result files of the selected folder are shown and can be opened by a long or double click.
  • Page 91: Stored Methods

    The stored methods icon opens the directories of folders containing methods stored by the user. ® On the left side of the screen all available directories/storages are shown: NanoPhotometer and/or USB flash drive. A click on a storage folder shows on the left side the subfolders of the storage folder and on the right side the method files.
  • Page 92: Preferences

    Within the Date and Time it is possible to set the actual date and time. Change the date and/or time by clicking on the date/time field. The selected time is shown below the date and time field. ® To change the time it is necessary to reboot the NanoPhotometer by clicking on the Set and Reboot button.
  • Page 93: About

    ANGUAGE ® In language settings, the user has the option to change the language of the NanoPhotometer to the following languages: English, Chinese, French, German, Japanese, Portuguese, Russian or Spanish. The language is changed for the user interface, printouts and saved Excel and PDF files.
  • Page 94: Illumination Sample Window

    NP80/N60/N50/C40 User Guide Version 3.1 LLUMINATION AMPLE INDOW Toggle switch to switch on/off the illumination of the sample window (for NP80/N60/N50 only) Note: Only available for NP80/N60/N50 models. NABLE OLUME ® Toggle switch to enable the submicroliter cell option in the NanoPhotometer C40.
  • Page 95: Warning Messages

    LANK ONTROL ® Toggle switch to switch on/off the Blank Control™ of the NanoPhotometer Note: Blank Control™ is available for all NanoVolume methods (for NP80/N60/N50). AMPLE UALITY ONTROL It is possible to change the upper and the lower limit of the ratio alert warning messages.
  • Page 96: Network

    ® NanoPhotometer NP80/N60/N50/C40 User Guide Version 3.1 ETWORK In Network preferences it is possible to choose between a Dynamic Host Configuration Protocol (DHCP) and a static network configuration. As default the DHCP protocol is selected. Connect ® the NanoPhotometer with the Ethernet and the IP is automatically set during the startup of the ®...
  • Page 97: W I F I

    / IPP compatible printers supporting PDF format, in the network. Note: IPP version 2.2 is required and some printer configuration settings might need to be ® changed in order to allow communication with the NanoPhotometer Enter the IP of the network printer to the input window.
  • Page 98: Report Configuration

    Note: If a printer is directly connected to the NanoPhotometer via USB, this printer will have the highest priority and will be the printer used by default when selecting Print on NanoPhotometer. In order to print utilizing a printer on the network, please disconnect the installed USB printer.
  • Page 99: Troubleshooting

    ® NanoPhotometer NP80/N60/N50/C40 User Guide Version 3.1 ROUBLESHOOTING SELF CALIBRATION TEST ® The NanoPhotometer self-calibration test is performed automatically every time the instrument is powered on. If the instrument passes the self-calibration test the home screen is shown. If the instrument does not pass the test, a message window will appear explaining the reason for the failed test along with the recommended solution.
  • Page 100: Assistance

    The Assistance menu includes: support, report a problem (only available for tablet and computer versions), software maintenance and legal as functions to help with any technical ® issues or questions that may arise with the NanoPhotometer Note: Assistance is not available on smartphones with screen sizes less than 7 inches. UPPORT Selecting support on the left side assistance menu will show the available options for contacting Implen.
  • Page 101: Oftware Aintenance

    REATE ® To create a log file insert a USB flash drive to the USB port of the NanoPhotometer . Click on “Create Log File”. The log (NPOS.log) file will be saved on the root folder of the USB flash drive.
  • Page 102: Install Printer Driver

    9. DYMO/HP printer is ready to use ® Note: In order to connect a printer to the NanoPhotometer , please do so from the Home Screen. Printers will not properly function if USB connection of printer is done from within a method.
  • Page 103: Contact Implen

    ® NanoPhotometer NP80/N60/N50/C40 User Guide Version 3.1 ONTACT MPLEN There is an option to contact Implen for instruments connected to the internet. For any support issues and questions please contact the Implen team directly: Europe, Asia, South Pacific, Middle East and Africa...
  • Page 104: Maintenance

    Good Laboratory Practice (GLP), Good Manufacturing Practice (GMP), or ISO9000-9004; the proper performance of the spectrophotometer has to be tested and proven ® on a regular basis with individually set intervals. Implen provides certified NanoPhotometer ® secondary standards as an optional accessory. These NanoPhotometer...
  • Page 105: Leaning And Eneral

    This message pops up twice. Between the first and second warning message, there is at least one hour ® battery power left for use of the NanoPhotometer under standard conditions. After the second warning the instrument will automatically begin shutting down within 10 to 15 seconds.
  • Page 106 Files are saved in the Download Folder of the Android tablet/smartphone directory. ® This message is shown on the NanoPhotometer when a method is open on another control device. Instrument connected to control device! Do you Click on OK and the measurements session is...
  • Page 107: Important Alert Messages

    Clean the nanovolume pedestal and the mirror in the pedestal head with 70% EtOH and distilled Measurement head not clean - please wipe ® water and then reboot the NanoPhotometer . If the pedestal and lid. message still appears please create a log file and...
  • Page 108 Implen Customer Support. Message appears if stored results or a stored ® method made on another NanoPhotometer type is Stored method/result was created for unavailable opened with an unavailable mode like Cuvette or mode NanoVolume/Cuvette/Submicroliter Cell! NanoVolume e.g.
  • Page 109: Warranty

    ® NanoPhotometer NP80/N60/N50/C40 User Guide Version 3.1 ARRANTY Implen guarantees that the product supplied has been thoroughly tested to ensure that it meets its published specification. The warranty included in the conditions of supply is valid for 12 months and is valid only if the product has been used according to the instructions supplied.
  • Page 110: Appendix

    Přístroj neotevírejte, jinak bude obsluha vystavena nebezpečí elektrické energie, UV záření a jemné vláknové optiky, nebo může dojít k poškození přístroje. Pokud používáte s přístrojem NanoPhotometer C40 buňku na submikrolitry, nezapomeňte ® před zahájením měření zakrýt měřicí hlavici víkem.
  • Page 111: Vybalení A Umístění

    Zkontrolujte u přístroje jakékoli známky poškození z přepravy. Pokud zjistíte jakákoli poškození, neprodleně informujte svého dodavatele. Zajistěte, aby předpokládané stanoviště pro instalaci splňovalo podmínky prostředí pro bezpečný provoz: vnitřní prostory nebo suché prostředí. Poznámka: Nevystavujte přístroj NanoPhotometer do blízkosti kapalin, chemikálií, deště, ® vlhkosti nebo prašného prostředí.
  • Page 112: Veiligheidsinformatie

    Open het instrument niet. Dit kan de gebruiker blootstellen aan elektrische stroom, UV-licht en gevoelige glasvezels en kan het instrument beschadigen. ® Indien de submicrolitercel wordt gebruikt met de NanoPhotometer C40 moet u voor de meting nagaan of het deksel op de meetkop is geplaatst.
  • Page 113: Uitpakken En Plaatsen

    Ga na of uw gewenste installatielocatie voldoet aan de omgevingsvereisten voor een veilig gebruik: alleen binnen en in droge omgevingen te gebruiken. ® Opmerking: Plaats uw NanoPhotometer niet in de buurt van vloeistoffen, chemische stoffen, regen, vocht of stoffige omgevingen.
  • Page 114: Appendix 3 - I

    N'ouvrez pas l'équipement car vous pourriez vous exposer à un courant électrique, de la lumière UV ou aux délicates fibres, ou encore endommager l'équipement. ® Si vous utilisez la cellule Sous-microlitre avec le NanoPhotometer C40, assurez-vous que le couvercle est bien en place sur la tête de mesure avant de mesurer.
  • Page 115: Déballage Et Positionnement

    : utilisation en intérieur ou dans un environnement sec. ® Remarque : ne placez pas votre NanoPhotometer à proximité de liquides, de produits chimiques, de précipitations, d'humidité ou d'environnements poussiéreux. Plage de températures de 10-40°C ; si vous utilisez le chauffage de la cuvette, la plage de températures est de 10-30°C.
  • Page 116 ® NanoPhotometer NP80/N60/N50/C40 User Guide Version 3.1 Mettez l'équipement sous tension à l'aide du bouton marche/arrêt qui se trouve sur son panneau arrière une fois que vous l'avez branché. L'instrument procédera à une série de vérifications d'autodiagnostic. Veuillez contacter immédiatement le fournisseur d'origine si vous rencontrez des difficultés techniques ou de manipulation d'échantillons.
  • Page 117: Sicherheitsinformationen

    Öffnen Sie auf keinen Fall das Gerät. Es besteht die Gefahr eines elektrischen Schlags, UV-Licht Freisetzung und Beschädigung der empfindlichen Faseroptik. ® Bei Verwendung der Submikroliter Messzelle in Verbindung mit dem NanoPhotometer C40 ist sicher zu stellen, dass vor jeder Messung der Deckel auf der eingesteckten Submikrolitermesszelle liegt.
  • Page 118 ® NanoPhotometer NP80/N60/N50/C40 User Guide Version 3.1 ® Hinweis: Das NanoPhotometer keinen großen Mengen an Flüssigkeiten, Regen, Feuchtigkeit oder staubiger Umgebung aussetzen. Temperaturbereich 10 - 40° C; Bei Verwendung der Küvettenheizung ist der Temperaturbereich 10 bis 30° C. Wenn das Gerät extremen Temperaturschwankungen ausgesetzt ist (z.B. Transport bei niedrigen Außentemperaturen), kann es notwendig sein das Gerät der Raumtemperatur...
  • Page 119: Informazioni Di Sicurezza

    ® Non poggiare oggetti in cima al NanoPhotometer ® Il NanoPhotometer con il gruppo batteria (versione portatile) deve essere spento durante il trasporto.
  • Page 120: Disimballaggio E Collocazione

    Accertare che il sito d’installazione proposto sia conforme ai requisiti ambientali per un utilizzo sicuro: ambiente chiuso o asciutto. ® Nota: non esporre il NanoPhotometer a liquidi, sostanze chimiche, pioggia, umidità o polvere. Intervallo di temperatura 10-40°C; se il riscaldamento avviene tramite la cuvetta, l’intervallo è di 10-30°C.
  • Page 121: Informacje Dotyczące Bezpieczeństwa

    ® ciała, aby zapobiec poczuciu dyskomfortu oraz obrażeniom ciała wskutek oddziaływania wysokiej temperatury. Nie wolno umieszczać żadnych przedmiotów na urządzeniu NanoPhotometer ® Przed przeniesieniem urządzenia NanoPhotometer z akumulatorem (wersji mobilnej) należy je ®...
  • Page 122: Rozpakowywanie I Umiejscowienie

    ® NanoPhotometer NP80/N60/N50/C40 User Guide Version 3.1 Uwaga: Należy unikać rozlewania próbek biologicznych na elementach urządzenia. Jeżeli dojdzie do rozlania, należy niezwłocznie zdezynfekować urządzenie zgodnie z procedurami laboratoryjnymi oraz instrukcją czyszczenia urządzenia (zob. 8 Maintenance). umieszczony na produkcie lub na dokumentach dodanych do produktu oznacza, że Symbol urządzenia nie wolno traktować...
  • Page 123 ® NanoPhotometer NP80/N60/N50/C40 User Guide Version 3.1 W przypadku wystąpienia problemów technicznych lub z próbką należy niezwłocznie skontaktować się z pierwotnym dostawcą urządzenia. Uwaga: Eksploatacja urządzenia w sposób niezgodny ze specyfikacją lub w warunkach niesprzyjających bezpiecznemu działaniu może zmniejszyć skuteczność jego zabezpieczeń i...
  • Page 124: Información De Seguridad

    No abra el instrumento, pues ello podría exponer al operario a corriente eléctrica, luz UV y fibra óptica sensible, o dañar el instrumento ® Si se usa la celda submicrolitro con el NanoPhotometer C40, asegúrese de que la tapa está colocada en el cabezal de medición antes de tomar la medida.
  • Page 125 Asegúrese de que el lugar donde desea instalar la unidad cumple las condiciones ambientales sobre funcionamiento seguro: uso en interiores o en un ambiente seco. ® Nota: No coloque el NanoPhotometer cerca de líquidos o productos químicos, ni en entornos con lluvia, humedad o polvo.
  • Page 126: Säkerhetsinformation

    över 60°C, eller i en explosiv atmosfär. ® För att förhindra obehag av eller skada från värmeexponering ska din NanoPhotometer inte läggas i ditt knä eller i närheten av någon kroppsdel.
  • Page 127: Uppackning Och Placering

    Kontrollera att din föreslagna installationsplats överensstämmer med de miljömässiga villkoren för säker användning: inomhusanvändning eller torr miljö. ® Obs: Låt inte din NanoPhotometer komma nära vätskor, kemikalier, regn, fukt eller dammiga miljöer. Temperaturområde 10-40°C; Om kuvettuppvärmning används är området 10-30°C.
  • Page 128: Appendix 9 - Instalação De

    Não abra o instrumento, dado que pode expor o operador à corrente elétrica, a luz UV e a delicadas fibras óticas, além do risco de o danificar. ® Se for usado o alvéolo submicroliter com o NanoPhotometer C40, certifique-se de que a tampa está colocada no ponto de medição, antes de proceder à medição.
  • Page 129: Desembalamento E Posicionamento

    ® Nota: Não instale o NanoPhotometer na proximidade de líquidos ou produtos químicos, nem à chuva ou em ambientes húmidos ou com poeiras. A amplitude da temperatura é de 10-40°C. Se for utilizada a cubeta de aquecimento, a amplitude é...
  • Page 130 ® NanoPhotometer NP80/N60/N50/C40 User Guide Version 3.1 Nota: Se este equipamento for utilizado de forma não especificada ou em condições ambientais não adequadas para o funcionamento em segurança, a proteção proporcionada pelo equipamento pode ficar comprometida e a garantia do instrumento pode ser anulada.
  • Page 131: Alphabetical Appendix

    ® NanoPhotometer NP80/N60/N50/C40 User Guide Version 3.1 LPHABETICAL PPENDIX Cuvette ............... 37, 41 Absorbance Ratio ............. 79 Calculations ............82 Data Transfer ............42 Measurement Protocol ......... 79 Date and Time............92 Accessories .............. 14 Delete Data .............. 35 Optional Accessories ........... 14 Didymium Glass Filter ..........
  • Page 132 Driver ..............102 DYMO ..............16 HP ................ 18 ® NanoPhotometer C40 ........... 12 Installation ............26 ® NanoPhotometer N50 ........... 11 Network ............... 97 ® NanoPhotometer N60 ........... 10 Printouts ............16, 18 ® NanoPhotometer NP80 .......... 9 Protein Assay NanoVolume ..........
  • Page 133 ® NanoPhotometer NP80/N60/N50/C40 User Guide Version 3.1 Safety Information ............ 21 Table area ..............31 Bezpečnostní informace ........110 Touch Screen ............104 Información de seguridad ........124 Trademarks ............102 Informacje dotyczące bezpieczeństwa ....121 Troubleshooting ............99 Informações de Segurança ........ 128 Informations de sécurité...

This manual is also suitable for:

Np80N60C40

Table of Contents