Table of Contents
Advertisement
Advertisement
Table of Contents

Related Manuals for Ninja CT800 Series


Summary of Contents for Ninja CT800 Series
- Page 1 CT800 Series INSTRUCTIONS ninjakitchen.com 1-877-646-5288...
- Page 2 120V, 60Hz Watts: 1500W PLEASE READ CAREFULLY AND KEEP FOR FUTURE REFERENCE. These instructions are designed to help you get a complete understanding of your new Ninja Chef Blender. If you have any questions, please call our Customer Service line at 1-877-646-5288. 1-877-646-5288...
-
Page 3: Table Of Contents
Important Safety Instructions ......3 Getting to Know Your Ninja Chef™ Blender ....7 Features . -
Page 4: Important Safety Instructions
IMPORTANT SAFETY INSTRUCTIONS PLEASE READ CAREFULLY BEFORE USE • FOR HOUSEHOLD USE ONLY WARNING To reduce the risk of injury, fire, electrical shock, or property damage, basic safety precautions must ALWAYS be followed, including the following numbered warnings and subsequent instructions. Read all instructions prior to using the Unplug the appliance from the outlet appliance and its accessories. - Page 5 13 DO NOT operate any appliance with 17 Before each use, inspect blade assemblies a damaged cord or plug, or after the for damage. If a blade is bent or damage is appliance malfunctions, or has been suspected, contact SharkNinja to arrange dropped or damaged in any manner.
- Page 6 IMPORTANT SAFETY INSTRUCTIONS PLEASE READ CAREFULLY BEFORE USE • FOR HOUSEHOLD USE ONLY WARNING To reduce the risk of injury, fire, electrical shock, or property damage, basic safety precautions must ALWAYS be followed, including the following numbered warnings and subsequent instructions. 23 During operation and handling of the 30 DO NOT blend hot ingredients or liquids appliance, avoid contact with moving...
- Page 7 35 If at any time the blender cup becomes 42 NEVER leave the appliance unattended warm to the touch, or steams or vents while in use. while blending, immediately stop blending 43 If you find unmixed ingredients sticking to ingredients and turn off the unit. the sides of the pitcher, use the included 36 DO NOT perform grinding operations tamper, with the lid locked on the pitcher,...
-
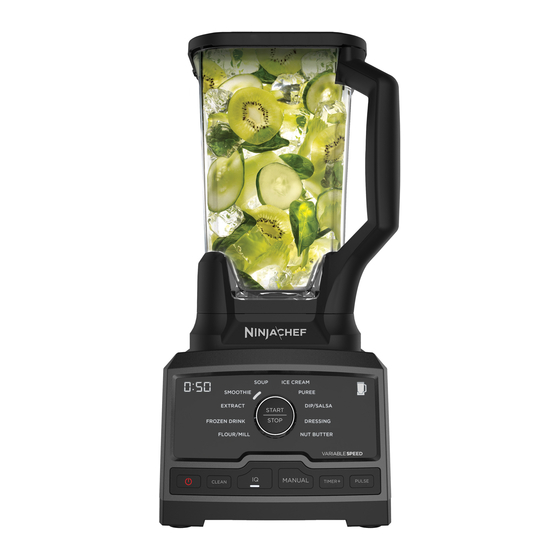
Page 8: Getting To Know Your Ninja Chef Blender
GETTING TO KNOW YOUR NINJA CHEF BLENDER ™ WELCOME! Congratulations on your purchase. Use this instruction manual to learn about the great features of your Ninja Chef blender. From assembly to use to maintenance, you will find it all in here. - Page 9 n i n j a k i tc h e n . c o m...
-
Page 10: Features
FEATURES IMPORTANT: Review all warnings on pages 3–6 before proceeding. DID YOU KNOW? • All containers and lids are BPA free. • All blades, containers, and lids are dishwasher safe. MODES: CLEAN To run the self-cleaning program, first add warm water to the CLEAN line and a couple drops of dishwashing soap to the pitcher. -
Page 11: Before First Use
BEFORE FIRST USE Remove all packaging materials from the unit. Exercise caution when handling the pitcher, as bottom blade assembly is sharp. 2 If included with your model, handle the Pro Extractor Blades Assembly by grasping around ® the perimeter of the blade assembly base. 3 Wash containers, lids, blade assemblies, and tamper in warm, soapy water using a dishwashing utensil with a handle to avoid direct contact with the blades. -
Page 12: Using Your 72 Oz. Pitcher
USING YOUR 72 OZ. PITCHER IMPORTANT: Review all warnings on pages 3–6 before proceeding. IMPORTANT: Hot ingredients are meant only for blending in the pitcher, NOT in the cup. TIP: To learn more about the unit’s programs, refer to page 9. TIP: Use the lid cap to easily add oil to emulsify dressings. - Page 13 3 Add ingredients to the pitcher, making 4 Place lid onto pitcher, then press down sure not to exceed the MAX LIQUID firmly, making sure that both side clips on line on the side of the pitcher. When lid fully snap onto lip of pitcher. Insert the blending any room temperature, cold, or lid cap into the lid and turn clockwise to freezing ingredients, such as beverages...
- Page 14 USING YOUR 72 OZ. PITCHER - CONT. IMPORTANT: Review all warnings on pages 3–6 before proceeding. IMPORTANT: As a safety feature, if the pitcher is not properly installed, a flashing “JAR” message will appear on the control panel. If this happens, repeat step 2 on page 11.
- Page 15 7 To remove the pitcher from 8 To remove the lid, pull up 9 When finished, unplug the motor base, turn the one of the side tabs, then the unit and release the pitcher counterclockwise lift off the lid. The pitcher motor base from the and then lift it off the motor can then be emptied.
-
Page 16: Using Your Single-Serve Cups
USING YOUR SINGLE-SERVE CUPS IMPORTANT: Review all warnings on pages 3–6 before proceeding. WARNING: DO NOT blend hot ingredients in the cup. Doing so may cause excessive pressure buildup, resulting in the risk of the user being burned. Hot blending is meant for the pitcher only. - Page 17 3 Place Pro Extractor Blades 4 Turn the Single-Serve Cup upside down Assembly on ® top of cup and rotate clockwise until sealed and install onto the motor base. Align the tightly. tabs on the cup with the slots on the base, then rotate cup clockwise until it clicks into place.
- Page 18 USING YOUR SINGLE-SERVE CUPS - CONT. IMPORTANT: Review all warnings on pages 3–6 before proceeding. IMPORTANT: As a safety feature, the timer will flash “JAR” and the motor will be disabled if the cup is not properly installed. If this happens, repeat step 4 on page 16.
- Page 19 7 To remove the cup from the 8 Remove the Pro Extractor 9 To enjoy your drink on the motor base, turn the cup Blades Assembly by go, place the Spout Lid ® counterclockwise and then twisting it counter- onto the Single-Serve Cup lift it off the motor base.
-
Page 20: Care & Maintenance
CARE & MAINTENANCE CLEANING NEVER directly spray the base or control panel with water or other liquids. Separate all parts. DO NOT use abrasive cloths/pads/brushes 2 Hand-Washing to clean the base or control panel, as this Wash containers, blade assemblies, lids, can dull or scratch the surface. -
Page 21: Troubleshooting Guide
TROUBLESHOOTING GUIDE WARNING: To reduce the risk of shock and unintended operation, turn off power and unplug unit before troubleshooting. Motor does not start or blade assembly does not rotate. • Make sure the pitcher or blender cup is securely placed on motor base. If “JAR” message appears on control panel, the pitcher or cup is not installed correctly. - Page 22 NOTES 1-877-646-5288...
-
Page 23: Warranty
ONE (1) YEAR LIMITED WARRANTY The 1-Year Limited Warranty applies to purchases made from authorized retailers of SharkNinja Operating LLC. Warranty coverage applies to the original owner and to the original product only and is not transferable. SharkNinja warrants that the unit shall be free from defects in material and workmanship for a period of 1 year from the date of purchase when it is used under normal household conditions and maintained according to the requirements outlined in this instruction manual, subject to the following conditions and exclusions. - Page 24 AUTO-IQ and PRO EXTRACTOR BLADES are registered trademarks of SharkNinja Operating LLC. NINJA CHEF is a trademark of SharkNinja Operating LLC. For SharkNinja U.S. Patent information, visit sharkninja.com/USPatents. © 2017 SharkNinja Operating LLC CT800�Series�IB�E�170710...
Need help?
Do you have a question about the CT800 Series and is the answer not in the manual?
Questions and answers