Ricoh SP 8400DN User Manual
Black and white
Hide thumbs
Also See for SP 8400DN:
- Manual (73 pages) ,
- Field service manual (2221 pages) ,
- Quick installation manual (2 pages)

Related Manuals for Ricoh SP 8400DN


Summary of Contents for Ricoh SP 8400DN
-
Page 1: User Guide
User Guide Getting Started Loading Paper Troubleshooting Information for This Printer For safe and correct use, be sure to read the Safety Information in Read This First before using the machine. -
Page 3: Table Of Contents
TABLE OF CONTENTS Manuals for This Machine..........................4 1. Getting Started Before You Start..............................7 How to Read the Manuals..........................7 Model-Specific Information...........................8 List of Options..............................9 Guide to Names and Functions of Components....................11 Guide to Functions of the Attention Light....................13 Guide to Functions of the Machine's Options....................16 Guide to Functions of the Machine's External Options................16 Guide to Functions of the Machine's Internal Options................17 Guide to the Names and Functions of the Machine's Control Panel............ - Page 4 Precautions for Loading Paper........................43 Loading Paper into Paper Trays........................43 Loading Paper into the Bypass Tray......................45 Loading Paper into Tray 3 (LCT).........................46 Loading Paper into the Large Capacity Tray (LCT)................... 48 Loading Orientation-fixed Paper or Two-sided Paper................49 Recommended Paper............................51 Recommended Paper Sizes and Types......................51 Printing from the Bypass Tray..........................
- Page 5 User Information on Electrical and Electronic Equipment (mainly Europe)......97 Note for the Battery and/or Accumulator Symbol (For EU countries only) (mainly Europe) ..................................98 Environmental Advice for Users (mainly Europe)..............98 Notes to users in the state of California (Notes to Users in USA) (mainly North America)..
-
Page 6: Manuals For This Machine
Manuals for This Machine The operating instructions of this machine are provided in the following formats: Format Manuals Printed manuals • Read This First • Start Guide • Quick Installation Guide CD-ROM • Driver Installation Guide Web page • Read This First •... - Page 7 Driver Installation Guide Describes how to install and configure each driver. This manual is included in the drivers CD. • Before you configure the extended security and authentication settings, refer to "Before Using This Machine" in the Security Guide. • You can see the following manuals on the Web page. •...
-
Page 9: Getting Started
1. Getting Started This section describes the symbols used in the manuals supplied with the printer, available options, and names and functions of components. Before You Start How to Read the Manuals Symbols used in the manuals This manual uses the following symbols: Indicates points to pay attention to when using the machine, and explanations of likely causes of paper misfeeds, damage to originals, or loss of data. -
Page 10: Model-Specific Information
1. Getting Started Notes The manufacturer shall not be responsible for any damage or expense that might result from the use of parts other than genuine parts from the manufacturer with your office products. For good output quality, the manufacturer recommends that you use genuine toner from the manufacturer. -
Page 11: List Of Options
Before You Start • Dimensions in this manual are given in two measurement units: metric and imperial. If your printer is a Region A model, refer to the metric units. If your printer is a Region B model, refer to the imperial units. - Page 12 1. Getting Started Option name Description Extended USB Board Type M19 Extended USB Board VM CARD Type P13 VM card PostScript3 Unit Type P13 Adobe PostScript 3 unit...
-
Page 13: Guide To Names And Functions Of Components
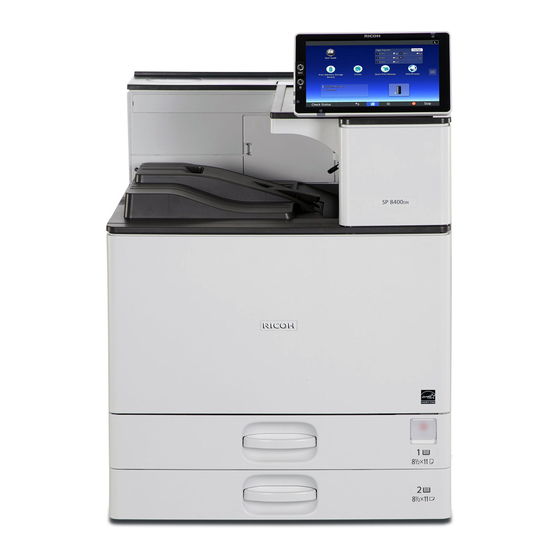
Guide to Names and Functions of Components Guide to Names and Functions of Components • Do not obstruct the machine's vents. Doing so risks fire caused by overheated internal components. Front and left view DUL005 1. Auxiliary Tray on the Paper Reversal Location Pull this tray to print on paper larger than A4 or 8 ×... - Page 14 1. Getting Started 7. Lower paper trays Load paper here. For details, see page 43 "Loading Paper". 8. Vents Prevent overheating. 9. Internal tray 1 Printed paper are delivered here. Front and right view DUL006 1. Right cover Open this cover when a paper jam occurs. 2.
-
Page 15: Guide To Functions Of The Attention Light
Guide to Names and Functions of Components 6. Lower right cover Open this cover when a paper jam occurs. Rear and left view DUL007 1. Vents Prevent overheating. Guide to Functions of the Attention Light This section introduces functions of the attention light. •... - Page 16 1. Getting Started CUV121 The attention light notifies the user by light when there is a paper jam or no paper is left. The colors of the lamp and their meanings are as follows: Lamp Status The bottom lamp lights blue. Printing The bottom lamp flashes blue.
- Page 17 Guide to Names and Functions of Components Lamp Status The top lamp flashes yellow. Warning (Example) • Toner has nearly run out. • Waste toner bottle is nearly full. • Paper has nearly run out. Read the message on the display panel, and then take appropriate action.
-
Page 18: Guide To Functions Of The Machine's Options
1. Getting Started Guide to Functions of the Machine's Options Guide to Functions of the Machine's External Options DUL001 1. Tray 3 (LCT) Consists of two paper trays. You can load paper even if Tray 3 (LCT) is in use. It is okay to pull out the left half of the tray while Tray 3 (LCT) is in use. -
Page 19: Guide To Functions Of The Machine's Internal Options
Guide to Functions of the Machine's Options 5. Internal Multi-Folding unit The Internal Multi-Folding unit can apply the following folds: Half Fold, Letter Fold-out, Letter Fold-in, and Z- fold. 6. Mailbox Sorts printed paper. Consists of mailbox output trays 1–4. 7. - Page 20 1. Getting Started Allows you to add an Ethernet port to the printer and use two IP addresses at the same time. To attach this option, see "Installing the Interface Units", Operating Instructions. • Extended USB Board Allows you to add a USB port. To attach this option, see "Installing the Interface Units", Operating Instructions.
-
Page 21: Guide To The Names And Functions Of The Machine's Control Panel
Guide to the Names and Functions of the Machine's Control Panel Guide to the Names and Functions of the Machine's Control Panel DNE093 1. Display panel This is a touch panel display that features icons, keys, shortcuts, and widgets that allow you to navigate the screens of the various functions and applications and provide you with information about operation status and other messages. -
Page 22: Changing The Display Language
1. Getting Started Changing the Display Language You can change the language used on the display. English is set as default. Press [Home] ( ) at the bottom of the screen in the center. Flick the screen to the left, and then press the [Change Langs. Widget] icon. Select the language you want to display. -
Page 23: How To Use The [Home] Screen
How to Use the [Home] Screen How to Use the [Home] Screen The [Home] screen is set as the default screen when the machine is turned on. One icon is assigned to each function, and these icons are displayed on the [Home] screen. You can add shortcuts to frequently used Web pages to the [Home] screen. - Page 24 1. Getting Started 5. Application list icon Press to display the application list. You can create shortcuts to the applications on the [Home] screen. To use an application displayed in the [Widgets] tab and [Program] tab, create a shortcut for the application on the [Home] screen.
-
Page 25: Main Icons On The [Home] Screen
How to Use the [Home] Screen • Machine Features • Maintenance: Print • Maintenance: Image • Counter • Inquiry • Address Book Management • Tray Paper Settings • Current Job / Job History • The [Home] screen is set as the default screen when the machine is turned on. You can change this default setting under Function Priority. -
Page 26: [Printer (Classic)] Screen
1. Getting Started Icon Description Application Site Press to display Application site. Allows you to download applications for your machine. For details, see "How to Use the Application Site", Operating Instructions. User Tools Press to display the screen for the machine's initial settings. System Mes. -
Page 27: [Information] Screen
How to Use the [Home] Screen 2. Operational status or messages Displays current machine status, such as "Ready", "Offline", and "Printing...". Information about the print job (user ID and document name) appears in this section. 3. [Print from Memory Storage Device] Press to display the screen for printing files stored on memory storage devices directly. -
Page 28: Possible Operations On The Screen
1. Getting Started DUL012 1. [Prev.] / [Crnt.] Press to switch between the [Information] screen of the previous count period and that of the current count period. 2. Paper Reduction Shows the amount of paper saved by using the duplex and combine printing functions. The figure indicates the percentage of paper saved from the total of all the paper used. - Page 29 How to Use the [Home] Screen Place your thumb and forefinger on the screen, and then pinch the fingers together to zoom out the screen. Double-tapping can also be effective for this operation. DNE103 • Pinch-out Place your thumb and forefinger on the screen, and then spread the fingers apart to zoom in the screen.
-
Page 30: Adding Icons To The [Home] Screen
1. Getting Started DNE101 • Drag Slide your finger while pressing the screen. You can move icons, folders, etc., to where you want to place them. DNE111 Adding Icons to the [Home] Screen Adding shortcuts to the [Home] screen You can add shortcuts to the machine's functions. You can display the icons for the machine's functions and the embedded software applications after you delete them from the [Home] screen. - Page 31 How to Use the [Home] Screen Drag the icon to where you want to place it on the screen. If you want to add a shortcut to [Printer (Classic)], proceed to Step 6. Select [Printer (Classic)]. Adding shortcuts to bookmarks on the [Home] screen You can add shortcuts to bookmarks that have been registered in favorites in the Web Browser to the [Home] screen.
-
Page 32: Turning On/Off The Power
1. Getting Started Turning On/Off the Power Turning On/Off the Power • When you push the main power switch, wait at least 10 seconds after it is confirmed that the main power indicator has lit up or gone out. The main power switch is on the right side of the machine. When this switch is turned on, the main power turns on and the main power indicator on the right side of the control panel lights up. -
Page 33: Saving Energy
Turning On/Off the Power Turning off the main power • When disconnecting the power cord from the wall outlet, always pull the plug, not the cord. Pulling the cord can damage the power cord. Use of damaged power cords could result in fire or electric shock. - Page 34 1. Getting Started • Open the front cover or right cover • When a machine is in Fusing Unit Off mode, the main power indicator is lit. In Sleep mode, the main power indicator flashes slowly. • The energy saving functions will not operate in the following cases: •...
-
Page 35: Accessing User Tools
Accessing User Tools Accessing User Tools This section describes how to access the User Tools menu. User Tools allow you to change or set defaults, and have eight types of menus: • Screen Features Specify the settings of the control panel. •... -
Page 36: Quitting User Tools
1. Getting Started Select the settings you want to change. To change the user tool in [System Settings], press [Machine Features], and then press [System Settings]. Change settings by following instructions on the display, and then press [OK]. Quitting User Tools This section describes how to quit the settings of User Tools. -
Page 37: Using Web Image Monitor
Using Web Image Monitor Using Web Image Monitor Using Web Image Monitor, you can check the machine status and change settings. • You cannot configure the machine settings using Web Image Monitor from a computer connected to the USB device server's network. Be sure to access Web Image Monitor from a computer connected to the machine's network. -
Page 38: Displaying Top Page
1. Getting Started Displaying Top Page This section explains the Top Page and how to display Web Image Monitor. • When entering an IPv4 address, do not begin segments with zeros. For example: If the address is "192.168.001.010", you must enter it as "192.168.1.10". Start your web browser. - Page 39 Using Web Image Monitor 5. Work area Display the contents of the item selected in the menu area.
-
Page 40: Replenishing And Replacing Consumables
1. Getting Started Replenishing and Replacing Consumables This section explains precautions for adding toner and staples, and how to replace the other consumables. Adding Toner • Do not incinerate toner (new or used) or toner containers. Doing so risks burns. Toner will ignite on contact with naked flame. - Page 41 Replenishing and Replacing Consumables • If toner or used toner is swallowed, dilute by drinking a large amount of water. Consult a doctor if necessary. • When removing jammed paper or replacing toner, avoid getting toner (new or used) on your clothing.
-
Page 42: Adding Staples
1. Getting Started Adding Staples • When closing the finisher, keep hands clear of the finisher's upper surface. • Stapling failures or jams may occur if you use a staple cartridge other than that recommended. Follow the instruction on the screen regarding how to add staples. •... - Page 43 Replenishing and Replacing Consumables • Purchasing and storing extra waste toner bottles is recommended. • Before removing the waste toner bottle from the printer, spread paper or some other material around the area to keep toner from dirtying your workspace. Maintenance Kit A Replace the Maintenance Kit A when the following message appears on the display: "Replacement of Maintenance Kit A will soon be necessary.
- Page 44 1. Getting Started...
-
Page 45: Loading Paper
2. Loading Paper This chapter describes available trays for each paper size and type, and explains how to load paper in paper trays. Loading Paper Precautions for Loading Paper • When loading paper, take care not to trap or injure your fingers. •... - Page 46 2. Loading Paper • When loading a low number of sheets, be sure not to squeeze the side fences in too tightly. If the side fences are squeezed too tightly against the paper, the edges may crease, thin paper may wrinkle, or the paper may misfeed.
-
Page 47: Loading Paper Into The Bypass Tray
Loading Paper • Various sizes of paper can be loaded in the paper trays by adjusting the positions of side fences and end fence. For details, see "Changing the Paper Size in Paper Trays", Operating Instructions. • You can load envelopes in the paper trays. When loading envelopes, place them in the correct orientation. -
Page 48: Loading Paper Into Tray 3 (Lct)
2. Loading Paper DCG018 • When you use the bypass tray, it is recommended to load the paper in orientation. • Certain types of paper might not be detected properly when placed on the bypass tray. If this happens, remove the paper and place it on the bypass tray again. •... - Page 49 Loading Paper • When paper loaded in the right side of Tray 3 (LCT) runs out, paper on the left is automatically shifted to the right. Do not pull out Tray 3 (LCT) while the tray is moving paper; wait until sounds stop coming from the tray.
-
Page 50: Loading Paper Into The Large Capacity Tray (Lct)
2. Loading Paper CVA019 Carefully push the paper tray fully in. • You can load paper even if Tray 3 (LCT) is in use. It is okay to pull out the left half of the tray while Tray 3 (LCT) is in use. •... -
Page 51: Loading Orientation-Fixed Paper Or Two-Sided Paper
Loading Paper Load paper into the paper tray with the print side down. Do not stack paper over the limit mark. DRY225 Close the right cover of the large capacity tray (LCT). Loading Orientation-fixed Paper or Two-sided Paper Orientation-fixed (top to bottom) or two-sided paper (for example, letterhead paper, punched paper, or copied paper) might not be printed correctly, depending on how the originals and paper are placed. - Page 52 2. Loading Paper Print Large capacity tray Trays 1–4 Tray 3 (LCT) Bypass tray side (LCT) One- sided Two- sided • To print on letterhead paper when [Auto Detect] is specified for [Letterhead Setting], you must specify [Letterhead] as the paper type in the printer driver's settings. •...
-
Page 53: Recommended Paper
Recommended Paper Recommended Paper Recommended Paper Sizes and Types This section describes recommended paper sizes and types. • If you use paper that curls, either because it is too dry or too damp, a staple clogging or paper jam may occur. •... - Page 54 2. Loading Paper Paper type and weight Paper size Paper capacity 60–300 g/m (16 lb. Bond– Select the paper size using the 550 sheets 110 lb. Cover) Tray Paper Settings menu Plain Paper 1–Thick Paper 4 A5 , A6 , B6 JIS , 11 ×...
- Page 55 Recommended Paper *1 Adjust the supporting side fence before loading B4 JIS , A3 , or 11 × 17 paper into Trays 3–4. *2 When loading paper with a vertical length of more than 279.4 mm (11.0 inches) in Tray 1, use paper that has a horizontal width of 420 mm (16.6 inches) or less.
- Page 56 2. Loading Paper Paper type and weight Paper size Paper capacity 52–300 g/m (14 lb. Bond– Custom size • 100 sheets (up to 10 mm 110 lb. Cover) in height) Thin Paper–Thick Paper 4 • Thick Paper 1: 40 sheets Vertical: 90.0–304.8 mm •...
- Page 57 Recommended Paper Paper type and weight Paper size Paper capacity 60–300 g/m (16 lb. Bond– 1000 sheets × 2 110 lb. Cover) Plain Paper 1–Thick Paper 4 × 11 *1 To load paper any of the sizes specified above, contact your service representative. Large capacity tray (LCT) Paper type and weight Paper size...
- Page 58 2. Loading Paper Paper Thickness Paper weight Thick Paper 3 221–256 g/m (80 lb. Cover–140 lb. Index) Thick Paper 4 257–300 g/m (140 lb. Index–110 lb. Cover) *1 Print quality will decrease if the paper you are using is close to the minimum or maximum weight. Change the paper weight setting to thinner or thicker.
-
Page 59: Thick Paper
Recommended Paper • Remove printed sheets one by one. • When loading translucent paper: • When loading translucent paper, always use long grain paper, and set the paper direction according to the grain. • Translucent paper easily absorbs humidity and becomes curled. Remove curl in the translucent paper before loading. - Page 60 2. Loading Paper • Select [Thick Paper 1], [Thick Paper 2], [Thick Paper 3], or [Thick Paper 4] as the paper thickness in [Tray Paper Settings]. • Even if thick paper is loaded as described above, normal operations and print quality might still not be possible, depending on the paper type.
- Page 61 Recommended Paper Types of envelopes Trays 1–4 Bypass tray Side-opening envelopes • Flaps: closed • Flaps: closed • Bottom side of envelopes: • Bottom side of envelopes: toward the back of the machine toward the back of the machine • Side to be printed: face up •...
- Page 62 2. Loading Paper • Certain types of envelopes might come out creased, dirtied, or misprinted. If you are printing a solid color on an envelope, lines may appear where the overlapped edges of the envelope make it thicker.
-
Page 63: Printing From The Bypass Tray
Printing from the Bypass Tray Printing from the Bypass Tray • If you select [Machine Setting(s)] in [Bypass Tray] under [Tray Setting Priority] in [System] of the Printer Features menu, the settings made using the control panel have priority over the printer driver settings. -
Page 64: Specifying Thick Paper, Thin Paper, Or Ohp Transparencies For Paper Type Using The Control Panel
2. Loading Paper Press [Printer Bypass Paper Size]. Press [Custom Size]. If a custom size is already specified, press [Change Size]. Press [Horizontal]. Enter the horizontal size using the number keys, and then press [ ]. Press [Vertical]. Enter the vertical size using the number keys, and then press [ ]. Press [OK] twice. - Page 65 Printing from the Bypass Tray Select the proper items, according to the paper type you want to specify. • Press [OHP (Transparency)] on the [Paper Type] area when loading OHP transparencies. • To load thin or thick paper, press [Plain: Hidden] on the [Paper Type] area, and then select the appropriate paper thickness in the [Paper Thickness] area.
- Page 66 2. Loading Paper...
-
Page 67: Troubleshooting
3. Troubleshooting This chapter provides solutions to common problems and it also explains how to correct unwanted print results. When the Machine Makes a Beeping Sound The following table describes the meaning of the various beep patterns that the machine issues to alert users about left originals and other machine conditions. -
Page 68: When A Status Icon Is Displayed
3. Troubleshooting When a Status Icon Is Displayed This section describes the status icons displayed when the machine requires the user to remove misfed paper, to add paper, or to perform other procedures. Status Icon Status : Paper Misfeed icon Appears when a paper misfeed occurs. -
Page 69: When The Indicator Lamp For [Check Status] Is Lit Or Flashing
When the Indicator Lamp for [Check Status] Is Lit or Flashing When the Indicator Lamp for [Check Status] Is Lit or Flashing If the indicator lamp for [Check Status] lights up or flashes, press [Check Status] to display the [Check Status] screen. - Page 70 3. Troubleshooting The following table explains problems that cause the indicator lamp for [Check Status] to light or flash. Problem Cause Solution Documents and reports do The paper output tray is full. Remove the prints from the tray. not print out. Documents and reports do There is no paper left.
-
Page 71: When You Have Problems Operating The Machine
When You Have Problems Operating the Machine When You Have Problems Operating the Machine Problem Cause Solution The indicator lamp remains In some cases, the machine Before you press [Energy Saver], lit and the machine does not does not enter Sleep mode check that Sleep mode can be enter Sleep mode even when [Energy Saver] is... - Page 72 3. Troubleshooting Problem Cause Solution Misfeeds occur frequently. Using curled paper often • Flatten the paper with your hands causes misfeeds, soiled to straighten out the curl. paper edges, or slipped • Load the paper upside down so positions while stack printing that the curled edges face is performed.
- Page 73 When You Have Problems Operating the Machine Problem Cause Solution Misfeeds occur frequently. There is a foreign object on • Remove the misfed paper. For the finisher tray. details about removing jammed paper, see page 92 "Removing Jammed Paper". • Do not place anything on the finisher tray.
- Page 74 3. Troubleshooting Problem Cause Solution The function does not run or The function cannot be Wait a while. When the Address Book cannot be used. performed while the Address backup is complete, the function will Book is being backed up be performed.
-
Page 75: If Usb Connection Fails
If USB Connection Fails If USB Connection Fails Problem Cause Solution The machine is not The USB cable is not Disconnect the USB cable, and turn off automatically recognized. connected properly. the machine, and then turn the machine back on. When the [Home] screen appears, connect the USB cable again. -
Page 76: Messages Displayed When You Use The Printer Function
3. Troubleshooting Messages Displayed When You Use the Printer Function This section describes the principal messages that appear on the display panel, error logs or reports. If other messages appear, follow their instructions. Messages Displayed on the Control Panel When You Use the Printer Function •... - Page 77 Messages Displayed When You Use the Printer Function Message Cause Solution "Load following paper in n. The printer driver settings are Check that the printer driver settings To force print, select incorrect or the tray does not are correct, and then load paper of another tray and press contain paper of the size the size selected in the printer driver...
- Page 78 3. Troubleshooting Message Cause Solution "Parallel I/F board has a An error has occurred in the Turn off the power, and then back on problem." IEEE 1284 interface board. again. If the message appears again, contact your service representative. "Printer font error." An error has occurred in the Contact your service representative.
-
Page 79: Messages Printed On The Error Logs Or Reports When You Use The Printer Function
Messages Displayed When You Use the Printer Function Message Cause Solution "Unable to access the • An error occurred Save the file to a different memory specified memory storage when the machine storage device, and then print again. device." accessed the memory storage device or a file stored on the memory storage device. - Page 80 3. Troubleshooting Message Cause Solution "Error occurred while The [Enter User Text:] field On the printer driver's [Detailed processing an Unauthorized on the [Unauthorized Copy Settings] tab, click [Effects] in "Menu:". Copy Prevention job. Job Prevention for Pattern Select [Unauthorized Copy cancelled."...
-
Page 81: When Other Messages Appear
When Other Messages Appear When Other Messages Appear Message Cause Solution "Firmware update will start. Automatic firmware update • If you want to start the firmware Press [OK]. It will start is enabled and it is the time update, press [OK], or configure automatically after 30 for an automatic update. -
Page 82: When Problems Occur While Logging In
3. Troubleshooting Message Cause Solution "Internal cooling fan is Large print runs will cause The fan will emit noise, but this is active." the machine's interior to heat normal and the machine will be up, triggering the cooling operable while the fan is running. fan. -
Page 83: When You Cannot Print
When You Cannot Print When You Cannot Print Cause Solution The power is off. For details about how to turn on the power, see page 30 "Turning On/Off the Power". The cause is displayed on the screen of Check the error message or warning status on the the control panel. - Page 84 3. Troubleshooting Cause Solution If the machine is using wireless LAN, SSID Check that the SSID is correctly set by using the settings are incorrect. machine's display panel. For details about SSID setting, see "Wireless LAN", Operating Instructions. If the machine is using wireless LAN, the Check access point settings when wireless LAN is used in receiver's MAC address may be the infrastructure mode.
-
Page 85: Other Printing Problems
Other Printing Problems Other Printing Problems This section describes likely causes of and possible solutions for problems that can occur when printing from a computer. When you cannot print clearly Problem Cause Solution The printed image is Settings for thick paper have PCL 5e smudged. - Page 86 3. Troubleshooting Problem Cause Solution Images smudge when The specified paper type PCL 5e rubbed. (Toner is not fixed.) and the paper that is On the printer driver's [Paper] actually loaded might be tab, select a proper paper type in different.
- Page 87 Other Printing Problems Problem Cause Solution A solid line is printed as a Dither patterns do not match. Change the dithering settings on the dashed line or appears printer driver. For details about the blurred. dithering settings, see the printer driver Help.
- Page 88 3. Troubleshooting When paper is not fed properly Problem Cause Solution PCL 5e Paper is not fed from the When you are using a selected tray. Windows operating system, On the printer driver's [Paper] printer driver settings tab, select the desired input tray in override those settings the "Input Tray:"...
- Page 89 Other Printing Problems Problem Cause Solution Misfeeds occur frequently. The paper is wrinkled or has • Use recommended paper. For been folded or creased. details about recommended paper, see page 51 "Recommended Paper Sizes and Types". • Use paper that has been stored in the recommended temperature and humidity conditions.
- Page 90 3. Troubleshooting Problem Cause Solution Edges of sheets are creased. You are using non- Use recommended paper. For details recommended paper. about recommended paper, see page 51 "Recommended Paper Sizes and Types". Duplex printing cannot be You have loaded paper that Change the paper.
- Page 91 Other Printing Problems Problem Cause Solution It takes a long time to Photographs and other If the Data In indicator is flashing, the complete a print job. data- intensive pages take a printer has received data. Wait for a long time for the machine to moment.
- Page 92 3. Troubleshooting Problem Cause Solution PDF files cannot print or PDF PDF files are password- To print password-protected PDF files, direct printing cannot be protected. enter the password in the [PDF Menu] performed. or on Web Image Monitor. For details about printing PDF files, see "PDF Menu", Operating Instructions or Web Image Monitor Help.
- Page 93 Other Printing Problems Problem Cause Solution A print process using • A communication error • Move the machine away from the wireless LAN is slow. might have occurred. wireless LAN device. • Interference from other • If there are active wireless LAN wireless LAN devices devices nearby, move the can reduce data...
-
Page 94: Removing Jammed Paper
3. Troubleshooting Removing Jammed Paper • The inside of the machine could be very hot. Do not touch the parts with a label indicating the "hot surface." Otherwise, an injury might occur. • Some of this machine's internal components get very hot. For this reason, take care when removing misfed paper. - Page 95 Removing Jammed Paper DUL208 Remove the jammed paper by following the procedures that are displayed on the screen. • When [Next] or [Previous] is displayed on the screen. After each step is complete, press [Next]. To go back to the previous step, press [Previous]. When the jammed paper is removed, restore the machine to the original state.
- Page 96 3. Troubleshooting...
-
Page 97: Information For This Printer
4. Information for This Printer This chapter describes environmental precautions and regulations. Information on Environmental Regulations ENERGY STAR Program ® ENERGY STAR Program Requirements for Imaging Equipment ® This company is a participant in the ENERGY STAR Program. This machine is compliant with the regulations specified by the ®... - Page 98 4. Information for This Printer • The default delay time the machine waits before entering Sleep mode is 1 minute. This default time can be changed. • The machine can print jobs from computers while in Sleep mode. Specification • (mainly Europe and Asia) Specification Reduced electrical consumption...
-
Page 99: User Information On Electrical And Electronic Equipment (Mainly Europe)
Information on Environmental Regulations • Depending on which embedded software application is installed on it, the machine might take longer than indicated to enter Sleep mode. User Information on Electrical and Electronic Equipment (mainly Europe) Users in the countries where this symbol shown in this section has been specified in national law on collection and treatment of E-waste Our Products contain high quality components and are designed to facilitate recycling. -
Page 100: Environmental Advice For Users (Mainly Europe)
4. Information for This Printer Üretici: Ricoh Company, Ltd. 8-13-1 Ginza, Chuo-ku, Tokyo 104-8222 Japan +81-36278-2111(English only/Sadece İngilizce) Note for the Battery and/or Accumulator Symbol (For EU countries only) (mainly Europe) In accordance with the Battery Directive 2006/66/EC Article 20 Information for end-users Annex II, the above symbol is printed on batteries and accumulators. - Page 101 For details about the return program, please refer to the Web page below or consult your service person. https://www.ricoh-return.com/ Energy efficiency The amount of electricity a machine consumes depends as much on its specifications as it does on the way you use it.
-
Page 102: Trademarks
4. Information for This Printer Trademarks Adobe, PostScript, and PostScript 3 are either registered trademarks or trademarks of Adobe Systems Incorporated in the United States and/or other countries. Firefox is a registered trademark of the Mozilla Foundation. Google and Chrome are trademarks of Google Inc. ®... - Page 103 Trademarks • The product names of Windows 8.1 are as follows: ® ® Microsoft Windows ® ® Microsoft Windows 8.1 Pro ® ® Microsoft Windows 8.1 Enterprise • The product names of Windows 10 are as follows: ® ® Microsoft Windows 10 Home Premium ®...
- Page 104 4. Information for This Printer...
-
Page 105: Index
INDEX Internal options............Internal tray 1............Adding toner............Attention Light..........13, 17 Auxiliary tray on the paper reversal location..Label paper............Large capacity tray..........LCT..........16, 46, 48, 54, 55 Beeping pattern............. Loading paper........43, 45, 46, 48 Bridge unit.............. Logging in the machine......... - Page 106 Privilege..............Problem..............Recommended paper........... Region A..............Region B..............Removing jammed paper........Replacing consumables........Replenishing consumables........Right cover............. Shortcut icon..........21, 28, 29 Sleep mode............Status icon.............. Status indicator............Symbols..............Thick paper............Trademarks............Translucent paper..........Tray................. Tray 1..............Tray 2..............Tray 3..........16, 46, 51, 54 Tray 4..............
- Page 107 © 2016...
- Page 108 M0AN-7109...
Need help?
Do you have a question about the SP 8400DN and is the answer not in the manual?
Questions and answers