Table of Contents
Advertisement
Advertisement
Table of Contents

Subscribe to Our Youtube Channel
Related Manuals for MyRepublic Wi-Fi Halo

Summary of Contents for MyRepublic Wi-Fi Halo
- Page 1 Wi-Fi Halo Manual...
-
Page 2: Table Of Contents
How to connect via WPS How to limit device access (parental controls) How to set up port forwarding on your Wi-Fi Halo How to set up your Wi-Fi Halo as an access point Troubleshooting Power cycling your Wi-Fi Halo Factory resetting your Wi-Fi Halo You have forgotten your Wi-Fi Halo’s Wi-Fi Password... -
Page 3: Product Overview
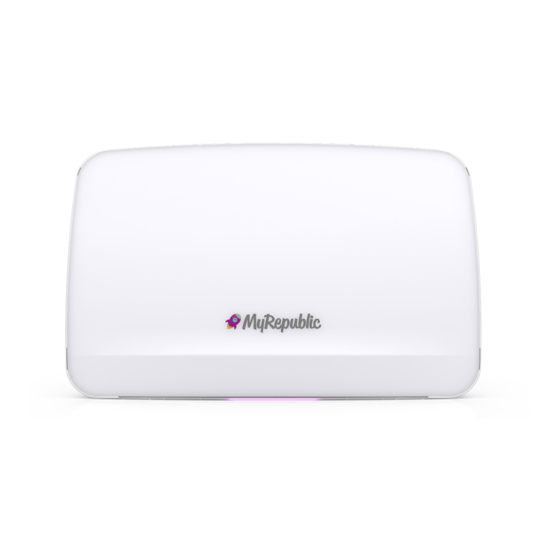
Product Overview... - Page 4 Product Overview MyRepublic Wi-Fi Halo The MyRepublic Wi-Fi Halo is a AC2200 dual-band Wi-Fi Gigabit router. Using the latest 802.11ac standard, MU-MIMO and powerful beamforming technology, the Wi-Fi Halo is designed to support multiple devices and HD video streams simultaneously.
-
Page 5: Product Contents
Here are the items you should receive along with your MyRepublic Wi-Fi Halo. Ethernet Cable MyRepublic Wi-Fi Halo Wi-Fi Security Card Power Adapter Note: • If you find any of your product contents damaged or missing, please contact MyRepublic customer support at myservice@myrepublic.com.sg or call 6717 1680 for further assistance. -
Page 6: Technical Specifications
Product Overview Technical specifications Main Processor USB Master Capability • Broadcom BCM63139 • 1 USB 3.0 Interfaces Memory Voice • 512 MB RAM (DDR3) • 1 FXS port • 256 MB Flash Dimensions LED Indicators • 265mm X 160mm X 60mm •... -
Page 7: Hardware Features
Product Overview Hardware features Status Light Green : Halo is starting up Purple: Halo is working Wi-Fi Light Flashing Orange: Halo is connecting to the internet Flashing Blue: Halo working, no LAN cable plugged in WAN port Steady Orange: Halo working, no internet detected Red: Hardware/software failure Status... -
Page 8: Setting Up: Basics
Product Overview Setting Up: Basics... -
Page 9: Your Home Network Equipment Setup
Product Overview Your home network equipment setup Termination Point (TP) Power Power Source Source Wi-Fi Halo ONT (modem) Ethernet Cable Ethernet Cable... -
Page 10: How To Set Up Your Wi-Fi Halo
Termination Point (TP) and turned on for at least 2 minutes before setting up your Wi-Fi Halo. There should also be no red or yellow lights on your ONT. 1. Place your Wi-Fi Halo in a location that is away from direct sunlight, metal equipment and other devices that may interfere or cause Wi-Fi signal loss (e.g. - Page 11 Note: • When connecting to your Wi-Fi Halo wirelessly, ensure that your wireless device is configured to obtain an IP address automatically. Most devices are usually configured this way. • If you’re having difficulties connecting wirelessly, your device may need to be configured in a...
- Page 12 Wi-Fi Halo (these LAN ports are coloured yellow). Note: • When connecting to your Wi-Fi Halo wirelessly, ensure that your wireless device is configured to obtain an IP address automatically. Most devices are usually configured this way. • If you’re having difficulties connecting wirelessly, your device may need to be configured in a...
-
Page 13: How To Log Into Your Wi-Fi Halo Router Management Console
How to log into your Wi-Fi Halo Router Management Console 1. Once connected to Wi-Fi Halo, open your web browser (it can be Chrome, Firefox or Internet Explorer) and type “http://192.168.1.1” into your web browser’s address bar. Press Enter to load the webpage. -
Page 14: How To Use The Quick Setup Wizard
Setting Up: Basics How to use the Quick Setup Wizard 1. Log in to your Wi-Fi Halo’s Router Management Console (please refer to the previous section if you need instructions on how to do so). 2. After successfully logging in, click on the “Quick Setup Wizard” button in the upper right corner of the main page. - Page 15 • If you ever forget your Router Management Console password and need to access the Console, you will need to perform a factory reset on your Wi-Fi Halo. You can find the instructions on how to perform a factory reset in the later pages of this manual.
- Page 16 Setting Up: Basics 6. Wi-Fi Setup • The Wi-Fi Halo already has 2.4GHz and 5GHz Wi-Fi networks set up by default. You do not need to make any changes here unless you want to change your Wi-Fi network name (SSID) or Wi-Fi network password.
- Page 17 Setting Up: Basics 7. Summary The final step of the Setup Wizard is a summary of the information taken from the previous steps. Review your settings and click the “Finish” button to apply all the changes.
-
Page 18: Setting Up: Advanced
Setting Up: Advanced Setting Up: Advanced... -
Page 19: How To Change The Password Of Your Wi-Fi Halo Router Management Console
How to change the password of your Wi-Fi Halo Router Management Console 1. Log in to your Wi-Fi Halo’s Router Management Console (a previous section of this manual has instructions on how to do so). 2. Once signed in, click on the “Access Control” section. - Page 20 • If you ever forget your Router Management Console password and need to access the Console, you will need to perform a factory reset on your Wi-Fi Halo. You can find the instructions on how to perform a factory reset in the later pages of this manual.
-
Page 21: How To Change Your Wi-Fi Network Name And Password
How to change your Wi-Fi network name and password 1. Log in to your Wi-Fi Halo’s Router Management Console (a previous section of this manual has instructions on how to do so). 2. Click on the gear icon next to “Wi-Fi 2.4GHz” or “Wi-Fi 5GHz” network, depending on which Wi-Fi network’s settings you would like to edit. - Page 22 Setting Up: Advanced 4. Under “Security”, you can change your Wi-Fi network’s password by entering the password you prefer in the “Password” field. Click the “Apply” button. 5. A window will appear to remind you that changing your Wi-Fi name or password will cause your current wireless connections to be disrupted.
-
Page 23: How To Change Your Wi-Fi Halo's Wi-Fi Channels
Setting Up: Advanced How to change your Wi-Fi Halo’s Wi-Fi channels 1. Log in to your Wi-Fi Halo’s Router Management Console (please refer to the previous section if you need instructions on how to do so). 2. Click on the gear icon next to “Wi-Fi 2.4GHz” or “Wi-Fi 5GHz” network, depending on which Wi-Fi network’s settings you would like to edit. - Page 24 Setting Up: Advanced There should be a drop-down list of available Wi-Fi channels. Select the Wi-Fi channel you would like this Wi-Fi network to use and the “Apply” button to continue. Note: • To know which Wi-Fi channel is best to use, we recommend using a Wi-Fi scanner tool to check which are the least congested Wi-Fi channels in your area.
- Page 25 Setting Up: Advanced 4. A window will appear to remind you that changing your Wi-Fi channel settings may cause your current wireless connections to be disrupted. If you experience any interruptions, simply reconnect your device to the Wi-Fi network. 5. Once the changes are done, you should see a message appear stating “Data successfully saved”.
-
Page 26: How To Enable A Guest Wi-Fi Network (2.4Ghz/5Ghz)
Setting Up: Advanced How to enable a guest Wi-Fi network (2.4GHz/5GHz) 1. Log in to your Wi-Fi Halo’s Router Management Console (a previous section of this manual has instructions on how to do so). 2. From the Main Page, click the gear icon to the right of the “Guests” tab for the 2.4GHz or 5GHz guest network you are looking to enable. - Page 27 Setting Up: Advanced 4. You can change the name (SSID) and password of the guest Wi-Fi network here if you prefer. If you decide to go with the default settings, remember to get the guest network password by ticking the “Show Password” box at the bottom of the page to show the password.
-
Page 28: How To Configure Your Router Date And Time
How to configure your router date and time Note: • The date and time of the Wi-Fi Halo router cannot be set manually. You can only set it to follow the date and time of Internet NTP servers. 1. Log in to your Wi-Fi Halo’s Router Management Console (a previous section of this manual has instructions on how to do so). - Page 29 Setting Up: Advanced 4. Click on “Internet Time (NTP)” in the left menu. Here you can set the First Server and Second Server to other NTP servers. You can search the web for free NTP servers. You should ensure that the Current Time zone is set to Singapore GMT-8. Click the “Apply”...
-
Page 30: How To Check And Update Your Router Firmware
Setting Up: Advanced How to check and update your router firmware 1. Log in to your Wi-Fi Halo’s Router Management Console (a previous section of this manual has instructions on how to do so). 2. From the Main Page, select the “Device Settings” section. - Page 31 Update. The firmware installation process will take a few minutes. Wait for the Wi-Fi Halo to finish rebooting and then firmware should be successfully installed.
-
Page 32: How To Connect Via Wps
Wi-Fi router and wireless devices faster and easier. • Please refer to your device’s manual on how to enable its WPS to connect to Wi-Fi Halo. • The WPS feature is enabled for the Wi-Fi Halo by default. -
Page 33: How To Limit Device Access (Parental Controls)
3. Click on the tab titled “Parental Control” and select “Internet access control planning”. You should see a list of all devices that have connected to the Wi-Fi Halo. Select the device whose access to the Wi-Fi Halo you want to limit or control. - Page 34 Setting Up: Advanced 4. Once you select the device, you can set when the device can access the Wi-Fi Halo i.e. you can choose which days and times the device can connect to the Wi-Fi Halo. Click “Apply” to apply any changes you have made.
-
Page 35: How To Set Up Port Forwarding On Your Wi-Fi Halo
• Before starting, you should prepare the information the you need e.g. the port/port range, protocol, and the internal IP address on the service you wish to port forward to. 1. Log in to your Wi-Fi Halo’s Router Management Console (a previous section of this manual has instructions on how to do so). - Page 36 Setting Up: Advanced 5. Under the “Add Rules Manually” section, fill in the name of the service (this is for your own reference) and other required details such as the Protocol, External Port, Internal port. Once you are done, click the “Add” button to continue. 6.
- Page 37 Setting Up: Advanced 7. Preconfigured port forwarding for certain games is also available under “Port Forwarding” when you select “Games & Applications”. To enable this, click on “Show Advanced” (the option in the upper right corner of the page) to show additional configuration options. Select the game you want to set up port forwarding to from the drop-down menu.
-
Page 38: How To Set Up Your Wi-Fi Halo As An Access Point
Access Point (AP) Note: • The Wi-Fi Halo is currently not set up to work as an access point. The instructions below serve as a workaround. 1. Do not connect the Wi-Fi Halo to your current router yet. On your current router, reserve an IP address from the local DHCP pool that will be manually assigned to the Wi-Fi Halo i.e. - Page 39 Setting Up: Advanced 5. Key in the IP address and subnet mask you earlier reserved from the current router’s local DHCP pool (eg. 192.168.1.2 and 255.255.255.0). Predefined protocols and ports can also be selected in the Service drop-down menu. The Protocol, External port and Internal port would be automatically configured, the only thing you need to enter is the Internal host IP.
- Page 40 Setting Up: Advanced 8. A message should appear on top of the page indicating that the changes have been successfully saved.
-
Page 41: Troubleshooting
Troubleshooting Troubleshooting... -
Page 42: Power Cycling Your Wi-Fi Halo
(1 minute is recommended) to ensure that all electricial power has drained from the router. 4. Connect the power cable back to the Wi-Fi Halo and press the power button to turn the Wi-Fi Halo on. 5. The Status Light on the front of the Wi-Fi Halo should eventually turn solid purple... -
Page 43: Factory Resetting Your Wi-Fi Halo
Wi-Fi Halo will turn green after a few seconds. Reset Button 2. The Status Light on the front of the Wi-Fi Halo will remain green for a few seconds after the reset as the Wi-Fi Halo’s system stabilises. All in all, the Wi-Fi Halo will take up to 5 minutes to complete its factory reset process. -
Page 44: You Have Forgotten Your Wi-Fi Halo's Wi-Fi Password
Troubleshooting You have forgotten your Wi-Fi Halo’s Wi-Fi Password If you have not changed your Wi-Fi password from your Wi-Fi Halo’s default settings, you can find your Wi-Fi password on: The magnetic Wi-Fi Security Card that came with your Wi-Fi Halo... - Page 45 If you had previously changed your wireless settings from the default setting and forgot your password, do the following: 1. Connect to the Wi-Fi Halo over Wi-Fi or directly using an Ethernet cable 2. Login to the Wi-Fi Halo’s Router Management Console (a previous section of this manual has instructions on how to do so) 3.
-
Page 46: Your Wi-Fi Halo Cannot Be Detected By Your Devices Over Wi-Fi
Your Wi-Fi Halo cannot be detected by your devices over Wi-Fi 1. Power cycle the Wi-Fi Halo. You can refer to a previous section of this manual for instructions on how to do so. 2. Ensure that wireless setting and Wi-Fi adaptor in your computer or device is on. - Page 47 3. Under the “Basic” tab, make sure that the “Enable Wireless” option is set as “ON”. If you make any changes, remember to click the “Apply” button. 4. If the above steps still do not solve the issue, try to reposition the Wi-Fi Halo closer to your wireless device.
-
Page 48: Your Wi-Fi Halo Is Not Powering On
Troubleshooting Your Wi-Fi Halo is not powering on 1. Ensure that the power button at the back of your Wi-Fi Halo is set in the “on” position by switching it off and on. Power Button Power Supply 2. Ensure the power adapter is properly connected to the Wi-Fi Halo and the power supply. -
Page 49: Warranty Information For Your Wi-Fi Halo
Troubleshooting Warranty information for your Wi-Fi Halo • The Wi-Fi Halo comes with a 2-year warranty tied to the original purchaser starting from the point of installation or delivery - not the point of sign up. • This warranty only covers routers purchased from MyRepublic, and can only be claimed in Singapore. - Page 50 Subscription ID for our Customer Service personnel to check your warranty validity. • If you are an active MyRepublic fibre broadband customer and are having technical issues with your Wi-Fi Halo, a technician will be sent down to replace the Wi-Fi Halo if it is found to be faulty. •...
-
Page 51: Wi-Fi Intermittent Disconnection/Low Wi-Fi Signal/Slow Speed On Wi-Fi
2. Test your Internet connection by connecting your computer or laptop directly to the ONT via Ethernet cable i.e. bypass the Wi-Fi Halo. If all your devices have no LAN ports, you can skip this step. -
Page 52: How To Set Manual Dns E.g. To Google Dns
Troubleshooting How to set manual DNS e.g. to google DNS 1. Login to your Wi-Fi Halo’s Router Management Console (a previous section of this manual has instructions on how to access the console). 2. From the Main Page, click the gear icon next to “Internet Connectivity” to open its settings. - Page 53 4. Power cycle your Wi-Fi Halo to ensure that the changes take effect (a previous section of this manual has instructions on how to do this). Note: • You can use your preferred DNS server but certain MyRepublic services may need you to use MyRepublic DNS servers to function properly.
Need help?
Do you have a question about the Wi-Fi Halo and is the answer not in the manual?
Questions and answers