Table of Contents
Advertisement
Quick Links
- 1 How to Set-Up Your Wi-Fi Hub
- 2 How to Log into to Your Wi-Fi Hub Router Management Console
- 3 How to Use the Quick Setup Wizard
- 4 How to Add/Edit the User Name and Password of Your Wi-Fi Hub Router Management Console
- 5 How to Manually Change Your Wi-Fi Network Name and Password
- 6 How to Limit Device Access (Parental Controls)
- 7 How to Set up Port Forwarding on Your Wi-Fi Hub
- 8 Factory Resetting Your Wi-Fi Hub
- Download this manual
Advertisement
Table of Contents

Subscribe to Our Youtube Channel
Related Manuals for MyRepublic MyRepublic Wi-Fi Hub

Summary of Contents for MyRepublic MyRepublic Wi-Fi Hub
- Page 1 Manual...
-
Page 2: Table Of Contents
Contents Product Overview Product contents Technical specifications Hardware features Setting Up: Basics How to set-up your Wi-Fi Hub How to log into to your Wi-Fi Hub Router Management Console How to use the Quick Setup Wizard Setting Up: Advanced How to add/edit the user name and password of your Wi-Fi Hub Router Management Console How to manually change your Wi-Fi network name and password How to change your Wi-Fi Hub’s Wi-Fi channels... -
Page 3: Product Overview
Product Overview... - Page 4 Product Overview MyRepublic Wi-Fi Hub The MyRepublic Wi-Fi Hub is a AC1600 dual-band Wi-Fi Gigabit router. Supporting the latest ultra-fast 802.11ac standard, the Wi-Fi Hub is designed to support multiple devices and full HD video streams simultaneously.
-
Page 5: Product Contents
5GHz Wi-Fi Network: MyRepublic XXXX-5GHz Wireless Key: 1234ABCDEF Wi-Fi Security Card Power Adapter Note: • If you find any of your product contents damaged or missing, please contact MyRepublic customer support at myservice@myrepublic.com.sg or call 6717 1680 for further assistance. -
Page 6: Technical Specifications
Product Overview Technical Specifications USB Master Capability Main Processor • 2 USB 2.0 Interfaces • Broadcom BCM63169 Memory Voice • 2 FXS ports • 256 MB RAM (DDR3) • 128 MB Flash Dimensions Wireless capability • 220mm X 48mm X 172mm •... -
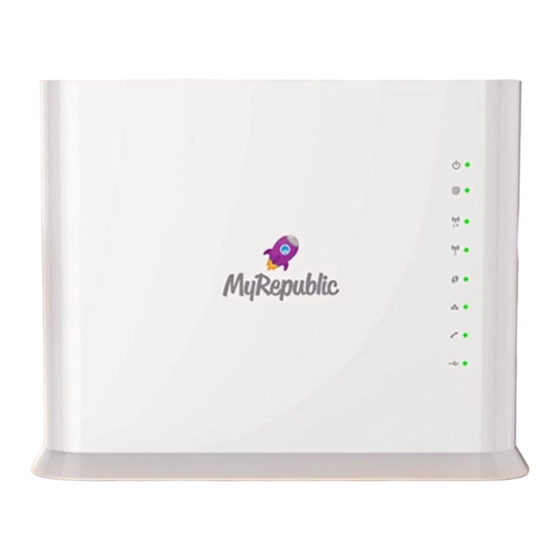
Page 7: Hardware Features
Product Overview Hardware Features Power Light WAN Light 2.4GHz Light 5GHz Light WPS Light LAN Light Phone Connection Light Connection Light Serial Number Mac Address Wireless SSID and key i.e. your Wi-Fi network name and Wi-Fi password Telephone Ports USB Ports Reset Button LAN Ports WAN Port... - Page 8 Product Overview Solid : The Wi-Fi Hub is booting up Solid : Power-on self-test is running, or device has a malfunction Power Flashing : Firmware download or upgrade is ongoing Solid : The Wi-Fi Hub is on ...
-
Page 9: Setting Up: Basics
Setting Up: Basics... -
Page 10: How To Set-Up Your Wi-Fi Hub
Setting Up: Basics How to set up your Wi-Fi Hub Note: • First make sure that your Internet connection has been set up and working properly. Your ONT should be connected to your fibre Termination Point (TP) and turned on for at least 2 minutes before setting up your Wi-Fi Hub. - Page 11 Setting Up: Basics 4. Plug one end of your Ethernet cable into the red WAN port at the back of the Wi-Fi Hub. 5. Plug the other end of your Ethernet cable into the ONT’s active Internet port (the ONT active port is usually Port 1, unless you have more than 1 broadband subscription in your house, then it might be Port 2).
- Page 12 Card. You can also find this information on the white sticker located on the back of your Wi-Fi Hub. ii. On your device, search for your Wi-Fi network and connect using the password provided. 2.4GHz Wi-Fi Network: MyRepublic XXXX 5GHz Wi-Fi Network: MyRepublic XXXX-5GHz Wireless Key: 1234ABCDEF Note: •...
-
Page 13: How To Log Into To Your Wi-Fi Hub Router Management Console
Setting Up: Basics How to log into to your Wi-Fi Hub Router Management Console 1. Once connected to the Wi-Fi Hub, open your web browser (it can be Chrome, Firefox or Internet Explorer) and type “http://192.168.1.1” into your web browser’s address bar. -
Page 14: How To Use The Quick Setup Wizard
Setting Up: Basics How to use the Quick Setup Wizard 1. Log in to your Wi-Fi Hub’s Router Management Console (please refer to the previous section if you need instructions on how to do so). 2. After successfully logging in, click on the “Setup Wizard” button in the upper right corner of the main page. - Page 15 Setting Up: Basics Note: • To improve security, it is highly recommended that you change your Router Management Console login name and password to something other than the default “admin”. • If you ever forget your Router Management Console login username and password and need to access the Console, you will need to perform a factory reset on your Wi-Fi Hub.
- Page 16 Setting Up: Basics 6. The final step of the Setup Wizard is a summary of the information taken from the previous steps. Review your settings and click the “Finish” button to apply all the changes.
-
Page 17: Setting Up: Advanced
Setting Up: Advanced... -
Page 18: How To Add/Edit The User Name And Password Of Your Wi-Fi Hub Router Management Console
Setting Up: Advanced How to add/edit the user name and password of your Wi-Fi Hub Router Management Console 1. Log in to your Wi-Fi Hub’s Router Management Console (a previous section of this manual has instructions on how to do so). 2. - Page 19 Setting Up: Advanced 4. Under “User Manager” tab, to add a new login name and password, click on the “Add new user” button at the bottom. You will see new fields under “Name” and “Change Password” where you can enter a new username and password.
- Page 20 Setting Up: Advanced To edit the existing login name and password, click on the edit icon (there is a little pencil in it) next to the user details you would like to edit. You should now be able to edit the existing username and password. Note: •...
-
Page 21: How To Manually Change Your Wi-Fi Network Name And Password
Setting Up: Advanced How to manually change your Wi-Fi network name and password 1. Log in to your Wi-Fi Hub’s Router Management Console (a previous section of this manual has instructions on how to do so). 2. Select the “Wireless” section. You should already see the 2 Wi-Fi networks provided: the 2.4GHz Wi-Fi network and the 5GHz Wi-Fi network. - Page 22 Setting Up: Advanced 3. Under “Access Point”, look for the “SSID Name” and “Wireless Password” fields. The “SSID” refers to the name of the Wi-Fi network. Make the changes you want and click “Close” to save your changes.
-
Page 23: How To Change Your Wi-Fi Hub's Wi-Fi Channels
Setting Up: Advanced How to change your Wi-Fi Hub’s Wi-Fi channels 1. Log in to your Wi-Fi Hub’s Router Management Console (please refer to the previous section if you need instructions on how to do so). 2. From the Main Page, click on the “Wireless” section. Under the “Wireless”... -
Page 24: How To Enable The Guest Wi-Fi Network
Setting Up: Advanced How to enable the guest Wi-Fi network 1. Log in to your Wi-Fi Hub’s Router Management Console (a previous section of this manual has instructions on how to do so). 2. From the Main Page, select the “Wireless” section. The Wi-Fi Hub comes with guest Wi-Fi networks already set up for for both 2.4GHz and 5GHz bands. - Page 25 Setting Up: Advanced 3. After selecting the guest network, you will see options to set: • SSID Name: this is the name of the Wi-Fi network • Security Mode: If disabled, anyone can connect to this Wi-Fi network. As this is a guest network, you may wish not to use any security modes to allow guests easy access to the network.
-
Page 26: How To Configure Your Router Date And Time
Setting Up: Advanced How to configure your router date and time 1. Log in to your Wi-Fi Hub’s Router Management Console (a previous section of this manual has instructions on how to do so). 2. From the Main Page, select the “Gateway” section. 3. -
Page 27: How To Install Your Router Firmware
2.5 minutes. After the Wi-Fi Hub finishes rebooting, the firmware will be installed. Note: • Don’t have the latest firmware file? Please check the MyRepublic support page at https://support.myrepublic.com.sg/hc/en-us/sections/200595554-Modem-ONT-Router for the latest firmware version, contact MyRepublic customer support at myservice@myrepublic.com.sg or call 6717 1680 for further assistance. - Page 28 Setting Up: Advanced How to connect via WPS To connect to the wireless network through WPS, press the WPS button, which can be found on top of the Wi-Fi Hub. Then, use the device you want to connect to the Wi-Fi Hub and select the wireless network you want to connect to.
-
Page 29: How To Limit Device Access (Parental Controls)
Setting Up: Advanced How to limit device access (parental controls) First you will to get the physical address a.k.a. MAC addresses of the wireless devices you want to block or allow. A MAC address is a unique string of numbers and letters that identifies each device on your network. - Page 30 Setting Up: Advanced 4. From the “Advanced Settings”, select “Time of Day”. 5. Click on the “Add New Rule” button to set up parental controls based on time. 6. These are the options when adding a new rule: • Enabled: Untick the box to disable. This determines whether the rule is active. •...
- Page 31 Setting Up: Advanced For example, the settings in the image below would mean that the device with MAC address D4:61:2E:D5:B2:66 would only be able to connect to the Wi-Fi Hub from 5pm - 9pm on Monday only. If you wish to edit or delete an access rule, click the edit or delete icons found on the right of the rule.
-
Page 32: How To Set Up Port Forwarding On Your Wi-Fi Hub
Setting Up: Advanced How to set up port forwarding on your Wi-Fi Hub Port forwarding can be set up 2 ways: 1st Option: 1. Log in to your Wi-Fi Hub’s Router Management Console (a previous section of this manual has instructions on how to do so). 2. - Page 33 Setting Up: Advanced 4. Under IPv4 Port forwarding table, click on “Add new IPv4 port mapping” to add a custom port mapping or click on the dropdown arrow to add by common applications. For custom port mapping, you need to fill in the following details and then click the “Add”...
- Page 34 Setting Up: Advanced 2nd Option: 1. Under WAN services, click on the Dropdown icon 2. Select the application from the dropdown menu that you want to forward to a specific IP address. For example, you can select “Bittorrent”.
- Page 35 Setting Up: Advanced 3. Enter the destination IP you want the application’s ports forwarded to and click on the “Add” icon on the right to add the port forward rule. 4. The new rule will appear with the Name, Destination IP and Destination MAC.
-
Page 36: How To Set Up Your Wi-Fi Hub As An Access Point
Setting Up: Advanced How to set up your Wi-Fi Hub as an access point Note: • The Wi-Fi Hub is currently not set up to work as an access point. The instructions below serve as a workaround. 1. Connect an Ethernet cable from one of the LAN ports on the back of your main router to one of the LAN ports at the back of the Wi-Fi Hub. - Page 37 Setting Up: Advanced 4. Under the “Local Network” settings, you need to do the following: a. Under “Global Information”, delete the default router’s Local Device IP address (which should be 192.168.1.1) and assign it with another IP address that is within the same network range from the router to where the Wi-Fi Hub would be connected i.e.
- Page 38 Setting Up: Advanced b. Under the “DHCP Settings”, disable the DHCP server. c. Click “Save” to apply the changes. d. Reboot the router by pressing the power button located at the back of Wi-Fi Hub. Telephone Ports USB Ports Reset Button LAN Ports WAN Port Power Port...
-
Page 39: Troubleshooting
Troubleshooting... -
Page 40: Power Cycling Your Wi-Fi Hub
Troubleshooting Power cycling your Wi-Fi Hub Note: • If you are experiencing router issues such as slow Internet speeds, disconnections or poor Wi-Fi performance, power cycling your router can be a simple but easy fix. • The terms “power cycle” or “restart” or “reboot” mean the same thing – but do not confuse them with “reset”... -
Page 41: Factory Resetting Your Wi-Fi Hub
Troubleshooting Factory resetting your Wi-Fi Hub If you can’t access your Wi-Fi Hub’s Router Management Console or forgot your Wi-Fi network password, you may need to reset your Wi-Fi Hub back to its default factory settings. Note: • If you factory reset your Wi-Fi Hub, it will reset your Router Management Console’s username and password back to their default, which is “admin”... - Page 42 Wi-Fi password on: The magnetic Wi-Fi Security Card that came with your Wi-Fi Hub The sticker on the back of your Wi-Fi Hub 2.4GHz Wi-Fi Network: MyRepublic XXXX 5GHz Wi-Fi Network: MyRepublic XXXX-5GHz Wireless Key: 1234ABCDEF Serial Number...
-
Page 43: You Have Forgotten Your Wi-Fi Hub's Wi-Fi Password
Troubleshooting If you had previously changed your wireless settings from the default setting and forgot your password, do the following: Connect to the Wi-Fi hub over Wi-Fi or directly using a Ethernet cable ii. Login to the Wi-Fi Hub’s Router Management Console (a previous section of this manual has instructions on how to do so) iii. - Page 44 Troubleshooting v. After selecting the Wi-Fi network, you should be able to see the network’s name (SSID name) and its password (Wireless Password). You can choose to make changes to the network’s name or password here if you like.
-
Page 45: Your Wi-Fi Hub Cannot Be Detected By Your Devices Over Wi-Fi
Troubleshooting Your Wi-Fi Hub cannot be detected by your devices over Wi-Fi 1. Power cycle your Wi-Fi Hub router. You can refer to a previous section of this manual for instructions on how to do so. 2. Ensure that wireless setting and Wi-Fi adapter in your computer or device is on. 3. - Page 46 (a previous section of this manual has instructions on how to change this). 9. Reboot both Wi-Fi Hub and device to reinitialize the connection 10. If none of the above options work, please contact MyRepublic’s support for further checking. Note: •...
-
Page 47: Your Wi-Fi Hub Is Not Powering On
3. Check your power adapter for any damage or burns. A burnt smell coming from the router or adapter would suggest overheating and heat damage. 4. Connect your power adapter to another power socket. If your Wi-Fi Hub still does not power on please contact MyRepublic Customer Service for further assistance. Power Socket Power Adapter... -
Page 48: Warranty Information For Your Wi-Fi Hub
The Wi-Fi Hub comes with a 2-year warranty tied to the original purchaser starting from the point of installation or delivery - not the point of sign up. • This warranty only covers routers purchased from MyRepublic Singapore, and can only be claimed in Singapore. •... - Page 49 Wi-Fi Hub, a technician will be sent down to replace the Wi-Fi Hub if it is found to be faulty. • If your warranty is still valid and you are no longer a MyRepublic customer, you will need to come to the MyRepublic head office to have the device replaced.
-
Page 50: Wi-Fi Intermittent Disconnection/Low Wi-Fi Signal/Slow Speed On Wi-Fi
Wi-Fi Hub (a previous section of this manual has instructions on how to do a factory reset). If your issues still persist after a factory reset, please contact MyRepublic Customer Service. -
Page 51: How To Set Manual Dns E.g. To Google Dns
Troubleshooting How to set manual DNS e.g. to google DNS 1. Login to your Wi-Fi Hub’s Router Management Console (a previous section of this manual has instructions on how to access the console). 2. From the Main Page, select “Advanced Settings”. 3. - Page 52 5. Power cycle your Wi-Fi Hub to ensure that the changes take effect (a previous section of this manual has instructions on how to do this). Note: • You can use your preferred DNS server but specific MyRepublic services may need you to use MyRepublic DNS servers to function properly.
Need help?
Do you have a question about the MyRepublic Wi-Fi Hub and is the answer not in the manual?
Questions and answers