Table of Contents
Advertisement
Quick Links
Advertisement
Table of Contents

Related Manuals for Phonic Ear FrontRow Pro


Summary of Contents for Phonic Ear FrontRow Pro
- Page 1 i n s t a l l e r g u i d e...
- Page 2 YOU’RE ABOUT TO MAKE LEARNING MORE FUN Welcome to F -- the teacher-friendly way to RONT improve the learning environment in every classroom. With your new active learning system, you’ll enjoy greater student attention, less teacher fatigue, and very likely better test scores. To help you start benefiting from your F RONT system right away, we recommend that you first read...
-
Page 3: Table Of Contents
CONTENTS Getting started in six easy steps Before you begin ..............Pages 1-5 A checklist of everything you need to install your active learning system Step 1 . -
Page 4: Before You Begin
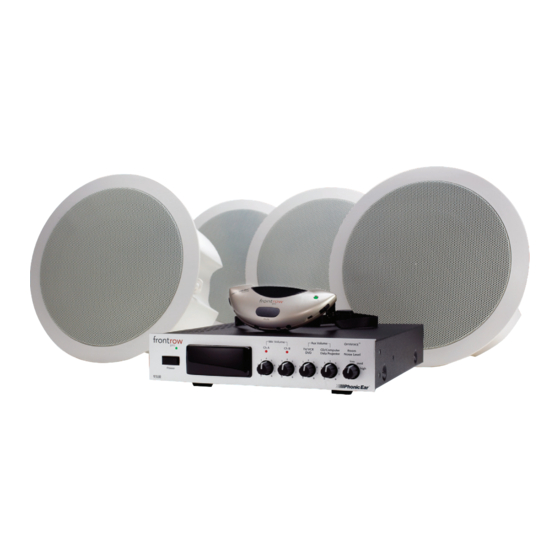
RONT minutes to prepare, you’ll help ensure the actual set-up is as quick and problem-free as possible. Visualize your goal When your FrontRow Pro system is installed, it will look something like this: General safety precautions • Do not install or use the receiver near water or heat sources •... - Page 5 Step 1. There are two ways to approach integration. Wired This is more work for the installer, but seamless for the teacher: Computer audio TV/VCR audio Aux Input #1 Aux Input #2 Teacher station Phonic Ear 930R SVGA computer video TV/VCR Video (RCA) Data Projector www.gofrontrow.com...
- Page 6 Data Projector Get your FrontRow Pro parts ready Check the contents of your FrontRow Pro installation kit against the parts listed below. To help you stay organized, we recommend that you keep the parts needed for each step separate. Open your main component box (the long box)
- Page 7 (incl. w/speaker Get yourself ready Nearly everything you need to install your FrontRow Pro system is included in the boxes we shipped. You will need some basic tools and materials, depending on how your classroom is built: What kind of walls do you have?
- Page 8 For concrete walls, assemble the following tools: Hammer drill Hammer Masonry drill bits Plastic cable (zip) ties Phillips #2 driver bit Plastic raceway with adhesive Level or ruler/tape measure Tin snips (optional) Crimp pliers or scissors Ladder Concrete screws Safety goggles Are you installing ceiling speakers? If so, you’ll also need: Keyhole saw or sabre saw or RotoZip...
-
Page 9: Step 1
If possible, place the receiver in a corner where it will not be pointed at windows. Want to install your FrontRow Pro system in a cabinet? No problem. Just be sure to install external sensors as shown later in this guide. - Page 10 A good place for the receiver Point your receiver away from windows Your FrontRow Pro system communicates with light. Strong sunlight can overwhelm that communication. Your receiver will perform best if it is pointed away from windows that get direct sunlight. If this is not possible, no problem, just plan on installing one or more external sensors.
- Page 11 Installing ceiling speakers? Use the following guidelines when choosing where to put your ceiling speakers: Define the area where students are sitting -- this is the area you want to cover with speakers; not the entire room. Divide this area into four equal sections Using a piece of tape, mark a ceiling tile in the center of each of the four sections -- these are the tiles where you’ll mount your ceiling speakers Avoid installing speakers directly in front of the white board -- this not only covers an area not used by...
- Page 12 Installing wall speakers? Use the following guidelines when choosing where to put your wall speakers: Define the area where students are sitting -- this is the area you want to cover with speakers; not the entire room. Mentally divide this area into four equal sections Using a piece of tape, mark a desk in the center of each of the four sections -- these are the targets at which you’ll aim each of your wall speakers For each section, choose a speaker location that is:...
- Page 13 Inadequate coverage of student listening area ✘ Incorrect Too much coverage in front of white board (feedback risk) www.gofrontrow.com...
- Page 14 Planning sensor placement Your FrontRow Pro receiver has a powerful built-in sensor -- often sufficient to serve your entire classroom. The walls or design of some classrooms may not allow for the direct transmission and reflections of infrared light that your active learning system relies on.
- Page 15 Positioning 2 wall sensors Wall sensors are ideal for complete coverage of rooms, even those with non-reflective or obstructing walls. Use the following guidelines when installing wall sensors: Mentally divide the room into three equal sections, with the main receiver contained within one section Use a piece of tape to mark a spot for each of the two wall sensors.
- Page 16 Positioning ceiling and wall sensors Combining external sensors is ideal for complete coverage of odd sized or oversized rooms with or without non- reflecting or obstructing walls. Use the following guidelines when installing ceiling and wall sensors: – Mentally divide an odd-shaped room into sections as shown. The receiver and ceiling sensor should cover the larger sections of the room and the wall sensor should cover the alcove or smaller section.
-
Page 17: Step 2
Plug power supply into wall socket Connect any other teaching technology — TV / VCR, teacher’s computer, etc. — to your FrontRow Pro system through the Aux Input jacks (cables supplied) 930R (Back) You’ve now completed Step 2. Let’s proceed to routing your speaker and sensor cables. -
Page 18: Step 3
Step 3: Routing speaker and sensor cables Estimated time for this step: 45 minutes With your receiver installed, you now have a base for routing your cables. Ceiling speakers If you’re installing ceiling speakers, follow the guide- lines below. (If you’re installing wall speakers, follow the instructions starting on page 17). - Page 19 Connect cables to receiver To ensure faithful reproduction of stereo auxiliary inputs, be sure to properly match the red/black and left/right speaker wires to the proper receiver terminals. Connect all speaker and sensor cables as shown: wall sensor wall speaker ceiling speaker ceiling sensor Connecting more than three sensors?
- Page 20 Support cables Speaker and sensor cables should not rest on the ceiling. Lift them off the ceiling and use cable/zip ties to secure them loosely to beams, anchor bolts, or other support structures in the ceiling (do not attach them to ductwork, plumbing, or other secondary work).
-
Page 21: Step 4
Step 4: Install your speakers Estimate time for this step: 30 minutes Now that your cables are in place, you’re ready to install your speakers. Ceiling speakers If you’re putting in ceiling speakers, do the following: Cut ceiling tiles Locate one of your supplied ceiling tile bridges and the ceiling tile designated to hold a ceiling speaker Lay the bridge on the tile so that the large hole in the bridge is approximately centered in the tile... - Page 22 Connect speakers Remove a tile next to your speaker tile to give your- self some working room Remove the front grill from a ceiling speaker Fold in the speaker’s support tabs Place the speaker in position in the tile Using a Phillips screwdriver, turn each of the four mounting screws clockwise which will fold out the speaker’s support tabs and allow it to rest on the tile bridge...
- Page 23 Wall speakers If you’re installing wall speakers, do this: Screw the bracket baseplate to the wall using fasteners provided Screw the bracket balljoint assembly to the back of the speaker Slide the balljoint assembly onto the baseplate and tighten the Red to Red and thumbwheel.
-
Page 24: Step 5
Estimated time for this step: 10 minutes You’re almost done. Chances are, your FrontRow Pro system can perform perfectly at this stage (and if you’d like to try to skip this step, go ahead to Step 6). Just to make sure you get maximum voice pickup throughout the room, it’s probably a good idea to install at least one external sensor. - Page 25 AT0848 wall sensor features Wall sensor ceiling If you’re installing wall sensors: Note: Consult the wall sensor installation guide included with packaging for complete installation instructions. AT0794-B Locate the spots you marked in Step 2 for sensor placement AT0847 Bend sensor bracket so that when placed on the wall, bend the sensor will face the center of the section of the room it’s serving (see Step 2)
-
Page 26: Step 6
Step 6: Turn it on and test it Estimated time for this step: 5 minutes It’s important to confirm that everything is working before packing up your tools. Take a few moments to test your work. Use the following baseline settings to start: Ask another person to assess volume levels from front and back of room while you speak All volume controls at setting 2 to 3... - Page 27 Using three speakers instead of four If your room is too small for four speakers, daisy-chain three. Connect speaker wires to the terminals as shown below for best power and sound distribution 930R back right left compact speaker input terminals daisy chaining with 3-speaker connection grid Daisy-chaining four speakers: Daisy-chaining allows setup with shorter cable lengths...
- Page 28 Using up to six speakers: If your room is too big for four speakers, daisy-chain six. Connect speaker wires to the terminals as shown below for best power and sound distribution 930R back right left compact speaker input terminals right speakers left speakers daisy chaining with 4 or 6-speaker connection grid Using up to eight speakers:...
-
Page 29: Frequently Asked Questions
Why do I need to install external sensors? Your FrontRow Pro system uses infrared light to transmit your voice from the transmitter to the receiver, similar to how your remote control changes your TV channels. This light signal needs to either be direct (i.e., ‘line of sight’) or reflected off walls, ceiling, and other surfaces. -
Page 30: Specifications
Product Specifications base station receiver: 930R pendant transmitter: 930TM Receiving frequency: 2.3MHz & 2.8MHz Transmitting frequency: 2.3MHz & 2.8MHz (switchable) Modulation: FM wide-band Modulation: FM wide-band IR frequency response: 50Hz to 10kHz Operating range: 18.5m/60ft line-of-sight (typical) Speakers: 8 ohm Transmission angles: 160˚... - Page 31 Product Specifications handheld transmitter: 930HT ceiling sensor: 520-7347-103 Transmitting frequency: 2.3MHz & 2.8MHz (switchable) Operating frequency: 2.3MHz & 2.8MHz Modulation: FM wide-band Operating range: 18.5m/60ft line-of-sight (typical) Operating range: 12m/40ft line-of-sight (typical) Signal/Power interface: RCA-female jack, 8" lead Transmission angle: 360˚ radial Number of IR LEDs: 9 (sequal radial spacing;...
-
Page 32: Regulatory Compliance
• Consult the dealer or an experienced radio/TV techni- cian for help. Any changes or modifications made to any govern- ment-approved element of this instrument, without the express approval of Phonic Ear Inc in writing, could void the user's authority to operate those elements of the system. - Page 33 800.227.0735, then press 5 • canada 800.263.8700 • international +45 3917 7101 © 2005 Phonic Ear Inc. Phonic Ear and the names of Phonic Ear products are trademarks or registered trademarks of Phonic Ear Inc. in the U.S. and other countries.
Need help?
Do you have a question about the FrontRow Pro and is the answer not in the manual?
Questions and answers