Table of Contents
Advertisement
Quick Links
®
SysLINK
500 Family
Quick Start Guide
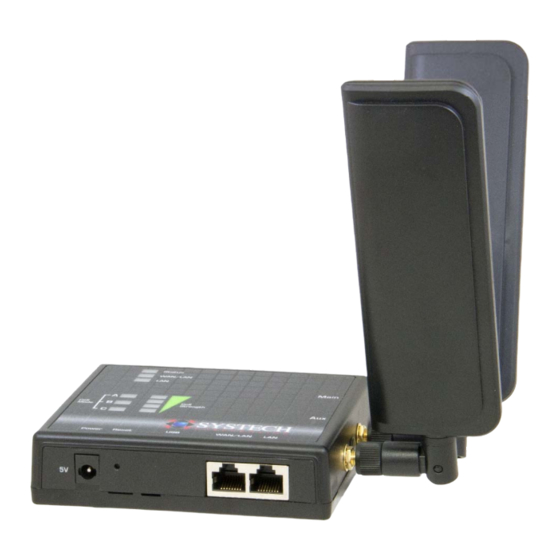
What's Included
Power Adapter, 5v
Note: Images may differ from actual items.
1
QS002‐002‐1706. Copyright 2017. Information subject to change without notice.
Cellular Antennas
(if purchased)
SL‐500
Includes SysSCRIPT Lite
IoT (Internet of Things) support
Remote access and control
Simple drag & drop script creation for
"if this, then that" functionality
Advertisement
Table of Contents

Related Manuals for Systech Corporation SL-500

Summary of Contents for Systech Corporation SL-500
- Page 1 ® SysLINK 500 Family Quick Start Guide SL‐500 Includes SysSCRIPT Lite IoT (Internet of Things) support What’s Included Remote access and control Simple drag & drop script creation for “if this, then that” functionality Cellular Antennas Power Adapter, 5v (if purchased) Note: Images may differ from actual items. 1 QS002‐002‐1706. Copyright 2017. Information subject to change without notice. ...
- Page 2 Front Right Side SL‐500 Back Top Interfaces and Features Status light Indicates current gateway status. Solid amber at Reset button initial power up. Blinking green at one second Button used to reset the gateway. Use paper clip, or intervals during normal operation. similar device, to press. To reboot the gateway, press the reset button momentarily. The status light WAN/LAN light will alternate between orange and red during the Flickering green during normal operation. Off if reboot. WAN/LAN port is disconnected. To reset the gateway back to factory defaults, hold LAN light for about 10 seconds. When the status light Flickering green during normal operation. Off if LAN alternates between red and green, you may release port is disconnected. the reset button. 2 ...
- Page 3 Cell Mode lights If cellular option installed, then these lights indicate the current cellular operating mode. A B C 1xRTT Off Off On EVDO/HSPA Off On On LTE On On On Cell Strength light If cellular option installed, then the number of lights indicates cellular signal strength. These lights are active even if cellular is currently not in use. 5V Power port Use included power adapter. Optionally may use other 5v DC power source. See technical specifications for power requirements. Cell Aux and Cell Main If cellular option installed, then attach cellular antennas here. Cell Main is required. Cell Aux is optional for improved connectivity and speed. USB port USB 2.0 type A connector. Used for optional external devices. LAN port Local Ethernet connectivity, usually used to attach additional local LAN devices (or local network hub) to the network. WAN/LAN port Source for Internet connectivity, usually connected ...
- Page 4 Set Up Your New Gateway Your gateway may include other, specialized software or hardware. If this is the case, the Hardware initialization process may require additional time. STEP 1 ‐ Antennas For example, if you have a Z‐Wave radio installed, If your gateway includes cellular, please install the the Z‐Wave initialization continues beyond the core included antennas. The cellular antennas must be initialization, and is complete sometime after the Z‐ screwed into the terminals of the gateway labeled Wave LED light turns on. “Cell Main” and “Cell Aux”. The two cellular At this point, your gateway is ready for use. antennas look identical. If SIM installation, or special gateway configurations are required, then continue with this guide. Also, if you are interested in remote access or control of the Internet of Things, then read the SysSCRIPT section of this guide. Cellular Installation & Configuration Cellular Antenna (with prong) SIM card Installation STEP 2 – Internet Connectivity If you are using cellular connectivity for the Internet, If you are using cellular connectivity, then a SIM card then go to the SIM Installation step. Once the SIM is may be required. No SIM is needed for most CDMA installed, no other Internet Connectivity and EVDO networks. However, HSPA+ and LTE networks require a SIM. configuration is required. Then go to the Power ...
- Page 5 SSH Access Ensure that the SIM card is inserted into the SIM slot and not between the SIM slot and the SysLINK case. To login to the Linux OS of the gateway directly, you When properly inserted, there will be some will need to enable SSH by accessing the local resistance when the card is about 80% inserted. configuration options described above. Access the local SysLINK configuration web page If Advanced Routing is licensed, click on the “Firewall using the Access Configuration instructions below. Settings” link in the user interface web page. Click to Click on “Cellular Settings” link in the menu on the place a checkmark in the “Allow Access” column in left pane. Login to the unit as instructed. the “Secure Shell” row on the Port Access Configuration page. Enter the APN in the “Access Point Name (APN)” edit field. If Advanced Routing is not licensed click on the “Security Settings” link in the user interface web Click “Save Changes”. page. Click to place a checkmark in the “Secure Shell” option box. Click “Reset/Reboot” link in the leftmost gray menu pane. Then, click “Reboot”. After enabling SSH Access, reboot the gateway from the “Reset/Reboot” menu option. Once the SysLINK gateway reboots it should connect to the cellular network. You can confirm this by After reboot, you may use SSH to access the Linux OS viewing the date and time from the SysLINK of the gateway. The default SSH username is “root”. configuration web page. This will be updated one to The default password is “sysl1nk” (with the number two minutes after the gateway reboots. You will one between the letters “l” and “n”). need to refresh the web page manually to see the Wi-Fi Access Point date and time change. ...
- Page 6 or Bluetooth devices (assuming the appropriate is an option to recover your username and password hardware is installed). if you forget it. Setup and configuration of SysSCRIPT requires just a Gateway Access few short minutes. You can access SysSCRIPT with To access SysSCRIPT, select the “SysSCRIPT” square your smart phone, tablet, or computer. No tile, under the “Applications” dropdown list. A new application installation is necessary. Simply use a window will open with a dropdown list of all current version of your favorite browser, such as gateways associated with your SysSCRIPT account. Chrome, Explorer, or Safari. Select “Gateways” to expose the entire list. From this list, find the gateway that you would like to work Gateway Activation with. Activation is a two‐step process – Gateway Activation and Account Activation. Activate SysSCRIPT on the New gateways will have a default gateway name of gateway by accessing the local configuration options the serial number preceded with a “GW”. For described above. Click on the “SysMAP Settings” in example, GW398254. the user interface web page. Click to place a When you have located the gateway of interest, checkmark in the “Enable the SysMAP service” select the “Details” button of the gateway. This will option box. bring you to a screen showing current status information of the gateway. It is usually desirable to Account Login rename the gateway to something more meaningful. Go to the following URL: Simply click on the gateway name to bring up a https://sso.systech.com renaming dialog box. If you previously created a SysSCRIPT account for any Also, you must set the initial time zone and location ...
- Page 7 locally on the gateway, please go to the following URL. https://sso.systech.com Support For technical support, please contact your reseller. Or if desired, contact Systech Corporation at: Email: support@systech.com Phone: 858‐674‐6500, ext 711 www.systech.com 7 ...
Need help?
Do you have a question about the SL-500 and is the answer not in the manual?
Questions and answers