Table of Contents
Advertisement
Advertisement
Table of Contents

Related Manuals for AOpen WT10M-FRG


Summary of Contents for AOpen WT10M-FRG
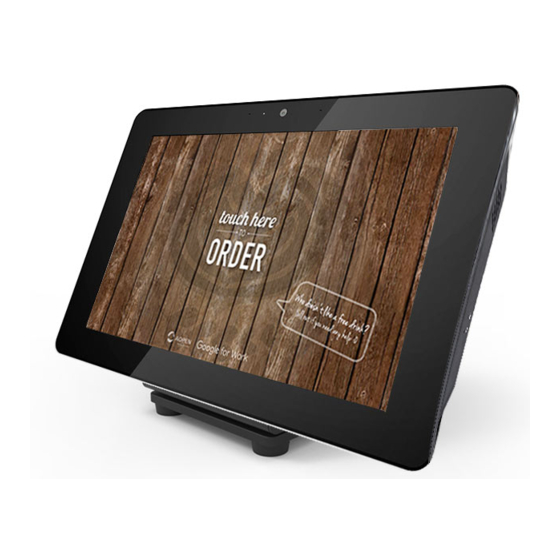
- Page 1 Chromebase Mini Commercial 10”All in one device Model : WT10M-FRG User Guide...
-
Page 3: Table Of Contents
Table of Contents Disposal Instructions ..........4 Copyright ..............8 Disclaimer ..............8 1. Safety Instructions ............9 .......... 10 ENERGY STAR Certification ............11 Risk of Overheating 2. Packing List ..............12 ..........12 2-1. Standard Accessories ..........13 2-2. -
Page 4: Disposal Instructions
To minimize pollution of our environment, please recycle this product. For more information about the collection and recycling of Waste Electrical and Electronic Equipment (WEEE), you are invited to visit our homepage at www.aopen.com under “Green Products” 廃棄上の指示 より良い地球保護のために、電子機器を廃棄処分にする時は、ゴミ箱に捨て ないで下さい。汚染を最小限に抑え、地球環境の最大限の保護のために、製... - Page 5 De genbruge produktet. For yderligere information vedrørende indsamling og genbrug af elektronik-affald (Waste Electrical and Electronic Equipment (WEEE)) er De velkommen til at besøge vores website www.aopen.com og læse nærmere under "Green Products". Verwijderingsinstructie (Dutch) Om mogelijke schade aan het milieu of de menselijke gezondheid door...
- Page 6 Verschmutzung und zur Sicherstellung grösstmöglichen Schutzes der Umwelt recyceln Sie bitte das Produkt. Für mehr Informationen zum Sammeln und Recyceln von elektrischen und elektronischen Müll (WEEE) besuchen Sie bitte unsere Homepage unter www.aopen.com unter dem Punkt "Green Products". Istruzioni per lo smaltimento (Italian)
- Page 7 Para mais informações sobre acerca da recolha e reciclagem de Equipamento Eléctrico e Electrónico (WEEE), convidamos-lhe a visitar nossa página na Internet em www.aopen.com sobre "Green Products". Instrucciones para depositar los productos electrónicos (Spanish) Para proteger mejor el medio ambiente, por favor, no deposite los productos electrónicos en los contenedores de basura tradicionales.
-
Page 8: Copyright
Copyright Copyright of this publication belongs to AOPEN Inc. AOPEN reserves the right to change the content of this publication without obligation to notify any party of such changes or revisions. No part of this publication may be reproduced, transcribed, transmitted, translated into any language, and stored in a retrieval system in any form or by any means electronically, mechanically, optically without the prior written permission of AOPEN Inc. -
Page 9: Safety Instructions
1. Safety Instructions 1. Please read these safety instructions carefully. 2. Please keep this User's Manual for reference. 3. Please disconnect this equipment from its power source before cleaning. Do not use liquid or sprayed detergent for cleaning. Use a lightly moistened sheet or cloth for cleaning. -
Page 10: Energy Star Certification
ENERGY STAR is a U.S. Environmental Protection Agency voluntary program that helps businesses and individuals save money and protect our climate through superior energy efficiency. AOPEN products that have the ENERGY STAR logo complies with the ENERGY STAR standard. The monitor and computer are automatically set to sleep after 8 and 30 minutes of user inactivity. -
Page 11: Risk Of Overheating
Risk of Overheating! Do not install Chromebase mini 10” in an enclosed space or place any objects on the back side of the Chromebase mini 10”. Be sure the heat sink that is on the back side of the Chromebase mini 10”has at least 5mm of clear space for thermal holes. -
Page 12: Packing List
2. Packing List 2-1. Standard Accessories a. System b. Power adapter (40W / 19V) Button tool x1 c. Power cord d. Desktop stand e. Button tool, M4 Screw x 8, M4 VESA Screw x 8 Washer x 8, Tie x 3 M3 Screw x 2 ( for I/O cover) M3 Screw x 2 (for I/O cover) f. -
Page 13: Optional Accessories
2-2. Optional Accessories a. PoE Splitter (IEEE 802.3at Type 2 "PoE+") LAN (RJ45) Recommend 802.3at Type 2 "PoE+“ switch DE3255/DE3250 use 12V/2A only Chrome box and base mini suggest 24V/1A Incorrect voltage might cause device damage b. Desktop Mounting KIT Cable hole Table stand Deco cover... -
Page 14: Product Introduction
3. Product Introduction 3-1 Getting started Connect the AC power adapter to your Chromebase Mini 10” Plug the AC power cord into a 100 V~240 V power source. BC1.2 each port supported 5V/1.5A Connect the DC power connector into your ... -
Page 15: Outlook View
3-2. External View Front Side Rear Side... -
Page 16: Dimensions
3-3. Dimensions 29.9mm... -
Page 17: Getting To Know Your Chromebase Mini 10
3-4. ” Getting to know your Chromebase Mini 10 Please use attached tool or paper clip to insert into buttonhole to amend the following settings. LED Power Indicator Recovery button Power Kensington button security lock Power button The power button allows you to turn the Chromebase Mini 10” on or off. You can use the power button to put your Chromebase mini 10”... - Page 18 Kensington security lock Kensington security Lock The Kensington security slot allows you to secure your Chromebase Mini 10” using Kensington® security products. VESA Hole The VESA standard defines dimensions of a display's four-hole. The Chromebase mini 10” VESA 75x75mm (75x50mm) hole allows you to screw in M4 (Deep 3.5mm) products.
-
Page 19: Rear Side Introduction
3-5. Rear side Introduction Air vent holes The air vent holes allow cooler air to enter your Chromebase mini 10” chassis. Remove I/O Cover BC1.2 each port supported 5V/1.5A USB 2.0 . These ports also support the Battery Charging 1.2 (5V/1.5A) technology that allows you to charge your USB devices. -
Page 20: Hdmi Port
USB 2.0 x 3 HDMI port The HDMI (High Definition Multimedia Interface) port supports a Full-HD device such as an LCD TV or monitor to allow viewing on a larger external display. LAN port The 8-pin RJ-45 LAN port supports a standard Ethernet cable for connection to a local network. -
Page 21: Peripheral Installation
3-6. Peripheral Installation Desktop Stand Mount Kit Assembly Fix the mount bracket onto the back side M4 screw x 2. -
Page 22: Declaration
4. Declaration... -
Page 24: Contact Information
AOPEN America AOPEN America Inc. 2150 N. First Street, Ste. 300, San Jose, CA 95131 Telephone: (+1) 408-586-1201 AOPEN Australia anhd New Zealand AOPEN ANZ AOPEN Australia & New Zealand Level 1, 572 -574 Swan Street Richmond VIC 3121, Australia. -
Page 25: Chrome Care
6. Chrome Care Please contact your authorised reseller or authorised distributor in the first instance for all warranty queries. For direct AOPEN Care in regard to AOPEN chrome products please see below: Australia/ News Zealand chromecare-au@aopen.com Americas - including South America, Canada chromecare-usa@aopen.com... - Page 26 Use the on-screen keyboard To type or handwrite text, or to add images to files, documents, and emails, you can use your Chromebook’s on-screen keyboard. Open the keyboard Open the keyboard in Settings Sign in to your Chromebase mini. Tap or click the status area, where your account picture appears. Tap or click Settings Show advanced settings.
- Page 28 Part No.: Doc. No.: 161-213-101...
- Page 29 Federal Communication Commission Interference Statement This equipment has been tested and found to comply with the limits for a Class B digital device, pursuant to Part 15 of the FCC Rules. These limits are designed to provide reasonable protection against harmful interference in a residential installation. This equipment generates, uses, and can radiate radio frequency energy and, if not installed and used in accordance with the instructions, may cause harmful interference to radio communications.
Need help?
Do you have a question about the WT10M-FRG and is the answer not in the manual?
Questions and answers