Table of Contents
Advertisement
Advertisement
Table of Contents

Related Manuals for 3M 1 Piece

Summary of Contents for 3M 1 Piece
- Page 1 1 Piece (Gen 4) User Manual...
-
Page 2: User Manual
1 Piece (Gen 4) User Manual January 8, 2016... - Page 3 Contact software manufacturers directly for terms of software licenses for any software mentioned in this document not originating from 3M. All brand or product names are the trademarks or registered trademarks of...
-
Page 4: Table Of Contents
Create Schedule for Home Inclusion Zone .................. 25 Create Exclusion Zone ........................29 Attaching the 1Piece ......................... 33 Unassign Hardware .......................... 35 Removing the 1 Piece (Gen 4) ......................39 Appendix ............................40 Violations and Definitions ....................... 40 1 Piece (Gen 4) Self Test ......................... 42... -
Page 5: Overview
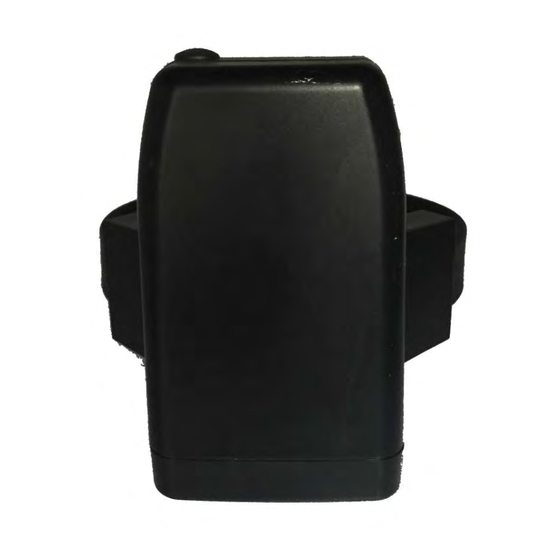
Overview 3M Electronic Monitoring’s One-Piece GPS Offender Tracking Device (Gen 4) utilizes GPS satellites to establish an offender’s location by utilizing the cellular network to transmit the data. It is a one-piece device that is worn on an offender’s ankle and is... -
Page 6: Operating Features
(moving) every minute. If the 1 Piece (Gen 4) does not experience any motion for two consecutive minutes, the 1 Piece (Gen 4) will go to “rest” and collect a GPS point every hour instead of each minute. As soon as any motion is generated, the 1 Piece (Gen 4) will resume recording points on a minute-to-minute basis. - Page 7 Hypoallergenic rubber strap Hypoallergenic rubber strap designed to last up to nine months. Magnetized Charger Magnetized Charger: The 1 Piece (Gen 4) has a magnetized charger to prevent an Magnetized Charger Magnetized Charger accidental disconnect when the battery is being recharged.
-
Page 8: Operating Details
The 1 Piece (Gen 4) has a SIM card, which is similar to the data transmitter/receiver found in most cellular phones. The 1 Piece (Gen 4) uses the SIM card to transmit and download the GPS points and alarms it has recorded to 3M Electronic Monitoring’s servers. -
Page 9: Leds
GPS, and Power Power Zone. The three LEDs work separately and provide the offender with information. The Zone Zone Zone 1 Piece (Gen 4) will vibrate to provide an indication that the offender must look at the LEDs. Zone Power... - Page 10 1 Piece (Gen 4) (Gen 4) (Gen 4) on Charger: on Charger: on Charger: on Charger: When the 1 Piece (Gen 4) is connected to the charger, the Power LED will be solid (not flashing) green green red. green green •...
- Page 11 Operating Details LEDs Officer: Officer: Officer: Officer: • During activation, the officer will see this LED flashing green green in unison with the green green flashing “Zone” LED. Offender: Offender: Offender: Offender: • In normal conditions, the GPS LED will be off. •...
- Page 12 Operating Details LEDs Zone Officer: Officer: Officer: Officer: • During activation, the officer will see this LED flashing green green green green in unison with the flashing “GPS” LED. Offender: Offender: Offender: Offender: • In normal conditions, the Zone LED will be off. •...
-
Page 13: Enrollment
Enrollment EM Manager (Smart View) Log In To access the secure website, go to https://smartview.ptm.com. You will be required to enter a user ID and password. When using EM Manager (Smart View) for the first time, you will create your own password. Enter your User ID (often your three initials and last four digits of your social security number), the temporary password that was emailed to you, and click OK. -
Page 14: Enroll A Contact
Enroll a Contact The Enroll Contact link is located on the left side of the Home page (see below). It is here that you will enter the officer’s information (name, address, phone number, etc.), report types, and default notification settings. 1. - Page 15 Enroll a Contact, Cont.
- Page 16 Enroll a Contact, Cont. Demographic Data Demographic Data Demographic Data Demographic Data Enter the Contact’s information. • All fields with red asterisks (*) are required fields. Report Options Report Options Report Options Report Options Enter an email address where the selected reports will be sent. Choose Daily Event Summary Report and/or Case Management Activity Report.
-
Page 17: Contact Information Page
Contact Information Page When you click Save Save, you will be taken to the Contact Information page (see below). Save Save Here, you can edit the contact information, as well as disable the contact. 1. To edit the contact information, move your mouse cursor over the Contact Functions dropdown menu and left click Edit. -
Page 18: Enroll An Offender
Enroll an Offender The Enroll Offender link is located on the left side of the Home page (see below). 1. Click the Enroll Offender link. -
Page 19: Supervision Level
Supervision Level Clicking on the Enroll Offender link will redirect you to the Level of Supervision page (see below). 1. Click on the Level of Supervision drop down menu. 2. Select your Level of Supervision (see below). 3. Click the Continue Continue Continue Continue button. - Page 20 Offender Enrollment After selecting the Level of Supervision, you will be redirected to the Enroll Offender page (see below). It is here that you will select an Assigned Officer, enter the Offender’s Information, select the Notification Contact and Method, Assign Hardware, and select the Basic Rule Setup.
- Page 21 Offender Enrollment, Cont. Offender Enrollment , Cont. Offender Enrollment Offender Enrollment , Cont. , Cont. Demographic Data Demographic Data Demographic Data Demographic Data 1. Enter the Offender's Information. • All fields with red asterisks (*) are required fields 2. Click the Map Map button to geo-code the offender’s address.
-
Page 22: Map Offender's Address
Map Offender’s Address Clicking the Map Map button on the Offender Enrollment screen will generate a map that displays a pushpin at the offender’s residence. Ensure that the pushpin location is correct and click the Submit Submit Submit button. It is also possible to edit the location by clicking Submit the Edit Pushpin Edit Pushpin... -
Page 23: Offender General Information Page
Offender General Information Page When Enrollment has been completed, you will be redirected to the Offender General Information page (see below). Here, you can Edit Offender Information, Disable the Offender, View GPS Points, Unassign Hardware, Edit Rules, Send Alerts, and Download Points. -
Page 24: Create Schedule For Home Inclusion Zone
Create Schedule for Home Inclusion Zone Click on the Home Rule (see below). - Page 25 Create Schedule for Home Inclusion Zone, Cont. Move your cursor over the Rules Functions drop-down menu and left click Edit..
- Page 26 Create Schedule for Home Inclusion Zone Create Schedule for Home Inclusion Zone, , , , Cont. Create Schedule for Home Inclusion Zone Create Schedule for Home Inclusion Zone Cont. Cont. Cont. You will be redirected to the Edit Rule page. Scroll down to the Permanent Rule Schedule.
- Page 27 Create Schedule for Home Inclusion Zone, Cont. 4. Each block represents a 30 minute increment of time. Left-click and drag the cursor along the blocks during the times that the offender is required to be home. As you move the cursor, the blocks will turn b b b b lue lue.
-
Page 28: Create Exclusion Zone
Create Exclusion Zone You can create an Exclusion Rule to ensure that the offender is not entering areas which are forbidden – such as schools, playgrounds, and victims’ residences. Move your cursor over the Rule Functions menu (see below). This will generate the Rule Functions menu. - Page 29 Create Exclusion Zone, Cont. Choose a Zone Shape. Choose Exclusion as the Zone Type. Click the Continue Continue Continue Continue button.
- Page 30 Create Exclusion Zone Create Exclusion Zone, , , , Cont. Cont. Create Create Exclusion Zone Exclusion Zone Cont. Cont. Enter the Rule Name (school, playground, etc.). Enter the address information and the zone size. The default is 600 ft. Select Yes or No if you want to notify the offender upon violation. Choose the appropriate Contact from the Notification Contact drop down list.
- Page 31 Create Exclusion Zone, Cont. Ensure that the address and zone size is correct. If you want to resize or move the zone, click the Move/Resize Move/Resize button. Move/Resize Move/Resize If you move or resize the zone, click the Finish Move/Resize Finish Move/Resize Finish Move/Resize button.
-
Page 32: Attaching The 1Piece
Push tamper plugs into the back of the brackets of Button on the front of the 1 the 1 Piece (Gen 4). Be sure to insert the left side first. Be sure to insert the left side first. Be sure to insert the left side first. - Page 33 Step 10: Step 10: Place the 1 Piece (Gen 4) on Press and hold the Activate Button on the front of the 1 Piece the offender’s leg, just (Gen 4) for three seconds. Note: there will be an initial, brief below the ankle bone, and feedback vibration that indicates the button is being pushed.
- Page 34 Unassigning Hardware 1. Move your cursor over the Hardware Functions dropdown menu and left click Unassign.
- Page 35 Unassigning Unassigning Hardware Hardware, , , , Cont. Hardware Cont. Cont. Cont. 2. Click the checkbox next to the 1 Piece (Gen 4) (see below). 3. Click on the drop-down menu and select a reason for unassignment. This is required.
- Page 36 Unassigning Hardware, Cont. 4. Click the Save Save Save Save button. A popup will generate with a warning that the unassignment is immediate. 5. Click OK...
- Page 37 Unassigning Hardware, Cont. 6. You will be returned to the Offender Information page, where the hardware will be pending unassignment. The device is now required to call 3M Electronic Monitoring and transmit its final data. The hardware will only be...
-
Page 38: Removing The 1 Piece (Gen 4)
Removing the 1 Piece (Gen 4) Step 1: Step 1: Step 1: Step 1: Step 2: Step 2: Step 2: Step 2: Step 3: Step 3: Step 3: Step 3: Cut the strap by using Use a 3M Electronic Use the screwdriver to... -
Page 39: Appendix
Motion No GPS Motion No GPS • Occurs when the 1 Piece (Gen 4) has accumulated 20 minutes of motion in a 60 minute period without receiving a signal from the GPS satellites. The device will vibrate three times consecutively and once every ten minutes until the violation has cleared by acquiring GPS. - Page 40 Tamper Tamper Tamper • The 1 Piece (Gen 4) has been compromised in some form. There will not be any notification to the offender that this has occurred, unless the officer selects the Notify Offender with Vibrate Notify Offender with Vibrate Notify Offender with Vibrate Notify Offender with Vibrate option on this rule.
-
Page 41: Piece (Gen 4) Self Test
• Make sure the 1 Piece (Gen 4) is unassigned from any offenders • Make sure the 1 Piece (Gen 4) does NOT have a strap with a pin tray in it • Make sure that the 1 Piece (Gen 4) is in a good wireless and GPS location •... - Page 42 RF energy exposure guidelines. Modifications to this device shall not be made without the written consent of 3M Company. Unauthorized modifications may void the authority granted under Federal Communication Rules and Industry Canada Rules permitting the operation of this device.
- Page 43 Canada Note: CAN ICES-3 B/NMB-3 B: This device complies with part 15 of the FCC Rules. Operation is subject to the following two conditions: (1) This device may not cause harmful interference, and (2) This device must accept any interference received, including interference that may cause undesired operation.
Need help?
Do you have a question about the 1 Piece and is the answer not in the manual?
Questions and answers