
Related Manuals for Expolite TOUR-PAR 18

Summary of Contents for Expolite TOUR-PAR 18
- Page 1 TOUR-PAR 18 BEDIENUNGSANLEITUNG FÜR LED51100 TOUR-PAR 18 USER MANUAL FOR LED51100...
-
Page 2: Technische Daten
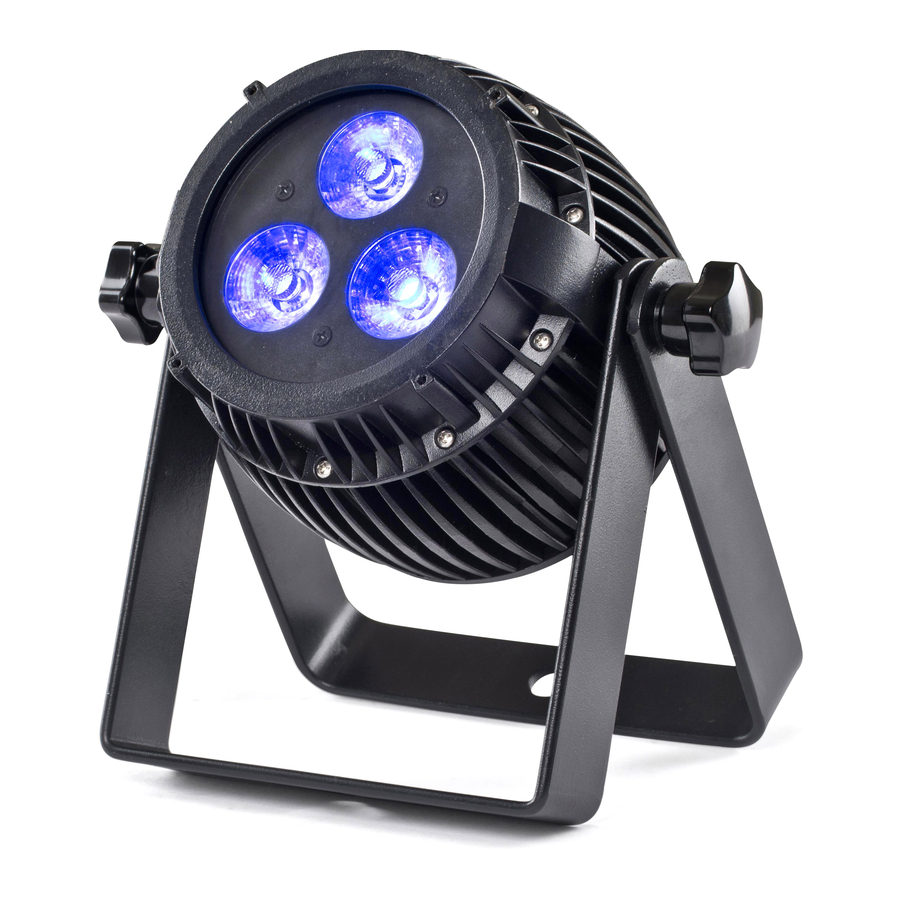
PRODUKTEIGENSCHAFTEN TECHNISCHE DATEN Spannung 100-264VAC 47-63Hz Leistungsaufnahme 40 Watt Betriebstemperatur -20° - 45°C Schutzklasse IP65 LEDs 3 x 6in1 RGBAWUv 12W Abstrahlwinkel 25° Breite 181 mm Tiefe 130 mm Höhe 201 mm Gewicht 1,80 kg 181 mm 102,4 mm... - Page 3 SICHERHEITSHINWEISE LESEN SIE VOR DER INBETRIEBNAHME IMMER DIE BEDIENUNGS- ANLEITUNG. STELLEN SIE SICHER, DASS DER AM GERÄT ANGEGE- BENE WERT FÜR DIE NETZSPANNUNG DEM DER VERSORGUNGS- SPANNUNG VOR ORT ENTSPRICHT. Dieses Produkt darf nur von qualifiziertem Fachpersonal installiert werden. Arbeiten am Gerät dürfen nur von qualifizierten Servicekräften vorgenommen werden.
- Page 4 SCHUTZ GEGEN FREMDKÖRPER UND WASSER Für Geräte mit Schutz gegen Fremdkörper und Wasser nach IP-Code Die Schutzart eines Gerätes wird anhand genormter Prüfverfahren festgestellt. Zur Einordnung der Schutzart wird der IP-Code be- nutzt. Dieser setzt sich aus den Buchstaben IP und zwei Kennzif- fern zusammen.
- Page 5 HINWEIS: Die numerische Steigerung der Schutzklassen, be- sonders bei starker Abschirmung gegen Wasser, suggeriert ein Einschließen der jeweils niedrigeren Schutzklasse. DIES IST NICHT KORREKT! ES GELTEN VERSCHIEDENE TESTKRITERIEN! So ist die Schutzart vielmehr anwendungsabhängig zu wählen. Eine Schutzart IP67 schließt somit beispielsweise nicht auto- matisch Ip66 ein.
-
Page 6: Installation
INSTALLATION BEFESTIGUNG HÄNGEND: Das Gerät kann an dem Haltebügel hängend montiert werden. Hierzu muss eine geeignete Befestigung wie eine Traversenschelle benutzt werden. Bitte achten Sie auf geltende Vorschriften zur Si- cherung, wie das Anschlagen eines Sicherungsseiles. STEHEND: Das Gerät kann durch aufklappen des Bügels sicher aufgestellt werden. -
Page 7: Bedienung
DISPLAYMENÜ BEDIENUNG Menu: Weiter zum nächsten Menü. Enter: Auswahl des aktuellen Punktes. Scrollen durch das Menü oder erhöhen von Werten. Down: Scrollen durch das Menü oder senken von Werten MENÜSTRUKTUR ADDRESS 001-512 MENÜ 0-255* STATIC CONTROL GREEN 0-255* AMBER 0-255* WHITE 0-255* 0-255*... - Page 8 ISQR SCUR ISQR SCUR DISY 2 MIN CTST CT01 0-255 GREEN 0-255 BLUE 0-255 AMBER 0-255 WHITE 0-255 0-255 CT10 0-255 GREEN 0-255 BLUE 0-255 AMBER 0-255 WHITE 0-255 0-255 AUTO AT01 0-255* AT02 0-255* AT03 0-255* 0-255* AT04 AT05 0-255* CHS1 RUN*...
- Page 9 INFO SOFT. VERSION POWER 100 % 80 % 50 % LOAD SETTING LOAD SEND STATISCHE FARBE EINSTELLEN Im Menü STAT wird aus den Farbwerten sowie Zoom und Strobe anhand der DMX-Werteskala (0 - 255) eine statische Szene einge- stellt. MENÜ STATIC CONTROL 0-255* GREEN...
-
Page 10: Master/Slave Mode
MASTER/SLAVE MODE Wenn das Gerät als Master betrieben wird, sendet es die Funktio- nen synchron über die Signalverbindung an verbundene Slave-Ge- räte.In diesem Betriebsmodus darf kein DMX512-Kontroller in der Signalkette eingebunden sein, da es zu Störungen führen würde. DMX PERSONALITY Im Menü... -
Page 11: Display Off
DISPLAY OFF Im Menü unter DISP wird eingestellt, ob das Display sich nach zwei Minuten abschaltet. Bei ON ist das Display durchgehend aktiv. Bei 2MIN schaltet sich das Display nach zwei Minuten automatisch MENÜ DISY 2 MIN KALIBRIERUNG DES WEISSWERTES 3.10 Im CALMENÜ... - Page 12 BENUTZERDEFINIERTE FARBEN 3.12 Im Menü unter CSTS werden zehn benutzerdefinierte Farben progammiert. MENÜ CTST CT01 0-255 GREEN 0-255 BLUE 0-255 AMBER 0-255 WHITE 0-255 0-255 CT09 CT10 3.13 ABRUFEN DES SOFTWARESTANDES Im Menü unter INFO>SOFT wird die verbaute Firmwareversion angezeigt. MENÜ...
- Page 13 ÜBERTRAGEN VON EINSTELLUNGEN VIA DMX-KABEL 3.16 Diese Option überträgt benutzerdefinierte Daten wie Auto- programme und Benutzerfarben auf verbundene Geräte des gleichen Typs. Es sollten keine Geräte eines anderen Typs in der Signalkette verbunden sein, da die Datenpakete zu Fehlern führen können.
- Page 14 STEUERUNG ÜBER DMX512 KANALBELEGUNG Hinweis: Dieses Produkt hat verschiedene DMX-Modi. (siehe auch: Personality) 4CH 5CH 6CH 7CH 9CH 12CH WERT FUNKTION 0 - 255 DIMMING ALL 0 - 255 0 - 255 GREEN 0 - 255 BLUE 0 - 255 AMBER 0 - 255 WHITE...
- Page 15 4CH 5CH 6CH 7CH 9CH 12CH WERT FUNKTION AUTO4 76 - 80 (R↑, G↑, B↑, W↑, R↓, G↓, B↓, W↓) AUTO5 (RAINBOW EFFECT: B, BG↑, BG, 81 - 85 B↓, G, G, GR↑, GR, G↓, R, R, RB↑, RB, R↓, B) 86 - 90 CHASE 1 91 - 95...
- Page 16 4CH 5CH 6CH 7CH 9CH 12CH WERT FUNKTION RED=FULL, GREEN=0, BLUE->UP 172 - 210 (PROPORTIONAL) MAGENTA (RED=FULL, GREEN=0, COLOR BLUE=FULL)(STEP) MIXING INSTEAD RED->DOWN, GREEN=0, 212 - 250 OF RGB BLUE=FULL (PROPORTIONAL) CHAN- BLUE (RED=0, GREEN=0, BLUE=- 251 - 255 FULL (PROPORTIONAL)) USE THE DIMMER MODE WHICH 0 - 10 MENU HAD SET UP...
-
Page 18: Product Specifications
PRODUCT SPECIFICATIONS TECHNICAL SPECIFICATION voltage 100-264VAC 47-63Hz power consumption 40 Watt operation Temperatur -20° - 45°C protection class IP65 LEDs 3 x 6in1 RGBAWUv 12W beam angle 25° width 181 mm depth 130 mm height 201 mm weight 1.80 kg 181 mm 102,4 mm... -
Page 19: Safety Warning
SAFETY WARNING This product must be installed by a qualified professional. All maintenance must be carried out by a qualified electrician. A minimum distance of 0.5 m must be maintained between the equipment and a combustible surface. The product must always be operated in a well ventilated area. DO NOT stare directly into the LED light source. - Page 20 PROTECTION AGAINST SOLIDS AND WATER Only for IP-rated fixtures The protection level of a housing is set by apllied standards. For classification there is used the IP-Code. It contains the declaration „IP“ and two following numbers. The first number charaterises the protection against harmful effects of solids, the second is rating the waterprotection.
- Page 21 TEMPORARY USE Eventequipment is designed for temporary use. This are typical purpose as concerts, festivals, theatre, clubs and disco use and referable venues. Longterm use, specially under outdoorconditions and fixed out- door installation can bring damage in aging materials and affect the coated surface.
-
Page 22: Power Connections
INSTALLATION MOUNTING HANGING: The fixture can be mounted in a hanging position using the supporting bracket. The bracket should be secured to the mounting truss or struc- ture using a standard mount- ing clamp. Please note that when hanging the unit a safety cable should also be used. -
Page 23: Display Panel Operation
DISPLAY PANEL OPERATION DISPLAY OPERATION Menu: back Enter: enter Down: down MENU MAP ADDRESS 001-512 MENU 0-255* STATIC CONTROL GREEN 0-255* AMBER 0-255* WHITE 0-255* 0-255* SHUT 0-255* PRSC NONE GREEN BLUE AMBER WHITE YELLOW PINK CYAN ORANGE VIOLETT GOLDEN 2700 K 3200 K 4000 K... - Page 24 ISQR SCUR ISQR SCUR DISY 2 MIN CTST CT01 0-255 GREEN 0-255 BLUE 0-255 AMBER 0-255 WHITE 0-255 0-255 CT10 0-255 GREEN 0-255 BLUE 0-255 AMBER 0-255 WHITE 0-255 0-255 AUTO AT01 0-255* AT02 0-255* AT03 0-0-255* AT04 0-0-255* AT05 0-255* CHS1 RUN*...
-
Page 25: Edit Static Colour
INFO SOFT. VERSION POWER 100 % 80 % 50 % LOAD SETTING LOAD SEND EDIT STATIC COLOUR Combine RED, GREEN, BLUE, AMBER, WHITE and UV to create an infinite range of colors (0-255). Set the value of the STROBE at SHUT (0-25Hz). -
Page 26: Editing Custom Programs
MASTER/SLAVE MODE When the fixtures work in master mode it will send out the signal for the slave synchronous with it. To avoid the host signal and DMX512 signals interfere with each other, should cut off the DMX512 signals. DMX PERSONALITY Use Menu CHANNEL MODE to select DMX-Personality. -
Page 27: Dimmer Curve
DISPLAY OFF Using the MENU DISY to auto switch off Display. If ON, Display is on all time. Using 2MIN, Display will turn off after 2 minutes. MENU DISY 2 MIN BALANCE COLOR PARAMETERS 3.10 Enter the CALIBRATION MENU to adjust the RGBAWUv parameter to adjust the white at full DMX Levels. - Page 28 CUSTOM COLOR SETTING 3.12 Enter CTST MENU to edit the custom Colors. MENU CTST CT01 0-255 GREEN 0-255 BLUE 0-255 AMBER 0-255 WHITE 0-255 0-255 CT09 CT10 CHECK FIRMWARE INFORMATION 3.13 Enter MENU - INFO for checking the installed Firmware Version. MENU INFO SOFT...
- Page 29 SEND USERDATA BY DMX-CABLE 3.16 This Option will copy all USERDEFINED DATA to connected fixtures of the same type. Make sure there are no other types connected as there can be bad effect to different types receiving datapackages. MENÜ SEND UP/DOWN...
-
Page 30: Channel Assignment
USING A DMX512 CONTROLLER CHANNEL ASSIGNMENT Note: This product have four DMX512 channel configuration 4CH 5CH 6CH 7CH 9CH 12CH VALUE FUNCTION 0 - 255 DIMMING ALL 0 - 255 0 - 255 GREEN 0 - 255 BLUE 0 - 255 AMBER 0 - 255 WHITE... - Page 31 4CH 5CH 6CH 7CH 9CH 12CH WERT FUNCTION AUTO4 76 - 80 (R↑, G↑, B↑, W↑, R↓, G↓, B↓, W↓) AUTO5 (RAINBOW EFFECT: B, BG↑, BG, 81 - 85 B↓, G, G, GR↑, GR, G↓, R, R, RB↑, RB, R↓, B) 86 - 90 CHASE 1 91 - 95...
- Page 32 4CH 5CH 6CH 7CH 9CH 12CH WERT FUNCTION RED=FULL, GREEN=0, BLUE->UP 172 - 210 (PROPORTIONAL) MAGENTA (RED=FULL, GREEN=0, COLOR BLUE=FULL)(STEP) MIXING INSTEAD RED->DOWN, GREEN=0, 212 - 250 OF RGB BLUE=FULL (PROPORTIONAL) CHAN- BLUE (RED=0, GREEN=0, BLUE=- 251 - 255 FULL (PROPORTIONAL)) USE THE DIMMER MODE WHICH 0 - 10 MENU HAD SET UP...
- Page 34 WWW.EXPOLITE-LED.DE...
Need help?
Do you have a question about the TOUR-PAR 18 and is the answer not in the manual?
Questions and answers