Table of Contents
Advertisement
Advertisement
Table of Contents

Related Manuals for Technika TKHVD214


Summary of Contents for Technika TKHVD214
- Page 1 TKHVD214 E XC LU S I V E LY F RO M Owner’s Handbook HDMI DVD player...
-
Page 2: Important Safety Information
IMPORTANT SAFETY INFORMATION damaged, liquid has been spilled or objects have fallen IMPORTANT CAUTION! into the apparatus, the apparatus has been exposed to This equipment generates, uses and can radiate radio RISK OF ELECTRIC SHOCK DO NOT OPEN rain or moisture, does not operate normally, or has been frequency energy and, if not installed and used in dropped. -
Page 3: Battery Cautions
BATTERY CAUTIONS CAUTIONS IN USE CARE OF DISCS BATTERY WARNINGS GENERAL CAUTIONS DVD discs are fragile. Treat them with care. Always store The handset uses a battery. There is a risk of fire and burns CAUTION: During playback, the disc spins at high speed, them upright in their packing;... -
Page 4: Table Of Contents
Connecting power, power control ................... 9 UNPACKING Loading/removing discs ....................9 The carton should contain: Playing a DVD ........................ 10 • TKHVD214 DVD player Playing an audio CD ...................... 12 • Remote control with battery Program play......................... 13 • User guide Playing computer media files .................. -
Page 6: Controls And Connections
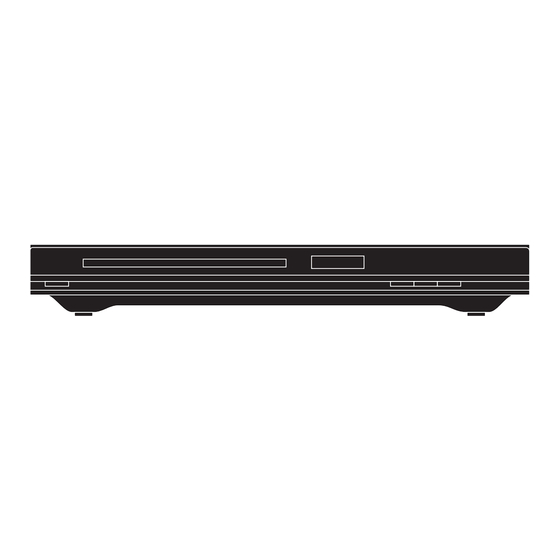
CONTROLS AND CONNECTIONS FRONT VIEW d e f Standby button Disc tray Display area Open/close button Play/pause button Stop button BACK VIEW Power cable HDMI jack Mix left (analogue audio) jack Mix right (analogue audio) jack AUDIO VIDEO HDMI SCART OUTPUT Video out (CVBS) jack SCART jack... -
Page 7: Remote Control Handset
REMOTE CONTROL FITTING/REPLACING THE BATTERIES Standby/On Angle When fitting the batteries in the remote control, refer to Volume up NTSC/PAL select the diagram. Volume down Subtitle Press the battery door catch (arrowed). While holding Mute On-screen display the catch, lift off the door. Cursor up Fast search back Setup... -
Page 8: Connecting Hdmi Digital Video And Audio
CONNECTING HDMI DIGITAL VIDEO AND AUDIO CAUTION: Always disconnect the player, TV, and any other AV system components from the mains before making or changing any connections. AUDIO VIDEO HDMI SCART OUTPUT HDMI CONNECTION TO A TV Your player includes different connection options. Digital HDMI connection is recommended for the highest quality video and audio performance. -
Page 9: Connecting Analogue Video And Audio
CONNECTING ANALOGUE VIDEO AND AUDIO CAUTION: Always disconnect the player, TV, and any other AV system components from the mains before making or changing any connections. AUDIO VIDEO HDMI SCART OUTPUT SCART CONNECTION TO A TV If your TV doesn’t have a digital HDMI connection, it may have a SCART audio/visual connector. -
Page 10: Connecting Power, Power Control
GETTING STARTED CONNECTING POWER USING THE REMOTE HANDSET LOADING/REMOVING A DISC • Check that the mains voltage marked on the rating Point the handset at the infrared receiving window of the Loading a disc: plate on the back panel is the same as the voltage in player, located on the front panel. -
Page 11: Playing A Dvd
PLAYING A DVD PLAYING A DVD DISC To change chapter: Repeat play: Most DVD movie discs are divided into chapters so you can • Press the REPEAT button repeatedly to step through • Load the disc and wait for the title menu to appear. skip to convenient points within the movie. - Page 12 PLAYING A DVD Root and title menus: On-screen display: Search the disc: • Press MENU to display the Root menu from the disc. An On Screen Display (OSD) disc status indicator will be You can search for a particular chapter or a time point displayed at the top of the screen when certain functions within a chapter or title using the GOTO feature.
-
Page 13: Playing An Audio Cd
PLAYING AN AUDIO CD PLAYING AN AUDIO CD Fast search: Changing the audio mode: • Press the ] or [ button repeatedly to fast search • Press the AUDIO button repeatedly to change the • Load an Audio CD into the player. forward or backward. -
Page 14: Program Play
PROGRAM PLAY OF A DVD OR AUDIO CD You can program up to 20 chapters (DVD) or tracks (audio Entering a program: Playing the program: CD) to play in your preferred sequence. • Use the ƒ„‚ buttons to highlight the program •... -
Page 15: Playing Computer Media Files
PLAYING COMPUTER MEDIA FILES PLAYING A CD-ROM OR DVD-ROM CONTAINING COMPUTER MEDIA FILES To return to the main screen: • Press MENU. You can also play a disc containing digital photos (.JPG), music (.WMA) or movies (MPEG4). The media files may all be saved to the ‘root’ folder of the disc or they may be saved in Playback control: folders. -
Page 16: Setting Up The Player
SETTING UP THE PLAYER The setup menu enables you to customise language and display preferences, to match your • When the setting you want to change is highlighted, press the „ button. audio and video components. A list of options for this setting will open. To open the setup menu: •... - Page 17 GENERAL SETUP PAGE Choose the General setup page to: • Change the TV display format. • Enable/disable multi-angle selection. • Change the on-screen language setting. • Switch the screen saver on or off. GENERAL SETUP PAGE TV display • Choose from 4:3 Pan Scan (Normal PS), 4:3 Letter Box (Normal LB), 16:9 (Wide). Angle mark •...
- Page 18 AUDIO SETUP PAGE Choose the Audio setup page to: • Set how the player downmixes multiple audio channels. AUDIO SETUP PAGE Analogue audio Downmix • Choose from LT/RT or Stereo.
- Page 19 DOLBY SETUP PAGE Choose the Dolby setup page to: • Change the audio channel arrangement for two channel modes. • Set dynamic range compression. DOLBY SETUP PAGE • Choose from Stereo (factory setting), L-Mono (left channel plays through both left and Dual mono right channels), R-Mono (right channel plays through both left and right channels), Mix-Mono (left and right channels are mixed, then played through both left and right...
- Page 20 VIDEO SETUP PAGE Choose the Video setup page to: NOTE: The component option is listed, but not available for this model. • Set the resolution for the HDMI video output. • Enable or disable the HDMI output. VIDEO SETUP PAGE •...
- Page 21 PREFERENCE PAGE General Audio Dolby Video Preference NOTE: The Preference page cannot be opened when a disc is playing. Preference Page Choose the Preference page to: TV Type • Set the TV system. Audio • Set the default audio language. Subtitle Disc Menu •...
-
Page 22: Troubleshooting
TROUBLESHOOTING CARE AND CLEANING TROUBLESHOOTING AFTER USING YOUR PLAYER If your DVD player is not working properly use this guide before contacting Tesco. Before • Remove the disc from the disc tray. investigating a problem, always switch off the player and any connected units. •... -
Page 23: Specifications
Power supply: ........110 - 240 V~, 50/60 Hz Your Technika appliance is covered by a warranty for 12 months from the date of purchase. If a fault develops during this period, please contact the TESCO electrical help line on 0845 Power consumption: ...... - Page 24 Delamare Road, Cheshunt, Herts, EN8 9SL Technika Helplines: Landlines 0800 323 4060 (Freephone from a BT landline). Mobiles 0330 123 4060 (Calls cost no more than calls to geographic numbers eg. 01 or 02 and are included in inclusive minutes and discount schemes). TKHVD214 V0.5...
Need help?
Do you have a question about the TKHVD214 and is the answer not in the manual?
Questions and answers