Table of Contents
Advertisement
Quick Links
SPECIFICATIONS
Power Source:
220-240V a.c., 50Hz
Power Consumption:
145W (28") , 149W (32") , 175W (36")
Stand-by Power
Consumption:
2.8W
Aerial Impedance:
75Ω unbalanced, Coaxial Type
Receiving System:
PAL I, PAL-525/60 UHF
M.NTSC
NTSC (AV only)
Receiving Channels:
UHF E21-E69
Intermediate Frequency:
Video/Audio
Video
39.5MHz
Audio
33.5MHz
32.95MHz (NICAM)
Colour
35.07MHz (PAL)
Terminals:
AV1 IN
Video (21 pin)
Audio (21 pin)
RGB (21 pin)
AV1 OUT
Video (21 pin)
Audio (21 pin)
AV2 IN
Video (21 pin)
Audio (21 pin)
S-Video IN
(21-pin)
AV2 OUT
Video (21 pin)
Audio (21 pin)
Selectable output (21 pin)
AV3 IN
S-Video IN
(4-pin)
Audio (RCAx2)
Video (RCAx2)
AV4 IN
AV4 OUT
High Voltage:
Picture Tube:
Audio Output:
(Music Power)
Digital Audio Input
Headphones:
Accessories
supplied :
1V p-p 75Ω
500mV rms 10kΩ
Dimensions:
Height:
Width:
1V p-p 75Ω
Depth:
500mV rms 1kΩ
Net weight:
1V p-p 75Ω
500mV rms 10kΩ
Specifications are subject to change without notice.
Y: 1V p-p 75Ω
Weights and dimensions shown are approximate.
C: 0.3V p-p 75Ω
1V p-p 75Ω
NOTE: This Service Manual should be used in conjunction with
500mV rms 1kΩ
the EURO-7 Technical guide.
Y: 1V p-p 75Ω
C: 0.3V p-p 75Ω
500mV rms 1Video
1V p-p 75Ω
Colour Television
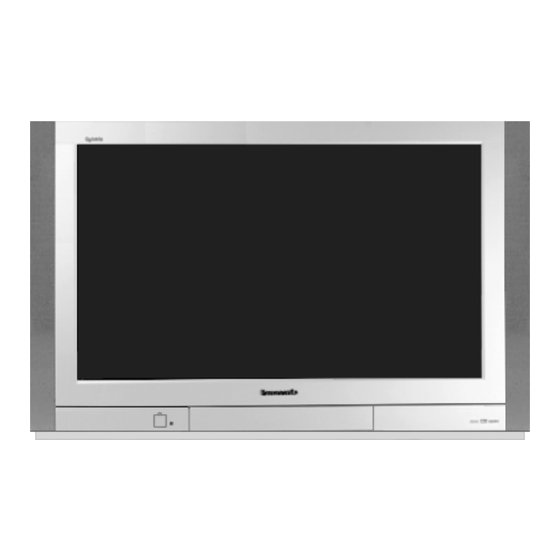
TX-28PB50
TX-32PB50/PB50N
TX-36PB50/PB50N
EURO-7 Chassis
Video (21 pin) 1V p-p 75Ω
Audio (21 pin) 500mV rms 10kΩ
S-Video IN
(21-pin)
RGB (21 pin)
Video (21 pin) 1V p-p 75Ω
Audio (21 pin) 500mV rms 1kΩ
30.5kV ± 1kV (28") , 32kV ± 1Kv (32/36")
W66EKT10X71
W76EKW10X72
W86LPX955X07
Front Left/Right 2 x 20W
8Ω Impedance
Coaxial / Optical
8Ω Impedance
3.5mm
Remote Control
2 x R6 (UM3) Batteries
28"
509mm
763mm
512mm
45kg
ORDER No. SM-01022
Y: 1V p-p 75Ω
C: 0.3V p-p 75Ω
66cm (28")
76cm (32")
86cm (36")
32"
36"
558mm
623mm
850mm
950mm
549mm
582mm
58.5kg
79.5kg
Advertisement
Table of Contents

Subscribe to Our Youtube Channel
Related Manuals for Panasonic TX-32PB50


Summary of Contents for Panasonic TX-32PB50
-
Page 1: Colour Television
ORDER No. SM-01022 Colour Television TX-28PB50 TX-32PB50/PB50N TX-36PB50/PB50N EURO-7 Chassis SPECIFICATIONS Power Source: 220-240V a.c., 50Hz Power Consumption: 145W (28”) , 149W (32”) , 175W (36”) AV4 IN Video (21 pin) 1V p-p 75Ω Audio (21 pin) 500mV rms 10kΩ... -
Page 2: Table Of Contents
CONTENTS SAFETY PRECAUTIONS................................2 SERVICE HINTS ..................................3 ADJUSTMENT PROCEDURE AND FACTORY SETTINGS .....................4 WAVEFORM PATTERN TABLE ...............................5 ALIGNMENT SETTINGS................................6 BLOCK DIAGRAMS ..................................7 PARTS LOCATION .................................13 REPLACEMENT PARTS LIST ..............................14 SCHEMATIC DIAGRAMS ...............................38 CONDUCTOR VIEWS................................49 SAFETY PRECAUTIONS GENERAL GUIDE LINES It is advisable to insert an isolation transformer in the X-RADIATION WARNING a.c. -
Page 3: Service Hints
SERVICE HINTS How to remove the rear cover 1. Remove the 10 screws as shown in Fig.2. SCREWS SCREWS Fig.2. LOCATION OF CONTROLS DP-Board G-Board DG-Board L-Board DF-Board Focus L-Board H-Board Screen U-Board HA-Board A-Board H-Board D-Board Z-Board Fig.3. - Page 4 HOW TO MOVE THE CHASSIS INTO SERVICE POSITION Remove the 3 screws (B) and (C) shown in Fig.5. / Fig.6., and remove the 2 speakers from the cabinet. Affix the support strap supplied in the service pack (TZS1EK002) using a back cover screw, into the top right-hand cabinet rib (A) shown in Fig.4.
-
Page 5: Adjustment Procedure
To get into Self-Check mode press the down (-/v) button on the customer controls at the front of the TV set, at the same time pressing the STATUS button on the remote control, and the screen will show: - Factory use only O.K. Sum : **** O.K. TX-28PB50 TX-32PB50/PB50N TX-36PB50/PB50N O.K. OPTION 1 : O.K. OPTION 2 : O.K. OPTION 3 : O.K. -
Page 6: Waveform Pattern Table
WAVEFORM PATTERN TABLE Note: All waveforms have been taken using a standard colour bar pattern. Video Out Luminance In Vert Drive IC3001 Pin 56 IC1315 Pin 37 A44 Pin 24 10mS 64µS 32µS VFLB H - Drive Vert Out IC451 Pin 6 A3 Pin 10 IC451 Pin 3 32µS... -
Page 7: Alignment Settings
ALIGNMENT SETTINGS (The figures below are nominal and used for representative purposes only.) Set the Bass to maximum position, set the Treble to minimum position, press the down button (- / v) on the customer controls at the front of the TV and at the same time press the INDEX button on the remote control, this will place the TV into the Service Mode. -
Page 13: Parts Location
PARTS LOCATION NOTE: The numbers on the exploded view below refer to the mechanical section of the Replacement Parts List. DF BOARD ONLY USED ON 32” & 36” MODELS. -
Page 14: Replacement Parts List
REPLACEMENT PARTS LIST Important Safety Notice Components Identified by mark have special characteristics important for safety. * When replacing any of these components, use only manufacturers specified parts. In case of ordering these spare parts, please always add the complete Model-Type number to your order. - Page 15 Cct Ref Parts Number Description Cct Ref Parts Number Description IC2706 PQ1CG21H2RZ REGULATOR D805 MA2240-BLFS DIODE IC2707 AN7808LB 8V REGULATOR D809 MA2082-ALFS DIODE IC2708 SI-8090K POWER SUPPLY D811 MA2082-ALFS DIODE IC2709 PQ1CG21H2RZ REGULATOR D819 ERA22-04V3 DIODE IC3001 CXA2069Q-TL SWITCHING D820 ERA22-04V3 DIODE IC3002...
- Page 16 Cct Ref Parts Number Description Cct Ref Parts Number Description D2404 MTZJT-778.2A DIODE Q1114 BC847B TRANSISTOR D2405 EU02 DIODE Q1115 BC847B TRANSISTOR D2406 EU02 DIODE Q1121 BC847B TRANSISTOR D2407 EG01CV0 DIODE Q1122 BC847B TRANSISTOR D2410 EU02 DIODE Q1125 BC847B TRANSISTOR D2411 FMGG26S DIODE...
- Page 17 Cct Ref Parts Number Description Cct Ref Parts Number Description Q2509 BC847B TRANSISTOR L1106 ELESN4R7KA COIL Q2510 BC857B TRANSISTOR L1107 TALC325T4R7M COIL Q2511 BC847B TRANSISTOR L1108 TALC325T4R7M COIL L1109 TALC325T4R7M COIL Q2512 BC847B TRANSISTOR Q2513 BC847B TRANSISTOR L1110 TALC325T4R7M COIL Q3001 BC847B TRANSISTOR...
- Page 18 Cct Ref Parts Number Description Cct Ref Parts Number Description L2433 TALL08T270KA COIL L4804 EXCELDR35V COIL L2435 TALL08T270KA COIL LC1101 TLK212T256AL COIL L2436 TALL08T270KA COIL LC1102 TLK212T256AL COIL L2437 TALL08T270KA COIL LC1104 TLK212T256AL COIL L2438 TALL08T270KA COIL LC1105 TLK212T256AL COIL L2440 EXCEMT271BT COIL...
- Page 19 Cct Ref Parts Number Description Cct Ref Parts Number Description D842 ERZV10D621CS VARISTOR 10W 20% JSA52 ERJ6GEY0R00 S.M.CARB 0.1W ERJ6GEY0R00 S.M.CARB 0.1W JSA53 ERJ6GEY0R00 S.M.CARB 0.1W ERJ6GEY0R00 S.M.CARB 0.1W JSA55 ERJ6GEY0R00 S.M.CARB 0.1W ERJ6GEY0R00 S.M.CARB 0.1W JSA57 ERJ6GEY0R00 S.M.CARB 0.1W ERJ8GEY0R00 S.M.CARB .125W...
- Page 20 Cct Ref Parts Number Description Cct Ref Parts Number Description JSDG71 ERJ3GEY0R00 S.M.CARB 0.1W JSDP31 ERJ6GEY0R00 S.M.CARB 0.1W JSDG72 ERJ3GEY0R00 S.M.CARB 0.1W JSDP32 ERJ6GEY0R00 S.M.CARB 0.1W JSDG73 ERJ3GEY0R00 S.M.CARB 0.1W JSDP33 ERJ6GEY0R00 S.M.CARB 0.1W JSDG74 ERJ3GEY0R00 S.M.CARB 0.1W JSDP36 ERJ6GEY0R00 S.M.CARB 0.1W JSDG75...
- Page 21 Cct Ref Parts Number Description Cct Ref Parts Number Description R461 ERDS1FJ1R0 CARBON 0.5W R854 ERDS1TJ333 CARBON 0.5W R462 ERJ6GEYJ103 S.M.CARB 0.1W R855 ERDS2TJ821T CARBON R463 ERJ6GEYJ563 S.M.CARB 0.1W R856 ERDS2TJ562 CARBON 5.6K R464 ERJ6GEYJ103 S.M.CARB 0.1W R857 ERF7ZK2R2 WOUND 7W 10% R465 ERJ6GEYJ103...
- Page 22 Cct Ref Parts Number Description Cct Ref Parts Number Description R1101 ERJ3GEYJ562V S.M.CARB 0.125 5.6K R1188 ERJ3GEYJ101 S.M.CARB 0.1W R1102 ERJ3GEYJ562V S.M.CARB 0.125 5.6K R1189 ERJ3GEYJ101 S.M.CARB 0.1W R1103 ERJ6GEYJ473 S.M.CARB 0.1W R1190 ERJ3GEYJ101 S.M.CARB 0.1W R1104 ERJ6GEYJ101 S.M.CARB 0.1W R1191 ERJ3GEYJ101 S.M.CARB...
- Page 23 Cct Ref Parts Number Description Cct Ref Parts Number Description R1341 ERJ6GEYJ331 S.M.CARB 0.1W R1420 ERJ6ENF2001 S.M.CARB 0.1W R1343 ERJ3GEYJ472V S.M.CARB 0.125 4.7K R1421 ERJ3GEYJ561V S.M.CARB 0.125 R1344 ERJ6ENF1500 S.M.CARB 0.1W R1423 ERJ6GEYJ471 S.M.CARB 0.1W R1345 ERJ3GEYJ103 S.M.CARB 0.1W R1425 ERJ6ENF2001 S.M.CARB 0.1W...
- Page 24 Cct Ref Parts Number Description Cct Ref Parts Number Description R2025 ERJ6GEYJ472 S.M.CARB 0.1W R2350 ERJ6GEYJ332 S.M.CARB 0.1W R2026 ERJ6GEYJ472 S.M.CARB 0.1W R2351 ERJ6GEYJ102 S.M.CARB 0.1W R2030 ERJ6GEYJ101 S.M.CARB 0.1W R2352 ERJ6GEYJ102 S.M.CARB 0.1W R2031 ERJ6GEYJ101 S.M.CARB 0.1W R2354 ERX5FJ1R0 METAL R2033 ERJ6GEY0R00...
- Page 25 Cct Ref Parts Number Description Cct Ref Parts Number Description R2438 ERJ6GEYJ471 S.M.CARB 0.1W R2515 ERJ6GEYJ103 S.M.CARB 0.1W R2440 ERJ6GEYJ471 S.M.CARB 0.1W R2516 ERJ6GEYJ103 S.M.CARB 0.1W R2441 ERJ6GEYJ223 S.M.CARB 0.1W R2517 ERJ6GEYJ151 S.M.CARB 0.1W R2442 ERJ6GEYJ223 S.M.CARB 0.1W R2518 ERJ6GEYJ472 S.M.CARB 0.1W R2443...
- Page 26 Cct Ref Parts Number Description Cct Ref Parts Number Description R2585 ERJ6GEYJ103 S.M.CARB 0.1W R2669 ERJ6GEYJ473 S.M.CARB 0.1W R2586 ERJ6GEYJ330 S.M.CARB 0.1W R2672 ERJ6GEYJ473 S.M.CARB 0.1W R2587 ERJ6GEYJ561 S.M.CARB 0.1W R2673 ERJ6GEYJ473 S.M.CARB 0.1W R2588 ERJ6GEYJ103 S.M.CARB 0.1W R2674 ERJ6GEYJ473 S.M.CARB 0.1W R2589...
- Page 27 Cct Ref Parts Number Description Cct Ref Parts Number Description R3053 ERJ6GEYJ221 S.M.CARB 0.1W R3435 ERJ6GEYJ333 S.M.CARB 0.1W R3054 ERJ6GEYJ331 S.M.CARB 0.1W R3436 ERJ6GEYJ101 S.M.CARB 0.1W R3059 ERJ6GEYJ561 S.M.CARB 0.1W R3437 ERJ6GEYJ101 S.M.CARB 0.1W R3062 ERJ6GEYJ331 S.M.CARB 0.1W R3438 ERJ6GEYJ223 S.M.CARB 0.1W R3064...
- Page 28 Cct Ref Parts Number Description Cct Ref Parts Number Description 100nF 3900pF C359 ECJ2VF1C104Z CERAMIC C844 ECKC3D392J CERAMIC 470µF 100pF C360 ECA1CM471GB ELECT C845 ECKC1H101J CERAMIC 10nF 10µF C361 ECJ2VB1H103K CERAMIC C847 ECA2WM100E ELECT 450V 22nF 100nF C363 ECJ2VB1H223K CERAMIC C851 ECQB1104JF3 FILM...
- Page 29 Cct Ref Parts Number Description Cct Ref Parts Number Description 100nF C1125 ECJ2VF1C104Z CERAMIC C1323 ECJ2VF1C105Z CERAMIC 100nF C1126 ECJ2VF1C104Z CERAMIC C1324 ECJ2VF1C105Z CERAMIC 100nF C1127 ECJ2VF1C104Z CERAMIC C1325 ECJ2VF1C105Z CERAMIC 100nF C1128 ECJ2VF1C104Z CERAMIC C1326 ECJ2VF1C105Z CERAMIC 100nF C1129 ECJ2VF1C104Z CERAMIC C1327...
- Page 30 Cct Ref Parts Number Description Cct Ref Parts Number Description 12pF C1398 ECJ1VC1H120J CERAMIC C1470 ECJ2VF1C105Z CERAMIC 12pF 33pF C1399 ECJ1VC1H120J CERAMIC C1471 ECJ1VC1H330J CERAMIC 68pF C1400 ECJ2VF1C105Z CERAMIC C1472 ECJ1VC1H680J CERAMIC 100pF 100nF C1401 ECJ1VC1H101J CERAMIC C1474 ECJ2VB1C104K CERAMIC 100nF C1403 ECJ2VF1C105Z...
- Page 31 Cct Ref Parts Number Description Cct Ref Parts Number Description 100nF C2014 ECJ2VC1H010C CERAMIC C2336 ECJ2VF1H104Z CERAMIC 100nF 47µF C2015 ECJ2VF1C104Z CERAMIC C2337 ECA1CM470GB ELECT 100µF 220µF C2016 ECA1HM101GB ELECT C2338 ECEA1HU221 ELECT 220µF C2017 ECJ2VC1H010C CERAMIC C2339 ECEA1HU221 ELECT 100µF C2022 ECJ2VF1C105Z...
- Page 32 Cct Ref Parts Number Description Cct Ref Parts Number Description 470nF 2.2nF C2427 ECQV1H474JZ FILM C2513 ECJ2YF1C225Z CERAMIC 470nF C2428 ECQV1H474JZ FILM C2514 ECJ2VF1C105Z CERAMIC 470nF 22pF C2429 ECQV1H474JZ FILM C2515 ECJ2VC1H220J CERAMIC 100nF 100nF C2432 ECJ2VF1C104Z CERAMIC C2516 ECJ2VB1C104K CERAMIC 470µF 470pF...
- Page 33 Cct Ref Parts Number Description Cct Ref Parts Number Description 5.6nF 470pF C2611 ECJ2VB1H562K CERAMIC C2732 EEUFC1A471B CERAMIC 5.6nF 100nF C2612 ECJ2VB1H562K CERAMIC C2733 ECJ2VF1H104Z CERAMIC 5.6nF 470µF C2613 ECJ2VB1H562K CERAMIC C2734 ECA1EM471GB ELECT 220pF 470µF C2614 ECJ2VC1H221J CERAMIC C2737 ECA1CM471GB ELECT 220pF...
- Page 34 560pF C3446 ECJ2VC1H561J CERAMIC TNPA1726AC L P.C.B. 220µF C3450 ECEA1AKA221B ELECT TQF8E3197-1 MODEL LABEL 220µF C3451 ECEA1AKA221B ELECT TBMA060 PANASONIC BADGE 100µF C3452 ECEA1CKA101 ELECT MISCELLANEOUS COMPONENTS 100µF C3453 ECEA1CKA101 ELECT TBLG3019 SET FOOT (FRONT) 22pF C3454 ECJ2VC1H220J CERAMIC TBLG3020...
- Page 35 CARBON 0.25W TNP8EL014AA L P.C.B. R526 ERC14GK184 SOLID 0.25W 180K TQF8E3188 MODEL LABEL R527 ERC14GK224 SOLID 1/4W 220K TBMA060 PANASONIC BADGE R530 ERD25TJ101 CARBON 0.25W MISCELLANEOUS COMPONENTS R531 ERC14GK334 SOLID 0.25W 10% 330K R532 ERD25TJ473 CARBON 0.25W TBL4G3402 SET FOOT...
- Page 36 R452 ERDS1TJ3R3 CARBON 0.5W TNPA1726AE L P.C.B. R473 ERJ6GEYJ222 S.M.CARB 0.1W TQF8E3203-1 MODEL LABEL R474 ERJ6GEYJ103 S.M.CARB 0.1W TBMA059 PANASONIC BADGE R509 ERX3FJ1R0 METAL MISCELLANEOUS COMPONENTS R520 ERD25TJ153 CARBON 0.25W R521 ERG2FJS123 METAL TBM8E2138 PRESET LABELRIGHT R522 ERD25TJ101 CARBON 0.25W...
- Page 37 Cct Ref Parts Number Description Cct Ref Parts Number Description R526 ERC14GK184 SOLID 0.25W 180K R527 ERC14GK224 SOLID 1/4W 220K R530 ERD25TJ101 CARBON 0.25W R531 ERC14GK334 SOLID 0.25W 10% 330K R532 ERD25TJ473 CARBON 0.25W R533 ERG3FJS821 METAL R534 ERDS2TJ333T CARBON R535 ERG1FJS332 METAL...
-
Page 38: Schematic Diagrams
SCHEMATIC DIAGRAMS FOR MODELS TX-28PB50 TX-32PB50/PB50N TX-36PB50/PB50N (EURO-7 CHASSIS) IMPORTANT SAFETY NOTICE Components identified by mark have special characteristics important for safety. When replacing any of these components, use only manufacturer's specified parts. NOTE RESISTOR All resistors are carbon ¼W resistor, unless marked otherwise. - Page 51 A – BOARD - TNPH0348...
- Page 52 A – BOARD – TNPH0348...
- Page 53 D – DOARD – TNPH0349...
- Page 54 DF – BOARD - TNPA1806...
- Page 55 G – BOARD – TNP8EG004 DIODES D1011 D1012 D3103 D3104 TRANSISTORS Q1003...
- Page 56 L – PCB – TNPA1726...
- Page 57 H – BOARD – TNPA1724...
- Page 58 Z - PCB – TNP8EZ007 DIODES D2410 D2437 IC2406 D2401 D2411 D2438 TRANSISTORS D2402 D2431 I.C.’s Q2402 D2403 D2432 IC2401 Q2403 D2404 D2433 IC2402 D2405 D2434 IC2403 D2406 D2435 IC2404 D2407 D2436 IC2405...
- Page 59 L – PCB – TNP8EL014 DIODES D903 D351 D904 D352 D953 D354 I.C.’s D355 IC351 D356 IC352 D360 IC353 TRANSISTORS D383 D385 Q955 D386 Q956 D901 D902...
- Page 60 NOTES...
- Page 61 NOTES...
Need help?
Do you have a question about the TX-32PB50 and is the answer not in the manual?
Questions and answers