Table of Contents
Advertisement
Quick Links
Advertisement
Table of Contents

Related Manuals for LBC LCR7W

Summary of Contents for LBC LCR7W
- Page 1 Model LCR7W 7-Spit Rotisserie Oven with Wash System Operator’s Manual LBC Bakery Equipment, Inc. 5901 – 23 Drive West, Suite 105 Everett, WA 98203 Phone: 888-RACKOVN (888-722-5686) Fax: 425-642-8310 Email: service@lbcbakery.com Website: www.lbcbakery.com REV D 7/2013...
-
Page 2: Read First
THE APPLIANCE FREE FROM COMBUSTIBLE MATERIALS. Your LBC Rotisserie was manufactured to rigid standards. The appliance has been tested and is listed by Intertek Testing Services (ETL Semko) and meets applicable safety and sanitation standards. The responsibility of the manufacturer is to supply suitable, comprehensive instructions and recommendations for proper operation and maintenance. -
Page 3: Table Of Contents
TABLE OF CONTENTS CHAPTER PAGE Read First ............. . . 2 Safe Operating Rules . -
Page 4: Safe Operating Rules
SAFE OPERATING RULES (Part 1 of 2) YOU MUST READ AND UNDERSTAND THIS SECTION BEFORE YOU OPERATE THIS APPLIANCE. Hot Surfaces The appliance may be hot. Do not contact hot surfaces in the appliance interior without proper protection. Contact with hot surfaces can cause serious burns, loss of skin and hair and the use of limbs. ... - Page 5 SAFE OPERATING RULES (Part 2 of 2) YOU MUST READ AND UNDERSTAND THIS SECTION BEFORE YOU OPERATE THIS APPLIANCE. Smoke or Fire Hazard If you see flames or smoke in or around the appliance: Turn the appliance off and contact your supervisor or an authorized service provider. Call 911 or contact fire safety personnel in accordance with your employer’s emergency plan.
-
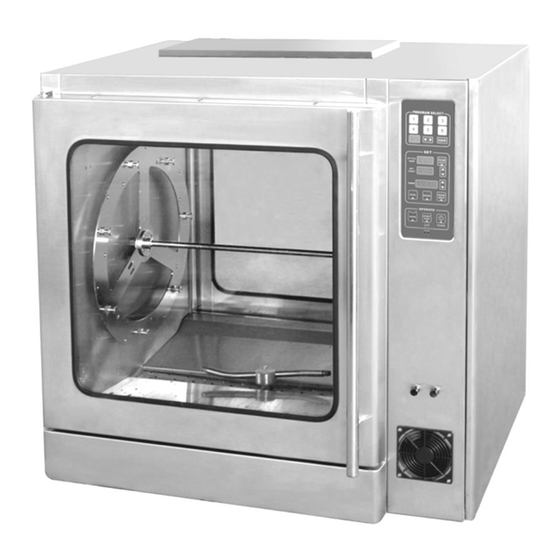
Page 6: Equipment Description
38.9” [988mm] Width 31.3” [795mm] Depth NOTE 1: The depth shown is for the LCR7W-2D two-door (pass through) oven and excludes handles. For the LCR7W-1D single-door oven, add 0.6” [15mm]. NOTE 2: The height shown excludes the legs, casters or stand. For countertop legs add 4.0” [102mm]. For floor legs add 6.0”... -
Page 7: Configurations
Stacked Appliances Combinations: 2 ea LCR7W Rotisseries or 1 ea LCR7W Rotisserie + 1 ea LHC7W Holding Cabinet NOTE: When a Rotisserie is stacked with a Holding Cabinet, it may be installed on the top or bottom. 6.0” [152mm] Legs or 3.5”... -
Page 8: Control Overview
CONTROL OVERVIEW (Part 1 of 3) See pages 9 & 10 for more thorough descriptions of the features shown below. E1. Quick-Select Buttons Easy access to most-frequently- used recipes E1. Recipe Indicator Light E1. Recipe Arrow Illuminates to indicate when a Buttons &... -
Page 9: Operation
CONTROL OVERVIEW (Part 2 of 3) During the first few hours of operation, you may notice a small amount of smoke coming from the N O T I C E rotisserie and/or a faint odor. This is normal in a new oven and will disappear after a few hours of use. - Page 10 CONTROL OVERVIEW (Part 3 of 3) Jog Button. Press-and-hold this button to rotate the carousel while the loading door is open. You can also rotate the carousel by closing the door. Wash Button. Press this button to begin the wash cycle. (NOTE: The oven must be at the proper temperature before the wash cycle can begin.
-
Page 11: How To Program And Save A Recipe
OPERATION (Part 1 of 6) How to Program and Save a Recipe Press the power button to turn the oven on. Select a recipe number. Up to 20 recipes may be saved. Buttons 1 through 6 are Quick-Select buttons intended for your most-used recipes. - Page 12 OPERATION (Part 2 of 6) Setup or deactivate the roast step. To setup, press the roast button and enter a set point and time. If you prefer to deactivate the roast step, enter a roast time of “00:00.” Setup the warm/hold step.
-
Page 13: How To Run A Recipe
OPERATION (Part 3 of 6) How to Run a Recipe Press the power button to turn the oven on. (NOTE: The oven will automatically heat to the set temp of the first step with an active timer value. Select your recipe. -
Page 14: How To Use The Wash System
OPERATION (Part 4 of 6) Close the loading door and press the timer start button. The timer light and the timer colon will change to from steady on to flashing to indicate the timer is active and counting down. (NOTE 1: To stop the timer, press the timer start button a second time. - Page 15 OPERATION (Part 5 of 6) Remove all cooked product from the oven along with any meat, bones or other debris from the oven interior. Press the wash button and select your desired wash mode. [NOTE: One press activates the 1X (normal) wash mode.
- Page 16 OPERATION (Part 6 of 6) After removing the outer drip plates, remove the inner drip plates. For easier removal, hand-turn the spray arm as shown. The plates hang loosely inside the oven; no tools are required for this step. Follow the scraping and cleaning instructions outlined in the previous step.
-
Page 17: Maintenance
Empty the grease receptacle to ensure it does not overflow. Replace the soap bottle when empty. Use only CIP Oven Cleaner, which can be purchased from LBC Bakery Equipment. See the Parts List section of this manual. CLEANER IS CORROSIVE. CAREFULLY READ... -
Page 18: Parts List
DISTRIBUTORS CAN CAUSE BODILY INJURY TO THE OPERATOR AND/OR DAMAGE TO THE APPLIANCE AND WILL VOID ALL WARRANTIES. Service on this or any other LBC appliance must be performed by qualified personnel. For an N O T I C E approved service representative in your area, visit our website at www.lbcbakery.com or call... -
Page 19: Notes
NOTES (Part 1 of 4)
Need help?
Do you have a question about the LCR7W and is the answer not in the manual?
Questions and answers