Table of Contents
Advertisement
Quick Links
Advertisement
Table of Contents
Troubleshooting

Related Manuals for Riptide Urban Lite


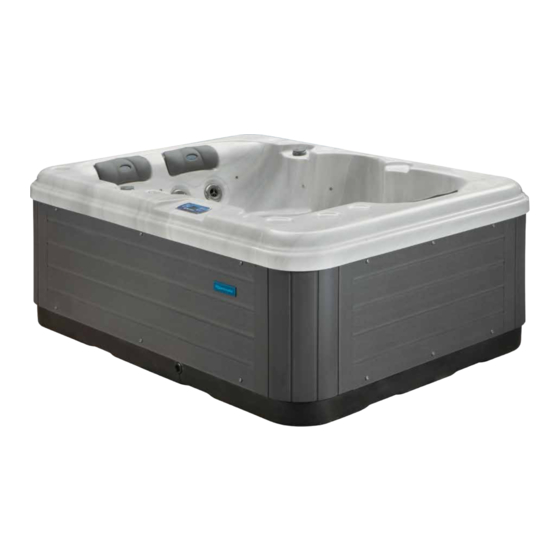
Summary of Contents for Riptide Urban Lite
- Page 1 LITE ™ Spas for wellness and modern living Owner’s Manual 2017 Euro 240v 50 Htz...
-
Page 2: Table Of Contents
CONTENTS The Urban Lite™ Collection model range funCtIOns Jets IMpOrtant safety InfOrMatIOn Light InstallatIOn and set-up Bar Top Controls Selecting a site for your spa Freeze Protection Electrical requirements and connections Compartment Door Checklist before filling your spa Clean Cycle... -
Page 3: The Urban Lite™ Collection Model Range
The Urban Lite Collection model range ™ Boulevard Power Supply Hand Held Massage Jet Control Hand Held Massage Jet Fitting Drain Point Air Control skyline Power Supply Air Control Hand Held Massage Jet Fitting Hand Held Massage Jet Control Drain Point... - Page 4 The Urban Lite Collection model range ™ Metro Power Supply Air Control Hand Held Massage Jet Fitting Hand Held Massage Jet Control Drain Point Mayfair Drain Point Diverter Control Air Control 1 Air Control 2 Power Supply Hand Held Massage...
-
Page 5: Important Safety Information
3. warnInG - risk of children drowning. Although COnneCt tHIs spa tO yOur eleCtrICIty supply your Riptide spa cover is not rated as a safety cover, it is wise to always keep the spa cover securely fastened 4. danGer - risk of accidental drowning. Extreme when not in use. -
Page 6: Installation And Set-Up
Riptide spa cover and cabinet. Lastly, avoid locating your spa in an area where debris could be blown into the spa. if sinking your Riptide spa into the ground a suitable drainage system must be installed to avoid the risk of hydrostatic pressure from rising ground water. -
Page 7: Checklist Before Filling Your Spa
2. Check drain valves: Check that the spa drain valve should be approximately 40-250 ppm. is fully closed. 6. Check for leaks: After the Riptide spa is full, but 3. tighten equipment fittings: in the equipment before turning the power on, check all the fittings and... -
Page 8: Control Panel Operations
The speed of the jets is fully adjustable via the simple The fully programmable Gecko YJ2 control system on Riptide spas allows total management of the to operate buttons on the control panel. water temperature and jet power at the touch of a audio system button. -
Page 9: Keypad Functions
CONTROL PANEL OPERATIONS Keypad funCtIOns power Settings Jets 1 Press any button to turn the keypad on. Light After 30 minutes without activity it will shut off. Jets 2 Mode Main screen The main screen gives you access to your accessories and water temperature. At the bottom of the screen you will see any error or maintenance messages that are present. -
Page 10: Water Care
CONTROL PANEL OPERATIONS water Care Settings Jets 1 The Water Care section will help you Light set up your ideal filtration and heating settings. Choose from Away, Beginner, Mode Jets 2 Energy Savings, Super Energy Savings, and Weekender, depending on your need. -
Page 11: Bluetooth Audio
CONTROL PANEL OPERATIONS Bluetooth audio Settings Jets 1 The keypad can be used with the Light in.stream 2 audio system. The in.stream 2 Settings menu gives you a Source Jets 2 Mode selector, a Bluetooth disconnect option, an On/Off switch and an audio control on fader, balance and subwoofer. -
Page 12: Date And Time
CONTROL PANEL OPERATIONS date and time Settings Jets 1 Here you can adjust the time format, Light change the year, date and time. Use the arrows to choose the setting that Jets 2 Mode you want to adjust, and select it by pressing the Light key. -
Page 13: Wifi (Optional Extra)
CONTROL PANEL OPERATIONS wifi (optional extra) Settings Jets 1 For the WiFi menu to appear in the Light Settings menu your in.touch module must be equipped with software Jets 2 Mode version 11.00 or higher. This menu allows you to connect your in.touch module to a WiFi network or to change its network. -
Page 14: In.stream 2 Audio Operation
CONTROL PANEL OPERATIONS in.stream 2 audio operation Volume Up/Down Next track Settings Jets 1 Light Jets 2 Mode Mode Play/Pause Last track press the Mode key to access your in.stream 2 turn power On/Off if you are using a device with Bluetooth technology, This option can be found under the Audio section in it must be connected for functions to work. -
Page 15: Jets
Using the key pad you can permanently select your favourite colour. Compartment door For easy access, all components in Urban Lite Spas are positioned on the same side as the compartment door. In the event that an engineer needs to get inside your spa all that is needed is to pull away the steps and open the cabinet. -
Page 16: Troubleshooting Guide
TROUBLESHOOTING GUIDE dIaGnOstICs - OperatIOn Once commissioned, your Riptide Spa should operate normally when properly set up. if, however, you encounter operating problems please use this general guide. if this guide does not help you solve the problem please contact your dealer. -
Page 17: Diagnostics - Error Codes
Troubleshooting TROUBLESHOOTING GUIDE Possible error codes on in.yj, in.ye, in.yt and in.xe control systems dIaGnOstICs - errOr COdes The error codes indicate a failure or problem that must be rectified to guarantee the good function of the system� n.YJ2 The error codes indicate a failure or problem that must be rectified to guarantee the good function of the The error code and the water temperature are displayed alternately on the keypad�... -
Page 18: Maintenance
To correct high TA, contact your authorised Note 3: Never mix chemicals. Riptide dealer. Note 4: Always add chemicals directly to the spa water, 5. Calcium hardness (CH) 250-500 ppM evenly spreading the chemicals over the surface. -
Page 19: Starting Your Spa With New Water
Cloudy water prevention and control 3. if possible, have your authorised Riptide dealer test Use a WATER CLARiFiER as per the instructions on the Calcium Hardness (CH) of your water and adjust as the manufacturer’s label. -
Page 21: Changing Your Spa Water
Replace the filters every year or sooner if necessary. Only use genuine Riptide filter cartridge replacements. CAUTiON: Using a brush to clean a filter could damage it. Commercially available filter cleaners may be used and can be obtained from your authorised Riptide dealer. -
Page 22: Cover Care
For these Low-use or No-use periods, we recommend the following: if your Riptide spa fails within the guarantee period and within the scope of its guarantee, contact your low-use: if your spa is being used less than once per authorised dealer and schedule a service call. -
Page 23: Riptide Limited Warranty
Terms and conditions apply no-nonsense warranty Riptide will make no call-out or labour charges or ask for part payment of parts for the entire warranty period, provided that your Urban Lite Spa has had annual services undertaken before each delivery anniversary. - Page 24 Riptide Pools Limited, 41 Robjohns Road, disclaimers Chelmsford, Essex, CM1 3AG, UK Tel 01245 265036 Riptide shall not be liable for loss of use of the Riptide spa or other incidental, consequential, special, annual service requirement indirect or punitive costs, expenses or damages,...
Need help?
Do you have a question about the Urban Lite and is the answer not in the manual?
Questions and answers