
Subscribe to Our Youtube Channel
Related Manuals for Body Champ BR3070


Summary of Contents for Body Champ BR3070
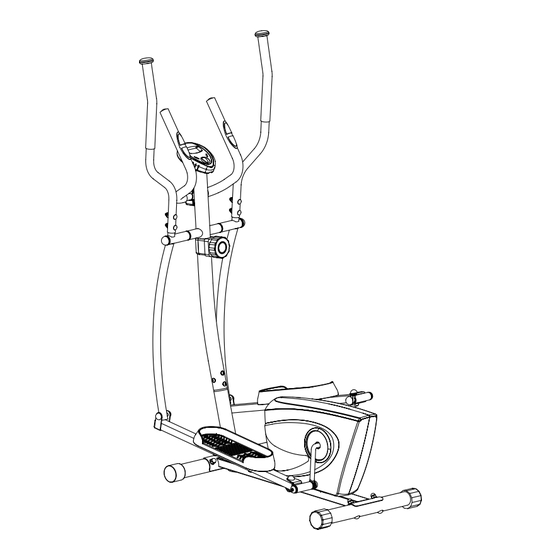
- Page 1 BR3070 * This item is for consumer use only and it is not meant for commercial use. * This item is for consumer use only and it is not meant for commercial use. OW NER ’ S MA NUAL OW NER ’ S MA NUAL...
-
Page 2: General Information
General Information Safety Storage and Use Before you undertake any exercise program, Your product is intended for use in clean please be sure to consult with your doctor. dry conditions. You should avoid storage in Frequent strenuous exercise should be excessively cold or damp places as this may approved by your doctor and proper use lead to corrosion and other related problems. - Page 3 Hardware & Tool List The following hardware is used to assemble your unit. Please take a moment to familiarize yourself with these items. PLEASE NOTE: some of these parts may have already been pre-assembled on your unit. Bolts #38L. Left Pedal Hinge Bolt #24.
-
Page 4: Parts Listing
Parts Listing The following parts list describes all of the parts illustrated on the exploded diagram on the following page. Please note, most of these parts are already pre-assembled on your unit. Description Description Main Frame Nylon Nut (M10) Front Post Bolt Cap (S16 ) Front Stabilizer Hex Bolt (M10×50 mm) -
Page 5: Exploded Diagram
Exploded Diagram The following diagram is provided to help you familiarize yourself with the parts and hardware that will be used during the assembly process. Please note that not all of the parts and hardware you see here will be used while you are assembling the machine because some of these items are already pre-installed. -
Page 6: Assembly Instructions
Assembly Instructions A s s e m b l y S t e p 1 Hardware Required With the help of an assistant, attach the Front Stabilizer (#03) Bolts to the front of the Main Frame (#01). Insert two Carriage Bolts (#12) through the Front Stabilizer (#03) followed by the front of the Main Frame (#01). - Page 7 Assembly Instructions A s s e m b l y S t e p 2 Hardware Required Remove four Bolts (#16) and four Arc Washers (#56) that were Bolts pre-assembled on the Main Frame (#01) and set them aside as they will be used in a later process.
-
Page 8: Left Side
Assembly Instructions A s s e m b l y S t e p 3 A s s e m b l y S t e p 3 Hardware Required Hardware Required Please refer to the diagram below and pay special attention to corresponding Bolts left &... - Page 9 Assembly Instructions A s s e m b l y S t e p 4 Hardware Required Remove Bolts (#51) and two Spring Washers Bolts (#52) that were pre-assembled on the Front Post (#02) and set them aside as they will be used in a #45.
- Page 10 Assembly Instructions A s s e m b l y S t e p 5 Hardware Required Removed two Screws (#55) that are pre-assembled on the back of the Monitor (#09) and set them aside as they will be use d in a later process. #55.
-
Page 11: Computer Operation
Computer Operation TIME DISTANCE ODOMETER SPEED CALORIES SCAN PULSE 0:00 FUNCTION MARK: A: Auto Scan O: Odometer (Total Distance) S: Current Speed C: Calories Burned : Pulse Rate D: Distance Traveled T: Elapsed Time BATTERY INSTALLATION/REPLACEMENT: 1. Lift off the battery cover and place two SIZE-AAA batteries into the battery housing on back of monitor with the +/- sides installed correctly. -
Page 12: Specifications
Computer Operation Calories Press the button until the ARROW points to “C” to display the calorie consumption/calories burned. Pulse Rate Press the button until “” appears to show your heart rate (Pulse) in beats per minute. Place the palms of your hands and grip lightly on both the contact pads and the monitor will display your heartbeat rate in beats per minute (BPM) on the LCD display. -
Page 13: Troubleshooting
Troubleshooting (AFTER COMPLETE ASSEMBLY) Solution Troubleshoot Area If the computer is not picking up your hand pulse signal (or you are getting HAND PULSE SIGNAL inaccurate readings), please adjust the following: Slightly moisten/dampen the palms with water so the sensors can detect a pulse signal. - Page 14 Warm-Up Instructions Before use, you must read and understand all instructions & warning stated in this Owner's Manual as well as posted on the equipment. The following flexibility exercises are provided to you as a means to prevent injury while you are exercising. A proper warm-up routine decreases the chance of injuring your muscles while you are exercising.
- Page 15 Warm-Up Instructions Trunk Flexion, Prone 1. Assume the depicted position on your hands and knees. Stretch your hands out in front of you and then slowly start to pull them back in toward your body as you tuck your chin and arch your back upward. 2.
-
Page 16: Proof Of Purchase
Proof of purchase Model Number BR 3070 version:8-21-2011 BR 3070...
Need help?
Do you have a question about the BR3070 and is the answer not in the manual?
Questions and answers