Table of Contents
Advertisement
Advertisement
Table of Contents

Subscribe to Our Youtube Channel
Summary of Contents for Hello Bee Prusa DIY 3D PRINTER KIT
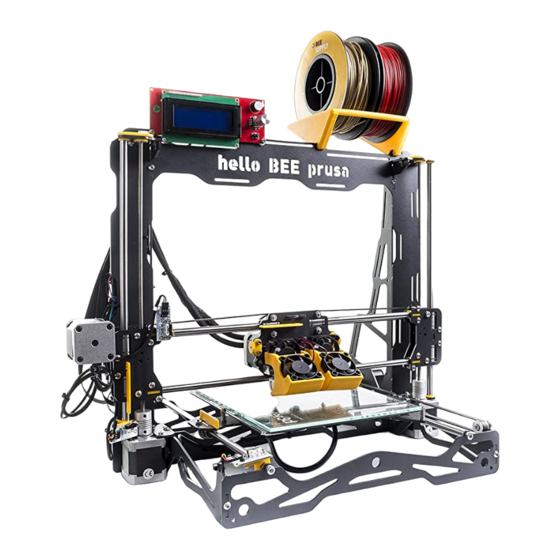
- Page 1 USER MANUAL DIY 3D PRINTER KIT...
-
Page 2: Table Of Contents
CONTENTS FIRST PRINT Configuring Cura 15.04.6........................3 Extruder calibration..........................11 calibration............................13 Load/Unload filament..........................17 Using an SDcard...........................18 GETTING STARTED WITH DUAL EXTRUSION How to set extruder offset........................19 How to set the two extruders at the same height................21 Steps to print with two extruders......................23 OTHER OPTIONS Uploading the firmware........................24... -
Page 3: First Print
FIRST PRINT For our first print, we will be using the free 3DBenchy 3D model - you can download it here: http://www.3dbenchy.com/ There are a few ways to print but we strongly recommended using Cura and an SDcard. CONFIGURING CURA 15.04.6 In order to generate the G-code for printing, you can use the Cura 15.04.6 Please download only related versions from this link: https://ultimaker.com/en/products/cura-software/list... - Page 4 Before you start using this software you need to create a correct profile. Add helloBEEprusa as a new machine on Cura 15.04.6. Go to “File > Machine settings” and click on “Add new machine”. Follow the next screenshots and use the same options. Access “Machine >...
- Page 5 Go to “Expert > Open expert settings…” and compare with the following screenshot.
- Page 6 CONFIGURE SETTINGS Follow these screenshots and use the same options. NOTE: for ABS filament, recommended settings are: a printing temperature of about 240ºC; bed temperature of 100ºC or more. For PLA filament, recommended settings are: a printing temperature of about 200ºC; bed temperature of about 60ºC.
- Page 7 Follow these screenshots and copy the following commands. USE THE FOLLOWING COMMANDS FOR START.GCODE: ;Basic settings: ;Layer height: {layer_height} Walls: {wall_thickness} Fill: {fill_density} ;Print time: {print_time} ;Filament used: {filament_amount}m {filament_weight}g ;Filament cost: {filament_cost} M140 S{print_bed_temperature} ;bed temperature line M109 S{print_temperature} ;temperature line G21 ;metric values G90 ;absolute positioning M107 ;start with the fan off...
- Page 8 USE THE FOLLOWING COMMANDS FOR END.GCODE: ;End GCode M104 S0 ;extruder heater off M140 S0 ;heated bed heater off (if you have it) G91 ;relative positioning G1 E-1 F300 ;retract the filament a bit before lifting the nozzle, to release some of the pressure G1 Z+0.3 E-5 F{travel_speed} ;move Z up a bit and retract filament even more G28 X0 Y0 ;move X/Y to min endstops, so the head is out of the way G90 ;absolute positioning...
- Page 9 USE THE FOLLOWING COMMANDS FOR START2.GCODE: ;Basic settings: Layer height: {layer_height} Walls: {wall_thickness} Fill: {fill_density} ;Print time: {print_time} ;Filament used: {filament_amount}m {filament_weight}g ;Filament cost: {filament_cost} M140 S{print_bed_temperature} ;Uncomment to add your own bed temperature line M104 S{print_temperature} ;Uncomment to add your own temperature line M109 T1 S{print_temperature2} ;Uncomment to add your own temperature line M109 T0 S{print_temperature} ;Uncomment to add your own temperature line G21 ;metric values...
- Page 10 USE THE FOLLOWING COMMANDS FOR END2.GCODE: ;End GCode M104 T0 S0 ;extruder heater off M104 T1 S0 ;extruder heater off M140 S0 ;heated bed heater off (if you have it) G91 ;relative positioning G1 E-1 F300 ;retract the filament a bit before lifting the nozzle, to release some of the pressure G1 Z+0.3 E-5 F{travel_speed} ;move Z up a bit and retract filament even more G28 X0 Y0 ;move X/Y to min endstops, so the head is out of the way G90 ;absolute positioning...
-
Page 11: Extruder Calibration
EXTRUDER CALIBRATION One very important step before you start printing is to ensure that the extruder is correctly aligned. In some cases, extra paint is present in the metal mainframe that causes a misalignment after assembling the extruder. Because of this, you can have a extruder like the following example. If this happens, just follow the next steps to correct this. - Page 12 Use one plain washer on each of the cylinder-head screw M3X30. After you place the four washers, the extruder should be aligned.
-
Page 13: Bed Calibration
BED CALIBRATION Before your first print, you must calibrate the bed so the first layer of the print can adhere to the bed evenly, otherwise it may ruin your print. For this you can use the LCD. Just follow the next steps: On the LCD, push the button to access “info screen”. - Page 14 Now, you use the 3 screws to level the bed. Remember that you need to keep the same clearance from the nozzle on all points of the bed. Next step is to adjust the home Z axis so the nozzle can stay at a distance of about 0.2mm from the bed. You can use a sheet of paper as reference for the needed distance.
- Page 15 SEMI-AUTOMATIC 9-POINT CALIBRATION This option in the LCD will help you to ensure that prints will adhere to the bed, even if the bed is not perfectly level. Before this, make sure the bed is calibrated. Now follow these steps to en- able the “Level bed”...
- Page 16 On each of the nine points, you must adjust the extruder height to make sure that the table and the extruder have a clearance of more or less 0.2mm. You can see this points represented on the next picture. Your printer should make a sound after finishing the leveling, if doesn’t beep at the end of the calibration you need to manually save the settings by goint to “Control”...
-
Page 17: Load/Unload Filament
LOAD/UNLOAD FILAMENT This option in the LCD will help you to load and unload filament in an easy way. For this you just need to follow the next steps. In the “Info screen” select “Change filament”. Now it is recommended that you select “Move to position” to ensure that the extruder goes to a safe position to change the filament. -
Page 18: Using An Sdcard
USING AN SDCARD After we correctly configure Cura 15.04.6, we just need to import the STL file and export the Gcode. We export the Gcode by doing “Save toolpath” and choosing to save it in your SDcard. Now insert the SDcard into the printer and with the LCD button, navigate to “Print from SD” and choose the file. -
Page 19: Getting Started With Dual Extrusion
GETTING STARTED WITH DUAL EXTRUSION Before you start printing with dual extruders, you need to setup the offset of the extruders. HOW TO SET EXTRUDER OFFSET Download and drag the following file into Cura workspace: https://github.com/beeverycreative/helloBEEprusa-software/raw/master/dual_extruder_offset.amf... - Page 20 Export the G-Code and print. Grab a metric ruler and measure the distance of any axis offset in the 3D printed object. (E.g.: The red rectangle and the blue rectangle 2,53mm should coincide. If not, measure the offset between them as precisely as possible).
-
Page 21: How To Set The Two Extruders At The Same Height
HOW TO SET THE TWO EXTRUDERS AT THE SAME HEIGHT Ensure that the X carriage has the exact same height, using its Z-axis motor as a reference, and ensure that the bed is calibrated, with the lowest nozzle as reference. - Page 22 With the extruders on the center of the print bed and with the lowest nozzle touching the table, take off the printed part containing a fan. Remove the one pertaining to the extruder that isn’t touching the table. Unscrew the little screw and we can now lower the nozzle until it is touching the table too. Screw it again and assemble the blower, now we have the nozzles at the same height.
-
Page 23: Steps To Print With Two Extruders
STEPS TO PRINT WITH TWO EXTRUDERS 1. Load the two STL files in to the Cura, for instance these 3DBenchy files. The first loaded STL file will be printed on extruder 0 and the second one on extruder 1. 2. Select any object and with mouse right click, select the “Dual extrusion merge”. 3. -
Page 24: Other Options
OTHER OPTIONS This section of the manual is to inform you of other possibilities of the helloBEEprusa. UPLOADING THE FIRMWARE Firmware is what controls the hardware and allows it to interact with outside devices. These steps will help you to upload the firmware 1. - Page 25 2. Download and install Arduino V1.6.8 (only this version) on your computer. https://www.arduino.cc/en/Main/OldSoftwareReleases#1.0.x 3. Unzip the firmware folder. In the Marlin folder, double-click on “Marlin.ino” to open the program.
- Page 26 4. In menu tools select the board – Arduino Mega 2560. Please disconnect any USB equipment from your computer, with the exception of USB mouse and keyboard, and connect only your hello- BEEprusa with the USB cable. 5. Select the port; 6.
-
Page 27: Pronterface
PRONTERFACE This software can be used to help you calibrate the print bed, load/unload filament and carry out other operations. You can download it from this link - version “Printrun-Win-Slic3r-03Feb2015”: http://koti.kapsi.fi/~kliment/printrun/ To make sure that the Pronterface is correctly configured, follow these steps: Go to “Settings”... -
Page 28: Pronterface - Bed Calibration
PRONTERFACE - BED CALIBRATION Before starting to level the bed, you can jog the extruder and the bed using the jog buttons (picture below) on Pronterface. You can move the Z axis in a way that the nozzle stays a bit closer to the bed and is essential for the following steps. -
Page 29: Load/Unload Filament (Optional Ways)
First configure Pronterface and Cura, after that, use Cura to generate the GCode of the object you want to print. Connect the printer via USB. Click on the “Connect” button and the printer will be connect to Pronterface, after that click on the “Load file”... - Page 30 In “Preheat PLA” select “Preheat PLA 0”, the printing table and the extruder 0 will start heating or select “Preheat PLA 1”, the printing table and the extruder 1 will start heating. After finishing heating, push the button to go to the “info screen” and select “Prepare”. In “Prepare”...
-
Page 31: Upgrade Your Hellobeeprusa
UPGRADE YOUR helloBEEprusa The information below will help you to understand what you need to do to update your helloBEEprusa. First, check your serial number to know what applies to you. 1111300001>1111400124 UPGRADES: • 2 x M5 brass nut; • Newest printed parts;... - Page 32 www.facebook.com/beeverycreative www.google.com/+beeverycreative ©2017 BEEVERYCREATIVE www.twitter.com/beeverycreative www.beeverycreative.com All rights reserved. Todos os direitos reservados www.linkedin.com/compan y/beeverycreative www.instagram.com/beev erycreative...
Need help?
Do you have a question about the DIY 3D PRINTER KIT and is the answer not in the manual?
Questions and answers