Table of Contents
Advertisement
Quick Links
Advertisement
Table of Contents

Related Manuals for UWE IBED


Summary of Contents for UWE IBED
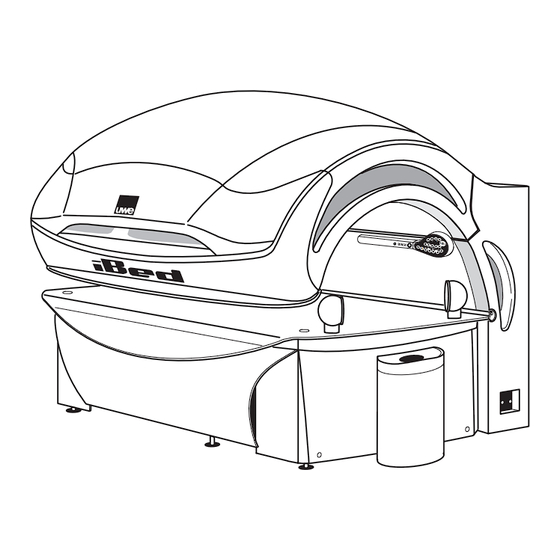
- Page 1 Bedienungsanleitung Operating Instructions iBED...
-
Page 2: Table Of Contents
Vorwort Forward Das iBED ist nach dem neuesten Stand der The iBED is built with state-of-the-art technology Technik gebaut und betriebssicher. Es können and is safe to operate. However, there is a risk of jedoch von dem iBED Gefahren ausgehen, wenn... -
Page 3: Sicherheitshinweise
(filter discs) Hinweise für Besonnungszeiten ..42 For every skin type a tip how ....43 iBed HD to get a nice tan with iBed HD 1 NOTES ON SAFETY 1 SICHERHEITSHINWEISE 1.1 Before initial operation 1.1 Vor der Inbetriebnahme... -
Page 4: Gefahrenquellen
Make sure there are at least 48 hours between die Schaltuhr fehlerhaft oder eine Filterschei- your first and second tanning sessions on the be zerbrochen ist. iBED. Lassen Sie mindestens 48 Stunden zwischen Ihren ersten beiden Besonnungen auf dem iBED verstreichen. -
Page 5: Bestimmungsgemässe Verwendung
Reparaturarbeit und dergleichen dürfen nur Servicing and repair work and the like may only vom Kundendienst der Firma uwe oder von ihr be carried out by uwe Customer Service or ermächtigten Personen durchgeführt werden. Die persons appointed by them. -
Page 6: Bedienung
ANGABEN FÜR DAS INFORMATION FOR THE TANNING STUDIOPERSONAL SALON PERSONNEL 2 BEDIENUNG 2 OPERATION 2.1 Ausstattungen - Neues und Bewährtes 2.1 Equipment - New and proven Wichtige Informationen! Important Information! To be read Unbedingt lesen! by everyone! Warnung Warning Nicht alle Gerätetypen verfügen über die hier Not every model is equipped with all of the aufgeführten Ausstattungsmodule und somit modules described here and therefore all... -
Page 7: Vorbereitung
AUDIOSYSTEM (Option) AUDIO SYSTEM (Optinal) Das Gerät kann an ein externes Audiosystem The unit may be connected to an external sound angeschlossen werden. system. HANDYANSCLUSS (Option) CONNECTION TO CELL PHONE (option) Das Gerät verfügt über einen Anschluss für Ihr The bed has a connection for your cell phone Handy,damit Sie Ihre eigene Musik hören können. -
Page 8: Starten Im Privatbetrieb
2.3.2 Starten im Privatbetrieb 2.3.2 Starting in private operation Betätigen Sie die START-Taste (2/1) auf der Actuate START-button (2/1) on the operating Bedien-Einheit. unit. Erhöhen Sie die Besonnungszeit in Minuten- Increase the tanning time in one-minute sprüngen durch mehrmaliges Betätigen der increments by repeatedly actuating START- START-Taste (2/1). -
Page 9: Besonnung Körper
2.3.5 Besonnung Körper 2.3.5 Body tanning Bedien- und Anzeigeelemente Operating and display elements • [+] - Taste (4/1) • [+] button (4/1) • [-] - Taste (4/2) • [-] button (4/2) • LED (4/3) • LED (4/3) Die Tasten steuern die Intensität der Körperbe- The buttons control the intensity of body tanning. -
Page 10: Audio
2.3.7 AUDIO (OPTION) 2.3.7 AUDIO (OPTIONAL) • Programmwahl • Program selection Bedienelemente Operating elements • Taste (6/3) • button (6/3) • Taste (6/4) • button (6/4) Wählen Sie über (6/3) und (6/4) aus den einge- Use (6/3) and (6/4) to select from the entertain- spielten Unterhaltungsprogrammen aus. -
Page 11: Störungsanzeigen
Immer auf äusserste Hygiene Always pay great attention to achten. hygiene. uwe Reiniger und andere Reini- Keep uwe cleaning agent or other gungsmittel nicht in die Augen cleaning agents out of your eyes. sprühen. Do not spray near an open flame. -
Page 12: Angaben Für Den Betreiber Inbetriebnahme
ANGABEN FÜR DEN BETREIBER INFORMATION FOR THE USER Inbetriebnahme 3 Initial operation 3.1 Wichtige Information! Unbedingt lesen! 3.1 Important Information! Kein mangelhaften Besonnungsge- To be read by everyone! Never switch räte in Betrieb nehmen. on a defective sun bed. Achten Sie auf die höchstzulässige Ensure the maximum permissible Warnung Raumtemperatur von maximal 35°C,... - Page 13 Grosse Abdeckhaube vor dem Fußgestell Removing large covering panel in front of the entfernen base. Entriegeln Sie die Abdeckhaube (11/2) mit Unlock the covering panel (11/2) with the dem Innensechskantschlüssel (11/1). Allen key (11/1). The front apron is held in Die Frontschürze wird durch ein Fangseil place by an arrester cable.
-
Page 14: Breeze-Behälter Anschliessen
3.4. BREEZE-Behälter anschliessen 3.4. Connecting the BREEZE tank Bei der Auslieferung ab Werk ist der BREEZE Be- On delivery from the factory, the BREEZE tank is hälter noch nicht angeschlossen. Der verschlos- not yet connected. The closed tank is transported sene Behälter wird im vorderen Teil des Fuß- in the front part of the foot area in its later location. -
Page 15: Breeze-Leitungen Entlüften
3.4.1 BREEZE-Leitungen entlüften 3.4.1 Bleeding the BREEZE lines Die BREEZE-Leitungen müssen bei der Erstinbe- The BREEZE lines must be bled during the initial triebnahme, nach Wartungsarbeiten am BREEZE- commissioning, following service work on the System und nach einem Behälterwechsel entlüftet BREEZE system and after changing the tank. -
Page 16: Audiosystem
Dust deposits reduce the tanning mindern die Bräunungswirkung. effect. Warnung Warning Ausschliesslich uwe Reiniger verwenden! Use only uwe cleaner! Reinigungsmittel nicht in die Augen sprühen! Keep cleaning agents away from the eyes! Nicht in offene Flammen sprühen! Do not spray cleaning agent near a naked... - Page 17 Sonnen- und Fitnessstudios. PICCOBELLO wird fitness studios. PICCOBELLO is supplied by uwe von uwe als Konzentrat geliefert und muss mit in concentrated form and must be mixed with Wasser zu einer gebrauchsfertigen Lösung ver- water to produce a diluted solution which is ready dünnt werden.
- Page 18 Klimascheibe reinigen (optional) Cleaning air separation sheet (optional) Lösen Sie die Halterung an der Klimascheibe Loosen the mount on the air separation (28/1). (28/1). Entnehmen Sie die Klimascheibe (28/2). Remove the air separation sheet (28/2). Reinigen Sie die Unterseite der Klimascheibe. Clean the bottom of the acrylic sheet bed.
-
Page 19: Know How Für
5 KNOW HOW FÜR DEN BETREIBER 5 KNOW HOW FOR THE OPERATOR 5.1 Service-Modul 5.1 Service module (Betriebsstunden, Fehlermeldung) (Operating hours, error messages) 5.1.1 Service-Modul 5.1.1 Service module Die Bedien-Einheit (31/1) dient zur Anzeige von The operating unit (31/1) is used to display verschiedenen Betriebszuständen, Fehlermel- various operating states and error messages and dungen und liefert Service-Informationen. -
Page 20: Programs Of The Service Module
5.1.3 Menüs des Service-Moduls 5.1.3 Service module menus Programm Menü Pr Program menu Pr Betriebstunden können Sie im Programm Operating hours can be read in the program Menü ablesen. menu. PrP1: Betriebsstunden Solarium PrP1: operating hours solarium PrP2: Betriebsstunden Leuchtmittel, ND PrP2: operating hours lamps, LP lamps Lampen in der Liege, HD-Strahler in the bed, HP lamps for the body... -
Page 21: Voreingestellte Wartungsintervalle
Contact uwe customer Verbindung mit dem Kundendienst service or your specialized dealer. Wichtig! Important! von uwe oder Ihrem Fachhändler. Löschen Sie den Fehlerspeicher Do not yet clear the error memory. noch nicht, sondern erst nach Rück- Rather, first consult uwe customer sprache mit dem Kundendienst von service or your specialized dealer. -
Page 22: Programme Des Service-Moduls . 20-21 Das Service-Modul Auf Einen Blick
Das Servicemodul auf einen Blick Standby Zustand Taste Start u. Stop 4 Sekunden drücken Programmmenü Pr Servicemenü S1 Servicemenü S2 Taste Start Taste Start Taste Start S2P1 Taste Stop Taste Stop Taste Stop PrP1 S1P1 Fehlerspeicher Betriebsstunden Solarium nicht belegt Taste Taste Start Start... -
Page 23: The Service At A Glance
The service at a glance Standby Mode Press the Start and Stop buttons simultaneously Programm menu Pr Service menu S1 Service menu S2 for about 4 seconds START button START button START button STOP button S2P1 STOP PrP1 STOP button Memory error Operating hours Solarium button... -
Page 24: Wartung Und
Beziehen Sie immer nur Original-Ersatzteile Order original spare parts only from your über Ihren Fachhändler oder uwe. Es kann keine specialized dealer or uwe. No liability can be Haftung übernommen werden, wenn andere als assumed if parts other than the original spare die Original-Ersatzteile eingebaut werden. -
Page 25: Acrylglasscheiben Liege
6.1.1 Liegenscheibe auswechseln 6.1.1 Replacing the bed panel Stellen Sie sicher, dass zuerst die Make certain that the gas springs Gasdruckfedern und dann die are dismounted first and then the Liegenscharniere demontiert bed hinges! Otherwise, there is a werden! Sonst besteht die Gefahr, danger that the gas springs will be Warning Warnung... -
Page 26: Acrylglasscheibe Seitenbräuner
6.1.3 Acrylic Panel Side Tanner 6.1.3 Acrylglasscheibe Seitenbräuner Acrylglasscheibe ausbauen Removing the Acrylic Panel Nehmen Sie den Innensechskantschlüssel Take the socket head screwdriver (36/2) and turn the 4 bolts (36/3). (36/2) und drehen Sie die vier Riegel (36/3) herum. Tilt the acrylic panel (36/1) forwards onto Kippen Sie die Acrylglasscheibe (36/1) mit the long side. -
Page 27: Wechsel Des Hochdruck
BREAKSAFE BREAKSAFE Jede XTT-Filterscheibe über dem Hochdruck- Each XTT filter disc above the high pressure lamp in the canopy is equipped with a BREAKSAFE brenner ist mit BREAKSAFE (Sicherheits-Vor- richtung) gesichert. Bricht eine dieser Filter- device. If one of these filter discs breaks, the scheiben, wird der Stromkreislauf unterbrochen power supply is cut off and the unit can only be restarted after the XTT filter disc has been... - Page 28 The coated side of the XTT filter must be towards Die beschichtete Seite der XTT-Filterscheibe zeigt the tube. brennerseitig. The uwe logo on the XTT filter disc must be Das uwe Logo auf der XTT-Filterscheibe muss readable from the bed. von der Liege aus lesbar sein.
-
Page 29: Wechsel Des Power Spots Und
6.3 Wechsel des Power Spots und der 6.3 Exchanging the Power Spot and the Besonnungslampe im Fluter sunlampin the canopy Acrylglasscheibe Fluter ausbauen Removing the Canopy Acrylic Panel Nehmen Sie den Innensechskantschlüssel Take the Allan key (42/1) provided. (42/1). Using the Allan key (42/1), turn the three Drehen Sie die drei Innensechskantriegel hexagon bolts (42/2). -
Page 30: Effekt Licht Fluter
(47/6) of the big cover. Abdeckhaube heraus. Loosen the plug connection (47/7) of the Lösen Sie die Steckverbindung (47/7) der control board (47/8) for the illuminated uwe Platine (47/8) für das uwe Leucht-Logo. logo. Nehmen Sie die Fronthaube (47/1) ab. -
Page 31: Uwe Logo
Aussparungen (48/4) der grossen Abdeck- (48/4) of the big cover. haube heraus. Loosen the plug connection (48/5) of the control board (48/7) for the illuminated uwe Lösen Sie die Steckverbindung (48/5) der logo. Platine (48/7) für das uwe Leucht-Logo. Nehmen Sie die Fronthaube (48/1) ab. -
Page 32: Floorlight Lampe Wechsel
6.3.5 FLOORLIGHT Lampe wechsel 6.3.5 FLOORLIGHT Liegenscheibe hochklappen Lifting the bed acrylic Entriegeln Sie die beiden Drehriegel (51/2) Unlock the two spagnolets (51/2) towards in Richtung Symbol (51/3) offen the symbol (51/3) “open” with the Allen key mit dem Innensechskantschlüssel (51/1). (51/1). -
Page 33: Filtermatten Im Fluter
Filtermatten wechseln Changing filter mats Entriegeln Sie die Frontschürze (53/2) mit Unlock the front apron (53/2) with the Allen Innensechskantschlüssel (53/1) und key (53/1) and move the front apron for- bewegen Sie die Frontschürze nach vorne. ward. Ziehen Sie die lange Filtermatte (53/3) auf Pull out the long filter mat (53/3) on the der Unterseite der Montageplatte Steuerung bottom of the controller mounting plate. -
Page 34: Breeze Behälter Auswechseln
Fall normales Leitungswasser oder nur des- nor distilled water may be used. Use only the tilliertes Wasser verwendet werden. Verwenden water available from uwe in the original tanks Sie immer nur das von uwe angebotene Wasser which is triple distilled and sterile. -
Page 35: Filterwechsel Breeze
6.6.1 Filterwechsel 6.6.1 Change of filters Entnehmen Sie den BREEZE-Behälter. Remove the BREEZE tank. Nehmen Sie die Schläuche vom Deckel Remove the tubes from the cover (62/3) of (62/3) des Behälters ab, indem Sie die the tank by pressing the blue instant plug-in blauen Schnellsteck-Kupplungen (62/2) clutches 62/2) downwards. -
Page 36: Sprühvorgänge Breeze
6.6.4 Sprühvorgänge BREEZE auf Null setzen, 6.6.4 Set the BREEZE spray cycles to zero, BREEZE entlüften bleed BREEZE Sprühvorgänge BREEZE auf Null setzen Setting BREEZE spray cycles to zero Betätigen Sie [START] und [STOP] Actuate [START] and [STOP] simultaneously gleichzeitig 4 Sekunden lang. for 4 seconds. -
Page 37: Wartung Aroma-System
Acrylglasscheibe Fluter montieren Fitting the Acrylic Panel of Canopy Stellen Sie die Acrylglasscheibe entsprech- Fit the acrylic panel into the longitudinal end dem Siebdruck in die Längsnut (68/4) groove (68/4) according to the screen ein. Gerät Ausf. XTT. Der polierte GB Bereich printing. -
Page 38: Betriebsstundenzähler Aroma
Netz trennen. servicing or repair work. Warnung Reparaturen sind nur durch die Fa. Warning Repair work should only be carried uwe oder durch autorisierte Perso- out by uwe Customer Service or nen durchzuführen. other authorized persons. - Page 39 Informationen über eine effektive Be- und For information on effective ventilation, refer Entlüftung entnehmen Sie aus der bei Ihrem to the „Climatization tips“ brochure available Händler oder bei uwe erhältlichen Broschüre from your dealer or from uwe. „Klimatipps“. Veranlasssen Sie eine Überprüfung...
-
Page 40: Entsorgung
über den Hausmüll. household waste. Die Entsorgung erfolgt über die Fir- Waste disposal is effected by com- ma uwe, oder über eines von ihr be- pany uwe, or via a waste disposal nannten Entsorgungsunternehmen. company denomnated by uwe. 9 TECHNISCHE DATEN / 9 TECHNICAL SPECIFICATIONS 9.1 Technische Daten, Abmessung, UV-Typ und Zeittafel... -
Page 41: Abdeckung Der Lampen
Acrylglasscheibe in der Liege und der GB-Bereich canopy panel. der Fluterscheibe. Die Hochdruckstrahler des Gerätes iBED sind mit The high pressure lamps of the iBED unit are folgenden Filterscheiben abgedeckt: covered by the following filter discs: Hochdruckstrahler (3 Stück): je eine Filterscheibe... -
Page 42: (Filterscheiben) Hinweise Für Besonnungszeiten
10 Hinweise für Besonnungszeiten iBed HD Was für ein Typ sind Sie? Hauttyp 1 Hauttyp 1 Hauttyp 2 Hauttyp 3 Hauttyp 4 etwas dunkler hell hellbraun, Haut: Haut: Haut: auffallend hell Haut: Haut: als Hauttyp 1 bis hellbraun oliv Sommer-... -
Page 43: For Every Skin Type A Tip How
10 For every skin type a tip how to get a nice tan with iBed HD What is your skin type? Skin Type 1 Hauttyp 1 Skin Type 3 Skin Type 4 Skin Type 2 white with light to Skin:... - Page 44 Light GmbH + Co. KG Buchstrasse 82 · Postfach 20 20 D-73510 Schwäbisch Gmünd...
Need help?
Do you have a question about the IBED and is the answer not in the manual?
Questions and answers