Table of Contents
Advertisement
Quick Links
Download this manual
See also:
User Manual
Advertisement
Table of Contents

Subscribe to Our Youtube Channel
Related Manuals for QuickLabel Systems QL800

Summary of Contents for QuickLabel Systems QL800
- Page 1 ® The Labels You Want When You Need Them. USER GUIDE • Fast print speed, up to 305 mm/s • Excellent print quality up to 1600 dpi • High-yield, vivid inks • Complete with color labeling software QuickLabel.com Part Number: 22834649-EN-E...
- Page 3 QL-800 User Guide Part Number 22834649-EN-E Revision 1.2 11/2015 QuickLabel Systems, An AstroNova™ Division World Headquarters 600 East Greenwich Ave., West Warwick, RI 02893 Tel: +1 (401) 828-4000 Fax: +1 (401) 822-2430 E-mail: info@QuickLabel.com www.QuickLabel.com Technical Support Tel: +1 (401) 828-4000 E-mail: support@QuickLabel.com...
- Page 4 This manual is copyrighted with all rights reserved. No part of this manual may be reproduced, transmitted, transcribed, stored in a retrieval system, or translated into any language in any form by any means without written permission of QuickLabel Systems. Trademarks QL-800®...
- Page 5 Printhead Limited Warranty QuickLabel Systems warrants the printhead from the date of purchase for a period of 90 days or for 250,000 inches of printing, whichever comes first, contingent upon the use of QuickLabel ink and labels. The QL-800 printhead is calibrated for use with QuickLabel ink and labels and performs optimally only when used with these materials.
-
Page 6: Obtaining Service
Obtaining Service To obtain warranted service, please contact QuickLabel Technical Support through one of the Factory Sales and Service Centers. Contact Information for Factory Sales and Service QuickLabel USA and World Headquarters 600 East Greenwich Avenue West Warwick, RI 02893 USA Tel: +1 (401) 828-4000 Fax: +1 (401) 822-2430 Web Site: www.QuickLabel.com... -
Page 7: Table Of Contents
Contents Chapter: 1 Getting Started ......1 About the QL-800 ........1 Installation and Setup Overview . - Page 8 Contents Setting up Labels in Third-Party Design Applications ....32 Setting up the Printer Driver ....... 33 Setting up General Options .
- Page 9 Contents Chapter: 7 Safety Warnings and Precautions ....79 Location ......... 79 Power Supply and Power Cord .
- Page 10 Contents QL-800 User Guide...
-
Page 11: Getting Started
When you start printing your own labels in your office or factory with the QL-800 from QuickLabel Systems, you'll stop production delays and reduce excess inventory. You will achieve flexibility and cost-savings because you are digitally printing the right label for the right customer in the right quantity, just-in-time. -
Page 12: Installation And Setup Overview
Getting Started The QL-800 is designed with all the power of a high-end digital label printing press, but it's sold at just a fraction of the price and fits on your desk or tabletop. The QL-800 is a versatile, in-house digital color label printer that prints both labels in a range of widths at high speeds, and in high-quality. -
Page 13: Unpacking The Printer
Getting Started Unpacking the Printer The printer is secured using packing tape and cushioning materials to protect it against vibrations and shock during transportation. Use the following procedure to unpack the printer. Keep the packing materials for future transportation. Remove the accessory box and packing materials from the shipping carton. QL-800 User Guide... - Page 14 Getting Started Lift the printer out of the shipping carton. The printer weighs about 70 pounds (31.75 kilograms). Two persons standing at the front and back of the printer respectively must lift the printer by the indicated lift points. Lift the front of the printer by the recessed handle. Lift the rear of the printer by the flat area of the purple frame above the mandrel.
- Page 15 Getting Started Remove all pieces of packing tape. This clear filament tape is used to secure the doors and covers in place. There is also tape holding the maintenance cartridge in place. Open the main side door and lower side door to access and remove this tape. With the main side door open, remove the yellow transport unit shipping lock by rotating it counterclockwise and then pulling it straight out.
-
Page 16: Checking The Included Parts
Getting Started Close all covers and doors. Checking the Included Parts Check to make sure the following items are included with the printer. • Power cable • USB cable • Printhead • Four ink cartridges (one for each color) • Installation CD Before Installing the Printer Choosing an Installation Location... -
Page 17: Installation Precautions
Getting Started • The minimum space required for installation and maintenance is shown below. 8 inches 203 mm 17.75 inches 451 mm 15 inches 381 mm 8 inches 203 mm Installation Precautions When installing the printer, observe the following precautions. •... -
Page 18: System Requirements
Getting Started System Requirements • 32-bit or 64-bit Microsoft® Windows® XP, Windows Vista®, Windows 7, or Windows 8 • Microsoft .NET Framework 3.5 SP1 • 350 MB free hard drive space • CD/DVD drive • One available USB 2.0 port for USB installation or network connectivity for network installation Connecting the Power Cable Connect the power cable to the printer power inlet (1). -
Page 19: Switching The Printer On And Off
These messages indicate that the driver has not been “logo tested” by Microsoft. However, it has been tested thoroughly by QuickLabel Systems, and will not cause any of the problems listed in these messages. - Page 20 Getting Started Use the driver installation wizard to install the driver. Refer to the following information during this process. • Choose the USB connection method when prompted. • Select an installation location for the QL-800 Maintenance Utility when prompted. Choose Finish in the installation wizard after successfully installing the QL-800 Maintenance Utility and driver.
-
Page 21: Resolving Windows 7 And Windows 8 Usb Installation Issues
Getting Started Resolving Windows 7 and Windows 8 USB Installation Issues When you install the printer driver via USB, you first run the installation wizard and then connect the printer to your PC via the USB cable. If you connected the USB cable before running the installation wizard, Windows 7 and Windows 8 will not recognize the printer correctly. -
Page 22: Installing The Printer Driver (Network)
Getting Started Select QuickLabel Systems QuickLabel QL-800 and choose Properties. The Properties window will open. Choose the General tab. Choose Change Settings. Then choose the Driver tab. Choose Update Driver. When you are prompted, select the Search automatically for updated driver software option. - Page 23 Getting Started thoroughly by QuickLabel Systems, and will not cause any of the problems listed in these messages. Ensure the printer is powered on and connected to the network via a LAN cable. Power on your computer and insert the QL-800 Installer CD in the CD drive. The Installer CD wizard will open.
-
Page 24: Using The After Shipping Wizard
Getting Started Using the After Shipping Wizard After installing the driver, the QL-800 Maintenance Utility will be available for use. You will use the After Shipping wizard in this utility to ready the maintenance roller, install ink cartridges, and install the printhead. Launch the QL-800 Maintenance Utility. -
Page 25: Installing Ink Cartridges
Getting Started Installing Ink Cartridges Use the following instructions to install ink cartridges. Warning: For safety, keep ink cartridges out of the reach of children. If ink is accidentally ingested, contact a physician immediately. Open the main side door. Open both ink cartridge latches. Each latch can be opened by pressing the top of the locking mechanism and pulling outward. -
Page 26: Installing The Printhead
Getting Started Caution: There are sharp needles in the ink cartridge slot. Never put your fingers in this area. Note: The printer is designed so that ink cartridges cannot be inserted in the wrong slots. Do not attempt to insert ink cartridges in the wrong slots. Close the ink cartridge latches. - Page 27 Getting Started Open the top cover. Remove the fluidic cap protectors from the two fluidic couplings. Open the end of the printhead package box and slide out the foil bag. Inspect the integrity of the foil vacuum sealing. The foil bag should be formed tightly to the contours of the printhead cartridge.
- Page 28 Getting Started Carefully rip open the foil packaging at the notch. Use scissors if your foil bag does not have a notch or you are finding it difficult to tear the bag. Remove the printhead from the foil bag. Caution: Do not place the unprotected printhead cartridge on any surface prior to installation in the printer.
- Page 29 Getting Started Carefully remove the protective tape from the electrical contacts. While holding the printhead cartridge by the handle with one hand, grasp the pull tab with the other hand, and slowly peel back the plastic strip covering the electrical contacts. Caution: Dispose of the removed strip immediately and do not allow the removed strip to touch the electrical contacts.
- Page 30 Getting Started Tilt the top of the printhead cartridge toward the back of the printer, about 20º. Then gently seat the back of the printhead cartridge into the print engine. 20° When the back of the printhead is firmly seated, gently rotate the printhead cartridge into position against the stops on the printhead connector board.
-
Page 31: Loading And Unloading Media
Getting Started Slowly close the printhead latch. The fluidic couplings should advance and seal to the printhead cartridge. Caution: If the latch will not close, do not force it. Reseat the printhead and try again. Close the top cover. Loading and Unloading Media Loading Media Turn the wing nut [1] on the end of the mandrel counterclockwise to loosen the mandrel. - Page 32 Getting Started Turn the wing nut [1] on the end of the mandrel clockwise until you feel resistance. This action secures the roll in place. Put the outer flange [4] on the mandrel. Make sure the outer flange contacts the roll [2].
-
Page 33: Unloading Media
Getting Started Note: If the automatic media feeding process fails, the media will be ejected back out of the printer. On the front of the printer, slide the media exit guide [5] so it lightly contacts the edge of the media exiting the printer. Unloading Media Press and hold the back-feed key. -
Page 34: Quicklabel Services
Getting Started QuickLabel Services QL-800 Label Materials QuickLabel develops QL-800 label printing substrates. We sell cost-effective labels that meet various end-use requirements, including industry and government regulatory labeling standards. QuickLabel BPO Blanket Purchase Order Program As the manufacturer of the QL-800 and the supplies, QuickLabel has the advantage of providing you with lower prices due to production efficiencies. -
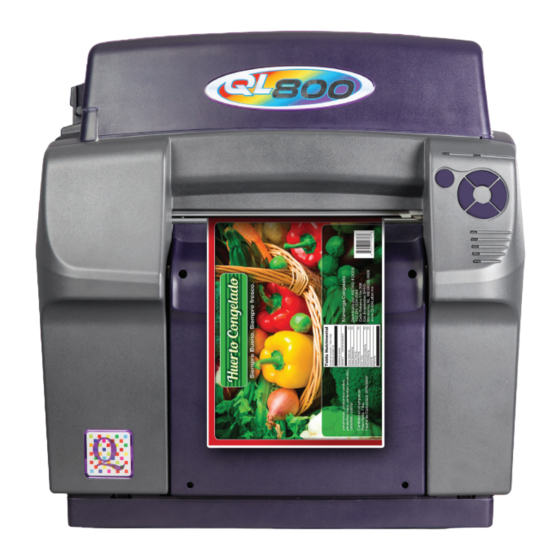
Page 35: Ql-800 Overview
QL-800 Overview Printer Part Names and Functions Front View Part Description Media Exit Slot Printed labels are ejected through this slot. Operation Panel Use these keys to operate various printer func- tions. Top Cover Open this cover to access the printhead. Main Side Door Open this door to access the transport unit and ink cartridges. -
Page 36: Back View
QL-800 Overview Back View Part Description Media Entry Slot Media enters the printer through this slot. Reserved This port is not used. Do not connect to this port. USB Port Connect the USB cable here when using the USB connection method. LAN Port Connect the LAN cable here when using the LAN connection method. -
Page 37: Operation Panel
QL-800 Overview Operation Panel Description • If the printer power is off, press and release this Power key to turn the power on. • If the printer power is on, press and hold this key to turn the power off. •... -
Page 38: Led Indicators
QL-800 Overview Description • Press and release the back-feed key to Back-Feed back-feed media one label length. • Press and hold the back-feed key to back-feed media until you release the key. • To unload media, press and hold the back-feed key until the printer beeps once. -
Page 39: Color Basics
Utility to determine the affected items. Color Basics Color in design and printing is a sophisticated topic. At QuickLabel Systems, we have worked to make using the QL-800 printer as easy as possible. We understand that your goal is to design and print colorful, effective labels with consistency. -
Page 40: Color Profiling
QuickLabel QL-800 Color Profiles When printing, even the type of material printed on can change the way colors appear. QuickLabel Systems has created color profiles for the materials you will be using in order to offer you the most accurate color reproduction possible. -
Page 41: Designing And Printing Labels
Design software is available from QuickLabel Systems and other software vendors. • Custom QuickLabel Omni from QuickLabel Systems - This software product, developed by QuickLabel Systems, makes it easy to create barcodes and position text and graphics on a label. •... -
Page 42: Setting Up The Label Design Software
This section describes how to set up your label design software to print on the QL-800. Setting up Labels in Custom QuickLabel Omni Custom QuickLabel Omni is a software application developed by QuickLabel Systems to access special features in our printers and allow customers to easily design and print labels. -
Page 43: Setting Up The Printer Driver
Designing and Printing Labels • Use in-gamut colors - When designing in color, ensure you use colors that are within the printing gamut. Most design applications will indicate when a color is out of gamut. For example, in Adobe Photoshop and Illustrator, out-of-gamut colors are indicated by an exclamation point icon in the Color palette. - Page 44 Designing and Printing Labels Choose the General tab. If necessary, you can select a printing orientation. Orientation is often set within the design application. However, if you cannot select an orientation in the design application, choose from the following options: •...
-
Page 45: Setting Up A Custom Label Size
Designing and Printing Labels Select the type of material the label will be printed on. Select a label size from the list. Note: If necessary, you can set up a custom label size to meet your needs. Select whether color or monochrome printing will be used. •... - Page 46 Designing and Printing Labels Choose the General tab. Choose Manage Labels. The Custom Label Size window will open. Enter or select a label name. • To edit an existing label size profile, select the label name from the list. • To create a new label size profile, enter a label name in the list.
-
Page 47: Setting Up Media Options
Designing and Printing Labels If necessary, you can delete a label size profile by selecting it from the list and then choosing Delete. Choose OK. Setting up Media Options Before you print using a third-party application, you will need to select media options for your label. - Page 48 Designing and Printing Labels If necessary, use the offset options to adjust the location of a printed image relative to the registration marks on the media. • Horizontal Offset - Negative values move the image left on the label. Positive values move the image right on the label.
-
Page 49: Using Service Options
Designing and Printing Labels Using Service Options You can clean the printheads, launch the status monitor, order supplies, and contact technical support using the printer driver. Open the appropriate printer window based on your version of Windows. • In Windows XP, choose Start >... -
Page 50: Saving And Recalling Driver Settings
Designing and Printing Labels Choose OK. Related Topics: - Cleaning Printheads on page 53 Saving and Recalling Driver Settings After setting up the driver, you can save the driver settings. It may be helpful to save driver settings for each label you will be printing. Open the appropriate printer window based on your version of Windows. -
Page 51: Printing Labels
Designing and Printing Labels • To edit an existing settings profile, select the profile name from the list. • To create a new settings profile, enter a profile name in the list. Edit the driver settings as needed. Save the settings. •... - Page 52 Designing and Printing Labels If necessary, you can pause, resume, and cancel print jobs from the operation panel on the front of the printer. • While printing, press and release the pause/resume key to pause the print job. • While paused, press and release the pause/resume key to resume the print job.
-
Page 53: Using The Status Monitor
Designing and Printing Labels Using the Status Monitor Viewing the Printer Status Open the QL-800 Status Monitor. You can access the Status Monitor from the Windows Start Menu, QL-800 Maintenance Utility, or the printer driver. • From the Windows Start Menu, choose Start >... -
Page 54: Viewing The Job Status And Cancelling Jobs
Designing and Printing Labels Viewing the Job Status and Cancelling Jobs Open the QL-800 Status Monitor. You can access the Status Monitor from the Windows Start Menu, QL-800 Maintenance Utility, or the printer driver. • From the Windows Start Menu, choose Start >... - Page 55 Designing and Printing Labels • In the QL-800 printer driver, choose Launch Status Monitor from the Services tab. You can view estimates of remaining ink percentages in the Ink Levels area. You can view an estimate of the maintenance cartridge level percentage in the Maintenance Cartridge Level area.
- Page 56 Designing and Printing Labels QL-800 User Guide...
-
Page 57: Ql-800 Maintenance Utility
QL-800 Maintenance Utility About the Maintenance Utility The QL-800 Maintenance Utility is installed during the driver installation process. The utility allows you to view printer information and perform a variety of maintenance functions. Printer Information Tab Use the Printer Information tab to view printer system information, upgrade printer firmware, and set the clock. -
Page 58: Upgrading The Printer And Print Module Firmware
QL-800 Maintenance Utility Choose the Printer Information tab. View the printer information. • Printer - This section provides the serial number of the printer and the installed firmware version number. It also provides the transport usage in inches. • Print Module - This section provides the serial number of the print module and the installed firmware version. -
Page 59: Setting The Clock
QL-800 Maintenance Utility On the rear of the printer, turn the power inlet switch on. Power on the printer. Setting the Clock Launch the QL-800 Maintenance Utility. From the Windows Start Menu, choose Start > All Programs > QL-800 > QL-800 Maintenance Utility. -
Page 60: Setting The Vertical Baseline
QL-800 Maintenance Utility Setting the Vertical Baseline If you send the same job to two or more QL-800 printers and notice that the image prints in different locations, you can move the vertical baseline of a printer. Note: Adjusting the baseline is needed only for synchronizing the output of two or more printers. -
Page 61: Setting The Cut/Stop Position
QL-800 Maintenance Utility Note: Adjusting the baseline is needed only for synchronizing the output of two or more printers. Baselines are adjusted at the factory and should be close from printer to printer. If you are using one QL-800, baseline adjustment is not necessary. Launch the QL-800 Maintenance Utility. -
Page 62: Cleaning Tab
QL-800 Maintenance Utility Choose the Print Settings tab. To read the cut/stop position value from the printer and set the Cut/Stop Position control accordingly, choose Read From Printer. Enter a cut/stop position value. • Positive values result in more media being fed after printing before the media stops. -
Page 63: Cleaning Printheads
QL-800 Maintenance Utility Note: The auto-maintenance routine uses ink and other consumables. Run the auto-maintenance routine only as often as needed to maintain print quality. Launch the QL-800 Maintenance Utility. From the Windows Start Menu, choose Start > All Programs > QL-800 > QL-800 Maintenance Utility. -
Page 64: Preparing For Moving
QL-800 Maintenance Utility • Light - Start with light cleaning to resolve minor print defects. Then print a test label. If the issue is not resolved, use the heavy cleaning method. • Heavy - Use heavy cleaning to resolve major print defects, or when light cleaning has not fully resolved a print defect. -
Page 65: System Logs Tab
QL-800 Maintenance Utility Pack the printer in its original packing material for shipping. After setting up the printer in the new location, return to the Cleaning tab in the QL-800 Maintenance Utility. Choose After Shipping. Follow the on-screen instructions to complete this procedure. System Logs Tab Use the System Logs... -
Page 66: Saving Log Files
QL-800 Maintenance Utility Saving Log Files Launch the QL-800 Maintenance Utility. From the Windows Start Menu, choose Start > All Programs > QL-800 > QL-800 Maintenance Utility. A language and printer prompt will open. Select a display language and the QL-800 printer you want to connect to. Choose Choose the System Logs tab. -
Page 67: Replacing The Printhead Assembly
QL-800 Maintenance Utility Replacing the Printhead Assembly Use the following procedure to replace the printhead assembly. This process will replace the printhead for each color. Note: Wear protective gloves to prevent ink from staining your hands during this procedure. Launch the QL-800 Maintenance Utility. From the Windows Start Menu, choose Start >... -
Page 68: Replacing The Maintenance Cartridge
QL-800 Maintenance Utility Replacing the Maintenance Cartridge When the maintenance cartridge is filled to capacity with collected ink, printing stops. An error message and LED indicate this condition. • A message indicating the maintenance cartridge is full will be displayed in the Status Monitor and System Logs tab of the Maintenance Utility. -
Page 69: Replacing The Maintenance Roller
QL-800 Maintenance Utility Replacing the Maintenance Roller Use the following procedure to replace the maintenance roller. Note: Wear protective gloves to prevent ink from staining your hands during this procedure. Launch the QL-800 Maintenance Utility. From the Windows Start Menu, choose Start >... - Page 70 QL-800 Maintenance Utility QL-800 User Guide...
-
Page 71: Printer Maintenance
Printer Maintenance Replacing Ink Cartridges When the remaining ink level becomes low, a low ink message will be displayed on the Status Monitor and in the System Logs tab of the maintenance utility. When an ink cartridge is out of ink, an out of ink message will be displayed and printing will stop. Additionally, four yellow LEDs on the printer indicate ink status. - Page 72 Printer Maintenance Open the ink cartridge latch for the empty ink cartridge. The latch can be opened by pressing the top of the locking mechanism and pulling outward. Remove the empty ink cartridge. Slide in the new ink cartridge, septum end first, label side up. Push the cartridge in all the way.
-
Page 73: Cleaning
Printer Maintenance Close the ink cartridge latch. Close the main side door. Cleaning Cleaning the Printer Exterior Over time, the plastic exterior panels of the printer may accumulate dust, dirt, etc. You can clean these panels as needed. Dampen a clean, lint-free cloth with water. Gently clean the plastic exterior surfaces using the cloth. -
Page 74: Cleaning The Maintenance Tray Area
Printer Maintenance Lift the roller handle [1] to open the input pinch rollers. There are two rollers on the top and one roller on the bottom of the media entry slot. Insert the cloth end of the wooden stick into the roller area. Clean the rollers using a side-to-side motion. -
Page 75: Cleaning The Transport Belts
Printer Maintenance Dampen a clean, lint-free cloth with deionized water. Do not use paper towels, napkins, or any other material that may leave lint or debris behind while cleaning. Problems can occur if lint enters the interior of the printer. Use the cloth to clean the empty maintenance tray area inside the printer. - Page 76 Printer Maintenance Grasp the handle on the transport unit. Then pull the transport unit straight out of the printer. Note: If the yellow transport unit shipping lock is installed, you will not be able to remove the transport unit. You must first remove the shipping lock by rotating it counterclockwise and then pulling it straight out.
- Page 77 Printer Maintenance If necessary, you can grasp and move the belts manually in either direction to expose more belt surface area for cleaning. All four belts will move at the same time. If the belts are damp from cleaning, allow them to dry completely before reinstalling the transport unit.
- Page 78 Printer Maintenance QL-800 User Guide...
-
Page 79: Troubleshooting
Troubleshooting Error Messages Error Messages Problem Solution 1001 Paper Path Error The printer cannot move media Look for and clear a potential into the proper position. jam. Press and release the power key to resume the job. Or press and hold the pause/resume key to cancel the job. - Page 80 Troubleshooting Error Messages Problem Solution 1006 Cutter Jam The cutter did not make it to the Clear the obstruction in the cut- opposite side. ter area. Press and release the power key to resume the job. Or press and hold the pause/resume key to cancel the job.
- Page 81 Troubleshooting Error Messages Problem Solution 100E Belt Motor Stall The belt motor has stalled. Remove the transport unit and inspect it. Press and release the power key to resume the job. Or press and hold the pause/resume key to cancel the job. 100F Pinch Motor Stall The pinch motor has stalled.
- Page 82 Troubleshooting Error Messages Problem Solution 1015 Internal Error There is an electronics failure. Press and release the power key to clear the error. Turn the printer power off, wait three seconds, and turn the power on again. If the issue persists, contact Technical Support.
- Page 83 Troubleshooting Error Messages Problem Solution 1022 Shared Memory Response There is an internal communi- Press and release the power Timeout cations failure. key to clear the error. Turn the printer power off, wait three seconds, and turn the power on again. If the issue persists, contact Technical Support.
- Page 84 Troubleshooting Error Messages Problem Solution 1032 Invalid EEPROM Checksum An internal EEPROM failure Press and release the power occurred. key to clear the error. Turn the printer power off, wait three seconds, and turn the power on again. If the issue persists, contact Technical Support.
- Page 85 Troubleshooting Error Messages Problem Solution 1042 Can't find Job Parameter Job status message does not Press and release the power contain valid horizontal offset key to resume the job. Or press parameter. and hold the pause/resume key to cancel the job. 1043 Can't find Job Parameter Job status message does not...
-
Page 86: Removing A Media Jam
Troubleshooting Removing a Media Jam If a media jam occurs during a print job, the red error LED will light on the front panel and the specific error message will be displayed in the Status Monitor. Note: After clearing a media jam, you will need to reprint labels that were not completed before the jam occurred. - Page 87 Troubleshooting Open the main side door. Lift the roller handle [2] to open the input pinch rollers. There are two rollers on the top and one roller on the bottom of the media entry slot. The rollers must be open to allow removal of the transport unit and remaining media in the next step.
- Page 88 Troubleshooting Grasp the handle on the transport unit. Then pull the transport unit straight out of the printer. Note: If the yellow transport unit shipping lock is installed, you will not be able to remove the transport unit. You must first remove the shipping lock by rotating it counterclockwise and then pulling it straight out.
-
Page 89: Safety Warnings And Precautions
Safety Warnings and Precautions Before using this printer, please read this section thoroughly. Warnings to heed and important matters are described here to prevent user injury and printer damage. Do not attempt to operate this printer in any way other than those mentioned in the User Guide. -
Page 90: Power Supply And Power Cord
Safety Warnings and Precautions Power Supply and Power Cord Warning • To avoid causing a fire or serious electrical shock, always use the power cord provided with this printer. To avoid a fire or electrical shock, do not use an extension cord. -
Page 91: Moving The Printer
Safety Warnings and Precautions into contact with electrical components inside the printer, this could cause a fire or serious electrical shock. Caution • There are high voltage points inside the printer. To avoid a fire or electrical shock, never attempt to disassemble or repair the printer. •... -
Page 92: Ink Cartridge And The Maintenance Cartridge
Safety Warnings and Precautions • The printer weighs about 70 pounds (31.75 kilograms). Two persons standing at the front and back of the printer respectively must lift the printer by the indicated lift points. Lift the front of the printer by the recessed handle. Lift the rear of the printer by the flat area of the purple frame above the mandrel. - Page 93 Safety Warnings and Precautions • Do not install or remove the ink cartridge or maintenance cartridge unless it needs to be replaced. Doing so can accelerate wear of the printer components. QL-800 User Guide...
- Page 94 Safety Warnings and Precautions QL-800 User Guide...
-
Page 95: Specifications
Specifications Printer Specifications Printer Printing Technology Thermal Inkjet Resolution 1600 x 1600 dpi, 1600 x 800 dpi Label Size/Print Area Width 2.0” (51 mm) - 8.3” (211 mm) Length 1.0” (25 mm) - 30.0” (762 mm) Print Speed 6 ips at 1600 x 1600 dpi 12 ips at 1600 x 800 dpi Media Sensing Gap, Reflective (bottom-only), Continu-... - Page 96 Specifications Printer Label Media Width: 2.125” (54 mm) - 8.425” (214 Length: 1.125” (29 mm) - 30.125” (765 Types: Gloss Paper, Matte Paper and Synthetic pressure-sensitive; Paper Tag Stock Roll: 8” OD (203 mm) QuickLabel® paper and synthetic labels on 3” ID (76.2 mm) core Thickness: 5.5 mil - 7.5 mil (0.140 mm - 0.191mm)
- Page 97 Specifications Printer Environmental Printer Operating 41º F to 95º F (5º C to 35º C), 20% to 90% Relative Humidity (non-condens- ing) Printer should be installed on level surface with no more than 1º tilt in any axis No longer than 8 weeks powered off or in standby.
-
Page 98: Label Specifications
Specifications Label Specifications Label Rollstock 8” OD (203 mm) QuickLabel® paper and synthetic labels Label Size/Print Area Width: 2.0” - 8.3” (51 mm - 211 mm) Length: 1.0” - 30.0” (25 mm - 762 mm) Construction Width (a): 2.125” - 8.425” (54 mm - 214 Edge Trim Left / Right (b): 0.063”... - Page 99 Specifications Label Reflective Mark Width (c): 0.75” (19 mm) minimum Length (d): 0.125” (3.175 mm) Density: >1.1 (reflective measured with X-Rite 504) Non-glossy finish Other Features Gap (e): 0.118” (3.0 mm) - 0.75” (19 Multi-Across/Down: Yes, 1.0” (25 mm) min. width, 1.0” (25 mm) min. length Maximum of 0.25”...
- Page 100 Specifications QL-800 User Guide...
- Page 101 Index Inner Flange 26 Installation Location 6 Aerosol Filter Installation Precautions 7 Replacing 57 Installation Summary 2 Auto-Maintenance 52 Label Design Software Cancelling jobs 44 Setup 32 Cleaning Labels Exterior 63 Designing 31 Input pinch rollers 63 LAN Port 26 Maintenance Tray Area 64 LED Indicators 25, 28 Transport belt 65...
- Page 102 Index Printer Information 48 Printhead Third Party Applications 31 Installing 16 Top Cover 25 Printhead Assembly Replacing 57 Printhead Cleaning 53 Upgrade 48 Printing Labels 41 USB Port 26 Safety 79 Vertical Baseline 50 Shipping 54 Specifications 85 Status Monitor 43, 44 Wing Nut 26 System Requirements 8 QL-800 User Guide...
Need help?
Do you have a question about the QL800 and is the answer not in the manual?
Questions and answers