Table of Contents
Advertisement
Advertisement
Table of Contents

Related Manuals for Oster P11043AP-YZ


Summary of Contents for Oster P11043AP-YZ
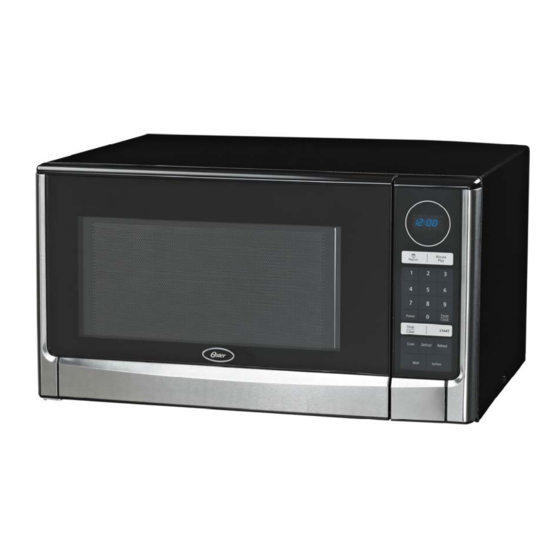
- Page 1 1.6 Cu. Ft. Countertop Microwave Model: P11043AP-YZ GLN010214...
-
Page 2: Table Of Contents
TABLE OF CONTENTS IMPORTANT SAFETY INSTRUCTIONS PRECAUTIONS TO AVOID POSSIBLE EXPOSURE TO EXCESSIVE MICROWAVE ENERGY INSTALLATION GUIDE GROUNDING INSTRUCTIONS PRODUCT DIAGRAM CONTROL PANEL INSTALLING THE TURNTABLE OPERATION INSTRUCTIONS COOKING UTENSILS GUIDE COOKING TECHNIQUES CLEANING AND CARE BEFORE CALLING FOR SERVICE SPECIFICATIONS... -
Page 3: Important Safety Instructions
IMPORTANT SAFETY INSTRUCTIONS READ ALL SAFETY INSTRUCTIONS BEFORE USING THIS MICROWAVE WARNING - to reduce the risk of burns, electric shock, fire, injury to persons, or exposure to excessive microwave energy, basic safety precautions should be followed, including the following: 1. -
Page 4: Precautions To Avoid Possible Exposure To Excessive Microwave Energy
IMPORTANT SAFETY INSTRUCTIONS (continued) 20. Use only thermometers specifically designed for microwaves. 21. Do not operate any heating or cooking under this microwave. 22. Be certain the glass tray and roller rings are in place when using the microwave. 23. Read and follow the specific “Precautions to Avoid Possible Exposure to Excessive Microwave Energy” section found on page 3. -
Page 5: Installation Guide
INSTALLATION GUIDE 1. Make sure all packing materials are removed from inside the microwave door. 2. Check the microwave for damage, such as misaligned or bent door, damaged door seals and sealing surface, broken or loose door hinges and latches, and dents inside the cavity or on the door. 3. -
Page 6: Product Diagram
GROUNDING INSTRUCTIONS (continued) POWER CORD A short power supply cord is provided to reduce the risks resulting from becoming entangled in or tripping over a long cord. Longer cord sets or extension cords are available and may be used if care is taken in using them. If using a longer cord, the marked electrical rating of the cord set or extension cord should be at least as great as the electrical marking of the microwave itself and the extension cord must be a grounded-type 3-wire cord. -
Page 7: Control Panel
CONTROL PANEL MENU ACTION SCREEN Cooking time, power, indicators and present time are displayed. MINUTE PLUS Touch to add cooking time. NUMBER PADS(0-9) Touch to set clock, cooking time or enter food weight. POWER Use to set microwave power levels. TIMER/CLOCK Touch to set TIMER or CLOCK function. -
Page 8: Operation Instructions
If the glass tray or turntable ring assembly cracks or breaks, contact your nearest authorized service center. OPERATION INSTRUCTIONS SETTING THE CLOCK Touch TIMER/ CLOCK pad. Use the number pads to enter the correct time. Touch TIMER/ CLOCK pad again. NOTE: ·This is a 12 hour clock. -
Page 9: Minute Plus
During the cooking process, you click "MINUTE PLUS" key once, can increase 1 minutes of cooking time. OPERATION INSTRUCTIONS (continued) MINUTE PLUS You can set 100% power level cooking quickly by pressing this button to set 1 minute each time. The longest time you can set is 99 minutes and 59 seconds. -
Page 10: Auto Menu
OPERATION INSTRUCTIONS (continued) AUTO MENU Popcorn 1. Press STOP/CLEAR pad to reset the oven. 2. Press POPCORN pad to select 1~4 amt. Press Popcorn pad Display AMT Weight Once 3.5 OZ Twice 2.85 ~ 3.5 OZ Thrice 1.2 ~ 1.6 OZ 4 times 1.5 ~ 1.75 OZ 3. - Page 11 OPERATION INSTRUCTIONS (continued) COOK 1. Press STOP/CLEAR pad to reset the oven. 2. Press COOK pad once. 3. Press number 1~6 to select food code. 4. Press the corresponding number to select food servings. Code Food Press number Servings Code Food Press number Servings Once...
-
Page 12: Cooking Utensils Guide
OPERATION INSTRUCTIONS (continued) CHILD LOCK Use to prevent unsupervised operation of the oven by little children. The Child Lock indicator will on display screen, and the oven can not be operated while the Child Lock is set. To set: In standby mode, press and hold the STOP/CLEAR button for 3 seconds, a beep sounds and lock indicator lights. -
Page 13: Cooking Techniques
COOKING UTENSILS GUIDE (continued) NOT RECOMMENDED Glass jars and bottles -- Regular glass is too thin to be used in a microwave. It can shatter and cause damage and injury. Paper bags -- These are a fire hazard, except for popcorn bags that are designed for microwave use. Styrofoam plates and cups -- These can melt and leave unhealthy residue on food. - Page 14 COOKING TECHNIQUES (continued) TURNING Turn foods over midway through cooking to expose all parts to microwave energy. This is especially important when cooking large foods such as roasts. STANDING Foods cooked in a microwave build up internal heat and continue to cook for a few minutes after heating stops. Let foods stand to complete cooking, especially for foods such as cakes and whole vegetables.
-
Page 15: Cleaning And Care
CLEANING AND CARE 1. Turn off the microwave and unplug the power cord from the wall when cleaning. 2. Keep the inside of the microwave clean. When food splatters or spilled liquids adhere to microwave walls, wipe with a damp cloth. Mild detergents may be used if the microwave gets very dirty. Avoid using spray or other harsh cleaners. -
Page 16: Specifications
SPECIFICATIONS Power Consumption 120V~60Hz, 1600W Output 1100W Operation Frequency 2450MHz Outside Dimensions (H×W×D) × 21 × 17 inches Oven Cavity Dimensions (H×W×D) × 15 × 17 inches Oven Capacity 1.6 cu. ft. Cooking Uniformity Turntable System Net Weight Approx. 38.3 lbs. - Page 17 ©2014 Sunbeam Products, Inc. doing business as Jarden Consumer Solutions. All rights reserved. ® Oster logo is a registered trademark of Sunbeam Products, Inc. used under license. Distributed by Guangdong Galanz Microwave Oven and Electrical Appliances Manufacturing Co., Ltd.,...
- Page 18 Shunde, Foshan, Guangdong, 528305, China For service, support and warranty information, call 800-324-0340.
Need help?
Do you have a question about the P11043AP-YZ and is the answer not in the manual?
Questions and answers