Table of Contents
Advertisement
Advertisement
Table of Contents

Related Manuals for GDS Compuprint 9050


Summary of Contents for GDS Compuprint 9050
-
Page 1: User Manual
User Manual 9050 plus 9050 G00641 FAMILY... -
Page 3: Compuprint Product Information
User Manual 9050/9050plus Compuprint Products Information Thanks for choosing the Compuprint 9050 and printer models. 9050plus Your printer is a reliable working equipment that will be very useful in your daily job. Our printers have been designed to be compact and respectful of the work environment. -
Page 4: Safety Information
User Manual 9050/9050plus Safety and environmental notices Safety notices There are two levels of safety notices: Danger and Cautions. Danger hazard level The word Danger indicates the presence of a hazard that has the potential of causing death or serious personal injury. -
Page 5: Safety Precautions
User Manual 9050/9050plus Safety precautions Never remove any printer cover except to install a printer accessory as expressly described in this manual. The following areas of the printer should be covered for safety reasons: Rear Plug Cover Large Rear Cove Rear Plug Covers The above opening must always be protected with their cover. - Page 6 User Manual 9050/9050plus Electrical safety and portable power strip receptacles Extension cords DANGER DANGER<1-1> Do not use an extension power-cord. The customer must supply the correct electrical outlet which must meet the requirements stated under “Printer Specifications” in the User's Guide. Portable power strip receptacles (temporary power taps) Portable power strip receptacles (referred to as “temporary power taps”...
-
Page 7: Ffc Notes
User Manual 9050/9050plus FFC Notes This equipment has been tested and found to comply with the limits for a Class A digital device, pursuant to Part 15 of the FCC Rules. These limits are designed to provide reasonable protection against harmful interference when the equipment is operated in a commercial environment. -
Page 8: Table Of Contents
User Manual 9050/9050plus Table of Contents Compuprint Product Information Entering the Power-On Configuration Safety Information Resetting to Factory Default Values FFC Notes Program Setup Canadian D.O.C. Radio Interference Entering the Program Setup Regulation iv EEC Regulations Hexadecimal Dump Table of Contents ANSI Emulation Getting to Know Your Printer DEC Emulation... -
Page 9: Getting To Know Your Printer
User Manual 9050/9050plus Getting to Know Your Printer Printer Features (9050plus) 24 Needle Print Head 136 columns @10 cpi High speed Draft printing at 720 cps, Draft printing at 600 cps, LQ printing at 110 cps ... -
Page 10: Unpacking Your Printer
User Manual 9050/9050plus Unpacking Your Printer The following items are included in the box: Notify any damage to your supplier Quick Setup Guide CD Driver with User documentation Ribbon Cartridge Power Cable 78413010-003... -
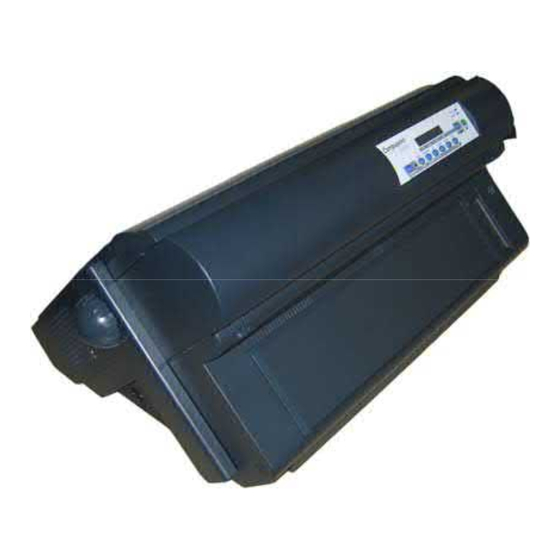
Page 11: Printer Parts
User Manual 9050/9050plus Printer Parts Front View 78413010-003... -
Page 12: Setting Up Your Printer
User Manual 9050/9050plus Setting Up Your Printer Choosing a Suitable Location CAUTION: The 4247 printer weighs 21 kg (46 lbs). Two persons are required to lift it.. Consider the following points when you choose the location for your printer: ... -
Page 13: Ribbon Cartridge Installation
User Manual 9050/9050plus Ribbon Cartridge Installation Make sure that you are using only Compuprint original consumables 1. Make sure that the printer is turned off. 2. Find the ribbon cartridge among the accessories To be used when the ribbon shifter option is not installed To be used when the ribbon shifter option is installed (see later on for installation of this option) 3. - Page 14 User Manual 9050/9050plus 6. Move the print carriage in the middle of the area to prepare it for ribbon cartridge installation 7. Before installing the ribbon cartridge turn the ribbon-winding knob in the arrow direction (located on the cartridge) to take up slack in the ribbon To avoid damage to the ribbon, do not turn the winding knob in the wrong direction a.
- Page 15 User Manual 9050/9050plus Slide and insert the ribbon guide between the print head and the ribbon guide mask holding it perpendicular to the print head. Make sure that the ribbon is inserted correctly between the print head and the print head mask.
- Page 16 User Manual 9050/9050plus 10. Push the cartridge down gently until it clips into place at locking points Black cartridge when the ribbon shifter option is not Black “Long Life” cartridge when the ribbon shifter installed option is installed 11. Turn the ribbon-winding knob again in the direction of the arrow to take up slack in the ribbon. 12.
-
Page 17: Host Computer Connection
User Manual 9050/9050plus Host Computer Connection plus The 9050 printer can be connected to your host computer via different available interfaces on a single controller. DANGER <1-14> Switch off printer power and unplug the printer power cord before connecting or disconnecting a communication port, a teleport, or other attachment connector. - Page 18 User Manual 9050/9050plus The 9050 printer can be connected to your host computer via different available interfaces on two alternative controllers. Before connecting the interface cable, make sure that the printer and the host computer are turned OFF First Controller: this controller provides the following three interfaces ...
-
Page 19: Driver Installation
User Manual 9050/9050plus Driver Installation Windows Environment At this point it is necessary to configure your printer for your Operating System. The installation procedures depend upon the host environment. The printer drivers of all current Compuprint printers can be found at the Internet Address: http://www.compuprint.com Starting from WINDOWS 95/98/2000/XP/NT4.0/Millennium®/Vista/Win7/Win8/Win10 environments the printer supports the Plug &... - Page 20 User Manual 9050/9050plus At this point select the printer model. The home of printer services will be displayed. ReadMe Manuals BrowseCD Driver WebSite Tools When select the Driver an attention pop-up mask will appear to advise to disconnect all cables and press OK The Driver Installation starts 78413010-003...
- Page 21 User Manual 9050/9050plus After the Install selection, the file .INF with all the printer information is stored in the directory: ..:\Windows\INF\ When the printer will be connected, the Windows O.S. will automatically detect it and apply the driver. If the file .INF containing the printer information is already installed, this message will be displayed.
-
Page 22: Lan Connection
User Manual 9050/9050plus LAN Connection To work under LAN (Local Area Network) it is mandatory to set the LAN Interface Through the Printer Operator Panel to match the network setting. See later on the specific LAN configuration chapter. Contact your system administrator for the correct values. In the Local Area Network printing environment, the PCs can share a printer, that is, different users can use the same printer. - Page 23 User Manual 9050/9050plus Define the port setting Protocol: RAW N° of Port: 9100 At this point the O.S. asks for the new driver. Share or not the printer Locate the .INF file in the CD subfolder as indicate in the previous chapter.
-
Page 24: Monitoring Printer & Remote Printer
User Manual 9050/9050plus Monitoring Printer & Remote Printer Configuration in LAN The LAN interface of the printer has a built-in web pages which can be used for monitoring the status of the network printer and for the remote configuration. Following procedure describes the use of an Intenet Browser (i.e.: IE, Mozilla, Chrome, etc.) To browse the printer Home web page, enter the IP Address as web page address. - Page 25 User Manual 9050/9050plus When click on Printer Configuration the System Page is opened: It is possible to choose : Loading the default factory setting parameters overwriting the current ones for all setup pages (All, Macrox, Configuration) Setting the default Macro at power on ...
- Page 26 User Manual 9050/9050plus Security Page The following screen appears REMARK Remind you that it is necessary to select Power on Reset button to go to Reboot Page and save the changes. Screen after Reboot Printer action ...
- Page 27 User Manual 9050/9050plus Printer Configuration Config Options Page To obtain the Printer Configuration information tables, click on the respective left button. This page contains a series of tables with the corresponding printer set-up. For a detailed description of each parameters and values refer to the Configuration chapter later on in this manual.
- Page 28 User Manual 9050/9050plus Lan Settings Page This is the Lan Setting Page User Macrox Page This is the User Macro# Page You can now choose the network printer configuration. When the parameters are set as necessary, click on the Submit button at the end of the table.
-
Page 29: Netviewmaster Utility
User Manual 9050/9050plus NetViewMaster Utility The NetViewMaster Utility is a software tool for network administrators that allows the configuration and control of Compuprint Serial Dot Matrix and Transactional Dot Matrix Printers remotely connected to the Ethernet LAN. With this tool the installed printers may be controlled, configured and organized easily. Detailed information can be found in the specific NetViewMaster Utility User Manual p.n. -
Page 30: Unix Environment
User Manual 9050/9050plus UNIX Environment To configure the printer in Unix environment, you have to run the “cmpwizard.sh” script from the drivers\unix directory included in this CD-ROM , except for Linus 7.x and Solaris 7.x operating systems described later in this section. - Page 31 User Manual 9050/9050plus 4. Enter the Logical Port Name. The Logical Port Name is “prt1”. 5. Enter the Print Server Name. The printer server name is “ps1”. 6. If this configuration is ok , enter “y” to confirm. The installation is now complete. If you want to print the test file, enter the lpr -Pps1 test command. 78413010-003...
-
Page 32: Linux 7.X & Solaris 7.X Operating Systems
User Manual 9050/9050plus Linux 7.x & Solaris 7.x Operating Systems To configure the printer for the Linux 7.x and Solaris 7.x operating systems, follow the corresponding procedure described below: Configuring a Remote Printer for the Red Hot Linux 7.x Operating System 1. -
Page 33: As/400 Environment
User Manual 9050/9050plus AS/400 Environment Configuring AS/400 for ASCII (TCP/IP protocol) Configuring with ADDTCPIFC ADDTCPIFC is used to add a TCP/IP interface to AS/400. This step configures the AS/400 for connection to a TCP/IP At the AS/400 command line, enter the following command: ADDTCPIFC INTNETADR('127.000.000.000')LIND(ETHLAN) SUBNETMASK ('255.255.254.000') - Page 34 User Manual 9050/9050plus See the IP Address value set in the parameter of the LAN INTERFACE item in the Power-On Configuration setup. Setting up Printing for ASII Files The next step in configuring the AS/400 is to setup the remote printing capability. There are two ways to do this: 1.
- Page 35 User Manual 9050/9050plus where: Output queue: enter the name of the AS/400 outpu queue. Remote System: enter the host name of your printer or INTNETADR, which then prompts you to specify the IP address of your printer. ...
-
Page 36: Power Connection
User Manual 9050/9050plus Power Connection DANGER <1-11> Your country may require an approved power cord and plug. Ensure that you have the correct power cord and plug. Use this cord and plug only with an approved, correctly- installed power receptacle. 1. -
Page 37: Selecting The Display Language
User Manual 9050/9050plus Selecting the Display Language The display messages for this printer can be displayed in five different languages: English (Default), French, German, Italian and Spanish. To select the language, that you prefer, proceed as follows: 1. Press the PROGRAM key and keep it pressed while powering on the printer until the following message wil be displayed: RELEASE KEYS 2. -
Page 38: Configuring The Printer
User Manual 9050/9050plus Configuring the Printer Operator Panel Presentation The operator panel enables you to perform many of the printer functions including paper path selections, font selection and the printer setup. The operator panel consists of: A 16 character display (Liquid Crystal Display) ... - Page 39 User Manual 9050/9050plus The following messages appear to indicate other printer conditions or user intervention requests. The list is in alphabetical order. MESSAGE DESCRIPTION ALTERNATE This message appears to indicate that the Alternate functions of the operator panel keys have been selected pressing the ALTERNATE key. BUSY M1 This message appears to indicate that the printer is printing.
-
Page 40: Indicators
User Manual 9050/9050plus Indicators Lit when the printer can receive and print data (printer online). Blinks when there is data in the buffer and the printer is offline. ON-LINE Unlit when the printer is disabled and the buffer does not contain any data, or during the initialization, setup or tests ... - Page 41 User Manual 9050/9050plus ON LINE Key ON LINE Normal Enables or disables the printer. Function If this key is pressed while powering the printer on, the self test is printed; the printout is stopped pressing this key again. ...
-
Page 42: Alternate Key
User Manual 9050/9050plus LOAD/FF Key Normal Executes a Form Feed (FF). When paper is loaded into the printer, it advances Function to the following page; if no paper is loaded, it is positioned for printing MICROFEED Alternate Moves the paper backward in microsteps. -
Page 43: Printer Setups
User Manual 9050/9050plus Printer Setups The main printer setup parameters can be selected via the operator panel. The setup parameters are divided into two printer setups, the Power-On Configuration, that allows a complete configuration at installation time according to the hardware and the emulation types, and the Program Setup, that allows you to set the functions that are the most useful in your daily job. -
Page 44: Power-On Configuration
User Manual 9050/9050plus Power-On Configuration Setup The default values of the various functions are indicated in bold. Entering the Power-On Configuration Setup 1. Make sure that the printer is turned off. 2. Press and hold the PROGRAM key pressed while powering on the printer until the RELEASE KEYS message is displayed. - Page 45 User Manual 9050/9050plus Printout of the Configuration Printer Settings PRINT OUT? NO PRINT OUT? YES → or ← ↓ EMUL. OPTIONS The Setup is not printed. PRINT OUT? NO The printer setup is printed showing the currently selected values. PRINT OUT? YES The printout starts as soon as you select this value.
-
Page 46: Emulation Options
User Manual 9050/9050plus Emulation Options This setup defines the available options according to the selected emulation and is structured as follows: Setting the Emulation Options Printer Emulation PRINT OUT? NO EMUL. OPTIONS ↑ ↑ EMUL. OPTIONS → → or EMUL. -
Page 47: Epson Character Sets
User Manual 9050/9050plus EPSON Character Sets EMUL. EPSON LQ ↑ CHAR. SET CS1 → or ← → or ← CHAR. SET CS2 CHAR. SET ITALIC → or ← ↓ NATION CP437 These items select the character set to be used in EPSON emulation. IBM Character sets EMUL. - Page 48 User Manual 9050/9050plus IBM National Character Sets CHAR. SET CS2 ↑ → or ← NATION CP437 NATION … → or ← NATION FARSI2 → or ← ↓ AUTO CR NO The following national character sets can be selected: CP 437 CP437 G 96GREEK...
- Page 49 User Manual 9050/9050plus LF Code Behavior AUTO CR xx ↑ → or ← AUTO LF NO AUTO LF YES → or ← AUTO LF HOST → or ← ↓ 20 CPI IBM NO BAR CODE NATIV AUTO LF NO No Automatic LF after CR.
- Page 50 User Manual 9050/9050plus Interface Interface Type Settings Depending upon the installed Controller Board, the printer model can be equipped with different interfaces to connect to the host system. The possible interfaces are: 9050 9050LAN 9050plus Parallel Centronics Serial 232C ...
- Page 51 User Manual 9050/9050plus Parallel Interface This setup defines the use of the parallel interface and is structured according to the interface specific parameters. Setting the Parallel Interface Parameters Interface Type INTERFACE PARALL INTERFACE ↑ ↑ PARALL INTERFACE → → or 1284 BIDIR.
- Page 52 User Manual 9050/9050plus Number of Data Bits SELECT-IN HOST ↑ → or ← DATA BITS 8 DATA BITS 7 → or ← ↓ INP. BUFFER 2K Selection of the number of data bits: 7 or 8. Input Buffer Size DATA BITS 8 ↑...
- Page 53 User Manual 9050/9050plus Serial Interface The following Serial Interface Parameters will display only if the Serial Interface is present This setup defines the use of the serial interface and is structured according to the interface specific parameters. Setting the Serial Interface Parameters Interface Type PARALL INTERFACE SERIAL INTERFACE...
- Page 54 User Manual 9050/9050plus Baud Rate SERIAL I/F 232 ↑ BAUD 300 → or ← BAUD 600 → or ← BAUD 1200 → or ← BAUD 2400 → or ← BAUD 4800 → or ← → or ← BAUD 9600 BAUD 19200 →...
- Page 55 User Manual 9050/9050plus Handshake Protocol PARITY NONE ↑ → or ← HANDSHAKE DTR HANDSHAKE XONXOF → or ← ↓ CONNECTION LOCAL HANDSHAKE DTR The Handshake is performed using the DTR Protocol. HANDSHAKE XONXOF HANDSHAKE XONXOFF The Handshake is performed using the XON-XOFF Protocol. Connection Type HANDSHAKE DTR ↑...
- Page 56 User Manual 9050/9050plus LAN Interface The following LAN interface parameters will display only if the Ethernet 10/100 Mbit interface is present This setup defines the use of the LAN interface and is structured according to the interface specific parameters. Setting the LAN Interface Parameters IP Assignment PARALL INTERFACE...
- Page 57 User Manual 9050/9050plus Init IP Address IP ASSIGN FIXED ↑ INIT IP ADDRESS 000.000.000.000 → or ← INIT IP ADDRESS … → or ← INIT IP ADDRESS 255.255.255.255 → or ← ↓ INIT NET MASK 255.255.254.000 These values set the INIT IP address. The IP address is represented by a decimal notation where the decimal values are divided by points in four fields.
- Page 58 User Manual 9050/9050plus Init Host Name DEF. GATEWAY ID 000.000.000.000 ↑ INIT HOST NAME …………… → or ← PROGRAM key ↓ INIT WORKGROUP CMP_GROUP The host is identified by a name. This function allows to create the name of the init host using a 14- character string. Use the ←...
- Page 59 User Manual 9050/9050plus Mail Server Address This item is displayed only if the SMTP ENABL. function is selected in YES SMTP ENABL. YES ↑ MAIL SERV.ADDRES 000.000.000.000 → or ← MAIL SERV.ADDRES … → or ← MAIL SERV.ADDRES 255.255.255.255 →...
- Page 60 User Manual 9050/9050plus Enable/Disable the LPR Service SENDER ADDRESS xxxxxxxxxxx or SMTP ENABL. NO ↑ → or LPR ENABL. NO LPR ENABL. YES ↓ FTP ENABL. LPR ENABL. YES Enables the LPR (Line Printer Remote Protocol) service. LPR ENABL. NO Disables the LPR (Line Printer Remote Protocol) service Enable/Disable the FTP Service LPR ENABL...
- Page 61 User Manual 9050/9050plus Enable/Disable the HTTP Service DIRIP ENABL ↑ → or HTTP ENABL. NO HTTP ENABL. YES ↓ TELNET ENABL.. HTTP ENABL. YES Enables the HTTP (HyperText Transfer Protocol) service. HTTP ENABL. NO Disables the HTTP (HyperText Transfer Protocol) service Enable/Disable the SNMPD Service HTTP ENABL ↑...
- Page 62 User Manual 9050/9050plus Functions The Functions item groups the following printer functions: Buzzer setting, Paper loading sequence, Bar code density, Text printing direction, Graphics printing direction, Bar code printing direction, Graphics printing speed, ...
- Page 63 User Manual 9050/9050plus Setting the Functions Group Items Enable/Disable the Buzzer SERIAL INTERFACE (*) LAN INTERFACE (**) FUNCTIONS ↑ ↑ FUNCTIONS → BUZZER YES → or ← BUZZER NO → or ← ↓ RETURN TO MFG: NO ↓ SEQUENCE NONE Enable or disables the buzzer.
- Page 64 User Manual 9050/9050plus Text Print Direction BAR CODE 120DPI ↑ → or ← TEXT DIRECT BI TEXT DIRECT UNI → or ← ↓ GRAPH DIRECT BI Selects the print direction for text: bidirectional or unidirectional Graphics Print Direction TEXT DIRECT BI ↑...
- Page 65 User Manual 9050/9050plus Paper Path at Power-On GRAPH H.S. YES ↑ → or ← P. ON PATH MACRO P. ON PATH LAST → or ← ↓ MENU ENGLISH The paper path at power-on is the one from the default Macro. P.
- Page 66 User Manual 9050/9050plus Enable/Disable Front1 Tractor Jam Sensor This item is displayed only if the 6 pin Front1 Push Tractor option is installed MENU ENGLISH ↑ → or ← F1 JAM SENS. Y F1 JAM SENS. N → or ← ↓...
-
Page 67: Resetting To Factory Default Values
User Manual 9050/9050plus Resetting to Factory Default Values With the BACK TO MFG function it is possible to reset all items in the Power On Configuration Setupand in the Program Setup to their factory default values. This may be useful if you do not remember the values you set in the setups, or because you simply changed you mind about the settings you have just done. -
Page 68: Program Setup
User Manual 9050/9050plus Program Setup The default values of the various functions are indicated in bold. Entering the Program Setup Press the PROGRAM key when the printer is turned on and is offline or online without printing. The following message will be displayed: PRINT OUT? The figure in the following page shows the structure and how to move inside the Program Setup. - Page 69 User Manual 9050/9050plus Printout of the Printer Settings → or ← PRINT OUT? YES PRINT OUT? NO ↓ PRINT STATS? NO The setup is not printed. PRINT OUT? NO The printer setup is printed. The printout starts as soon as you select this value. PRINT OUT? YES NOTE: The Program setup printout indicates: ...
- Page 70 User Manual 9050/9050plus Printout of the Printer Statistics PRINT OUT? NO ↑ → or ← PRINT STATS? YES PRINT STATS? NO ↓ USER MACRO PRINT STATS? NO The printer statistics is not printed. The printer statistics is printed. The printout starts as soon as you select this value. PRINT STATS? YES NOTE: The Printer Statistic printout indicates: ...
- Page 71 User Manual 9050/9050plus User Macro The USER MACRO item allows to prepare four ((or eight depending by the model) printing environments (MACRO#1, MACRO#2, MACRO#3 and MACRO#4). Each macro is composed of a group of parameters which define a configuration that can then be recalled to easily set the printer for four printing environments. Selection of the User Macro PRINT STATS? NO USER MACRO...
- Page 72 User Manual 9050/9050plus User Macro Parameters The table continues on the next page 78413010-003...
- Page 73 User Manual 9050/9050plus Line Spacing MACRO#1 ↑ MACRO#1 → → or ← LINE SP. 6 LPI LINE SP. 8 LPI → or ← LINE SP. 12 LPI → or ← LINE SP. 3L/30MM → or ← LINE SP. 4L/30MM →...
- Page 74 User Manual 9050/9050plus Line Spacing Lock LINE SP. 6 LPI ↑ → or ← LINE SP. LOCK NO LINE SP. LOCK YES → or ← ↓ LENGTH xxx Setting this item, the value set for vertical spacing can be changed by software or operator panel. LINE SP.
- Page 75 User Manual 9050/9050plus Form Feed (FF) Command TOP OF FORM 0 ↑ → or ← IGNORE F.F. NO IGNORE F.F. YES → or ← ↓ SKIPOVER 0 IGNORE F.F. NO The Form Feed (FF) command is always executed. IGNORE F.F. YES The Form Feed (FF) command is ignored when the paper is in the top of form (TOF) position.
- Page 76 User Manual 9050/9050plus Font Lock DRAFT MODE NORM ↑ → or ← FONT LOCK NO FONT LOCK YES → or ← ↓ QUALITY LQ FONT LOCK NO Setting this item, the Font can be changed by software or operator panel. FONT LOCK YES Setting this item, the Font can be changed ONLY by operator panel.
- Page 77 User Manual 9050/9050plus Pitch Selection FONT Draft ↑ PITCH 5 CPI → or ← PITCH 6 CPI → or ← PITCH 7.5 CPI → or ← PITCH 8.5 CPI → or ← → or ← PITCH 10 CPI PITCH 12 CPI →...
- Page 78 User Manual 9050/9050plus Left Margin PITCH LOCK NO ↑ → or ← LEFT MARGIN 0 LEFT MARGIN ... → or ← LEFT MARGIN xxx → or ← ↓ RIGHT MARGIN 136 The Left Margin is set in number of columns (depending on the current pitch) starting from the physical left edge. Right Margin LEFT MARGIN 0 ↑...
- Page 79 User Manual 9050/9050plus Paper Path Selection This function defines the default paper path for the current macro. Paper Path selection depends upon the printer model and the installed options. SLASH ZERO NO ↑ → or ← PATH FRONT 1 PATH FRONT 2 →...
- Page 80 User Manual 9050/9050plus Tear Delay Mode TEAR NORMAL ↑ → or ← TEAR DELAY 1 TEAR DELAY … → or ← TEAR DELAY 5 → or ← ↓ STRONG IMPACT This item defines the time that printer uses to move paper to the Tear-Off position in automatic tear mode. The range of the tear delay is between 1 and 5 seconds.
- Page 81 User Manual 9050/9050plus Quiet Printing PERFOR. SAFE NO ↑ → or ← QUIET PRINT OFF QUIET PRINT ON → or ← ↓ AUTOGAP 0 QUIET PRINT OFF The function is disabled. Printing at normal noise level. QUIET PRINT ON The function is enabled.
- Page 82 User Manual 9050/9050plus Vertical Character Tuning TUNING: HORIZ 0 ↑ TUNING: VERT. -30 → or ← TUNING: VERT..→ or ← TUNING: VERT. 360 → or ← ↓ SPACE COMP. NO These values adjust the distance between the top paper margin and the first printable line. The values correspond to 1/180 inch units, i.e.
- Page 83 User Manual 9050/9050plus Selecting Another Macro MACRO -> MFG NO ↑ NEXT MACRO? YES → or ← NEXT MACRO? NO ↓ ↓ CONFIG MENU NO MACRO#1 To pass over to another macro, select NEXT MACRO YES. Pressing the ↓ or ↑ key the item MACRO#1 is displayed, then press the →...
-
Page 84: Hexadecimal Dump
User Manual 9050/9050plus Hexadecimal Dump CONFIG MENU NO ↑ HEX DUMP YES → or ← HEX DUMP NO ↓ STORE? QUIT If you select HEX DUMP YES, press the PROGRAM key to set this item. The hexadecimal printing continues, until the HEX DUMP NO item is selected, entering again into the Program Setup. -
Page 85: Ansi Emulation
User Manual 9050/9050plus ANSI Emulation The following items appear only when the ANSI emulation has been selected. ANSI Character Sets EMULATION ANSI ↑ → or ← CHAR SET CS1 CHAR SET CS2 → or ← ↓ CH.TAB CODE 437 CHAR SET CS1 The printer uses the CS1 character set. - Page 86 User Manual 9050/9050plus Reset Enable NATION USA ↑ → or ← RIS ENABLE YES RIS ENABLE NO → or ← ↓ RIS ENABLE YES If the printer receives a command (ESC c) from the host to reset the printer, then the printer will (YES) or will not (NO) reset the current configuration to the power-up configuration.
- Page 87 User Manual 9050/9050plus Control Codes in Dot Graphics PRIME ON DEL YES ↑ → or ← CONTRL IN DG YES CONTRL IN DG NO → or ← ↓ CONTRL IN DG YES If the printer receives a control code from the host while in dot graphics mode, then the printer will (YES) or will not (NO) respond to the particular control code based upon your selection.
- Page 88 User Manual 9050/9050plus Superscript/Subscript Character Enable 8 BIT CTRL YES ↑ → or ← S/SUB SCRIPT YES S/SUB SCRIPT NO → or ← ↓ ESC+CTR CODE YES The printer will (YES) or will not (NO) respond to ESC [2 m and ESC [3 m commands. ESC+Control Code S/SUB SCRIPT YES ↑...
- Page 89 User Manual 9050/9050plus Automatic Wrap DOUBLE LF YES ↑ → or ← AUTO WRAP YES AUTO WRAP NO → or ← ↓ CLEAR MARGIN YES If the printer receives printable data from the host, and such data exceeds the current line length (right margin), then the printer will (Y) or will not (N) continue to print the remaining data on the following line based upon your selection.
- Page 90 User Manual 9050/9050plus Barcode Guard Bar Enable BACKUP NONE ↑ → or ← GUARD BAR YES GUARD BAR NO → or ← ↓ FONT LOCK The printer will (Y) or will not (N) include left, right and center Guard bars of the barcode styles which use Guard bars based upon your selection.
-
Page 91: Dec Emulation
User Manual 9050/9050plus DEC Emulation When the DEC PPL2 emulation is selected, the following item will be access in the Power-on Configuration Setup and in The Program Setup (Macro): G0 Character Set EMULATION ANSI ↑ → or ← GO C-S- US ASCII GO C-S- …. - Page 92 User Manual 9050/9050plus Autowrap AUTO CR YES ↑ → or ← AUTO WRAP YES AUTO WRAP NO → or ← ↓ PITCH 10 CPI AUTOWRAP YES Setting this item, the data over the right margin setting are discharged. AUTOWRAP NO Setting this item, the data over the right margin setting are automatically printed in the next line.
- Page 93 User Manual 9050/9050plus Line Spacing MACRO#1 ↑ LINE SP. 2 LPI MACRO#1 → → or ← LINE SP. 3 LPI → or ← LINE SP. 4 LPI → or ← → or ← LINE SP. 6 LPI LINE SP. 8 LPI →...
-
Page 94: How To Select The Paper Path
User Manual 9050/9050plus How to Select the Paper Path The paper can be loaded into the printer using different paper paths. The messages indicating the paper paths are shown depending upon the printer model and if the corresponding loading device is installed on the printer. Proceed as follows: 1. -
Page 95: Adjusting The Tear-Off Position
User Manual 9050/9050plus Adjusting the Tear-Off Position To check the Tear-Off Position proceed as follows: 1. Check if the paper perforation matches the tear-off bar on the printer. 2. To move manually the paper to the Tear-Off position, press the TEAR key when the printer is enabled without printing (TEAR NORMAL function selected YES in the Program Setup). -
Page 96: How To Lock/Unlock The Printer Setups
User Manual 9050/9050plus Pressing the TEAR key the paper is moved to the tear-off position. TEAR NORMAL Pressing again the TEAR key to exit from the tear-off mode, the paper is moved to the printing position. TEAR AUTOMATIC If the printer is not receiving data, the paper is moved automatically to the tear position. The TEAR key is disabled for the tear-off function. -
Page 97: How To Handle The Paper Parking
User Manual 9050/9050plus How to Handle the Paper Parking According to the setting of the TEAR item in the Program Setup, the paper parking procedure is performed in different ways. See the following description: If TEAR NO is selected: ... - Page 98 User Manual 9050/9050plus If TEAR NORMAL is selected: When the paper is positioned at the first printable line and the paper path is changed (changing Macro pressing the PATH key) or the PARK key is pressed, the printer performs automatically parking...
- Page 99 User Manual 9050/9050plus If TEAR AUTOMATIC is selected: When the paper is positioned at the first printable line and the paper path is changed (changing the Macro or pressing the PATH key) or the PARK key is pressed, the printer performs automatically the parking procedure.
- Page 100 User Manual 9050/9050plus If LABEL is selected: When the paper is positioned at the first printable line and the paper path is changed (changing the Macro or pressing the PATH key), or the PARK key is pressed the printer automatically ejects the paper towards the rear of the printer.
-
Page 101: Paper Handling
User Manual 9050/9050plus Paper Paths Paper Handling Front1 Push Path Base Configuration Front 2 Push Path With Installed Option 78413010-003... -
Page 102: Paper Specifications
User Manual 9050/9050plus Paper Specifications It is important to use the correct paper for obtaining the best performance. See the information table below: Fanfold Paper Loading Mode Front1 Tractor Front2 Tractor option Width 76 to 432 mm 76 to 432 mm 3 to 17 inches 3 to 17 inches Length... - Page 103 User Manual 9050/9050plus 1. Open the Push tractors cover turning it upwards 2. Unlock the sprockets of the Front1 tractor moving and lay it on the top of the printer the sprocket levers down. Slide the left sprocket to the first printing column.
- Page 104 User Manual 9050/9050plus 5. Insert the paper on the right sprocket pins and 6. If you are using the 6 pin Front1 Push tractor close the right sprocket cover option, make sure the paper goes under the paper sensor, and close the right sprocket cover. 7.
-
Page 105: Printinga Configuration Sheet
User Manual 9050/9050plus 9. Lock the left and right sprockets moving the sprocket 10. Close the Push tractors cover. Press the levers up LOAD/FF key to load the paper into the printer. The paper must be loaded as shown in figure. -
Page 106: Printer Maintenance And Troubleshooting
User Manual 9050/9050plus Printer Maintenance and Troubleshooting Cleaning the Printer DANGER <2-22> Carefully follow all cleaning instructions, using only the materials and solutions recommended. Before you clean the Printer, make sure the printer has been turned off for at least 15 minutes before starting any cleaning operations Periodic cleaning will help keep your printer in top condition so that it will always provide optimal performance. -
Page 107: Replacing The Ribbon Cartridge
User Manual 9050/9050plus Replacing the Ribbon Cartridge 1. Make sure that the printer is turned off for at least 15 minutes. CAUTION: The printhead may get hot during operation. Be careful when removing or replacing the ribbon.. 2. Open the top printer cover. 3. -
Page 108: Printing The Self Test
User Manual 9050/9050plus Printing the Self Test If you need to know any printer setting, and to check if the printer is working well, print the self- test. Proceed as follows: 1. Keep the ON LINE key pressed while powering on the printer until the display shows RELEASE KEYS. 2. -
Page 109: Error Handling
User Manual 9050/9050plus Error Handling When an error condition occurs: the printer is disabled; the first message on the display indicates the error, while the second message gives more details concerning the error conditions. Press always the ON LINE key to reset the error condition Error Message Description Messages Indication... - Page 110 User Manual 9050/9050plus Messages Indication Solution Install the rear plug cover on the printer. INTERLOCK ERROR The rear plug cover is not CHECK INSERTION installed on the printer. JAM FRONT1 PATH A paper jam error condition Check the paper path and remove the CHECK PAPER jammed paper.
-
Page 111: Problems List Index
User Manual 9050/9050plus Problems List Index 1. “Forms problems” on page 109 “Problem: Forms buckle, twist, jam, or tractor holes tear” on page 109 “Problem: Forms do not feed past printhead” on page 109 “Problem: Forms do not stack correctly” on page 109 “Problem: Characters are off registration”... - Page 112 User Manual 9050/9050plus Problem: Forms do not stack correctly Solution: Use the recommended table size (see 1. The forms do not stack correctly on the table behind “Choosing a Suitable Location” on page 5). the printer Note: Up to 101.6 mm (4 in.) of forms may stack on the table behind the printer without decreasing the ability of the forms to stack correctly.
- Page 113 User Manual 9050/9050plus Solution: Replace the ribbon cartridge. 3. The ribbon cartridge is defective Solution: Replace the ribbon. 4. A new ribbon is over-inked. Problem: Printing is too light or partial characters print Solution: See “Adjusting the Distance of the Print 1.
-
Page 114: Clearing Form Jams
User Manual 9050/9050plus Clearing Forms Jams Use the following procedure to clear forms jams from the printer 1. Open the top cover 2. Tear off the forms at perforations before it enters the printer and after it exits the printer. 3. -
Page 115: Options
User Manual 9050/9050plus Options The Controller Board (only for 9050) The 9050 printer’s interface available configurations are: Controller board with serial, parallel and USB interfaces Controller board with LAN and parallel interfaces. The original configuration may be modified by ordering the controller board with the desired interfaces and replacing the existing board with it. - Page 116 User Manual 9050/9050plus 5. Use the information under “Handling the Controller Board” on the preceding page as you remove the Controller Board from its shipping box and from the protective package. 6. Align the left and right sides of the Controller Board with the guides in the printer and slide it into the slot.
-
Page 117: The Front2 Push Tractor
User Manual 9050/9050plus The Front2 Push Tractor The 4 pin Front2 Push Tractor is available for the 9050plus and 9050 printer. An optional second front push tractor can be installed on the printer model. This tractor allows the handling of a second fanfold paper. -
Page 118: Removing The Front2 Push Tractor
User Manual 9050/9050plus 3. Insert the connector cable in the electrical 4. Rotate the Front2 push tractor onto the Front1 connector located in the lower push tractor push tractor. Removing the Front2 Push Tractor If you need to remove the upper push tractor, turn the printer off. Disconnect the connector cable and press on the push buttons to disengage the Front2 push tractor 78413010-003... -
Page 119: Loading Paper Using The Front2 Push Tractor
User Manual 9050/9050plus Loading Paper Using the Front2 Push Tractor (option) 1. To select the Front2 push tractor paper path press the PATH key until the display shows: LOAD FRONT2 If you have been using a different path, the display shows: PATH CHANGING ... - Page 120 User Manual 9050/9050plus 4. Space the paper guides along the tractor bar. Open 5. Hold the fanfold paper in front of the the sprocket covers of the left and right sprocket sprockets and insert the paper perforation on the left sprocket pins and close the sprocket cover.
-
Page 121: Loading Paper Using The Front1 Push Tractor
User Manual 9050/9050plus 8. Adjust gently the right sprocket to remove slack Close the Push tractors cover. Press the from the paper Lock the Front2 tractor sprockets LOAD/FF key to load the paper into the moving the sprocket levers down printer Loading Paper Using the Front1 Push Tractor when the Front2 Push Tractor (Option) is Installed... -
Page 122: The Printer Pedestal
User Manual 9050/9050plus 3. When the fanfold paper has been loaded on the Front1 push tractor, reposition the Front2 push tractor in its initial position before closing the Push tractors cover The Printer Pedestal For better paper handling, use the available Three Levels Floor printer pedestal option. The instructions are included inside this option. -
Page 123: Ribbon Shifter Installation
User Manual 9050/9050plus Ribbon Shifter Installation This option can be easily installed also by a user, but it requires a little head-cross screwdriver. It is composed by a ribbon shifter motor and two screws. The ribbon shifter motor has a plastic ribbon shifter which is moved up and down by the firmware of the printer. With this option installed the long life ribbon cartridge can be used. -
Page 124: Printing Characteristics
User Manual 9050/9050plus Printer Specifications Printing Characteristics Print Head Matrix 24 pins - 0.25 mm Print Speed (cps) High Speed Draft Normal Draft Best Draft 15 micro Throughput Mode (ECMA132) Print Mode Speed Pages per Hour Draft-High Speed Draft Spreadsheet 10CPI Lines per minute @10 cpi 40 characters/line... - Page 125 User Manual 9050/9050plus Print Attributes Sub-superscript, Underline, Overscore, Italics, Emphasized, Double Strike, Shadow, Enlarged,Compressed Graphic Resolution (dots per inch) horizontal 60, 80, 90, 120, 180, 240, 360 vertical 60, 72, 180, 360 Characters Sets Standard PC IBM Character CS1 and CS2 Sets EPSON National Variations USA, France, Germany, United Kingdom, Denmark-1, Sweden, Italy, Japan,...
- Page 126 User Manual 9050/9050plus Optional Configuration FRONT2 PUSH TRACTOR (4 pin) Fanfold Width: 76 to 432 mm (3 to 17 inches) Copies: 1 original + 7 copies Thickness Max. 0,635 mm (0.025 inches) Physical and Electrical Characteristics Interfaces with Automatic interface switching Parallel Centronics Compatible Bi-directional (IEEE-1284) nibble and byte modes - 36 pin Amphenol connector, 7/8 data bits...
- Page 127 ...
- Page 128 COMPUPRINT s.r.l. Via Cottolengo, 77 10072 Caselle T.se (TO) ITALY SPECIFICATIONS ARE SUBJECT TO CHANGE WITHOUT NOTICE. This manual refers to various company and products by their trade names. In most of the cases, these designations are claimed as trademarks or registered tramarkers by their respective companies.
Need help?
Do you have a question about the Compuprint 9050 and is the answer not in the manual?
Questions and answers