Advertisement
Table of Contents
Advertisement
Table of Contents

Related Manuals for Compex NetPassage 27G

Summary of Contents for Compex NetPassage 27G
- Page 1 Quick Install Guide Wireless-G Broadband Multimedia Router Compex NetPassage 27G...
-
Page 2: Table Of Contents
TABLE OF CONTENTS 1: INTRODUCTION ..................1 Package Content ..................1 2: NETWORK INFRASTRUCTURE ..............2 3: LET’S GET GOING-HARDWARE SETUP ............3 Power Up in 4 Steps .................. 3 4: GETTING STARTED WITH WIZARD SETUP ............. 4 5: CONFIGURING TCP/IP SETTINGS............. 12 6: CONFIGURING WIRELESS NETWORK CONNECTION....... -
Page 3: 1: Introduction
Chapter 1 Introduction 1: Introduction Thank you for purchasing the Wireless-G Broadband Multimedia Router. This Wireless- G router with two USB1.1 ports connects the USB devices to be shared with others. Typical devices include printers and hard drives. There are endless possibilities with what you using this Multimedia... -
Page 4: 2: Network Infrastructure
Chapter 2 Network Infrastructure 2: Network Infrastructure Only a few simple steps are required to set up the router to begin sharing your broadband Internet connection between your wired and wireless network clients. Example: Broadband Internet Access Distribution to a Fast Ethernet Network & Wireless Network Wireless LAN clients access the Internet and the wired... -
Page 5: 3: Let's Get Going-Hardware Setup
Chapter 3 Let’s Get Going – Hardware Setup 3: Let’s Get Going-Hardware Setup Power Up in 4 Steps In 4 simple steps, you shall have your router wired and functional. After which, you may proceed to the software configuration to get ready to surf the Internet at high-speed! Connect one end of the Ethernet cable to your Cable/ADSL modem, and then connect the other cable end to the socket labeled WAN on... -
Page 6: 4: Getting Started With Wizard Setup
Chapter 3 Let’s Get Going – Hardware Setup 4: Getting Started with Wizard Setup Insert the Product CD to your CD-ROM drive, go to the Utilities section and run the uConfig program. The program will prompt you with the following message. Click on the Yes button to proceed. - Page 7 Chapter 3 Let’s Get Going – Hardware Setup Next, an authentication page will appear as shown on the right. The default password, which password, pre- entered in the field provided. Click on the LOGIN! button to access the main page of the router.
- Page 8 Chapter 3 Let’s Get Going – Hardware Setup The first page of the Setup Wizard will appear, showing an overview of the basic setup. • Internet Connection This functionality lets specify the type of Internet Connection you are using. • Wireless Setup This functionality lets...
- Page 9 Chapter 3 Let’s Get Going – Hardware Setup Select your WAN connection, from following types Internet Connection: • Static IP For configuring Static IP, you need to manually enter the IP Address, Network Mask and Gateway IP Address that are provided by your ISP.
- Page 10 Chapter 3 Let’s Get Going – Hardware Setup To set up your wireless network, configure following parameters: SSID • The default SSID is ‘router’. Click on the Change button to enter your preferred SSID name. Channel • Click down-arrow button next to Channel. From the list, select your preferred wireless network channel.
- Page 11 Chapter 3 Let’s Get Going – Hardware Setup If WPA-PSK is enabled, select Hex or ASCII for the key string type to be used. Change the default WPA-PSK key that is set to ‘11111111’. The default GTK update is ‘600’(recommended value) To proceed, click on the Next button.
- Page 12 Chapter 3 Let’s Get Going – Hardware Setup • Workgroup default name ‘mygroup’. Create appropriate name workgroup to include your router and network clients. • Time Zone Choose your local time zone from the drop-down list. To proceed, click on the Next button. 10.
- Page 13 Chapter 3 Let’s Get Going – Hardware Setup 11. Click on the Back button to go back to the previous page or click on the Finish button to save the settings and reboot the router. 12. You will be returned to the Login page after 30 seconds. Note: The factory default password to access the web- based interface is <password>.
-
Page 14: 5: Configuring Tcp/Ip Settings
Chapter 5 Configuring TCP/IP Settings 5: Configuring TCP/IP Settings You should configure your PC or wireless client to obtain IP address automatically. For users of Microsoft Windows XP, you may configure the TCP/IP settings as follows: Click the Start button. Select Settings and click the Control Panel icon. - Page 15 Chapter 5 Configuring TCP/IP Settings Check the radio button next to Obtain an IP address automatically. Then click the OK button on this page, and the OK button previous page returns you to.
-
Page 16: 6: Configuring Wireless Network Connection
Chapter 6 Configuring Wireless Network Connection 6: Configuring Wireless Network Connection In the following chapters, you will find information on how to configure the router to function in your network, to access the Internet and to begin sharing the connection with your wired and wireless clients. 1. -
Page 17: 7: Schematic Overview
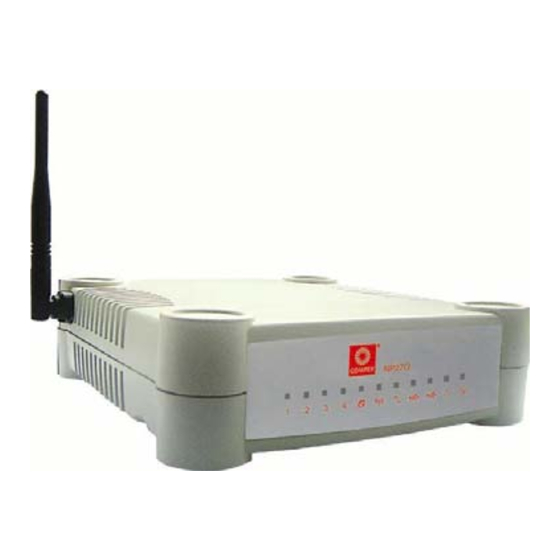
Chapter 7 Schematic Overview 7: Schematic Overview Front View of Router Name Description LAN Link/Act LED Steady GREEN LAN connection is on. 1, 2 3, 4 Flashing GREEN Data transmission at LAN connection. WAN LED Steady GREEN WAN connection is on. Wireless LAN Steady GREEN At least one wireless client is... - Page 18 Chapter 7 Schematic Overview Back View of Router Name Description External Foldable, non-detachable antenna Antenna 5 VDC Power Input WAN (RJ45 Port) WAN port connects to Cable/ADSL modem USB Ports 1, 2 Integrated USB1.1 Ports LAN RJ45 Ports Integrated LAN Switch Ports 1, 2, 3, 4...
- Page 19 Chapter 7 Schematic Overview Bottom View of Router Name Description Reset Push button To reboot, press once. To reset password, press and hold the button for 5 seconds. The DIAG light will flash fast for about 5 flashes/sec before releasing the button.
-
Page 20: 8: Technical Specification
8: Technical Specification Industrial Standards Wired: • IEEE 802.3 10Base-T • IEEE 802.3u 100Base-Tx • IEEE 802.3x Flow Control Wireless: • IEEE 802.11b • IEEE 802.11g WAN Interface 1x Auto MDI/MDI-X RJ45 Ethernet Port for external Cable/ADSL modem WAN Type •... - Page 21 USB1.1 Ports 2X integrated USB ports supporting: • Print Server • Storage disk drive IP Addressing All Classful/Classless subnets Built-in DHCP Server DHCP Reservation NAT Firewall Stateful Packet Inspection (SPI) Firewall Load-Balancing/Fail-Over Parallel Broadband Redundancy Virtual Server IP and Port Forwarding, De-Militarized Zone hosting IP Packet Filtering Time-based, TCP Port, Source IP Filtering...
- Page 22 Compex, Inc. may make improvements and/or changes to the product and/or specifications of the product described in this guide, without prior notice. Compex, Inc will not be liable for any technical inaccuracies or typographical errors found in this guide. Changes are periodically made to the information contained herein and will be incorporated into later versions of the guide.
- Page 23 DECLARATION OF CONFORMITY: Compex, Inc. declares that the product: Product Name: Compex Wireless-G 54Mbps XR Router Model No.: NetPassage 27G conforms to the following Product Standards: This device complies with the Electromagnetic Compatibility Directive (89/336/EEC) issued by the Commission of the European Community. Compliance with this directive implies conformity to the following European Norms (in brackets are the equivalent international standards.)
- Page 24 E-mail: Company: Address: Postal/Zip Code: Country: Phone: ( Note: For purchases within U.S.A and Canada, please fax to Compex, Inc. at (714) 482 0332 For purchases outside U.S.A and Canada, please fax to Compex Systems Pte Ltd at (65) 6280-9947...
- Page 25 Manual Revision: Daniel Manual Number: M-0512-V1.2E Version 1.2 September 2006...
Need help?
Do you have a question about the NetPassage 27G and is the answer not in the manual?
Questions and answers