Advertisement
Advertisement
Table of Contents

Related Manuals for Casio STR-600


Summary of Contents for Casio STR-600
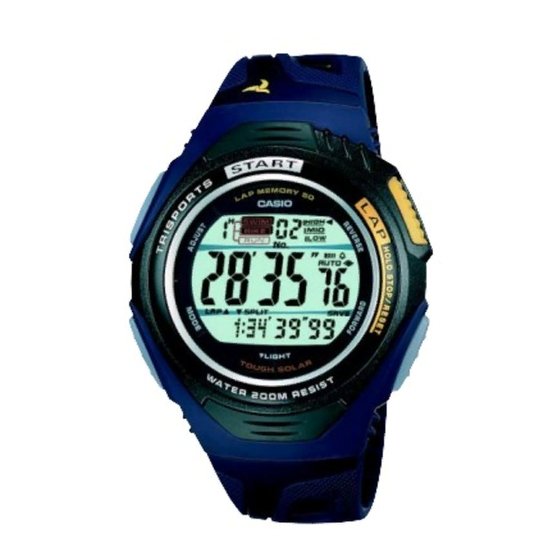
- Page 1 ERVICE ANUAL & PARTS LIST REF. NO. S/M-843 FEB. 2004 MODULE NO. QW-2634 STR-600 INDEX (WITHOUT PRICE)
-
Page 2: Table Of Contents
CONTENTS Page 1. SPECIFICATIONS: MODULE QW-2634 ............ 1 2. OPERATION CHART: MODULE QW-2634 ..........2 3. DRAWINGS: MODULE QW-2634 3-1. LCD DIAGRAMS ..................7 3-2. CIRCUIT DIAGRAM ..................8 3-3. CHECKING TERMINALS AND COMPONENTS ......... 9 4. EXPLODED VIEW: MODULE QW-2634 ........... 10 5. -
Page 3: Specifications: Module Qw-2634
1. SPECIFICATIONS: MODULE QW-2634 Item Detail Battery CTL1616 (Storage battery) Note: Use CTL1616 only. Other storage battery or CR1616 can cause damage to the watch. Battery life Approx. 10 months 1.19 µA maximum Current consumption Alarm system Piezo plate on Cover/Back ±15 sec./month Accuracy Accuracy setting system... -
Page 4: Operation Chart: Module Qw-2634
2. OPERATION CHART: MODULE QW-2634 Getting Acquainted Congratulations upon your selection of this CASIO watch. To get the most out of your About This Manual purchase, be sure to carefully read this manual and keep it on hand for later reference •... - Page 5 • Pressing while an elapsed time operation is in progress or stopped cycles the Configuring the Watch for Triathlon Timing lower Stopwatch Mode display between the three screens shown below. You can use the Target Mode to configure the watch with target splits, and to display leg indicators during timing of each leg.
- Page 6 Alarms Alarm time 5. After about eight seconds, the display will automatically change back to the elapsed You can set up to five independent alarms with hour, (Hour : Minutes) time display, with the time of the current leg (lap) in the center and the total elapsed minutes, and day of the week.
- Page 7 If you experience problems Timekeeping getting the rechargeable battery to a full charge, contact your dealer or CASIO • Resetting the seconds to distributor about having the rechargeable battery replaced.
- Page 8 To recover from the sleep state Perform any one of the following operations. • Move the watch to a well-lit area. It can take up to two seconds for the display to turn • Press any button. • Angle the watch towards your face for reading. To turn Power Saving on and off 1.
-
Page 9: Drawings: Module Qw-2634
3. DRAWINGS: MODULE QW-2634 3-1. LCD DIAGRAMS COL1 SWIM HIGH BIKE SLEEP MINSEC MIN0 AUTOEL COL3 COL0 SPLIT RECOV SAVE MIN1 HYP1 COL2 X14Y2 X14Y1 X14Y0 X14Y4 X14Y3 X13Y2 X13Y1 X13Y0 X13Y4 X13Y3 X12Y2 X12Y1 X12Y0 X12Y4 X12Y3 MINSEC X11Y2 X11Y1 X11Y0 X11Y4... -
Page 10: Circuit Diagram
3-2. CIRCUIT DIAGRAM LCD (2.8V 1/3b 1/5d) L1 - - - - L55 LC1 - - - LC5 SDO SCK CSB SCIN TOTAL 106PINS BONDING 101PINS Xtal GND VDD2 VC3 VC4 VDSP VDD1 VDD3 VC1 VC2 1. No bonding 2. Soldering pads (for switching modules) are not used in L–... -
Page 11: Checking Terminals And Components
3-3. CHECKING TERMINALS AND COMPONENTS Capacitor/Chip Capacitor/Chip Capacitor/Chip 13. Sensor/Tilt (7105 5275) Capacitor/Chip Capacitor/Chip Resistor/Chip Resistor/Chip Capacitor/Chip Capacitor/Chip Capacitor/Chip Coil Inverter Capacitor/Chip VDD2 CLF1 VDD2 CLF1 VOUT CLF2 L– VOUT CLF2 VOUT L– VDSP GND KI9 VDSP 3. PCB ASS'Y VDD3 (7640 7246) SCIN... -
Page 12: Exploded View: Module Qw-2634
4. EXPLODED VIEW: MODULE QW-2634 Casing parts: Spacer Casing parts: Dial ass'y with solar cell 8 (7218 0438) 15 (1008 2132) 1 (1013 1512) 11 (1008 2135) 11 (1008 2135) 2 (1008 9590) 17 (7230 0616) 16 (1008 2133) 18 (1008 2134) 3 (7640 7246) PCB Ass'y 7 (7231 1913) -
Page 13: Parts List: Module Qw-2634
Item Code No. Parts Name Specification Applicable MODULE/WITHOUT MOVEMENT QW-2634AT-01 STR-600-2V < The module QW-2634 is "built-in type" which is assembled directly to the case, therefore the module as the spare parts is not available. > 1013 1512 LCD C2634-01P QW-2634AT-01... -
Page 14: Precautions For Repair: Module Qw-2634
6. PRECAUTIONS FOR REPAIR: MODULE QW-2634 6-1. AC (ALL CLEAR) AND REMOVING OF MODULE Perform AC (ALL CLEAR) when inserting a new battery, or else the memories and/or counters may give erratic displays. Touch the AC contact and the positive (+) side of the battery or main plate with the metallic tweezers. The contact should be made for about two seconds. -
Page 15: Solar Cell-Pcb Ass'y Contact Checking
6-3. SOLAR CELL-PCB ASS'Y CONTACT CHECKING Check a Solar cell and PCB ass'y are contacted correctly by contact spring, when a module is disassembled. To enter TEST mode. 1) While pressing E button, press A and B buttons at the normal timekeeping mode. Check a Solar cell and PCB ass'y contact in the following order. - Page 16 CASIO TECHNO CO.,LTD. Overseas Service Division 6-2, Hon-machi 1-Chome Shibuya-ku, Tokyo 151-8543, Japan...
Need help?
Do you have a question about the STR-600 and is the answer not in the manual?
Questions and answers