Table of Contents
Advertisement
Quick Links
Advertisement
Chapters
Table of Contents
Troubleshooting

Subscribe to Our Youtube Channel
Summary of Contents for YL Instruments YL9100 HPLC
- Page 2 YL9100 HPLC SYSTEM YL9101 VACUUM DEGASSER USER MANUAL...
-
Page 3: Table Of Contents
Contents Chapter 1. Introduction .....................1 1-1. Specifications ............................1 Chapter 2. Installation ....................2 2-1. Inspection and site preparation ......................2 2-2. Connection of power .........................2 2-3. Connection of tubing .........................3 2-3-1. Connecting of mobile phase solvent ................3 2-3-2. Connecting of Solvent delivery pump................3 Chapter 3. -
Page 4: Chapter 1. Introduction
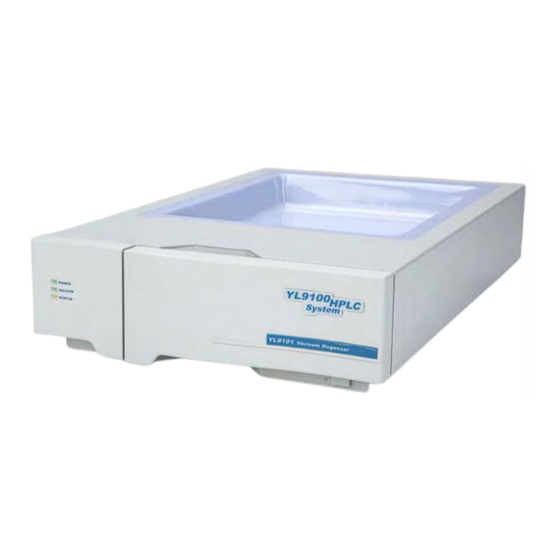
YL9101 Vacuum Degasser Chapter 1. Introduction It is not easy but important to select and handle mobile phase solvent in HPLC(High Performance Liquid Chromatography). YL9101 Vacuum Degasser is connected a high productive vacuum Degassing module which is built in the mixer and it is equipped with a precise 4-way valve module to provide optimum solvent degassing to HPLC user. -
Page 5: Chapter 2. Installation
YL9101 Vacuum Degasser Chapter 2. Installation 2-1. Inspection and site preparation Site requirement of YL9101 Vacuum Degasser 1) Room with 20℃ temperature with variation ± 5℃ with and 60% humidity 2) Where no direct and straight sunlight 3) Plain floor without carpet 4) Where having spare space of 20cm or more 5) Where there are 10% or less voltage change, no frequency change and 100Ω... -
Page 6: Connection Of Tubing
YL9101 Vacuum Degasser Confirm supplying voltage, electric power, socket, and type of connector are correct. Before connect power cable on the pump, please turn off the power switch of YL9101 Vacuum Degasser. Warning ! : The electric power should be matched with description on the rear side of instrument. If not, the instrument can be damaged or it can be a reason of fire. -
Page 7: Chapter 3. Operation
YL9101 Vacuum Degasser Chapter 3. Operation There are four LEDs in front of YL9101 Vacuum Degasser. POWER LED turns ON if main power turns on VACUUM LED turns ON during vacuuming STATUS LED turns ON if there is error during vacuum degassing 3-1. -
Page 8: Chapter 4. Maintenance
YL9101 Vacuum Degasser Chapter 4. Maintenance 4-1. Filtration of solvent Be sure to filter solvent by <5 μm when specially use buffering solution. Keep filtered solvent in the bottle, which is cleared from minute particles. When use filtered solvent, which kept more than 1 week, please filter again before use. - Page 9 YL9100 HPLC SYSTEM YL9110 QUATERNARY SOLVENT DELIVERY PUMP USER MANUAL...
- Page 10 YL9110 Quaternary Pump Contents Chapter 1. Introduction .....................1 1-1. Specifications ............................2 Chapter 2. Configuration and Principle ..............3 2-1. Configuration of flow path........................3 2-2. Operation............................5 2-3. Compressibility compensation ......................5 2-4. Solenoid valve control ........................6 2-5. Gradient curve...........................7 2-6. Rinse port ............................7 Chapter 3.
- Page 11 YL9110 Quaternary Pump 4-4-1.Installation of pump ......................18 4-4-2. Device Monitor.......................20 4-4-3. Method Setup ........................21 4-4-4. Error message ......................22 Chapter 5. Maintenance .......................23 5-1. Caution ............................23 5-2. Replacement of high pressure seal....................23 5-3. Replacement of plunger ........................25 5-4. Replacement of check valve cartridge ....................26 5-5.
- Page 12 [Fig. 4] Gradient curve ..........................7 [Fig. 5] Fitting for 1/16” OD tubing ......................10 [Fig. 6] Connection between YL9110 quaternary pump and YL9100 HPLC system......11 [Fig. 7] Tubing connection of rinse port ....................11 [Fig. 8] Connection of remote cable between YL9110 pump and injector..........12 [Fig.
-
Page 13: Chapter 1. Introduction
YL9110 Quaternary Pump Chapter 1. Introduction Young Lin YL9110 Solvent delivery pump is a pump for High performance liquid chromatograph. It provides high performance and functions as a HPLC pump, and controlled by software. YL9110 quaternary pump uses specially designed cam and pulse damper for stable solvent delivery and has a compressibility compensation function for accurate and precise solvent delivery. -
Page 14: Specifications
YL9110 Quaternary Pump 1-1. Specifications 1) Operating principle : Parallel dual-plunger pump, low pressure gradient 2) Compressibility compensation : Automatic 3) Flow range : 0.001-10ml/min 4) Flow rate accuracy : ≤ ±1% at 1ml/min 5) Flow rate precision : 0.1% RSD at 1ml/min 6) Maximum pressure : 6000 psi 7) Operating range : 0-6000 psi up to 5ml/min 8) Operating range : 0-3000 psi up to 10ml/min... -
Page 15: Chapter 2. Configuration And Principle
YL9110 Quaternary Pump Chapter 2. Configuration and Principle 2-1. Configuration of flow path YL9110 quaternary pump consists as same with figure 1. It uses Teflon tubing between pump inlet and inlet check valve, SUS316 or PEEK tubing from outlet check valve. [Fig. - Page 16 YL9110 Quaternary Pump • Pump Head Assembly Pump head is real working part to deliver solvent by piston movement and check valve. It consists of plunger, check valve, high pressure seal, low pressure seal and rinsing port. YL9110 quaternary pump built in automatic rinsing port to clean the head assembly efficiently if uses buffer solution.
-
Page 17: Operation
YL9110 Quaternary Pump 2-2. Operation There are essential parameters on the pump as like flow accuracy, precision, and reproducibility to get the reliance of analysis data and low detection limit. YL9110 quaternary pump uses high pressure resistant dual pump head, controls microprocessor to monitor the phase of cam to remove pulse, so fulfill the necessities of solvent delivery pump. -
Page 18: Solenoid Valve Control
YL9110 Quaternary Pump Pulsation by compressibility and delay Compensation of pulsation [Fig. 2] Delivery mechanism of YL9110 quaternary pump 2-4. Solenoid valve control YL9110 quaternary pump controls open/close signal of solenoid valve to perform low pressure gradient elution. For accuracy and precision of solvent mixing, YL9110 quaternary pump controls valve opening and closing time with real time compensation according to time gap of valve cycling and the phase speed of cam. -
Page 19: Gradient Curve
YL9110 Quaternary Pump 2-5. Gradient curve Solvent A and solvent B are mixed with flow rate Fb, Mixed solvent flows to the column with flow rate Fab, Solvent volume V of solvent A vs Concentration of solvent B (Fb/Fab-Fb) C(%) = 100 x {1 - (F )/V x t} The solvent ratio difference between present row and next row increases or decreases as a exponential curve. -
Page 20: Chapter 3. Installation
YL9110 Quaternary Pump Chapter 3. Installation 3-1. Inspection and site preparation YL9110 quaternary Pump is delivered along with the following parts when being shipped. Before opening transportation package, perform inspection for trace of shock or mistake, and if there is abnormality, do not open the contents and inform this company of it. -
Page 21: Connection Of Power
YL9110 Quaternary Pump Please check the following before you install the system. 1) Keep the ventilation as normal state. 2) Install on the stable place. Avoid the places as like near to air conditioner and heater, direct sun light, near to window. 3) Keep the place without dust and vibration. -
Page 22: Fig. 5] Fitting For 1/16" Od Tubing
YL9110 Quaternary Pump The cut surface of tubing should be cut at right angle without dust, tube should not be contracted, and middle inner diameter shall not be blocked. In order to cut stainless steel tubing, tubing cutter should be used, plastic tubing cutter or shaving cutter should be used for teflon and similar material of tubing, and the surface should be clean and have no crumbling. -
Page 23: Fig. 6] Connection Between Yl9110 Quaternary Pump And Yl9100 Hplc System
YL9110 Quaternary Pump [Fig. 6] Connection between YL9110 quaternary pump and YL9100 HPLC system Rinse port tubing connects on the each pump head using 1/4-28 fitting as same as [Fig. 7], and fill the 20~50% Methanol. The rinse pump inside of YL9110 quaternary pump circulates the rinse solvent into the pump head every minute. -
Page 24: Connection Of Remote Cable
YL9110 Quaternary Pump 3-4. Connection of remote cable YL9110 quaternary pump has connection terminals for remote input/output, external solenoid valve, and marker input/output. The remote cable from the injector(manual or autosampler) has to be connected on the Remote In terminal on the rear side of YL9110 quaternary pump to collect data at the moment of injection. -
Page 25: Fig. 10] Diagram Of Remote And Marker Input
YL9110 Quaternary Pump [Fig. 10] and [Fig. 11] are the diagram of remote and the other terminal input/output. In between YL9100 series modules, connect directly and confirm the configuration with the other modules. [Fig. 10] Diagram of Remote and Marker input [Fig. -
Page 26: Connection Of Communication Cable
YL9110 Quaternary Pump [Remote operation] START-IN : Operate instrument, and start running of gradient program. If you connect it with autosampler or external valve, automatic running is available. START-OUT : If the signal input on the START-IN terminal, the signal pulse output through this port. It can be used for synchronization of remote start with the other instrument. -
Page 27: Chapter 4. Operation
YL9110 Quaternary Pump Chapter 4. Operation There are four LEDs in front of YL9110 quaternary pump. POWER LED turns ON if main power turns on CONNECTED LED turns ON if communication is connected, LED blinks during connection READY/RUN LED turns ON before analysis, LED blinks during analysis ERROR LED turns ON if there is error 4-1. -
Page 28: Mobile Phase Filter And Bottle
YL9110 Quaternary Pump 4-2. Mobile phase filter and bottle Solvent vessel should be positioned at higher location than pump and not be positioned below pump, and inlet tubing length should be as short as possible. This can minimize pressure drop caused at inlet of pump during suction. -
Page 29: Filtration
YL9110 Quaternary Pump 4-3-2. Filtration Solvent should be necessarily filtered through 0.45μ m or less filtering membrane before use. Removal of small particles is necessary to compensate reliable operation of piston seal, and is necessary measure for reliability of other components in liquid chromatograph. Filtration process is necessary after mixing of solvent, and is more necessary in case of buffer to which un-dissolved impurities are source of deposits. -
Page 30: Measures When Not Uses For Long Time
YL9110 Quaternary Pump 4-3-4. Measures when not uses for long time 1) Prepare iso-propanol for analysis. 2) Open prime/purge pump and suck iso-propanol of at least 50ml into instrument. 3) Separate outlet tubing of pump. 4) Press out iso-propanol sucked into syringe in prime/purge valve and discharge at least 5ml into outlet of in-line filter. - Page 31 YL9110 Quaternary Pump After select YL911x pump on the left window, click arrow button to move this on the right window. Click red arrow button on the right bottom side and select the pressure unit. Double click YL911x pump on the right window, and check IP address of pump. Click “Details”...
-
Page 32: Device Monitor
YL9110 Quaternary Pump 4-4-2. Device Monitor After configure the pump on the configuration window, log in to open main control window. On the main control window, click Device monitor and then Device Monitor window pops up as below. In this window, can control the pump and monitor instrument status as like flow and pressure. -
Page 33: Method Setup
YL9110 Quaternary Pump Ready : It is displayed when the pump is ready. Prime : It is displayed during prime/purge status. : It is displayed during analysis. Fault : It is displayed if there is error on the pump. Halt : It is displayed if the pump stops. -
Page 34: Error Message
YL9110 Quaternary Pump If the signal is opposite when you use with the other device, change it on the External In/Out Set. 4-4-4. Error message If there are errors on the pump caused by pressure limit, control value range, and leak, the pump stops operation with error message. -
Page 35: Chapter 5. Maintenance
YL9110 Quaternary Pump Chapter 5. Maintenance In the event that problem occurs or it is necessary to change part due to wear of seal in using YL9110 quaternary pump, perform maintenance for instrument by referring to the following items. 5-1. Caution In order to protect instrument, take care for the following items in using it. -
Page 36: Fig. 14] Replacement Of High Pressure Seal
YL9110 Quaternary Pump change all seals of both head when change seal due to long use. Leaked solvent flows out through washing port. Change of high pressure seal 1) Loosen tubing of inlet check valve and outlet check valve of pump head. 2) Loosen two head nut for each head using spanner. -
Page 37: Replacement Of Plunger
YL9110 Quaternary Pump Conditioning of high pressure seal 1) Prepare organic solvent such as iso-propanol or methanol necessary. In order to conditioning it, use organic solvent only and do not use buffer solution and base solution. 2) Mix iso-propanol or methanol with water by 50:50, and fill instrument with it using the prime/purge valve. -
Page 38: Replacement Of Check Valve Cartridge
YL9110 Quaternary Pump 5-4. Replacement of check valve cartridge If check valve is not well operated due to contamination, pressure change is severe during operation and pump does not operate properly. Many problems of check valve are caused by small impurity that interferes with operation of check valve. -
Page 39: Supply Of Lubricant
YL9110 Quaternary Pump method, and be careful when treating strong acid and strong base. 1) Separate column inlet tubing connected to column. 2) Orient column inlet tubing toward waste bottle. 3) Set flow rate at 1ml/min. 4) If injector is installed, turn it to injection position. 5) Pump 100% iso-propanol through pump and injector for 10 minutes. - Page 40 YL9110 Quaternary Pump precision reduced ; so it is desired to check it periodically. Main cause of mobile phase filter blocking is growth of bacteria, and two causes to block inlet filter is growth of bacteria and use of solvent containing impurity.
-
Page 41: After Use System
YL9110 Quaternary Pump [Fig. 15] Replacement of in-line filter. 5-9. After use system If you keep the pump without cleaning, the pump can be damaged by the crystallization of salt, growth of microorganism, contamination. To maintain the pump properly, run the pump using iso-propanol for 30 minutes and the plug the outlet of pump, and keeps clean the solvent filter. -
Page 42: Troubleshooting
YL9110 Quaternary Pump 5-10. Troubleshooting In case general problem occurs as the following table, confirm the possible causes regarding this first, and then take proper countermeasures. The following table is countermeasure in case general problems occur. Problem Cause How to fix -Tubing inside is blocked. - Page 43 YL9110 Quaternary Pump Liquid is leaked -High pressure seal was worn. -Replace high pressure seal. or pressure -Plunger was worn. -Replace plunger. reduces when cleaning port is not used -Fitting in instrument was -Tighten fitting in instrument. Liquid is leaked loosened.
- Page 44 YL9100 HPLC SYSTEM YL9111 BINARY PUMP USER MANUAL...
- Page 45 YL9111 Binary Pump Contents Chapter 1. Introduction .....................1 1-1. Specifications ............................2 Chapter 2. Configuration and Principle ..............3 2-1. Configuration of flow path........................3 2-2. Operation............................5 2-3. Compressibility compensation ......................5 2-4. Gradient Curve ..........................6 2-5. Rinse port ............................7 Chapter 3. Installation ....................8 3-1.
- Page 46 YL9111 Binary Pump 4-4-2. Device Monitor.......................20 4-4-3. Method Setup ........................21 4-4-4. Error message ......................22 Chapter 5. Maintenance ..................23 5-1. Caution ............................23 5-2. Replacement of high pressure seal....................23 5-3. Replacement of plunger ........................25 5-4. Replacement of check valve cartridge ....................26 5-5. Replacement of low pressure seal ....................26 5-6.
- Page 47 [Fig. 4] Gradient curve ..........................6 [Fig. 5] Fitting for 1/16” OD tubing ......................10 [Fig. 6] Connection between YL9111 Binary pump and YL9100 HPLC system........11 [Fig. 7] Tubing connection of rinse port ....................11 [Fig. 8] Connection of remote cable between YL9111 pump and injector ..........12 [Fig.
-
Page 48: Chapter 1. Introduction
YL9111 Binary Pump Chapter 1. Introduction Young Lin YL9111 Solvent delivery pump is a pump for High performance liquid chromatograph. It provides high performance and functions as a HPLC pump, and controlled by software. YL9111 Binary pump uses specially designed cam and pulse damper for stable solvent delivery and has a compressibility compensation function for accurate and precise solvent delivery. -
Page 49: Specifications
YL9111 Binary Pump 1-1. Specifications 1) Operating principle : X2 Parallel dual-plunger pump, high pressure gradient 2) Compressibility compensation : Automatic 3) Flow range : 0.001-10ml/min 4) Flow rate accuracy : ≤ ±1% at 1ml/min 5) Flow rate precision : 0.1% RSD at 1ml/min 6) Maximum pressure : 6000 psi Operating range : 0-6000 psi up to 5ml/min Operating range : 0-3000 psi up to 10ml/min... -
Page 50: Chapter 2. Configuration And Principle
YL9111 Binary Pump Chapter 2. Configuration and Principle 2-1. Configuration of flow path YL9111 Binary pump consists as same with figure 1. It uses Teflon tubing between pump inlet and inlet check valve, SUS316 or PEEK tubing from outlet check valve. [Fig. - Page 51 YL9111 Binary Pump • Pump Head Assembly Pump head is real working part to deliver solvent by piston movement and check valve. It consists of plunger, check valve, high pressure seal, low pressure seal and rinsing port. YL9111 Binary pump built in automatic rinsing port to clean the head assembly efficiently if uses buffer solution.
-
Page 52: Operation
YL9111 Binary Pump 2-2. Operation There are essential parameters on the pump as like flow accuracy, precision, and reproducibility to get the reliance of analysis data and low detection limit. YL9111 Binary pump uses high pressure resistant dual pump head, controls microprocessor to monitor the phase of cam to remove pulse, so fulfill the necessities of solvent delivery pump. -
Page 53: Gradient Curve
YL9111 Binary Pump Pulsation by compressibility and delay Compensation of pulsation [Fig. 2] Delivery mechanism of YL9111 Binary pump 2-4. Gradient Curve Solvent A and solvent B are mixed with flow rate Fb, Mixed solvent flows to the column with flow rate Fab, Solvent volume V of solvent A vs Concentration of solvent B (Fb/Fab-Fb) C(%) = 100 x {1 - (F... -
Page 54: Rinse Port
YL9111 Binary Pump 2-5. Rinse port When using buffer solution, salts are generated on back side of high pressure seal and these deposits wear pump seal to cause shortening of seal life, which has bad effect on pump. Rinse port enables to insert proper solvent in back side of high pressure seal to prevent salts from being deposited and activated. -
Page 55: Chapter 3. Installation
YL9111 Binary Pump Chapter 3. Installation 3-1. Inspection and site preparation YL9111 Binary Pump is delivered along with the following parts when being shipped. Before opening transportation package, perform inspection for trace of shock or mistake, and if there is abnormality, do not open the contents and inform this company of it. -
Page 56: Connection Of Power
YL9111 Binary Pump Please check the following before you install the system. 1) Keep the ventilation as normal state. 2) Install on the stable place. Avoid the places as like near to air conditioner and heater, direct sun light, near to window. 3) Keep the place without dust and vibration. - Page 57 YL9111 Binary Pump The cut surface of tubing should be cut at right angle without dust, tube should not be contracted, and middle inner diameter shall not be blocked. In order to cut stainless steel tubing, tubing cutter should be used, plastic tubing cutter or shaving cutter should be used for teflon and similar material of tubing, and the surface should be clean and have no crumbling.
- Page 58 YL9111 Binary Pump [Fig. 6] Connection between YL9111 Binary pump and YL9100 HPLC system Rinse port tubing connects on the each pump head using 1/4-28 fitting as same as [Fig. 7], and fill the 20~50% Methanol. The rinse pump inside of YL9111 Binary pump circulates the rinse solvent into the pump head every minute.
-
Page 59: Connection Of Remote Cable
YL9111 Binary Pump 3-4. Connection of remote cable YL9111 Binary pump has connection terminals for remote input/output, external solenoid valve, and marker input/output. The remote cable from the injector(manual or autosampler) has to be connected on the Remote In terminal on the rear side of YL9111 Binary pump to collect data at the moment of injection. - Page 60 YL9111 Binary Pump [Fig. 10] and [Fig. 11] are the diagram of remote and the other terminal input/output. In between YL9100 series modules, connect directly and confirm the configuration with the other modules. [Fig. 10] Diagram of Remote and Marker input [Fig.
-
Page 61: Connection Of Communication Cable
YL9111 Binary Pump [Remote operation] START-IN : Operate instrument, and start running of gradient program. If you connect it with autosampler or external valve, automatic running is available. START-OUT : If the signal input on the START-IN terminal, the signal pulse output through this port. It can be used for synchronization of remote start with the other instrument. -
Page 62: Chapter 4. Operation
YL9111 Binary Pump Chapter 4. Operation There are four LEDs in front of YL9111 Binary pump. POWER LED turns ON if main power turns on CONNECTED LED turns ON if communication is connected, LED blinks during connection READY/RUN LED turns ON before analysis, LED blinks during analysis ERROR LED turns ON if there is error 4-1. -
Page 63: Mobile Phase Filter And Bottle
YL9111 Binary Pump 4-2. Mobile phase filter and bottle Solvent vessel should be positioned at higher location than pump and not be positioned below pump, and inlet tubing length should be as short as possible. This can minimize pressure drop caused at inlet of pump during suction. -
Page 64: Filtration
YL9111 Binary Pump 4-3-2. Filtration Solvent should be necessarily filtered through 0.45μ m or less filtering membrane before use. Removal of small particles is necessary to compensate reliable operation of piston seal, and is necessary measure for reliability of other components in liquid chromatograph. Filtration process is necessary after mixing of solvent, and is more necessary in case of buffer to which un-dissolved impurities are source of deposits. -
Page 65: Measures When Not Uses For Long Time
YL9111 Binary Pump 4-3-4. Measures when not uses for long time 1) Prepare iso-propanol for analysis. 2) Open prime/purge pump and suck iso-propanol of at least 50ml into instrument. 3) Separate outlet tubing of pump. 4) Press out iso-propanol sucked into syringe in prime/purge valve and discharge at least 5ml into outlet of in-line filter. - Page 66 YL9111 Binary Pump After select YL911x pump on the left window, click arrow button to move this on the right window. Click red arrow button on the right bottom side and select the pressure unit. Double click YL911x pump on the right window, and check IP address of pump. Click “Details”...
-
Page 67: Device Monitor
YL9111 Binary Pump 4-4-2. Device Monitor After configure the pump on the configuration window, log in to open main control window. On the main control window, click Device monitor and then Device Monitor window pops up as below. In this window, can control the pump and monitor instrument status as like flow and pressure. -
Page 68: Method Setup
YL9111 Binary Pump Ready : It is displayed when the pump is ready. Prime : It is displayed during prime/purge status. : It is displayed during analysis. Fault : It is displayed if there is error on the pump. Halt : It is displayed if the pump stops. - Page 69 YL9111 Binary Pump If the signal is opposite when you use with the other device, change it on the External In/Out Set. 4-4-4. Error message If there are errors on the pump caused by pressure limit, control value range, and leak, the pump stops operation with error message.
-
Page 70: Chapter 5. Maintenance
YL9111 Binary Pump Chapter 5. Maintenance In the event that problem occurs or it is necessary to change part due to wear of seal in using YL9111 Binary pump, perform maintenance for instrument by referring to the following items. 5-1. Caution In order to protect instrument, take care for the following items in using it. - Page 71 YL9111 Binary Pump Change of high pressure seal 1) Loosen tubing of inlet check valve and outlet check valve of pump head. 2) Loosen two head nut for each head using spanner. 3) Separate pump head assembly from instrument. At this time, plunger is left at the place where pump head assembly was loosened. When loosening it, pull it carefully in pump head guide direction and take care not to damage plunger.
-
Page 72: Replacement Of Plunger
YL9111 Binary Pump Conditioning of high pressure seal 1) Prepare organic solvent such as iso-propanol or methanol necessary. In order to conditioning it, use organic solvent only and do not use buffer solution and base solution. 2) Mix iso-propanol or methanol with water by 50:50, and fill instrument with it using the prime/purge valve. -
Page 73: Replacement Of Check Valve Cartridge
YL9111 Binary Pump 5-4. Replacement of check valve cartridge If check valve is not well operated due to contamination, pressure change is severe during operation and pump does not operate properly. Many problems of check valve are caused by small impurity that interferes with operation of check valve. -
Page 74: Supply Of Lubricant
YL9111 Binary Pump method, and be careful when treating strong acid and strong base. 1) Separate column inlet tubing connected to column. 2) Orient column inlet tubing toward waste bottle. 3) Set flow rate at 1ml/min. 4) If injector is installed, turn it to injection position. 5) Pump 100% iso-propanol through pump and injector for 10 minutes. - Page 75 YL9111 Binary Pump precision reduced ; so it is desired to check it periodically. Main cause of mobile phase filter blocking is growth of bacteria, and two causes to block inlet filter is growth of bacteria and use of solvent containing impurity.
-
Page 76: After Use System
YL9111 Binary Pump [Fig. 15] Replacement of in-line filter. 5-9. After use system If you keep the pump without cleaning, the pump can be damaged by the crystallization of salt, growth of microorganism, contamination. To maintain the pump properly, run the pump using iso-propanol for 30 minutes and the plug the outlet of pump, and keeps clean the solvent filter. - Page 77 YL9111 Binary Pump 5-10. Troubleshooting In case general problem occurs as the following table, confirm the possible causes regarding this first, and then take proper countermeasures. The following table is countermeasure in case general problems occur. Problem Cause How to fix -Tubing inside is blocked.
- Page 78 YL9111 Binary Pump Liquid is leaked or pressure -High pressure seal was worn. -Replace high pressure seal. reduces when -Plunger was worn. -Replace plunger. cleaning port is not used Liquid is leaked -Fitting in instrument was loosened. -Tighten fitting in instrument. from inside of -Damper was damaged.
- Page 79 YL9100 HPLC SYSTEM YL9112 ISOCRATIC PUMP USER MANUAL...
- Page 80 YL9112 Isocratic Pump Contents Chapter 1. Introduction .....................1 1-1. Specifications ............................2 Chapter 2. Configuration and Principle ..............3 2-1. Configuration of flow path........................3 2-2. Operation............................5 2-3. Compressibility compensation ......................5 2-4. Rinse port ............................6 Chapter 3. Installation ....................7 3-1. Inspection and site preparation ......................7 3-2.
- Page 81 YL9112 Isocratic Pump 4-4-4. Error message .......................22 Chapter 5. Maintenance ..................23 5-1. Caution ............................23 5-2. Replacement of high pressure seal....................23 5-3. Replacement of plunger ........................25 5-4. Replacement of check valve cartridge ....................26 5-5. Replacement of low pressure seal ....................26 5-6. Cleaning of flow path within pump ....................26 5-7.
- Page 82 [Fig. 2] Delivery mechanism of YL9112 isocratic pump................6 [Fig. 5] Fitting for 1/16” OD tubing ......................9 [Fig. 6] Connection between YL9112 isocratic pump and YL9100 HPLC system........10 [Fig. 7] Tubing connection of rinse port ....................10 [Fig. 8] Connection of remote cable between YL9112 pump and injector..........11 [Fig.
-
Page 83: Chapter 1. Introduction
YL9112 Isocratic Pump Chapter 1. Introduction Young Lin YL9112 Solvent delivery pump is a pump for High performance liquid chromatograph, it provides high performance and functions as a HPLC pump, and controlled by software. YL9112 isocratic pump uses specially designed cam and pulse damper for stable solvent delivery and has a compressibility compensation function for accurate and precise solvent delivery. -
Page 84: Specifications
YL9112 Isocratic Pump 1-1. Specifications 1) Operating principle : Parallel dual-plunger pump 2) Compressibility compensation : Automatic 3) Flow range : 0.001-10ml/min 4) Flow rate accuracy : ≤ ±1% at 1ml/min 5) Flow rate precision : 0.1% RSD at 1ml/min 6) Maximum pressure : 6000 psi Operating range : 0-6000 psi up to 5ml/min Operating range : 0-3000 psi up to 10ml/min... -
Page 85: Chapter 2. Configuration And Principle
YL9112 Isocratic Pump Chapter 2. Configuration and Principle 2-1. Configuration of flow path YL9112 isocratic pump consists as same with figure 1. It uses Teflon tubing between pump inlet and inlet check valve, SUS316 or PEEK tubing from outlet check valve. [Fig. - Page 86 YL9112 Isocratic Pump plunger, check valve, high pressure seal, low pressure seal and rinsing port. YL9112 isocratic pump built in automatic rinsing port to clean the head assembly efficiently if uses buffer solution. • Auto Rinsing Pump Auto rinsing pump delivers cleaning solvent from the rinsing solvent bottle to the inside of pump head. YL9112 isocratic pump rinse the system every 3 minutes automatically.
-
Page 87: Operation
YL9112 Isocratic Pump 2-2. Operation There are essential parameters on the pump as like flow accuracy, precision, and reproducibility to get the reliance of analysis data and low detection limit. YL9112 isocratic pump uses high pressure resistant dual pump head, controls microprocessor to monitor the phase of cam to remove pulse, so fulfill the necessities of solvent delivery pump. -
Page 88: Rinse Port
YL9112 Isocratic Pump Pulsation by compressibility and delay Compensation of pulsation [Fig. 2] Delivery mechanism of YL9112 isocratic pump 2-4. Rinse port When using buffer solution, salts are generated on back side of high pressure seal and these deposits wear pump seal to cause shortening of seal life, which has bad effect on pump. Rinse port enables to insert proper solvent in back side of high pressure seal to prevent salts from being deposited and activated. -
Page 89: Chapter 3. Installation
YL9112 Isocratic Pump Chapter 3. Installation 3-1. Inspection and site preparation YL9112 isocratic Pump is delivered along with the following parts when being shipped. Before opening transportation package, perform inspection for trace of shock or mistake, and if there is abnormality, do not open the contents and inform this company of it. -
Page 90: Connection Of Power
YL9112 Isocratic Pump Please check the following before you install the system. 1) Keep the ventilation as normal state. 2) Install on the stable place. Avoid the places as like near to air conditioner and heater, direct sun light, near to window. 3) Keep the place without dust and vibration. - Page 91 YL9112 Isocratic Pump The cut surface of tubing should be cut at right angle without dust, tube should not be contracted, and middle inner diameter shall not be blocked. In order to cut stainless steel tubing, tubing cutter should be used, plastic tubing cutter or shaving cutter should be used for teflon and similar material of tubing, and the surface should be clean and have no crumbling.
- Page 92 YL9112 Isocratic Pump [Fig. 6] Connection between YL9112 isocratic pump and YL9100 HPLC system Rinse port tubing connects on the each pump head using 1/4-28 fitting as same as [Fig. 7], and fill the 20~50% Methanol. The rinse pump inside of YL9112 isocratic pump circulates the rinse solvent into the pump head every minute.
-
Page 93: Connection Of Remote Cable
YL9112 Isocratic Pump 3-4. Connection of remote cable YL9112 isocratic pump has connection terminals for remote input/output, external solenoid valve, and marker input/output. The remote cable from the injector(manual or autosampler) has to be connected on the Remote In terminal on the rear side of YL9112 isocratic pump to collect data at the moment of injection. - Page 94 YL9112 Isocratic Pump Notice ! : Please do not connect wires between cables at your discretion. If you want to connect with the other instrument, please check input/output information and confirm with YL9112 isocratic pump terminal configuration. [Fig. 9] Pin configuration of each terminal [Fig.
-
Page 95: Connection Of Communication Cable
YL9112 Isocratic Pump YL9112 isocratic pump provides output signal(12V 500mA) to operate external solenoid valve as like [Fig 12]. [Fig. 12] Diagram of solenoid output [Remote operation] START-IN : Operate instrument, and start running of gradient program. If you connect it with autosampler or external valve, automatic running is available. START-OUT : If the signal input on the START-IN terminal, the signal pulse output through this port. - Page 96 YL9112 Isocratic Pump [Fig. 13] Connection of communication cable Notice ! : The LAN HUB used for cable connection on the PC must use switching mode module.
-
Page 97: Chapter 4. Operation
YL9112 Isocratic Pump Chapter 4. Operation There are four LEDs in front of YL9112 isocratic pump. POWER LED turns ON if main power turns on CONNECTED LED turns ON if communication is connected, LED blinks during connection READY/RUN LED turns ON before analysis, LED blinks during analysis ERROR LED turns ON if there is error 4-1. -
Page 98: Mobile Phase Filter And Bottle
YL9112 Isocratic Pump 4-2. Mobile phase filter and bottle Solvent vessel should be positioned at higher location than pump and not be positioned below pump, and inlet tubing length should be as short as possible. This can minimize pressure drop caused at inlet of pump during suction. -
Page 99: Filtration
YL9112 Isocratic Pump 4-3-2. Filtration Solvent should be necessarily filtered through 0.45μ m or less filtering membrane before use. Removal of small particles is necessary to compensate reliable operation of piston seal, and is necessary measure for reliability of other components in liquid chromatograph. Filtration process is necessary after mixing of solvent, and is more necessary in case of buffer to which un-dissolved impurities are source of deposits. -
Page 100: Measures When Not Uses For Long Time
YL9112 Isocratic Pump 4-3-4. Measures when not uses for long time 1) Prepare iso-propanol for analysis. 2) Open prime/purge pump and suck iso-propanol of at least 50ml into instrument. 3) Separate outlet tubing of pump. 4) Press out iso-propanol sucked into syringe in prime/purge valve and discharge at least 5ml into outlet of in-line filter. - Page 101 YL9112 Isocratic Pump After select YL911x pump on the left window, click arrow button to move this on the right window. Click red arrow button on the right bottom side and select the pressure unit. Double click YL911x pump on the right window, and check IP address of pump. Click “Details”...
-
Page 102: Device Monitor
YL9112 Isocratic Pump 4-4-2. Device Monitor After configure the pump on the configuration window, log in to open main control window. On the main control window, click Device monitor and then Device Monitor window pops up as below. In this window, can control the pump and monitor instrument status as like flow and pressure. -
Page 103: Method Setup
YL9112 Isocratic Pump Ready : It is displayed when the pump is ready. Prime : It is displayed during prime/purge status. : It is displayed during analysis. Fault : It is displayed if there is error on the pump. Halt : It is displayed if the pump stops. -
Page 104: Error Message
YL9112 Isocratic Pump If the signal is opposite when you use with the other device, change it on the External In/Out Set. 4-4-4. Error message If there are errors on the pump caused by pressure limit, control value range, and leak, the pump stops operation with error message. -
Page 105: Chapter 5. Maintenance
YL9112 Isocratic Pump Chapter 5. Maintenance In the event that problem occurs or it is necessary to change part due to wear of seal in using YL9112 isocratic pump, perform maintenance for instrument by referring to the following items. 5-1. Caution In order to protect instrument, take care for the following items in using it. - Page 106 YL9112 Isocratic Pump change all seals of both head when change seal due to long use. Leaked solvent flows out through washing port. Change of high pressure seal 1) Loosen tubing of inlet check valve and outlet check valve of pump head. 2) Loosen two head nut for each head using spanner.
-
Page 107: Replacement Of Plunger
YL9112 Isocratic Pump Conditioning of high pressure seal 1) Prepare organic solvent such as iso-propanol or methanol necessary. In order to conditioning it, use organic solvent only and do not use buffer solution and base solution. 2) Mix iso-propanol or methanol with water by 50:50, and fill instrument with it using the prime/purge valve. -
Page 108: Replacement Of Check Valve Cartridge
YL9112 Isocratic Pump 5-4. Replacement of check valve cartridge If check valve is not well operated due to contamination, pressure change is severe during operation and pump does not operate properly. Many problems of check valve are caused by small impurity that interferes with operation of check valve. -
Page 109: Supply Of Lubricant
YL9112 Isocratic Pump method, and be careful when treating strong acid and strong base. 1) Separate column inlet tubing connected to column. 2) Orient column inlet tubing toward waste bottle. 3) Set flow rate at 1ml/min. 4) If injector is installed, turn it to injection position. 5) Pump 100% iso-propanol through pump and injector for 10 minutes. - Page 110 YL9112 Isocratic Pump precision reduced ; so it is desired to check it periodically. Main cause of mobile phase filter blocking is growth of bacteria, and two causes to block inlet filter is growth of bacteria and use of solvent containing impurity.
-
Page 111: After Use System
YL9112 Isocratic Pump [Fig. 15] Replacement of in-line filter. 5-9. After use system If you keep the pump without cleaning, the pump can be damaged by the crystallization of salt, growth of microorganism, contamination. To maintain the pump properly, run the pump using iso-propanol for 30 minutes and the plug the outlet of pump, and keeps clean the solvent filter. - Page 112 YL9112 Isocratic Pump Problem Cause How to fix -Tubing inside is blocked. -Replace blocked tubing by loosening to be from tail side Pressure upper in turn. limit is loaded. -Check valve is blocked. -Replace outlet check valve. -Solvent is changed. -Wait until solvent is completely changed.
- Page 113 YL9112 Isocratic Pump Liquid is leaked or pressure -High pressure seal was worn. -Replace high pressure seal. reduces when -Plunger was worn. -Replace plunger. cleaning port is not used -Fitting in instrument was -Tighten fitting in instrument. Liquid is leaked loosened.
- Page 114 YL9100 HPLC System YL9120 UV/Vis Detector USER MANUAL...
- Page 115 YL9120 UV/Vis Detector Contents Chapter 1. Introduction .................... 1 1-1. Features of YL9120........................1 1-2. Specifications ..........................1 Chapter 2. Installation ....................3 2-1. Inspection and site preparation....................3 2-2. Connection of power ......................... 4 2-3. Connection of a column ......................4 2-4.
- Page 116 YL9120 UV/Vis Detector Figure Contents [Fig. 1] Pin configuration of each terminal ....................5 [Fig. 2] Diagram of Remote and Marker input ..................5 [Fig. 3] Diagram of Remote and Marker output ..................6 [Fig. 4] Connection of communication cable ................... 7 [Fig.
-
Page 117: Chapter 1. Introduction
YL9120 UV/Vis Detector Chapter 1. Introduction The YL9120 UV/Vis Detector is the most sensitive and versatile absorbance detector available for HPLC. It features dual wavelength capability, improved signal-to-noise performance, minimized drift and reduced optical bandwidth. The YL9120 UV/Vis Detector is designed to provide higher performance in UV/VIS detection for HPLC application such as development, analytical research and QA/QC. - Page 118 YL9120 UV/Vis Detector 14) Path Length : 10 mm ( Analytical cell ) 15) Cell Volume : 10 uL ( Analytical cell ) 16) Pressure limit : 1500psi ( Analytical cell ) 17) Wetted Materials : 316 stainless steel, Quartz, Teflon 18) Analog Outputs Two, software selectable : Absorbance Energy, Sample Energy, Reference Energy 19) Communications : LAN...
-
Page 119: Chapter 2. Installation
YL9120 UV/Vis Detector Chapter 2. Installation 2-1. Inspection and site preparation Carefully unpack the detector from the shipping box and inspect both the unit and packing for any signs of damage. If any damage is noted, contact the shipping company immediately. In addition to this manual, the shipping box contains a power cord, and any options which you ordered. -
Page 120: Connection Of Power
YL9120 UV/Vis Detector 5) Appropriate solvents, reagents, etc 6) Nuts, ferrules, appropriate to the column end-fittings being used 7) Wrenches appropriate to column end-fittings 8) Connecting tubing and union (if column cannot be connected directly to the cell). 2-2. Connection of power Confirm supplying voltage, electric power, socket, and type of connector are correct. -
Page 121: Connection Of Remote Cable
YL9120 UV/Vis Detector through the new tube to a waste reservoir. This will clean any particulates or oil that may be residing in the tube that could clog the heat exchanger or contaminate the sample cell of the detector. 2-4. Connection of remote cable YL9120 UV/Vis detector has connection terminals for remote input/output, and marker input/output. -
Page 122: Connection Of Communication Cable
YL9120 UV/Vis Detector [Fig. 3] Diagram of Remote and Marker output [Remote operation] START-IN : Operate instrument, and start running of gradient program. If you connect it with autosampler or external valve, automatic running is available. START-OUT : If the signal input on the START-IN terminal, the signal pulse output through this port. It can be used for synchronization of remote start with the other instrument. - Page 123 YL9120 UV/Vis Detector [Fig. 4] Connection of communication cable Note : The LAN HUB used for cable connection on the PC must use switching mode module.
-
Page 124: Chapter 3. Operation
YL9120 UV/Vis Detector Chapter 3. Operation There are four LEDs in front of YL9120 UV/Vis detector. POWER LED turns ON if main power turns on CONNECTED LED turns ON if communication is connected, LED blinks during connection READY/RUN LED turns ON before analysis, LED blinks during analysis ERROR LED turns ON if there is error... - Page 125 YL9120 UV/Vis Detector Double click YL9120 UV/Vis detector on the right window, and check IP address of the detector.
- Page 126 YL9120 UV/Vis Detector 3-1-2. Device Monitor After configure the UV/Vis detector on the System Configuration window, log in to open main control window. On the main control window, click Device monitor and then Device Monitor window pops up as below. In this window, you can control the UV/Vis Detector and monitor instrument status as like lamp on/off, wavelength selection, sampling rate, etc.
-
Page 127: Method Setup
YL9120 UV/Vis Detector Diagnosis : To Inspect hardware condition of the YL9120. Autozero : To change the absorbance to Zero “0” Reset : To release the UV/Vis detector status from the error. [Status message] Initializing : It is displayed during initialization. Ready : It is displayed when the pump is ready. - Page 128 YL9120 UV/Vis Detector In the table below, edit programming of time table, and setup the detector status during idle state Time Constant : To input the value of digital filter. If value is larger, the baseline is smoother while peak width is wider. Auto Zero : To change the absorbance to zero Auto Offset...
-
Page 129: Error Message
YL9120 UV/Vis Detector Setup the Time Table, choose lamps on/off and edit the time table such as wavelength A/B, CutFilter, Polarity, etc. according to time programming. 3-1-4. Error message If there is a leak from the detector, it stops operation with error message. -
Page 130: Chapter 4. Maintenance
YL9120 UV/Vis Detector Chapter 4. Maintenance 4-1. D2 lamp The Deuterium Lamp (D ) is covered from 190 to 600 nm of wavelength. The replacement time is either in case you use the lamp more than 2000 hours or in case the light intensity is a half (50%) of the original intensity when you installed the lamp at first. -
Page 131: How To Install A New D
YL9120 UV/Vis Detector 4-1-2. How to install a new D lamp 1) Insert the new lamp assembly onto the lamp housing on the right front panel. 2) Use the thumbscrews to attach the lamp assembly to the detector. 3) Connect the lamp lead to the lower of the two terminals in the lamp compartment. CAUTION ;... -
Page 132: How To Remove The Tungsten Lamp
YL9120 UV/Vis Detector 4) If the displayed value is less than a half of the original intensity, the lamp should be replaced to new one. Generally, you have to consider the lamp exchange when the light intensity of reference energy is less than 5 nA. 4-2-1. -
Page 133: How To Install A New Tungsten Lamp
YL9120 UV/Vis Detector 4-2-2. How to install a new Tungsten lamp 1) Insert the new lamp assembly onto the lamp housing on the right front panel. 2) Use the thumbscrews to attach the lamp assembly to the detector. 3) Connect the lamp lead to the lower of the two terminals in the lamp compartment. 4-3. -
Page 134: Troubleshooting
YL9120 UV/Vis Detector 4-4. Troubleshooting Most problems with HPLC detectors are, in fact, caused by other parts of the system. Noisy and drifting baselines, poor reproducibility in quantitative analysis, and similar problems are more often the result of dissolved air bubbles, contaminated eluents, dirty samples, or damaged columns rather than of actual problems with detector hardware. - Page 135 YL9120 UV/Vis Detector The absorption of solvent in the column Column is filled with UV absorbers that are has been changed. bleeding-replace column; impure solvent is equilibrating with the column-replace solvent with more pure grade, switch to a longer wavelength so that background absorption does not fluctuate as much.
- Page 136 YL9100 HPLC SYSTEM YL9130 COLUMN COMPARTMENT USER MANUAL...
- Page 137 YL9130 Column Compartment Contents Chapter 1. Introduction....................1 1-1. Specifications ............................1 Chapter 2. Installation ...................... 2 2-1. Inspection and site preparation......................2 2-2. Connection of power ........................... 3 2-3. Installation of switching valve and column..................3 2-4. Connection of remote cable ........................ 5 2-5.
-
Page 138: Chapter 1. Introduction
YL9130 Column Compartment Chapter 1. Introduction YL9130 column compartment is a thermostat to control column temperature of HPLC system. YL9130 column compartment uses RTD sensor to read temperature and PID control to control peltier device, it provides wide temperature range and excellent temperature accuracy. The followings are standard specification of YL9130 column compartment. -
Page 139: Chapter 2. Installation
YL9130 Column Compartment Chapter 2. Installation 2-1. Inspection and site preparation YL9130 column compartment is delivered along with the following parts when being shipped. Before opening transportation package, perform inspection for trace of shock or mistake, and if there is abnormality, do not open the contents and inform this company of it. -
Page 140: Connection Of Power
YL9130 Column Compartment Please check the following before you install the system. 1) Keep the ventilation as normal state. 2) Install on the stable place. Avoid the places as like near to air conditioner and heater, direct sun light, near to window. 3) Keep the place without dust and vibration. - Page 141 YL9130 Column Compartment These valves can be controlled by YL-Clarity software. If you configure the YL9130 column compartment with switching valve, use fittings supplied with system. Followings are valve configurations. [Fig. 1] Configuration of injection valve [Fig. 2] Configuration of switching valve [Fig.
-
Page 142: Connection Of Remote Cable
YL9130 Column Compartment 2-4. Connection of remote cable YL9130 column compartment has connection terminals for remote input/output, external solenoid valve, and marker input/output. The remote cable from the injector(manual or autosampler) has to be connected on the Remote In terminal on the rear side of YL9130 column compartment to collect data at the moment of injection. -
Page 143: Connection Of Communication Cable
YL9130 Column Compartment [Fig. 6] Diagram of Remote and Marker output [Remote operation] START-IN : Operate instrument, and start running of gradient program. If you connect it with autosampler or external valve, automatic running is available. START-OUT : If the signal input on the START-IN terminal, the signal pulse output through this port. It can be used for synchronization of remote start with the other instrument. -
Page 144: Chapter 3. Operation
YL9130 Column Compartment Chapter 3. Operation 3-1. Before Start There are four LEDs in front of YL9112 isocratic pump. POWER LED turns ON if main power turns on CONNECTED LED turns ON if communication is connected, LED blinks during connection READY/RUN LED turns ON before analysis, LED blinks during analysis ERROR... - Page 145 YL9130 Column Compartment After select YL9130 column compartment on the left window, click arrow button to move this on the right window. Click red arrow button on the right bottom side and select the temperature unit. Double click YL9130 column compartment on the right window, and check IP address of pump. Click “Detect”...
- Page 146 YL9130 Column Compartment [Control button] Operate : To run the column compartment at set temperature. Halt : To stop the operation of column compartment. Diagnosis : To self test of instrument. Reset : To release the column compartment status from the error. [Status message] Instrument State : To display the present status.
- Page 147 YL9130 Column Compartment Not Controlled It can be checked if you do not want to use YL9130 column compartment for analysis. If you select “Not Controlled”, it is displayed on the device monitor window and all the function to control YL9130 Column Compartment are deactivated.
- Page 148 YL9130 Column Compartment External In/Out Set external input and output signal. If the signal is opposite when you use with the other device, change it on the External In/Out Set. Pulse Width If you select “Pulse” as a external in/out method, set the time of maintaining output signal. The setup range is 100 ~ 100000 mSec.
- Page 149 YL9130 Column Compartment Chapter 4. Maintenance YL9130 shows the error message, please refer to the following, Error Cause How to fix Increase max. temperature limit High Temp Limit! Temperature is higher than Max. limit Decrease operating temperature Remove the leaks on the leak sensor and Solvent Leak! Solvent leaks find the leak position...
- Page 150 YL9100 HPLC SYSTEM YL9160 PDA Detector USER MANUAL...
- Page 151 YL9160 PDA Detector Contents Chapter 1. Introduction .................... 1 1-1. Features of YL9160........................1 1-2. Specifications ..........................1 1-3. Optics Design..........................2 Chapter 2. Installation ....................4 2-1. Inspection and site preparation....................4 2-2. Connection of power ......................... 5 2-3. Connection of a column ......................5 2-4.
-
Page 152: Chapter 1. Introduction
YL9160 PDA Detector Chapter 1. Introduction YL9160 PDA detector is the photo diode array absorbance HPLC detector covering very wide wavelengths from 190~950nm which can analyze simultaneous spectrum at very high rate and sensitivity. It features very low noise, drift level, variable bandwidth selection and very high rate data acquisition in order to meet most of the requirements for a HPLC detector. -
Page 153: Optics Design
YL9160 PDA Detector 13) Sampling Rate : Max. 50Hz 1~16 nm Spectral Bandwidth, Wide Spectral Range, Alternative Spectral Function 15) GLP Compliance: - Photometric Accuracy, Linearity, Noise Level, Drift - System Check, 16) Analog Output : 2 channel (Replaceable Dual Wavelength Detector) 17) Valve Output : 2ch, Programmable Sampling (Fraction Collector Function Available ) 18) Trigger Input : 2ch 19) Communication : TCP/IP... - Page 154 YL9160 PDA Detector range and a tungsten-halogen lamp is used for visible range. Visible lights pass through the arc hole of a D2 lamp so that all range of lights transmit to the 5o um slit. After projected to the slit, lights go to 1,024 photo diode array by a grating.
-
Page 155: Chapter 2. Installation
YL9160 PDA Detector Chapter 2. Installation 2-1. Inspection and site preparation Carefully unpack the detector from the shipping box and inspect both the unit and packing for any signs of damage. If any damage is noted, contact the shipping company immediately. In addition to this manual, the shipping box contains a power cord, and any options which you ordered. -
Page 156: Connection Of Power
YL9160 PDA Detector 5) Appropriate solvents, reagents, etc 6) Nuts, ferrules, appropriate to the column end-fittings being used 7) Wrenches appropriate to column end-fittings 8) Connecting tubing and union (if column cannot be connected directly to the cell). 2-2. Connection of power Confirm supplying voltage, electric power, socket, and type of connector are correct. -
Page 157: Connection Of Remote Cable
YL9160 PDA Detector through the new tube to a waste reservoir. This will clean any particulates or oil that may be residing in the tube that could clog the heat exchanger or contaminate the sample cell of the detector. 2-4. Connection of remote cable YL9160 PDA detector has connection terminals for remote input/output, and marker input/output. - Page 158 YL9160 PDA Detector [Fig. 3] Diagram of Remote and Marker input [Fig. 4] Diagram of Remote and Marker output [Remote operation] START-IN : Operate instrument, and start running of gradient program. If you connect it with autosampler or external valve, automatic running is available. START-OUT : If the signal input on the START-IN terminal, the signal pulse output through this port.
-
Page 159: Connection Of Communication Cable
YL9160 PDA Detector READY-OUT : When YL9160 PDA detector is not ready state because of running status, output error signal is indicated if there is a leak. 2-5. Connection of communication cable YL9160 PDA detector provides TCP/IP internet protocol as a standard. The IP address of YL9100 series is 10.10.10.60, if DIP SW settings on the rear side are On position. -
Page 160: Chapter 3. Operation
YL9160 PDA Detector Chapter 3. Operation There are four LEDs in front of YL9160 PDA detector. POWER LED turns ON if main power turns on CONNECTED LED turns ON if communication is connected, LED blinks during connection READY/RUN LED turns ON before analysis, LED blinks during analysis ERROR LED turns ON if there is error... - Page 161 YL9160 PDA Detector Click Add button to add YL9160 PDA Detector to pop up Setup window. Check IP address and add acquisition channels and PDA module. 3-1-2. Device monitor After setting the PDA, log in the software then following device monitor windows will come up. On this window, can check detector status and control.
- Page 162 YL9160 PDA Detector Auto Zero : Automatically zero absorbance value. Verification : Verify wavelength accuracy and dark current. Test result will be saved as a text file format in a designated folder. Fault Reset : Release Fault status when error happens. D2 On/Off : Turn on/off D2 lamp.
- Page 163 YL9160 PDA Detector W Lamp Time : Display used time of W lamp.. W Lamp Status : Display whether W lamp is on or off. [Setup of acquisition] In this window, can select acquisition wavelength for each channel. Can specify up to 8 channels and other parameters except wavelength are applied to all channels.
-
Page 164: Chapter 4. Maintenance
YL9160 PDA Detector Chapter 4. Maintenance 4-1. D2 lamp The Deuterium Lamp (D ) is covered from 190 to 600 nm of wavelength. The replacement time is either in case you use the lamp more than 2000 hours or in case the light intensity is a half (50%) of the original intensity when you installed the lamp at first. -
Page 165: Lamp
YL9160 PDA Detector 5) towards you. Be careful not to lose the two thumbscrews. Be careful not to get fingerprints on the lamp. 4-1-2. How to install a new D lamp 1) Insert the new lamp assembly onto the lamp housing on the right front panel. 2) Use the thumbscrews to attach the lamp assembly to the detector. -
Page 166: How To Remove The Tungsten Lamp
YL9160 PDA Detector 4-2-1. How to remove the Tungsten lamp 1) Make sure that the power cord is disconnected from the rear panel of the detector. 2) Unscrew the screws and remove the lamp assembly on the right front panel. CAUTION ;... -
Page 167: Flow Cell Cleaning
YL9160 PDA Detector 3) Connect the lamp lead to the lower of the two terminals in the lamp compartment. 4-3. Flow cell cleaning We do not recommend disassembly of the flow cell assembly for routine cleaning purposes. Most of the cell assembly can be adequately cleaned by flushing with several milliliters of appropriate solvent. - Page 168 YL9160 PDA Detector dissolved air bubbles, contaminated eluents, dirty samples, or damaged columns rather than of actual problems with detector hardware. In order to focus more effectively on troubleshooting detector problems, we will first discuss on-board diagnostic tips and later present a troubleshooting table organized by symptom, cause and how to fix.
- Page 169 YL9100 HPLC System YL9170 RI Detector USER MANUAL...
- Page 170 YL9170 RI Detector Contents TChapter 1. Introduction ..................1 T1-1. Features of YL9170 ........................ 1 1-2. Specifications ..........................1 Chapter 2. Installation ....................2 2-1. Inspection and site preparation....................2 2-2. Connection of power ......................... 3 2-3. Connection of a column ......................3 2-4.
-
Page 171: Tchapter 1. Introduction
YL9170 RI Detector Chapter 1. Introduction The YL9170RI Detector(Refractive Index detector) is used for detection of polymer(PE, PP, PVC, etc.), polymer additive and bio-polymer(Glucose, Sucrose, Fructose, Maltose, Lactose, etc.) as detector used for HPLC and GPC. 1-1. Features of YL9170 1) High Analysis Sensivity 2) Broad Linearity 3) High Stability... -
Page 172: Chapter 2. Installation
YL9170 RI Detector 19) Line frequency : 50/60Hz, ±5% 20) Weight : 11 Kg Chapter 2. Installation 2-1. Inspection and site preparation Carefully unpack the detector from the shipping box and inspect both the unit and packing for any signs of damage. If any damage is noted, contact the shipping company immediately. In addition to this manual, the shipping box contains a power cord, and any options, which you ordered. -
Page 173: Connection Of A Column
YL9170 RI Detector 2) Pump 3) Column 4) Standard test mixture 5) Appropriate solvents, reagents, etc 6) Nuts, ferrules, appropriate to the column end-fittings being used 7) Wrenches appropriate to column end-fittings 8) Connecting tubing and union (if column cannot be connected directly to the cell). 2-2. -
Page 174: Connection Of Cables
YL9170 RI Detector 20-60 psi back-pressure. NOTE: Before connecting any new tube or column to the detector, flow several mL of clean solvent through the new tube to a waste reservoir. This will clean any particulates or oil that may be residing in the tube that could clog the heat exchanger or contaminate the sample cell of the detector. -
Page 175: Chapter 3. Operation
YL9170 RI Detector Chapter 3. Operation There are three LEDs in front of YL9170 RI detector. POWER LED turns ON if main power turns on PURGE LED turns ON during cell purging PORALITY LED indicates the polarity of signal output About 2 minutes later after power-up, you can control and operate YL9170 RI detector by YL-Clarity. - Page 176 YL9170 RI Detector Double click YL9170 RI detector on the right window, and select the communication port that RI detector is connected. 3-1-2. Device Monitor After configure the RI detector on the System Configuration window, log in to open main control window. On the main control window, click Device monitor and then Device Monitor window pops up as below.
- Page 177 YL9170 RI Detector The Device Monitor shows the temperature of cell, optical balance and out signal as well. Descriptions of control buttons Purge : Start/Stop flushing cells with solvents. Temp On/Off : Set-up On/Off for the cell temperature. Polarity : Reverse the polarity of signal.
- Page 178 YL9170 RI Detector Autozero : Auto-zero the detector signal. 3-1-3. Method Setup In the table below, edit programming of time table, and setup the detector status during idle state. Range : Set-up for the maximum limit of voltage range. Sample Rate : Set-up for the sample rate. Autozero : Set-up for autozero at a data acquisition.
-
Page 179: Chapter 4. Maintenance
YL9170 RI Detector Chapter 4. Maintenance For use of service and maintenance, there is a keyboard and LCD display inside of YL9170 RI detector. LCD Display: The RI Detector has a four line display. The first line shows the actual temperature of the optical bank. The second line shows the optical balance in %. -
Page 180: Adjusting The Optical System
YL9170 RI Detector 4-1. Adjusting the optical system To perform the adjustment the sample and reference chamber of the flow cell have to be purged with distilled water. When both chambers contain the same liquid theoretically the same light intensity should reach the sample and reference side of the light sensor. -
Page 181: Lamp Exchange And Adjustment Of The Lamp
YL9170 RI Detector 4-2. Lamp exchange and adjustment of the lamp It might be possible that you need to re-adjust the light source due to some changes in the used light bulb due to the transport or you need to replace a burned out lamp. The adjustment of the light source is only possible when the housing is opened. - Page 182 YL9170 RI Detector [Inside of optical bench] 3) Loosen the holding screw of the light source and remove the lamp 4) Loosen the screw connector of the lamp’s power suply at the pre-amplifier board 5) Place a new lamp in the holder and tighten the holding screw 6) Connect the power wires of the lamp with the screw connector on the pre-amplifier board 7) Connect the main cable to the detector and switch on the instrument NOTE...
- Page 183 YL9170 RI Detector Make sure that only 2/3 of the slit are illuminated by the light source. This is illustrated in the following figure. [Slit aperture] NOTE The projected picture at the light sensor should be a sharp one. The full height of the photodiodes has to be illuminated by the light beam.
-
Page 184: Checking Sum And Difference Voltages
YL9170 RI Detector 4-3. Checking Sum and Difference voltages This chapter describes the check of the sum and difference voltages. These voltages result from different intensities reaching the sample side and the reference side of the light sensor. To perform the check follow the steps listed below: Make sure the instrument is switched on and both chamber of the flow cell are filled with distilled water wthout bubbles. -
Page 185: Check And Replacement Of The Valve
YL9170 RI Detector 1) Use a multimeter to check the lamp voltage at the test point on the circuit board. The lamp voltage should be set 3.3 ± 0.3V. 2) If the sum voltage is only a few millivolt the light bulb does not work. Chekc the power cables of the light source to make sure that they are connected properly. -
Page 186: Checking And Cleaning The Flow Cell
YL9170 RI Detector 4-5. Checking and cleaning the flow cell In some cases it might be necessary to clean the flow cell inside the YL9170 RI detector. You should try to wash away possible contaminations by purging both chambers of the flow cell with fresh mobile phase. Possible reasons to open the optical bench for checking the flow cell: 1) Drop of the sum voltage below 4500mV. -
Page 187: The Heating Circuit Of The Detector
YL9170 RI Detector If possible we recommend the addition of a small amount of organic solvent(isopropanol or methanol). If it is not possible to remove the contaminant from the cell it might be necessary to replace it with a new one.
Need help?
Do you have a question about the YL9100 HPLC and is the answer not in the manual?
Questions and answers